 Store
Store- Multimedia
For Windows
- Converter Tools
- Video Converter Ultimate

- Video Converter
- 4K Converter
- MP4 Converter
- Audio Converter
For Mac
- BD/DVD
For Windows
- DVD Tools
- DVD Ripper
- DVD Copy
- DVD Creator
- DVD Converter
- DVD Toolkit
For Mac
- Mobile
For Windows
For Mac
- Utility
- Freeware

User Guide
Introduction
Screen Recorder is the best screen recording software burn with multiple powerful functions. With it, you can record any on-screen activities you like in original images/sound quality easily. It can also record games smoothly with its 60fps frame rate and capture screen in PNG/JPG/GIF/BMP/TIFF format. And you can save the recorded videos in various formats, like WMV, MP4, VOB, AVI, FLV and other formats. What's more? You can add your favorite elements into recorded videos. Thank you for trusting and choosing us. Here are the details of Screen Recorder.

Register
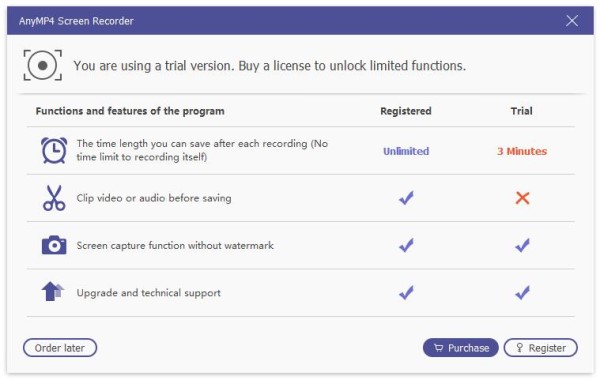
If you want to record over 3 minutes video or clip video/audio before saving, you would need to register the software.
If you are unregistered, when you open the software, it will pop up a window to remind you of registering. Click Register on the bottom right corner to register.
You can also find the register window by clicking the Key icon on the top bar.
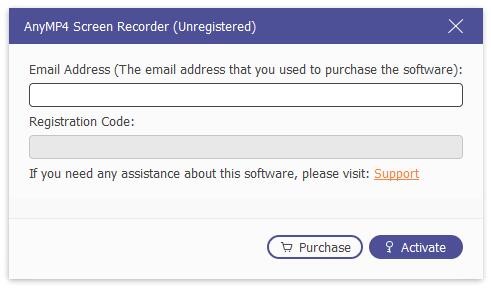
After clicking the "Register" button, it will show you the little window to input your email address which you use to receive the registration code and registration code. Then click "Register" to register.
Email Address: The email address is the email you used when you bought the program.
Registration Code: Copy and paste the registration code you received after the successful purchase in your email inbox.
Record Video
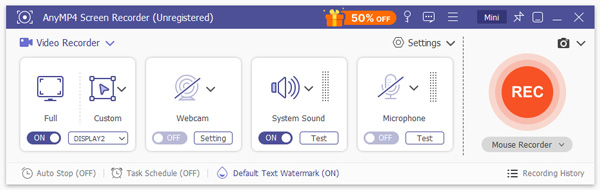
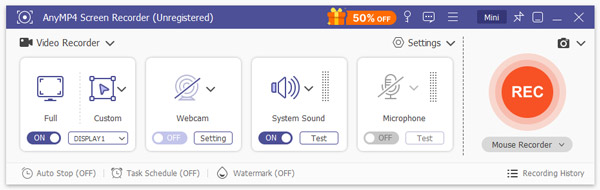
Step 1 Launch Screen Recorder on your Windows computer. And you will see the default Video Recorder mode is ready.
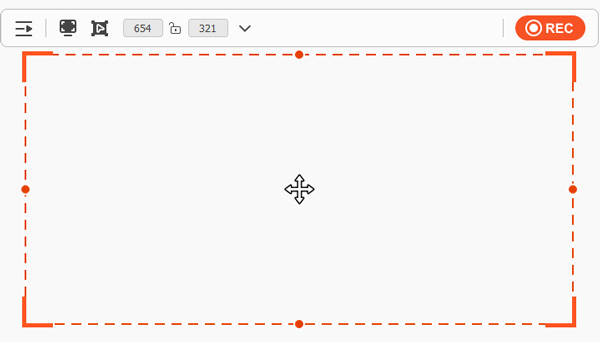
Step 2 After clicking Video Recorder, it will show you the red dotted line on the edge of your screen. This just is your recording area.
If you have your clear standard, you can Click "Custom" to choose fixed region. There are seven types: 3840×2160, 2560×1440, 1920×1080, 1280×720, 854×480, 1024×768 and 640×480. Or if you want to record the special window, you also can click Select region/window to record the window directly.
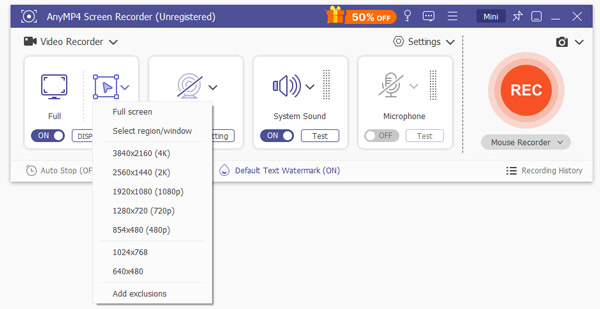
Otherwise, if you want to set the size by your own, you can drag the red point on the side or input the width and length on the bar to select the size.
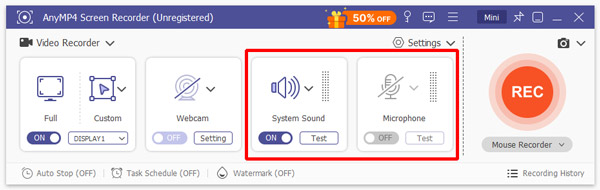
Step 3 If you are going to record a video conference, or record the Skype chat, you may need to select both system sound and the microphone.
Click the system sound and microphone. You also can open the inside camera to record its pictures and take photos.
Step 4 After setting the recording area and audio settings, click "REC" on the right side to begin recording. And it will show you the hotkeys for using more easily. And you also can change these.
Recording failed? Check the tutorial.
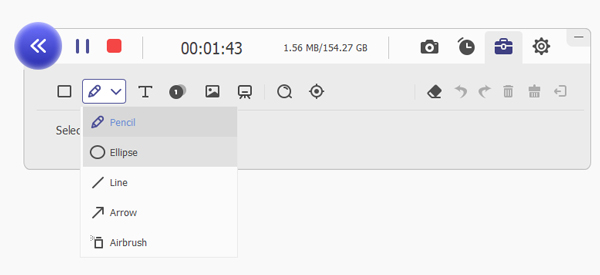
Step 5 After start recording, you will see a little bar like the following one.
You also can take snapshot by clicking the camera icon.

Or if you want to make drawing or add annotations, you can click the Toolbox icon.
Draw the border, line, arrows and any shape you need. You can select the size and color of it.
Air brush. You also can select the size and color of it. It would add powder effect to your recorded videos.
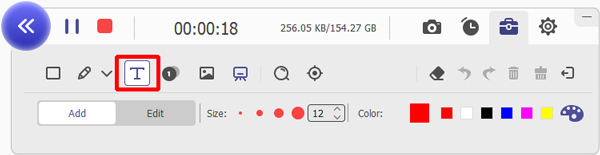
Text. By clicking the big T icon, you can input the words you want into your videos.
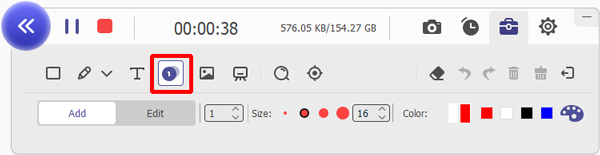
Callout. Using this, you can mark the order of the part. Apart from the size and color, you also can select the color of the number and its background color and choose the next number by clicking the up and down keys beside the callout.
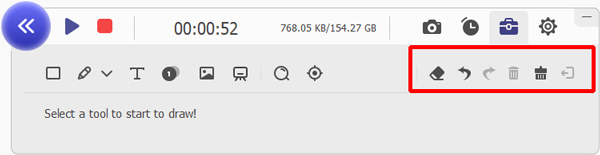
In case you make the wrong effect, you can click eraser icon to clear the wrong effect or click the dustbin icon to clear all items you add. You also can click undo and redo icons to adjust the effect.
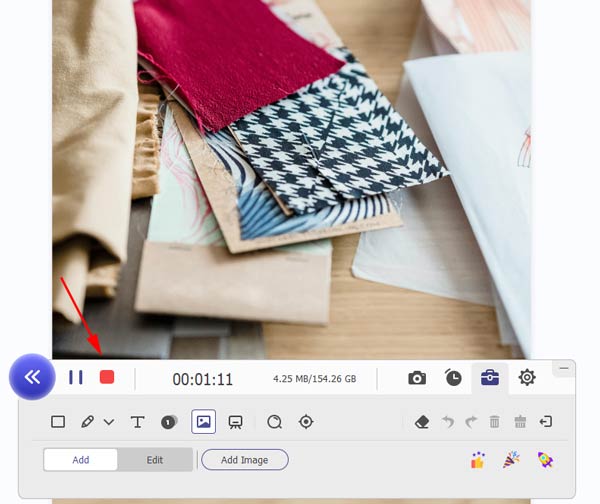
Step 6 If you want to stop recording, click the red square on the top left corner.
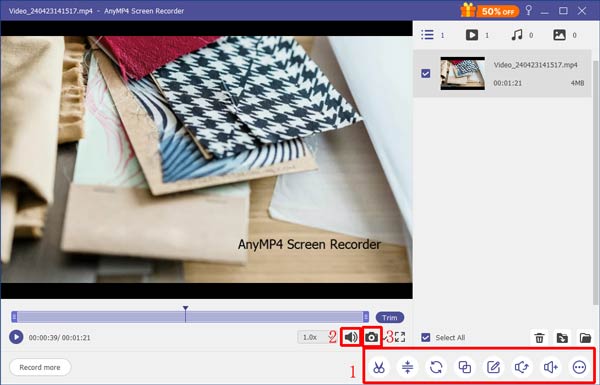
Then it will show the video you have recorded. In this window, you can preview and edit the recorded video.
- 1. Edit the video with the powerful tools on the toolbox.
- 2. Adjust the volume and take screenshot.
- 3. Re-record and save the video.
Record Audio
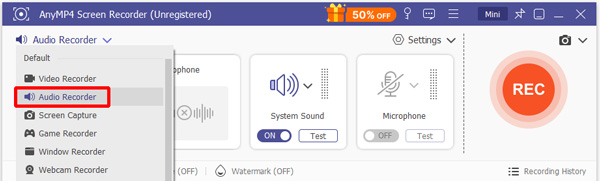
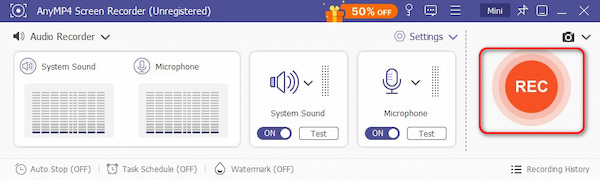
Step 1 Launch Screen Recorder on your Windows computer. Choose Audio Recorder from the main interface.
Step 2 Click the system sound and microphone to record the voice. You also can take photo by clicking the camera icon on the top right corner.
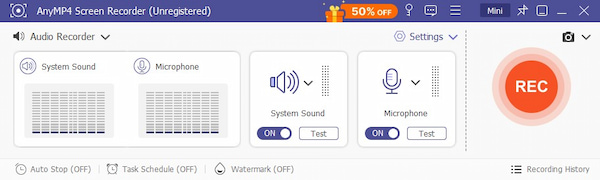
For System Sound recording, you can change sound source, adjust volume mixer, and check system sound.
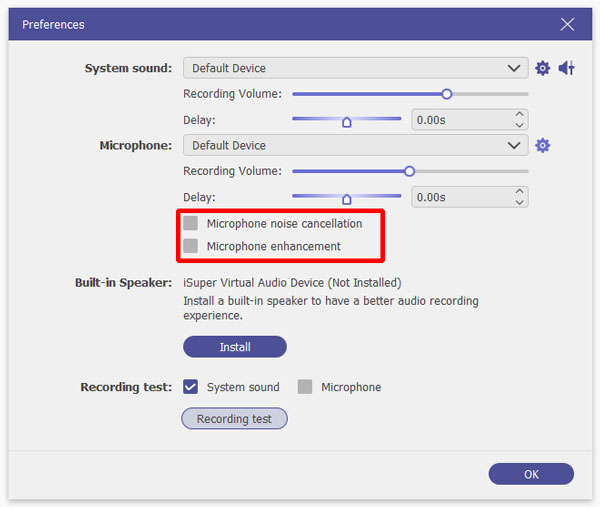
For voice recording, you can change microphone source and test your microphone. If you need to reduce noise and enhance the voice from microphone, you need to enable Microphone noise cancellation and Microphone enhancement.
Step 3 Click "REC" on the right side to begin recording. And it will show you the hotkeys. You also can change them.
Step 4 Click the red square on the left to finish recording.
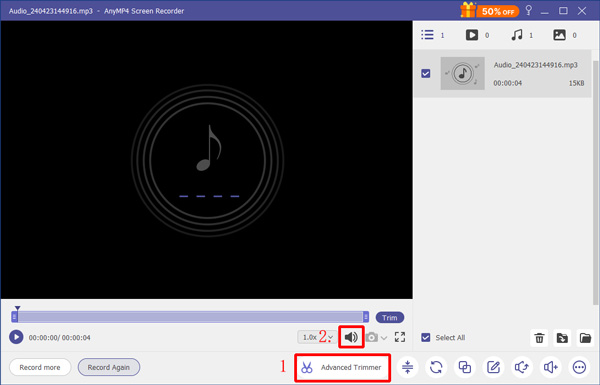
Then it will save to recording automatically and show the audio you have recorded. In this window, you can preview and edit the recorded audio.
- 1. Clip the audio by dragging the slider of the recorded video and click Trim to save.
- 2. Adjust the volume.
- 3. Change the speed of audio playback.
Record Game
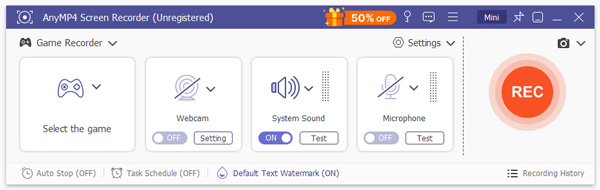
Step 1 Launch Screen Recorder on your computer and choose Game Recorder in the main interface.
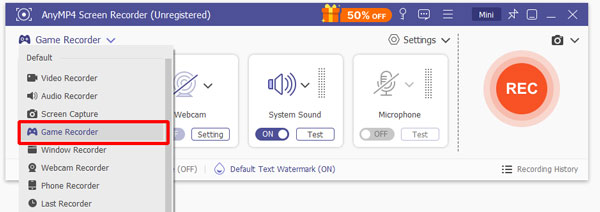
Step 2 Click the Arrow button on the left and choose the game you want to record from the drop-down list.
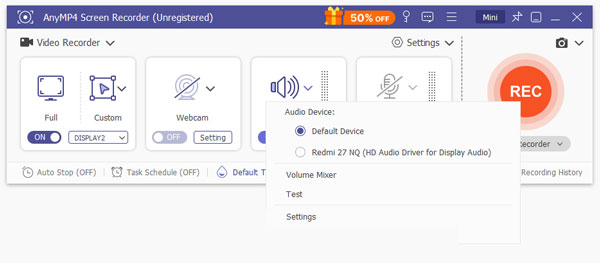
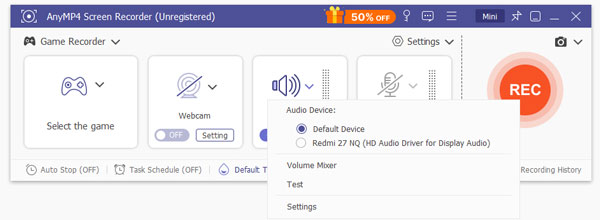
You can choose to turn on System Sound. Besides changing the volume, you can also choose Change sound source, Volume Mixer, and Sound check.
You can also choose to turn on Microphone. Change microphone source and Sound check are also available. Most importantly, you can cancel the noise in microphone and enhance microphone in settings.
When all the settings are ready, you can click REC on the right. And the hotkeys will be shown to you. And you can change them for your convenience.
Step 3 Then the window of the chosen software will pop up. Notice that it captures window and the range cannot be changed.

Step 4 Below the recorded window, you can see a little bar.
You can take snapshot when recording games.

If you want to end the recording, you can click the red square to stop it.

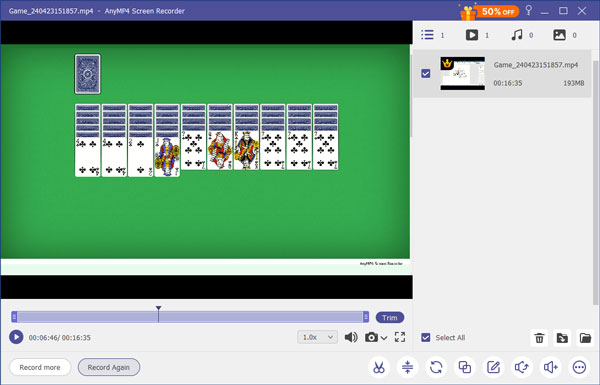
Step 5 The recording will be saved to your computer and you can preview the recorded video. In this window, you can:
1. Cut the video by moving the video play sliders.
2. Adjust the volume and take screenshot.
3. Re-record the video.
Record Webcam
Step 1 Launch Screen Recorder on your computer and choose Webcam from the main interface. Please make sure that your webcam works properly or you connect a webcam to your computer.
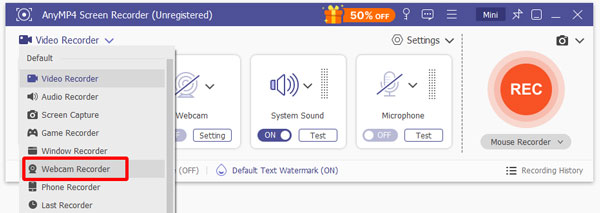
Step 2 Then you can preview the recorded area and adjust the position of your webcam.
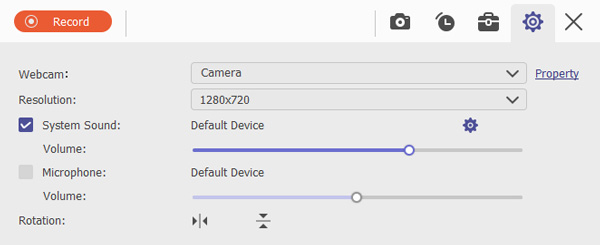
In the window down below, you can choose Integrated Webcam. You can change the Resolution, including 1280×720 30fps, 960×540 30fps, 848×480 30fps, and more. You can choose to turn off the Microphone. You can also rotate the image of the webcam 90 clockwise or counterclockwise and flip it vertically or horizontally.
Click Record at the top-left corner to start the recording.
Step 3 You'll see a little bar when recording.
You can take a snapshot during the recording.

If you want to stop recording, click the red square on the top left corner.

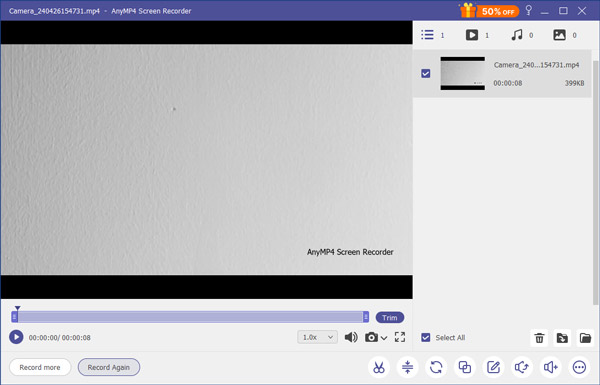
Step 4 You'll be taken to a window where you can see the video and snapshot list. Navigate your cursor to a certain item. Click the play icon and you can preview the file.
Record Phone
Phone Recorder lets you mirror and cast iPhone and Android to a computer. It offers a real-time mirror from phone to PC via WiFi and USB cable.
Mirror and Record iPhone on PC
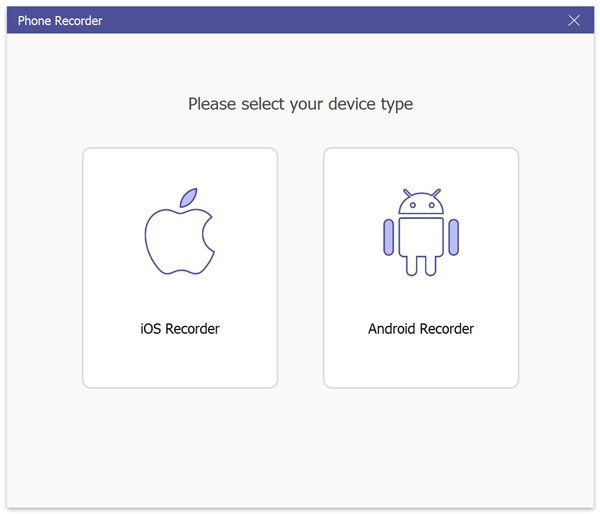
Step 1Launce AnyMP4 Screen Recorder on your computer and click the Phone Recorder option on the main interface.
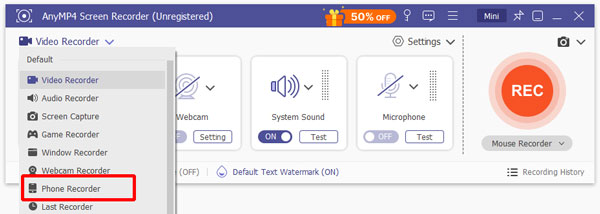
Step 2You can choose the device type on the Phone Recorder window. But the software currently only offers the screen-recording feature for iOS devices, so you can only record your iPhone or iPad screen by clicking the iOS Recorder option.
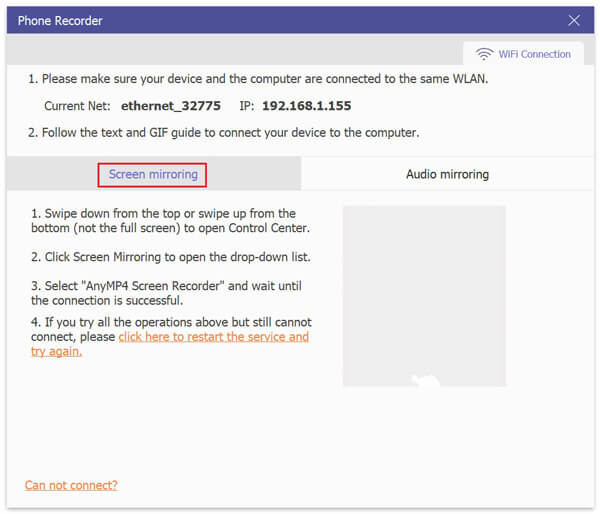
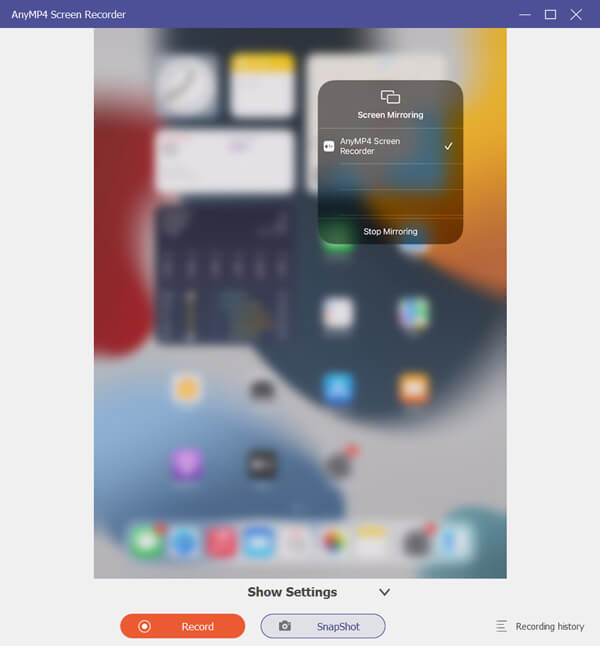
Step 3If you want to record the screen of your iOS device, click the Screen mirroring option. And then, connect your iOS device to the computer by operating your iOS device according to the on-screen instructions. And please make sure that your device and computer are connected to the same WLAN before connecting them.
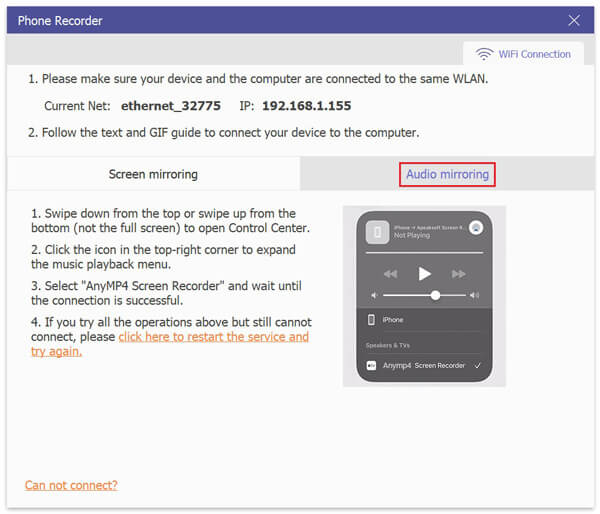
Or you can click the Audio mirroring option when you need to capture the audio of your device only.
Step 4You can edit the settings before starting recording.
You can select the resolution of your device screen from 4K, 2K, 1080p, 720p, 540p, and 320p by clicking the pull-down next to the Resolution.
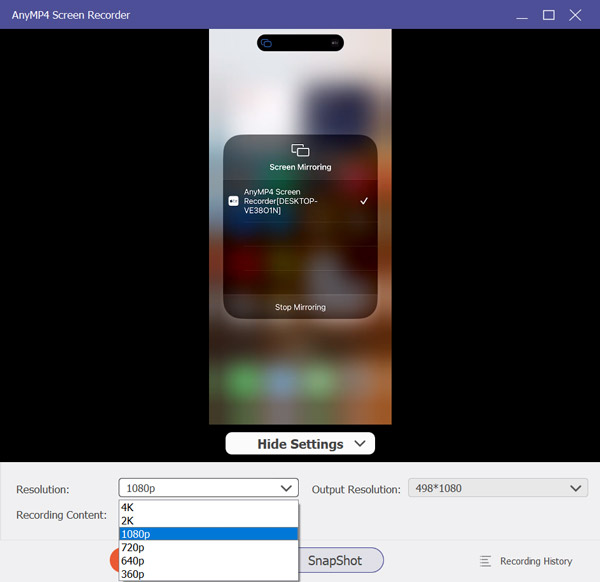
You also can set the output resolution for your screen-recording video by clicking the pull-down next to the Output Resolution.
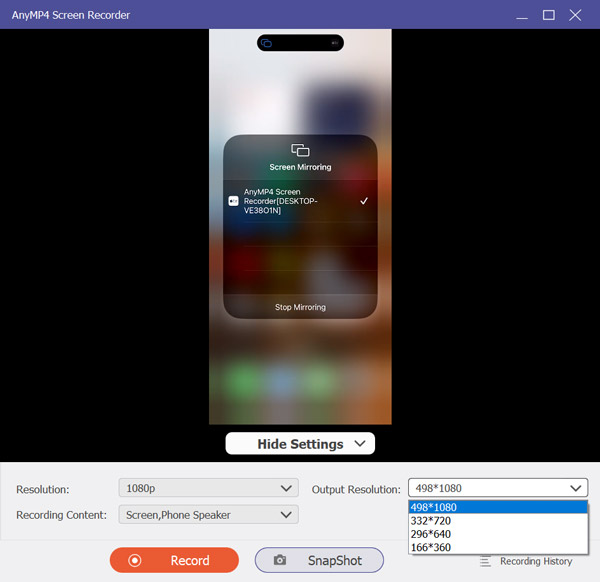
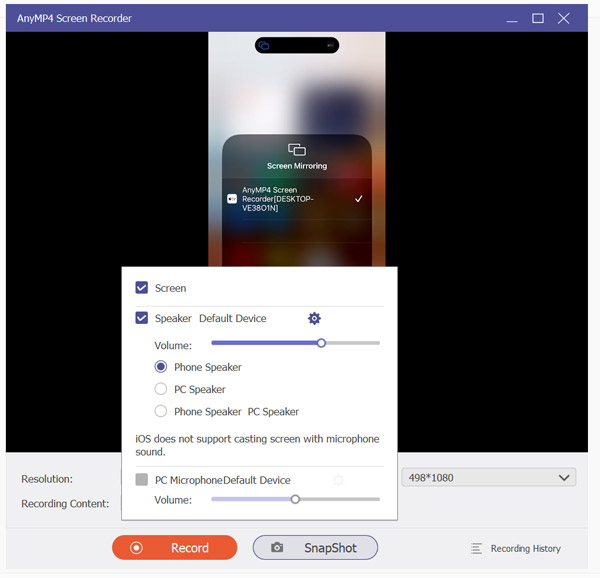
Click the pull-down next to the Recording Content, and then you can decide to capture screen and set the volume.
What's more, you can click the Hide setting option under the device screen to hide the settings table.
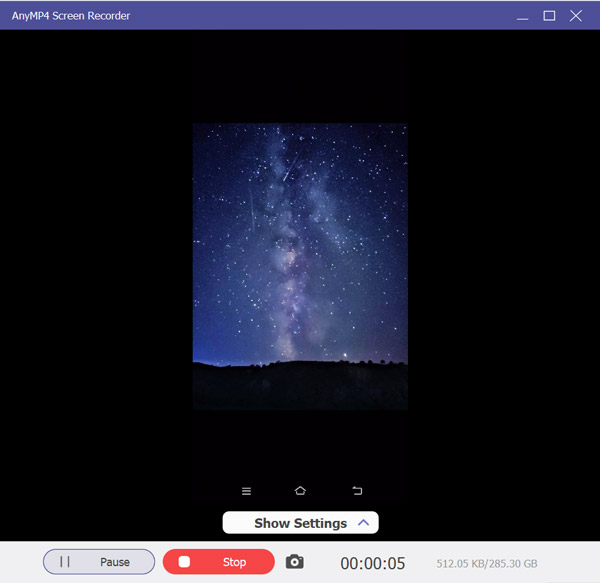
Step 5Click the Record button, and then you can record the device screen. Besides, you can click the Snapshot button to take screenshots while recording. If you need to record the audio only, you can click the Record button.
Step 6You can click the Stop button to finish recording. And you can click the Pause button when you want to suspend the process of screen recording. If you need to record the audio only, you can operate like this.
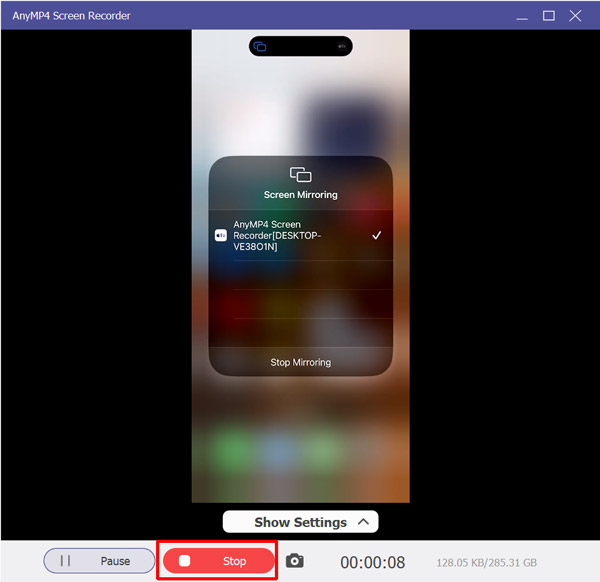
Finally, your screen recording file will be saved automatically here.
Mirror and Record Android Phone on PC
Step 1Again, run AnyMP4 Screen Recorder on your computer, select Phone Recorder, and then click Android Recorder.
Step 2There are 2 ways of mirroring and recording Android phone on PC via WiFi Connection and USB Connection.
WiFi Connection
1. When you choose WiFi Connection, you should download or install the FoneLab Mirror app via Google Play or your browser on your phone. By doing that, you can search this app name directly or scan the QR code to download.
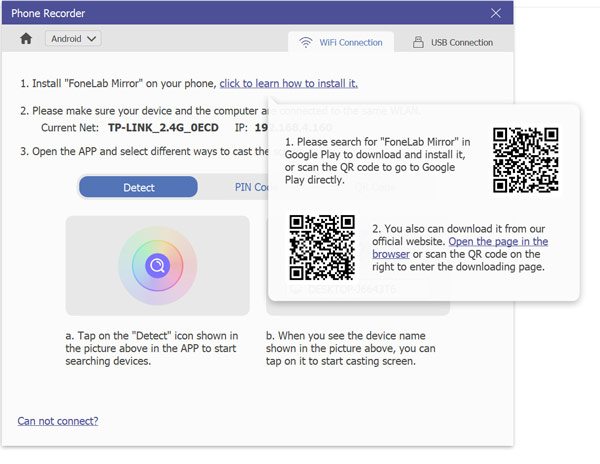
Then make sure your phone and the computer are connected to the same WiFi.
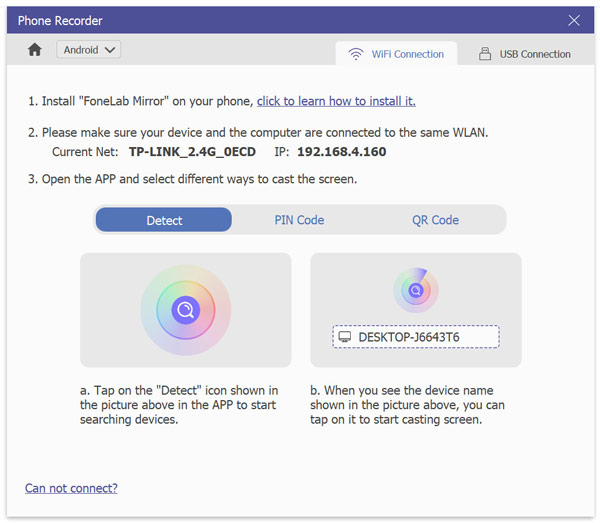
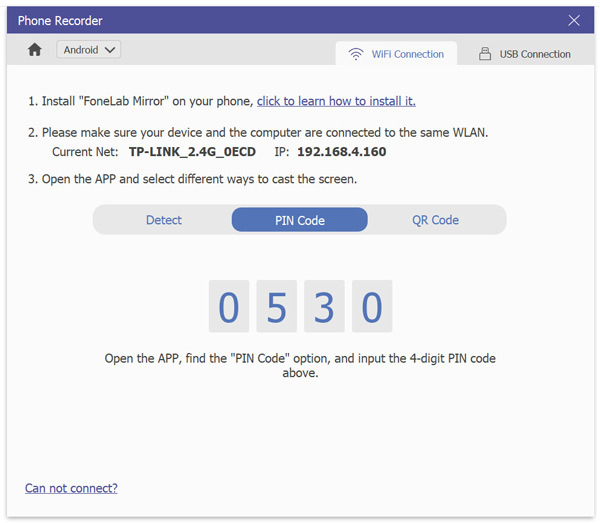
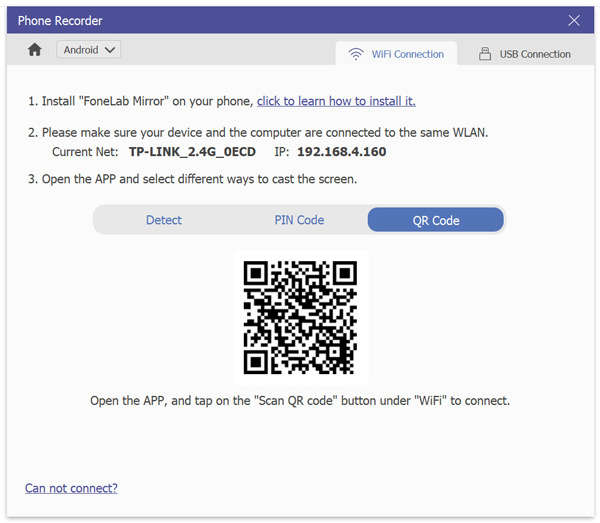
2. Open the app on your phone, and then 3 options for you to connect the phone recorder on computer from your phone, Detect, PIN Code, and QR Code.
Detect: You should tap on the Detect icon shown on the app interface and search for our phone recorder software.
PIN Code: Switch to the PIN Code tab, and input the 4-digit PIN code shown on the computer to confirm the connection.
QR Code: When you go to the QR Code tab on your phone, you need to scan the QR code shown on the computer to connect.
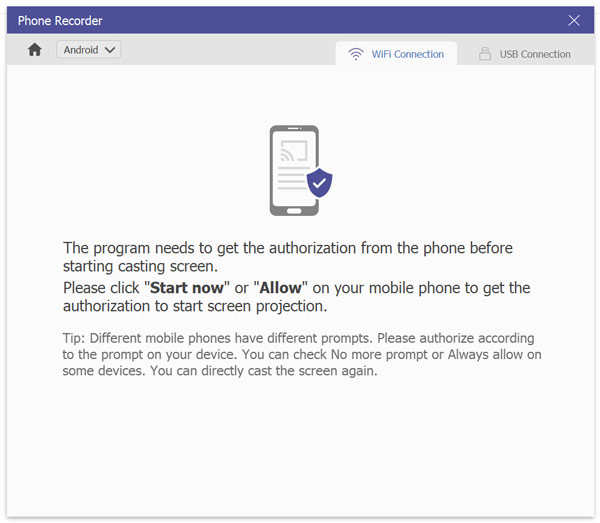
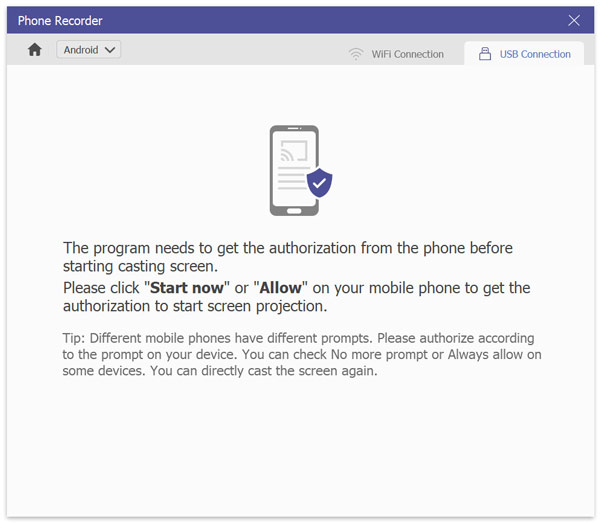
3. Once the connection is successful, tap Start now or Allow on your phone to start casting your Android phone to the computer.
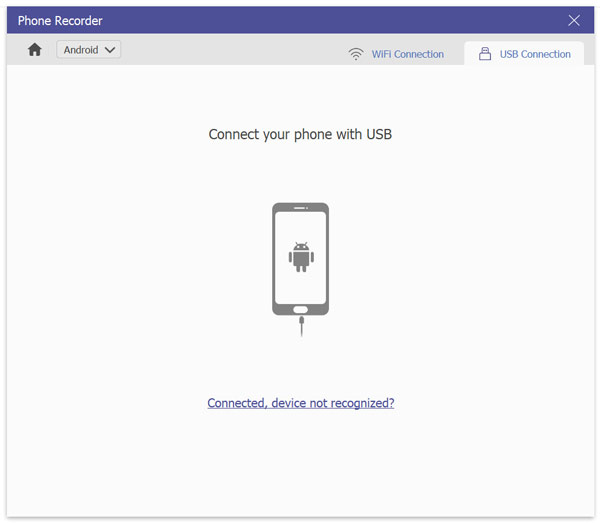
USB Connection
If you have no Internet connection, then here you are capable of mirroring Android phone to computer via your USB cable.
1. Connect your Android phone to your computer with the USB cable.
2. Enable USB debug on your Android phone.
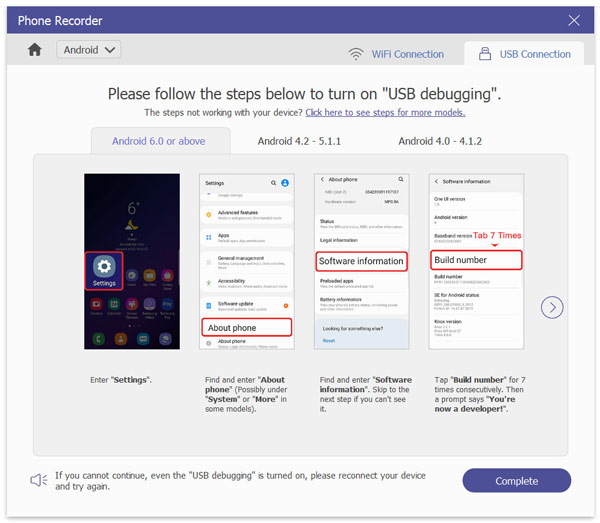
3. Like Android mirror, tap Start now or Allow on your phone to get the authorization to cast Android phone screen mirror.
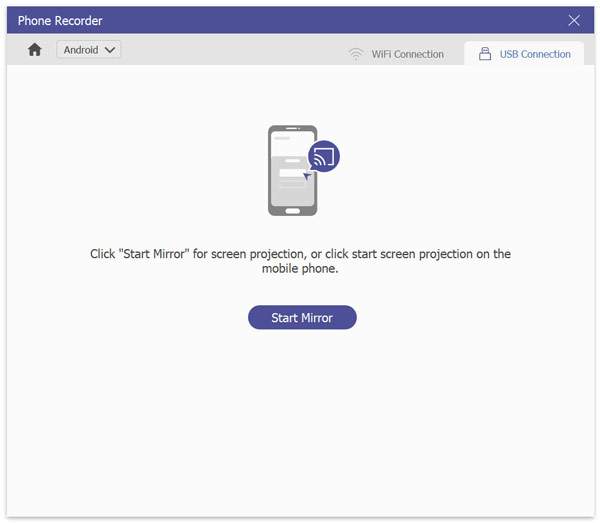
4. Now, tap Start Mirror to start casting Android phone screen to PC with USB cable.
Step 3When mirroring Android to computer, all the operations on your Android phone will be cast to a computer in real-time.
Before starting recording Android phone to PC, you can set the output recording resolution and record content like recording on iPhone.
Then, click Record to start recording Android phone on computer.
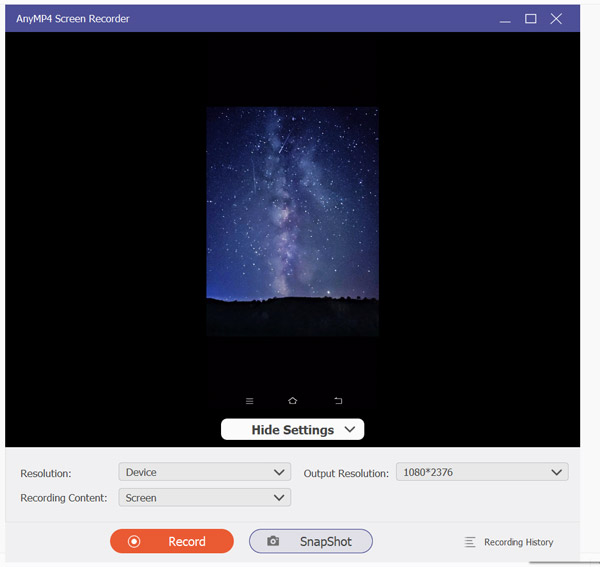
While recording your Android phone on computer, you can take snapshots of the recording screen and click the Stop button on the computer.
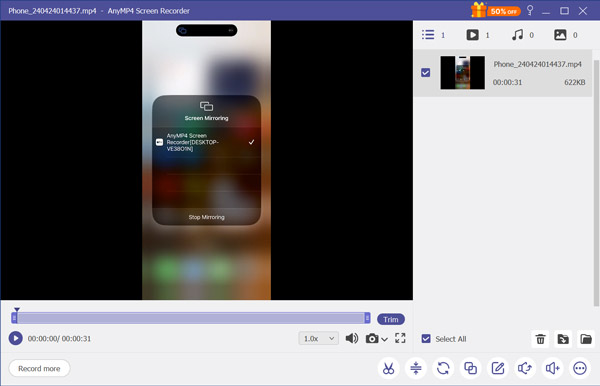
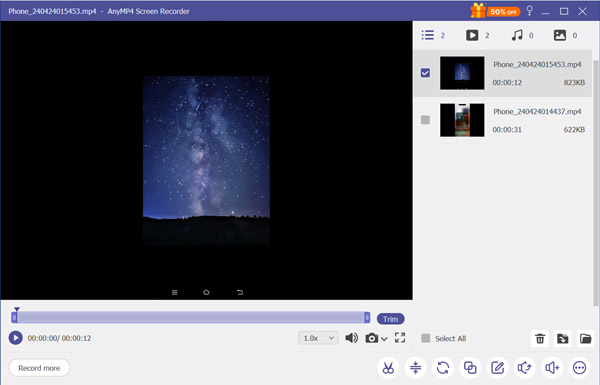
Step 4Then, you are directed into the preview window, where you can move the playing sliders to clip the recording file.
Click Export to save the recording file.
Record Display
Step 118.Run Screen Recorder on your device it will open with Video Recorder mode automatically.

Step 2If your device connects to multiple displays, you can use the Video Recorder function to record other displays. To begin, click the drop-down icon next to DISPLAY 1, the software will show other displays connected to your current device. Then you can select the display to record as you like.

Step 3After selecting the display, you can adjust the screen, sound, microphone, and webcam settings and click the REC button to start recording.
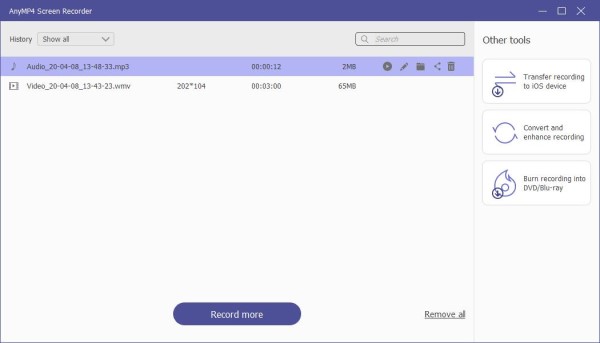
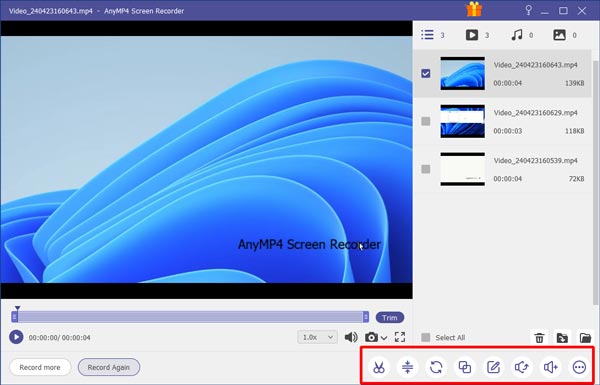
Edit Recording File
After saving your recording file, you can use the advanced tool to edit your recording file further.
AnyMP4 Screen Recorder offers you 7 tools: Advanced Trimmer, Video Compressor, File Merger, File Converter, Edit Media Metadata, Sound Extractor and Sound Booster, to edit the video or audio file.
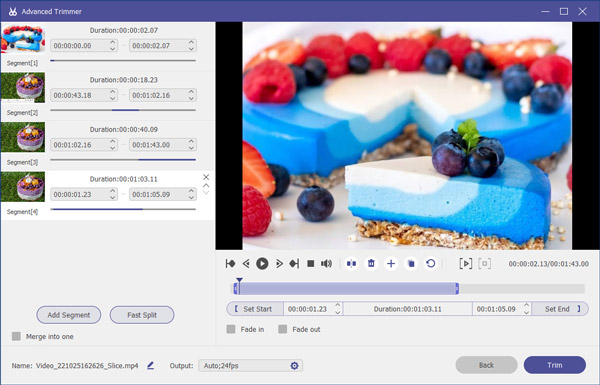
Advanced Trimmer
To split your recording file into several clips, you can use the Advanced Trimmer tool. Again, find it from the drop-down option.
Then you will see 2 trimmer options:
Add segment: Move the slide bar at the right panel to split a file into 2 parts, delete the part, add a segment, and copy and paste one clip.
Fast Split: Split 1 recording file into several segments by average files or time.
After making the options you want, click Trim to start trimming and saving them to your computer.
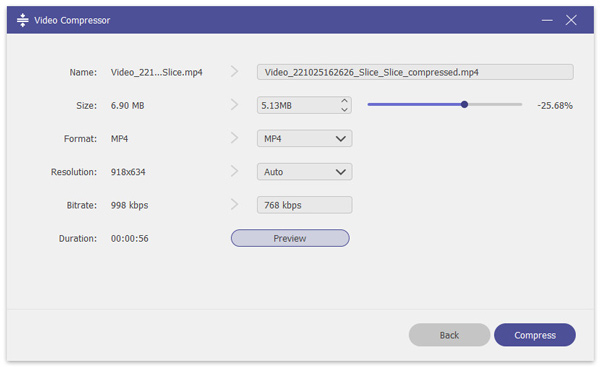
Video Compressor
Once you find the video recording file is too large in size, you can compress them to reduce the file size.
Select Video Compressor first under the More Tools drop-down option.
Then set the video file size by moving the slide bar next to Size. Choose the output format, resolution, and more.
Move the file size bar to get the video size you want to save.
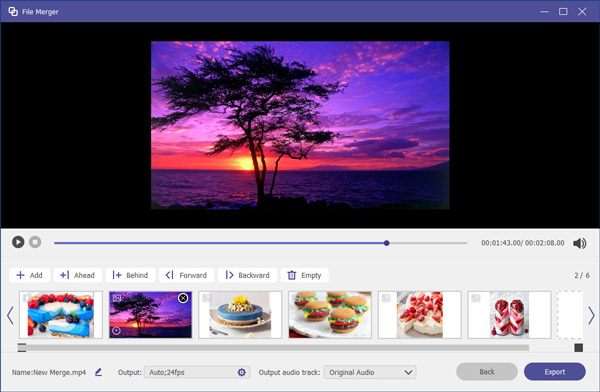
File Merger
When you have many recording files and want to put them in the order that you want, the File Merger feature is what you need.
Navigate the File Merger option from More Tools.
Then, add the recording file from your recording history, or load it from your local computer.
This software also supports photos and videos; you can edit the item separately.
Once the order is confirmed, you can click the Export button to save the merged file on your computer.
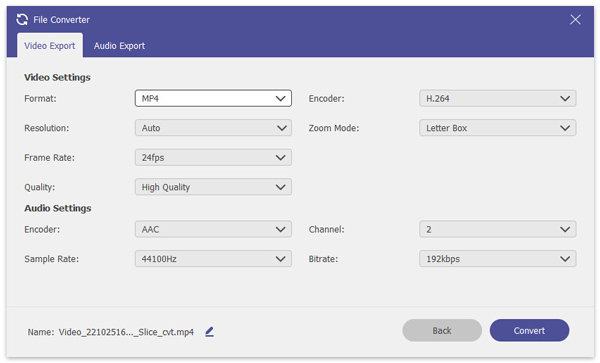
File Converter
Once you find the recording video or audio file format is incompatible with your player or other platforms, you can use the File Converter feature. You can easily transcode the format to MP4, MOV, WMV, AVI, MKV, GIF, MP3, WMA, WAV, etc.
Open the File Converter feature first.
Select the video or audio format that you need. Click the Convert button to start converting the recording file format.
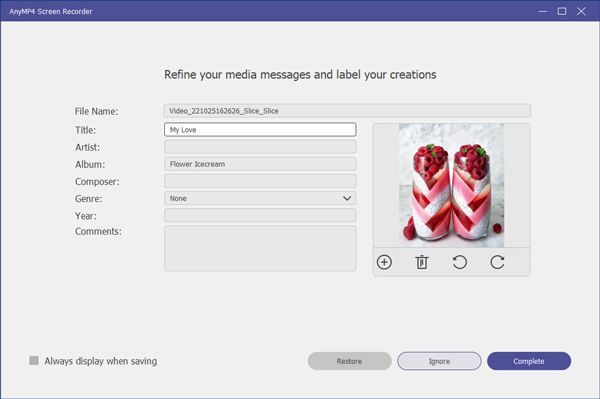
Edit Media Metadata
You can add the year, ID3 tag, and more data information for the recording video or audio file by Edit Media Metadata.
Input file name, album, title, genre, year, comment, video or audio cover, and more information to fill in the metadata information.
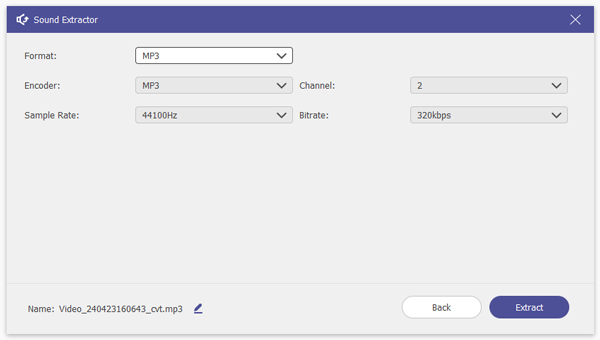
Sound Extractor
When you preview the recorded video, you can use Sound Extractor to create an audio file. It allows you to adjust the format, encoder, sample rate, etc.
Sound Booster
You may find the audio of your recording too small to hear, or there is a lag problem with your recording. To solve this, you can use Sound Booster to change the track, volume and delay.

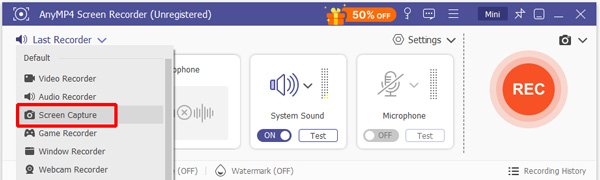
Take Screen Capture
Step 1Launch Screen Recorder on your Windows computer. Choose Screen Capture from the main interface.
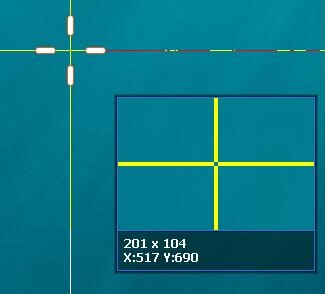
Step 2Then your mouse will be the shape of a cross. You can select the area you want by draging.
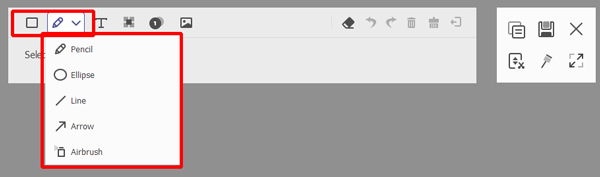
Step 3After capturing, you can see a little bar. This bar can help you make drawing to the screenshot.

Draw the border, line, arrows, air brush and any shape. You can select the size and color of it.
Text. You can input the words you want into your videos.

Callout. Using this, you can mark the order of the part. Apart from the size and color, you also can select the color of the number and its background color and choose the next number by clicking the up and down keys beside the callout.

Blur. You can select the target area and set the degree of blurring by dragging.

If there are some wrong editing, you can click eraser icon to clear them or click the dustbin icon to clear all effects. You also can click undo and redo icons to adjust the effect.

And in the right side, there are six options for you.
- 1. Copy the screenshot to put it in other places.
- 2. Save the screenshot you made.
- 3. Close the window to delete the screenshot.
- 4. Scroll capture screen.
- 5. Full screen to preview the screenshot.
- 6. Pin to screen.

Task Schedule
In each main interface of screen recorder, you can see the "Task Schedule".
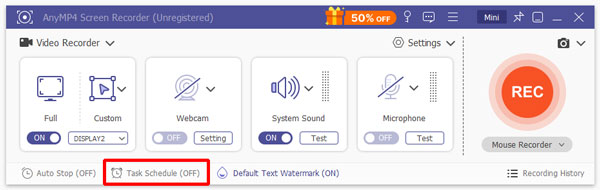
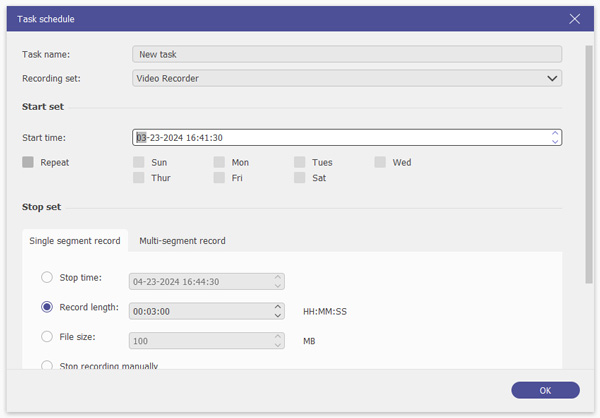
You can add new tasks and edit the settings of it.
Set the time of the beginning, record length and file size, etc.
Then this software will record automatically for you according to your settings.
Set preferences
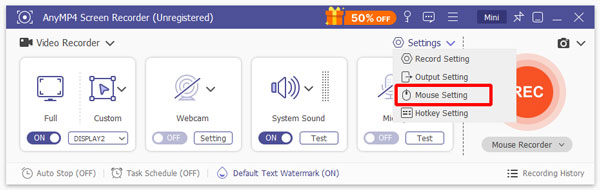
For personal needs, we also offer various preferences to make the recording. On the top right corner of the main interface is the Settings button for you to set preferences.
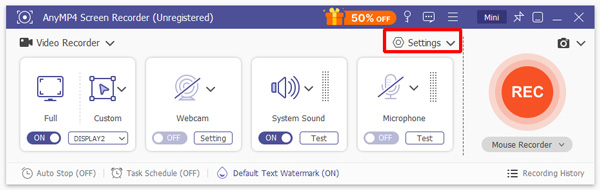
Recording
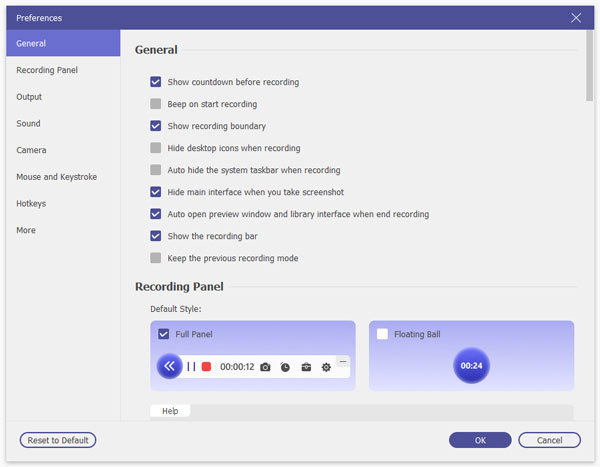
Click the Settings button and you will see the window of the recording settings.
In this pop-up window, you can see eight choices. These are show countdown before recording, beep on start recording, show recording boundary, hide float bar while recording, allow to move the recording region while recording, hide dock while recording, and auto open preview window when ending recording.
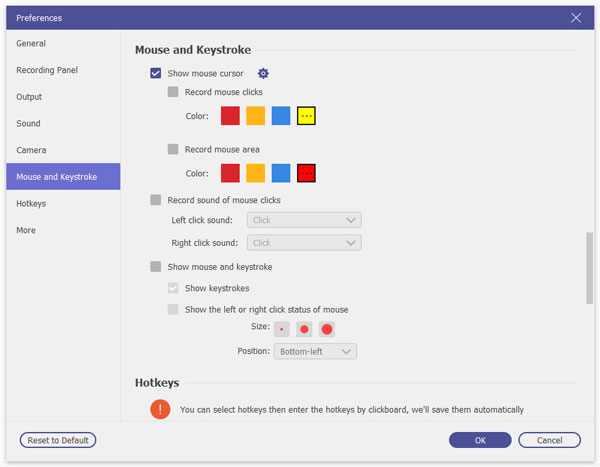
Mouse and Keystroke
By clicking the Mouse icon on the interface or rolling your mouse on the preference interface, you can see the mouse settings.
You can tick record mouse clicks and record mouse area, even the colors of these.
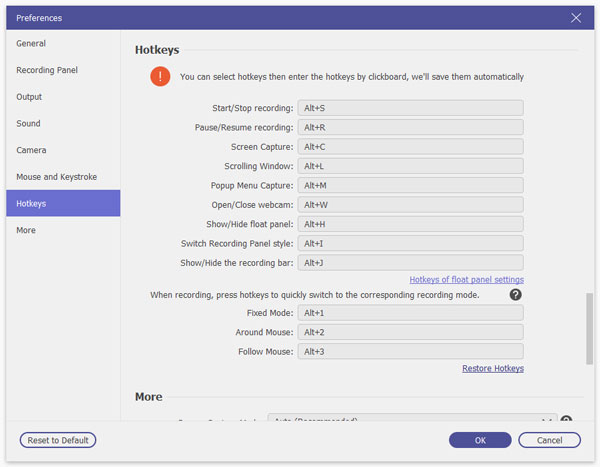
Hotkeys
By clicking the FIQ icon or rolling your mouse on the preference interface, you can see the hotkeys settings
Start/stop record
Pause/resume record
Screen capture
Open/close webcam
Show/hide float panel, etc.
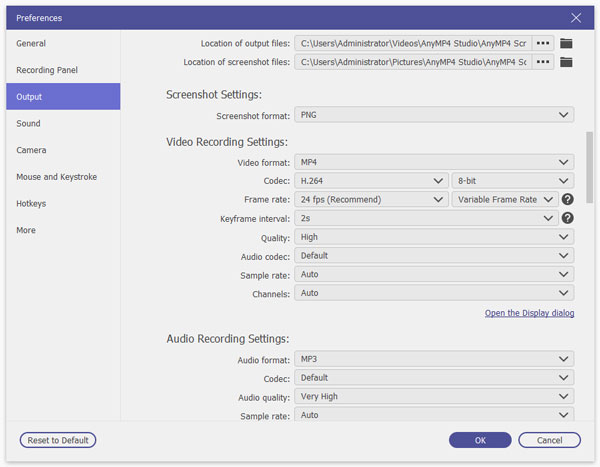
Output
Click the Output Setting of the interface or click "Output" option on the preference interface. Then you can see the output settings.
In this option, you can set video format and codex, frame rate, etc.
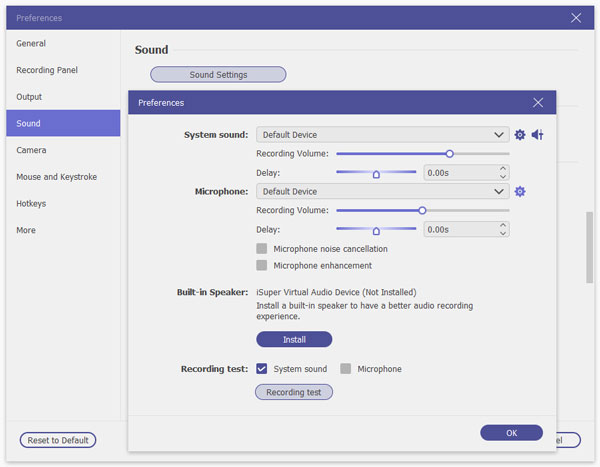
Sound
Navigate to the Sound tab from Preferences window. Here you adjust the volume of system sound and microphone, enable of disable Microphone noise cancellation and microphone enhancement. Also, you can test the sound from system sound or microphone.
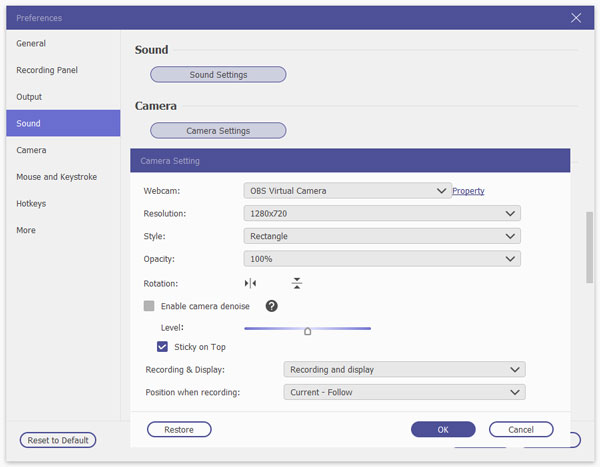
Camera
Switch to the Camera section and click the Camera Settings to enter the settings page where you can choose the webcam to record, change resolution, adjust position, etc.
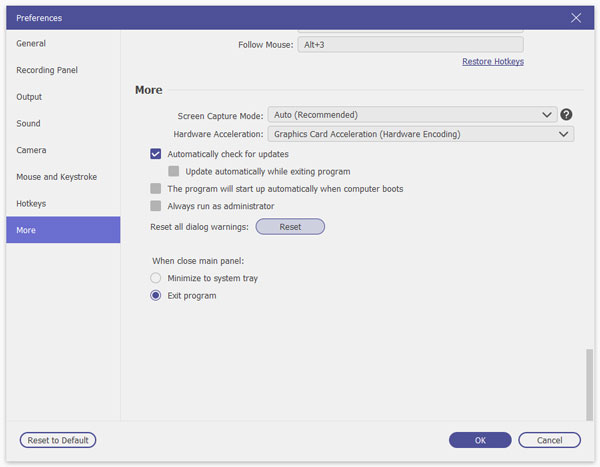
More
To get in this part, you need open one of the other four preferences and click "More" option on the right bar.
FAQs
What Is Capture Mode?
AnyMP4 Screen Recorder offers 4 modes to select based on your needs. Here you can grasp what they are and how to pick up.
Auto Mode: Auto mode is the default mode. Under this mode, AnyMP4 Screen Recorder will choose the right mode automatically, based on the performance of your computer. You do not need to make extra special settings.
Mode 1 (Common): Mode 1 ensures good quality and compatibility.
Mode 2 (Windows 10 1903 and later): Mode 2 improves the recording quality for Windows 10 1903 and later users.
Mode 3 (Common): Mode 3 is your safety mode. Under this mode, the quality may be damaged to guarantee the recording fluency.
Collect Device Info
While you are using AnyMP4 Screen Recorder, you may encounter some problems and cannot fic them by yourself, you can contact us by submitting your device information via support@anymp4.com.
Do not forget to include your phone brand, model and device OS version to help solve the problems efficiently.
How to Cast Android Audio
To mirror and cast your Android phone to computer with audio, you need to make the extra settings by following the tutorial as following:
Step 1. Prepare an aux cable, which can transmit your phone audio to your computer.
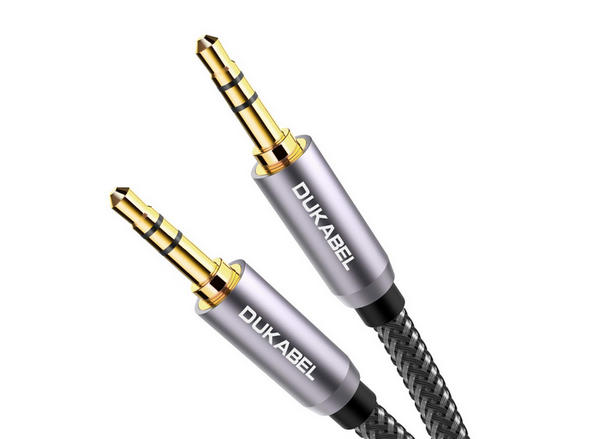
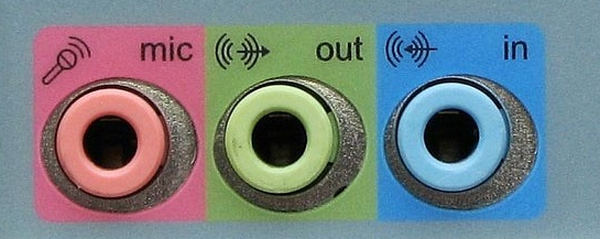
Step 2. Find the blue jack (line-in) in the back edge of a computer, and plug the aux cable in. Then insert the other end to your Android phone.
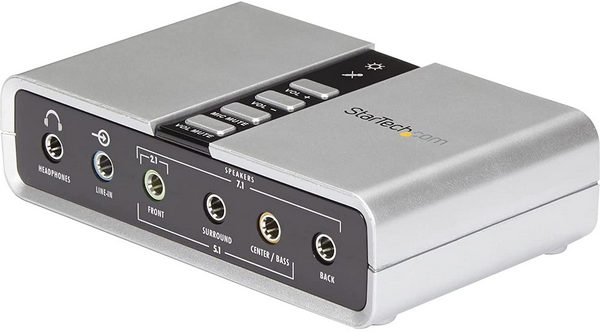
Make sure your computer has an external sound card that has been inserted to the USB post, and connect your Android phone with the external sound card with an aux cable.
Step 3. Return to your computer, just right click the Sound icon and select Open Volume Mixer.

Step 4. Click System Sounds and select Recording.
Step 5. Right click Line In and choose Enable.

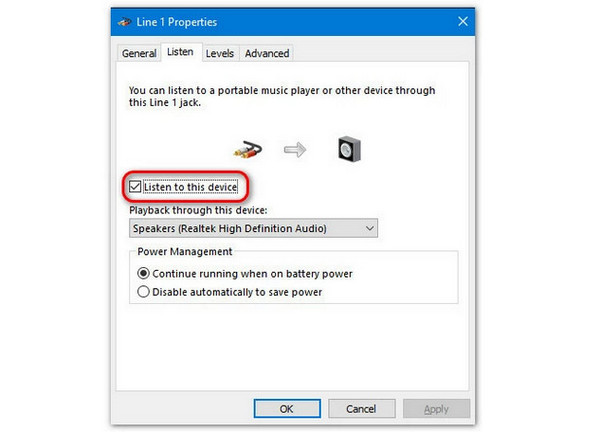
Step 6. Right click Line In again and select Properties. Choose Listen from the top and select Listen to this device. After all done, click OK.
Then just make sure your Microphone is enabled on computer, and you can listen to the audio casted from your Android.