Store
Store- Multimedia
For Windows
- Converter Tools
- Video Converter Ultimate

- Video Converter
- 4K Converter
- MP4 Converter
- Audio Converter
For Mac
- BD/DVD
For Windows
- DVD Tools
- DVD Ripper
- DVD Copy
- DVD Creator
- DVD Converter
- DVD Toolkit
For Mac
- Mobile
For Windows
For Mac
- Utility
- Freeware

User Guide
Get Started
Download & Install
Download AnyMP4 DVD Converter. Follow the instructions to install it to your computer. Then start it.
Register
You can enjoy the free trial version of AnyMP4 DVD Converter. But there are limits of the trial version. To enjoy the full functions, you can follow the steps and register it.
Step 1. You can register `the software in the window popping up when you open the software. If you miss it, you can still register this converter by clicking Register this product (a key icon). The registration window will appear then.
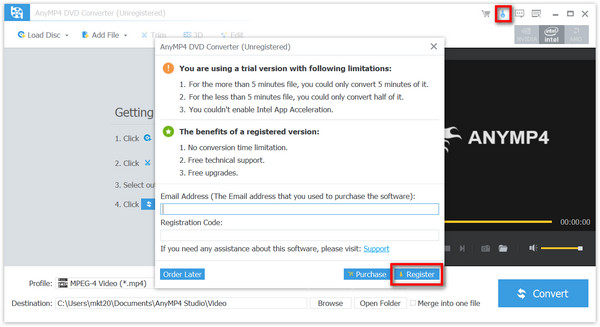
Step 2. Enter the Email Address which you used to buy this software. Then enter the Registration Code and click Register.
Update
The latest version of AnyMP4 DVD Converter provides new functions or fixes bugs. Please check your installed version on your computer.
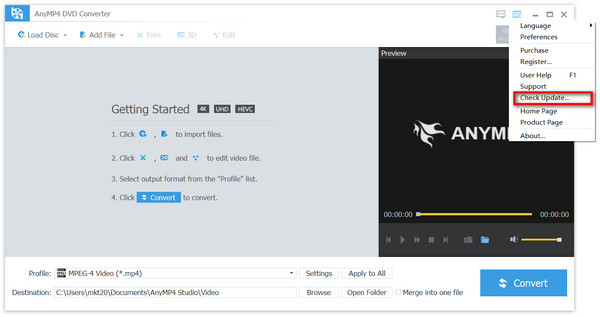
Method 1 Click the Menu button and choose Check Update… from the drop-down list. The software will check if there is an updated version. You can click OK if you already have the latest version.
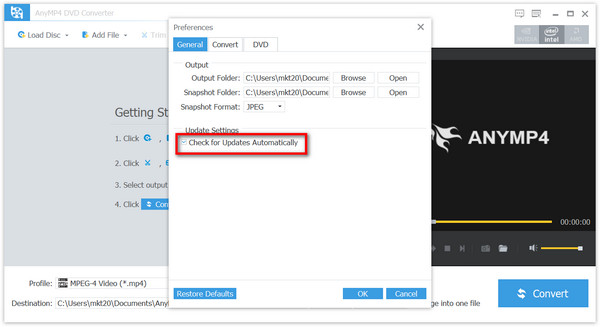
Method 2 You may forget to check the updated version sometimes. Then you can click the Menu button and choose Preferences. You can check the box of Check for Updates Automatically and click OK. The software will update automatically if there is an updated version.
Preferences
You can adjust the settings of this DVD converter as you like.
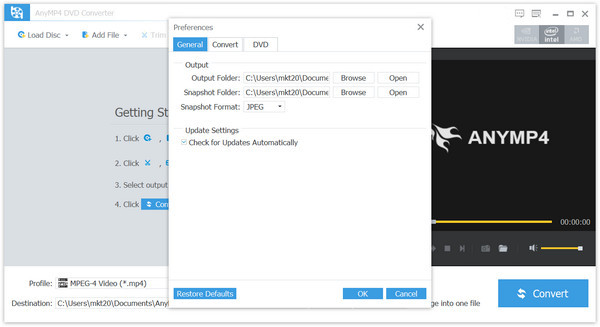
Step 1 Click the Menu button and choose Preferences from the drop-down list. You’ll see the General setting window. Here you can change Output Folder, Snapshot Folder/Format, and update setting mentioned above.
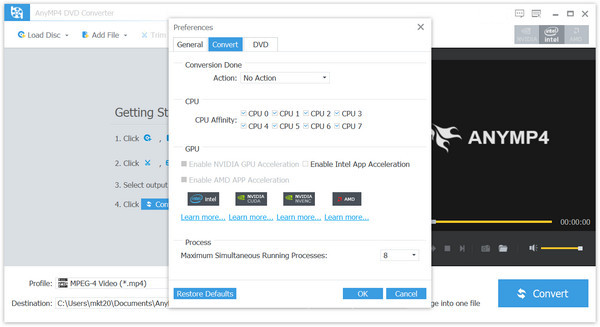
Step 2 Choose Convert at the top menu bar of the Preferences window. You can adjust CPU and GPU settings according to your preference. You can also set the action when the conversion is done, including No Action and Shut Down. The number of Maximum Simultaneous Running Processes can also be changed according to your need.
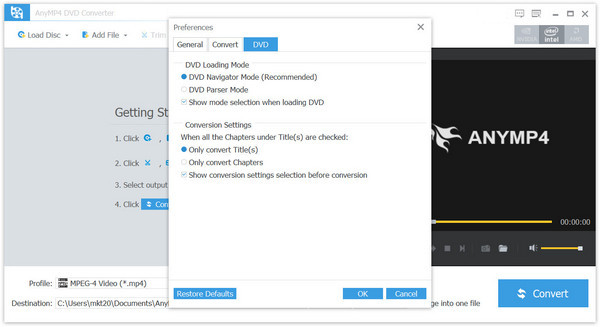
Step 3 Switch to DVD from the top menu bar. You can set the DVD Loading Mode. We recommend you DVD Navigator Mode. You can also adjust the Conversion Settings to only convert titles or chapters.
How to Convert Homemade DVD
You can convert your DVD to video of almost all formats. Follow the steps down below and have a try.
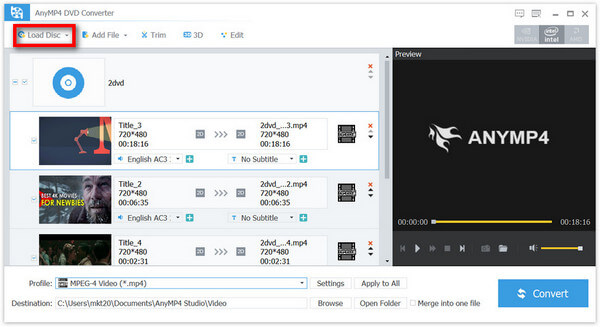
Step 1 Load Disc
Start it on your computer. Click Load Disc at the top-left corner of the main interface. Select the DVD you want to convert and open it. Or you can drag it into the converter directly. In addition, you can also add video file to the converter. They can be converted to other video formats.
Note: During the whole process, the Internet connection is required to handle the encrypted DVD files.
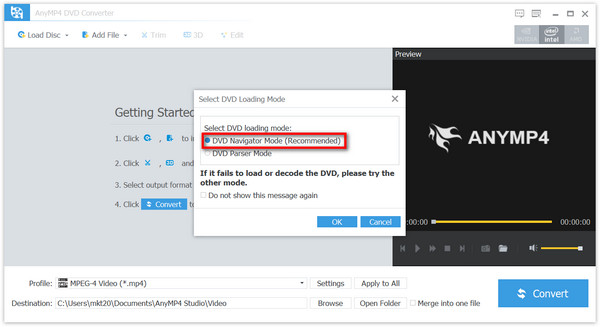
Step 2 Select DVD Loading Mode
Then a window will pop up to notice you to Select DVD Loading Mode. We recommend DVD Navigator Mode to provide you better experience. Then click OK.
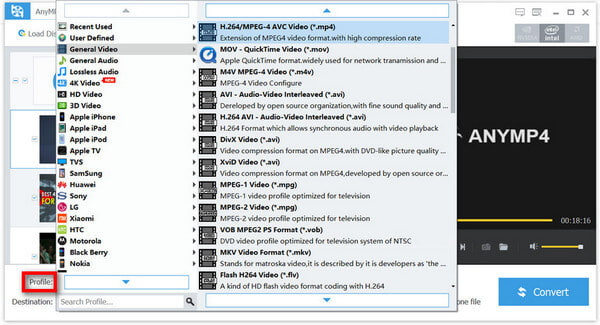
Step 3 Select Output Format
Click the Profile list and choose the wanted output format.
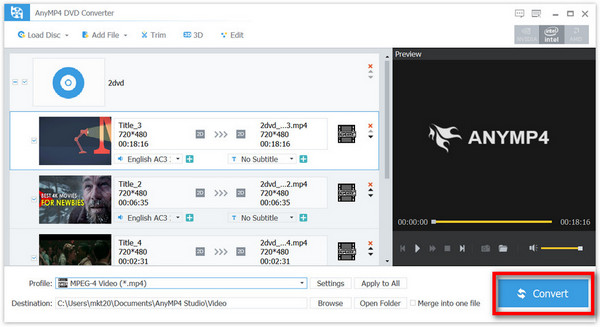
Step 4 Start Converting
You can change the Destination where the converted file is stored. After all settings are done, you can click Convert to start converting.
How to Edit Video
Editing features are available to users before the final conversion. You can edit your video with multiple choices according to your need.
Trim and Merge Videos
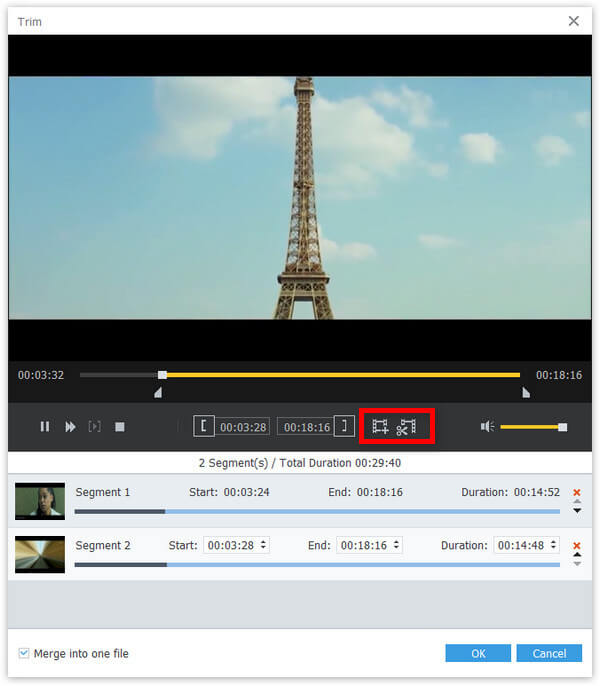
Step 1 In the main interface, click Trim at the top. You can drag the progress bar below the preview window to adjust the start and end. You can also change the time of Start, End, and Duration.
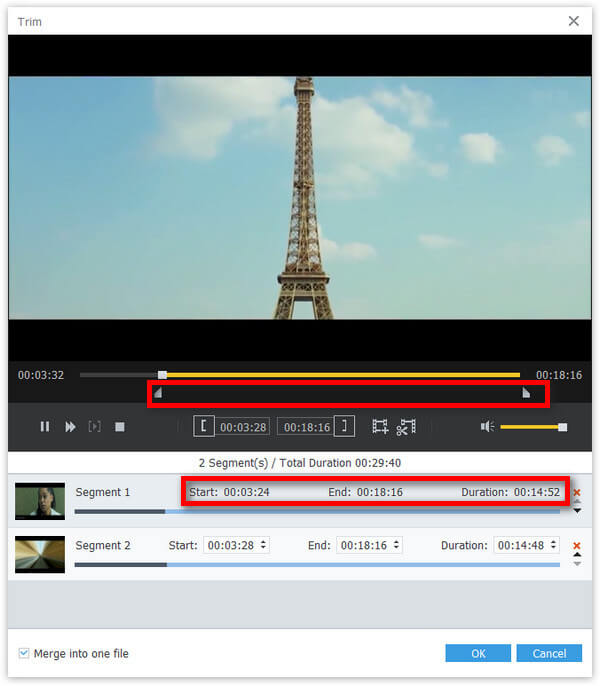
Step 2 If you want to get the same part of your video file, click the New clip icon. Adjust the progress bar and click Split, and you’ll get the split segment.
Step 3 After all the settings, you can click OK. If you want to combine all the segments, you can check the box of Merge into one file. Before merging, you can adjust the order by clicking the Arrow icon.
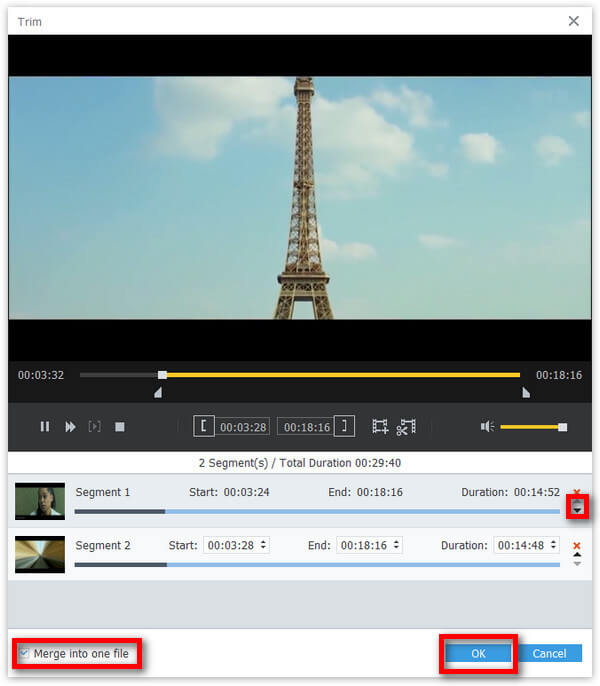
Besides merging trimmed segments, you can also choose Merge into one file in the main interface to combine your output files.
Rotate Video
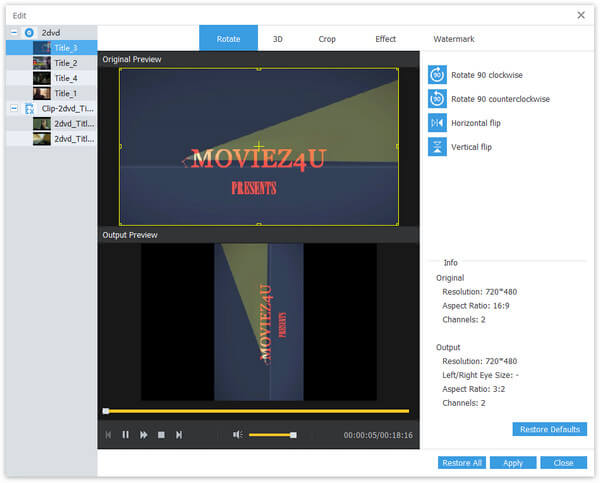
Step 1 Click the Edit button and enter the editing window. You’ll see the Rotate feature first.
Step 2 You can select Rotate 90 clockwise, Rotate 90 counter clockwise, Horizontal clip, and Vertical flip to adjust the display of the video according to your need. And you can preview the output video on the left.
Step 3 When everything is done, click Apply to save these settings.
Crop Video
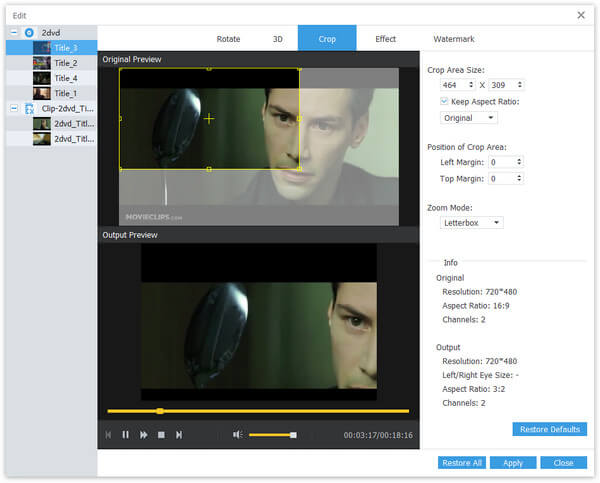
Step 1 Navigate to Crop in the editing window.
Step 2 You can drag the dashed rectangle to adjust the display range of the video. At the same time, you can preview the output video down below. You can also choose to change the number of Crop Area Size. Check the Keep Aspect Ratio and choose Original, Crop Area, 16:9, or 4:3 according to your need. You can also change the Zoom Mode and the Position of Crop Video like Left Margin and Top Margin.
Step 3 Click Apply at the right corner to apply the settings.
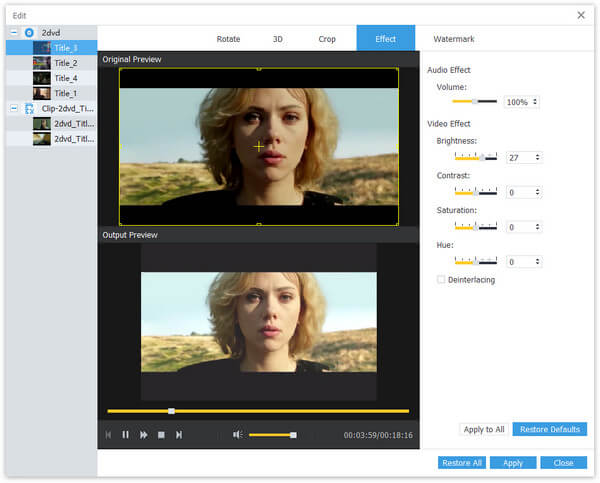
Adjust Video Effect
Step 1 Choose Effect next to Crop.
Step 2 You can adjust the Audio Effect like Volume. You can also change the Video Effect, including Brightness, Contrast, Saturation, and Hue. This converter also provides quality improving settings. You can check the Deinterlacing to improve video quality. At the same time, you can preview the output video on the left.
Step 3 Click Apply at the right corner to apply the settings.
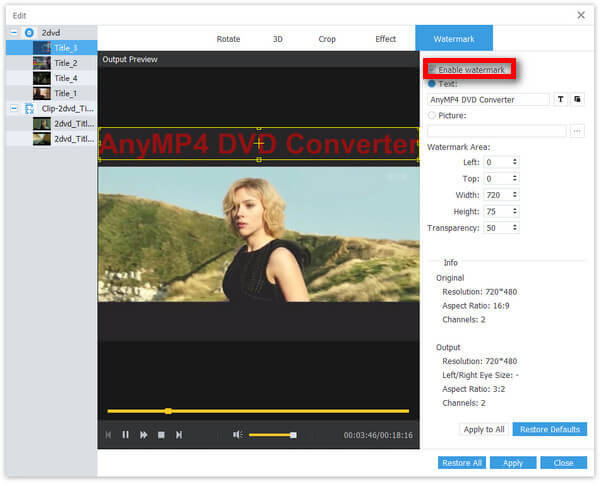
Add Watermark
Step 1 Choose Watermark from the top menu bar of the editing window.
Step 2 Check the box of Enable watermark. Then you can start your settings. You can add text or an image as your watermark. You can change the Watermark Area by changing the numbers including Transparency down below.
Step 3 After all the settings, you can hit Apply to save your changes.
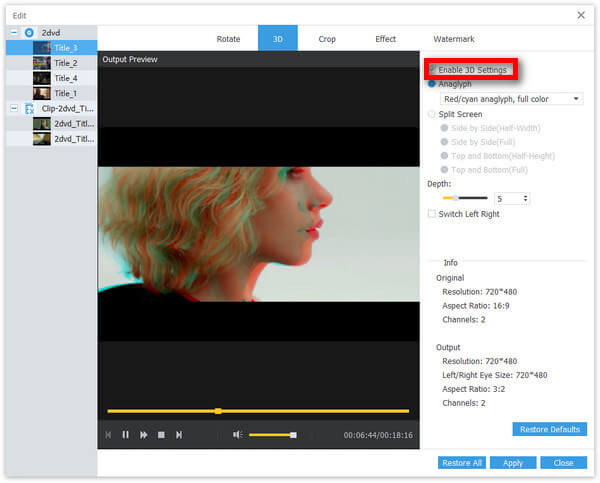
Create 3D Video
Step 1 Choose 3D from the top menu bar of the editing window. Or you can access the 3D feature in the main interface.
Step 2 Check the box of Enable 3D Settings in the first place. You can choose Anaglyph or Split Screen according to your need. But they cannot be applied at the same time. You can go through the drop-down options and choose the preferred one when previewing the output result. In addition, you can also change the Depth and Switch Left Right.