 Store
Store- Multimedia
For Windows
- Converter Tools
- Video Converter Ultimate

- Video Converter
- 4K Converter
- MP4 Converter
- Audio Converter
For Mac
- BD/DVD
For Windows
- DVD Tools
- DVD Ripper
- DVD Copy
- DVD Creator
- DVD Converter
- DVD Toolkit
For Mac
- Mobile
For Windows
For Mac
- Utility
- Freeware

User Guide
Get Started
AnyMP4 Video Converter for Mac is a convenient tool for converting file formats on Mac computers. And it offers many useful and popular functions like editing, cutting, etc. You can learn how to use this software from the following content.
Download & Install
Go to the official website of AnyMP4 Video Converter for Mac and download it. Then click the .dmg package to open the installing package. Later you can drag AnyMP4 Video Converter for Mac to the Applications for finishing the installation.
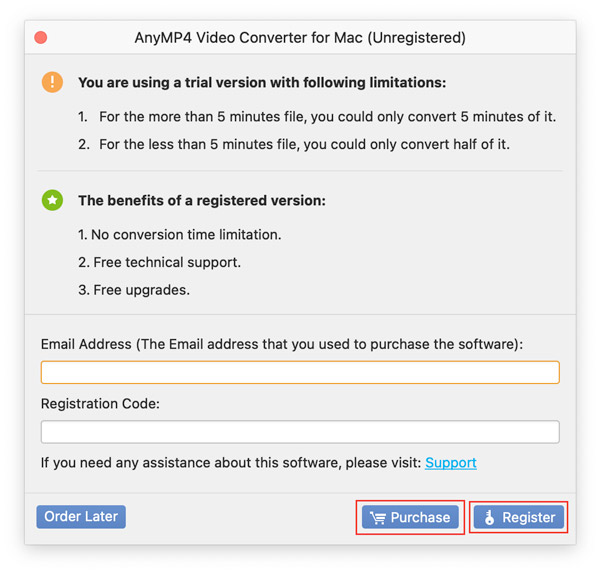
Register
Because of the limited features offered by the free trial version, you can click the Purchase button to get the registered version. After buying the license, you will receive your registration code in your mailbox. And then, you can input your email address and registration code and click the Register button to complete the registration.
Video/Audio Converting
You can do as the following steps say when you want to convert your video or audio to other formats.
Step 1. Launch AnyMP4 Video Converter for Mac on your Mac computer.
Step 2. Import files you would like to convert by clicking the Add File button.

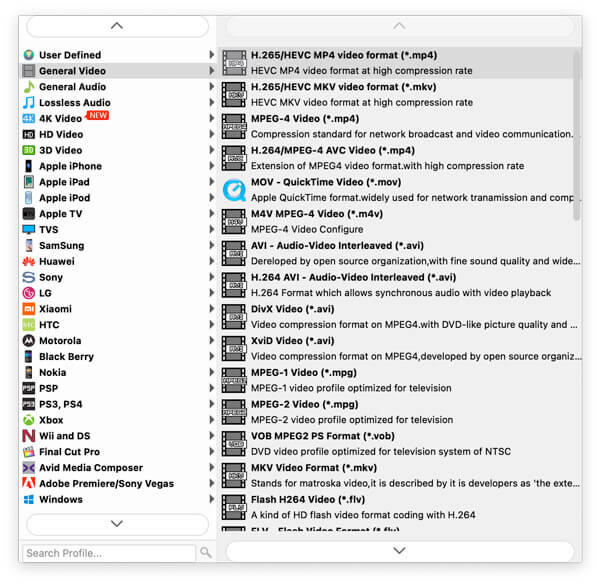
Step 3. To choose the format for your files according to your needs, you should click the pull-down of the Profile.

Here is the output format window, and you can select formats by tabbing them.
If you need to customize the frame rate, resolution, aspect ratio, bitrate, and more of your files, you can click the Settings button to modify them.
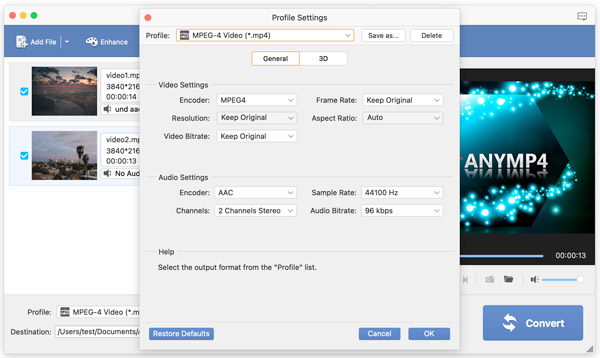
To change the output folder for your files, you can click the Browse button. Later, you can click the Apply to All button to make all files have the same settings.
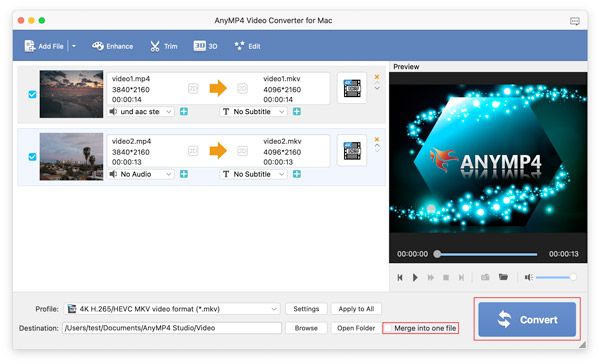
Step 4. Finally, click the Convert button to finish the conversion process. If you have to turn all files into one whole file, you should check the box of Merge into one file.
Video Editing
There are various video editing functions in AnyMP4 Video Converter for Mac.
Rotate & Flip
Step 1. Launch the software and add your video to it, and then click the Edit icon.
Step 2. After entering the Edit window, click the Rotate option. You can use this feature to change the direction of your video, which is recorded by your mobile phone with an unmatched direction. And this feature enables you to rotate your video 90 clockwise/counterclockwise and flip your video horizontally/vertically.
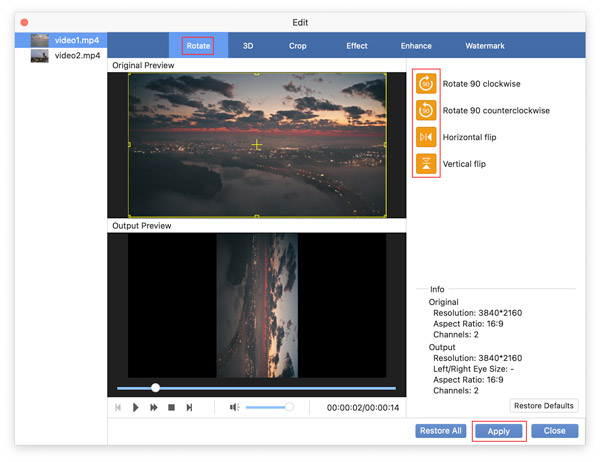
Step 3. Click the Apply button to save all your changes. Click the Restore All button to remove all changes applied.
Add 3D Effects
Step 1 Launch the software and add your video to it, and then click the 3D icon. Besides, you also can click the 3D option in the Edit window.
Step 2 You should check the box of Enable 3D Settings firstly. And there are two modes for you to choose from.
If you want to let your video look like an anaglyph, you can check its box. And the software offers several effects for users.
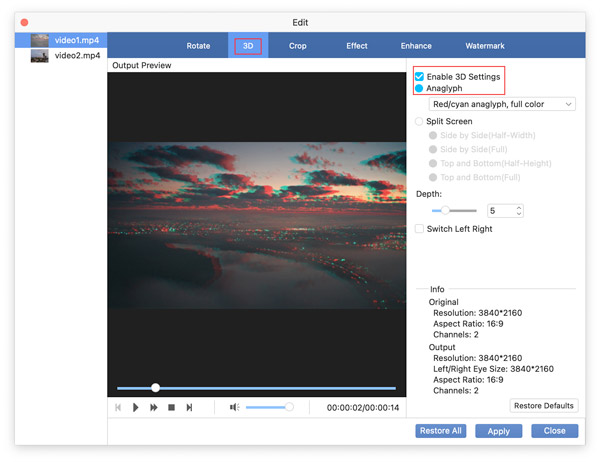
You can also check the Split Screen box to separate your video screen side by side or top and bottom.
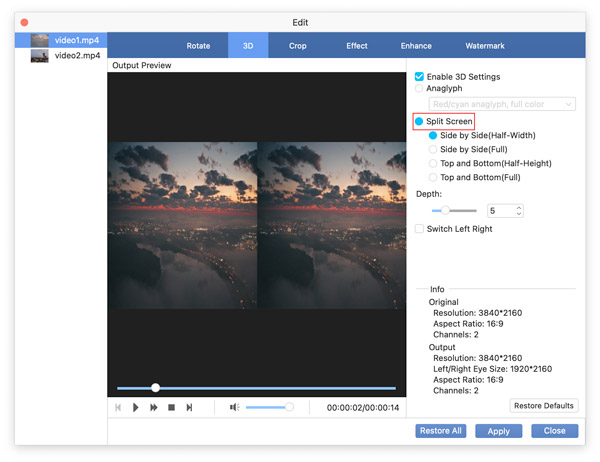
Step 3 Click the Apply button to save all your changes. Click the Restore All button to remove all changes applied.
Crop
Step 1. Launch the software and add your video to it, and then click the Edit icon. And then switch to the Crop tab.
Step 2. To keep the content you want, you can change the area size by modifying numbers or moving the cursor on the Original Preview window. Besides, you can choose to crop your video with a fixed aspect ratio or not by checking the box of Keep Aspect Ratio or not. What's more, the cropping feature provides four zoom modes like Letterbox, Medium, and so on for users.
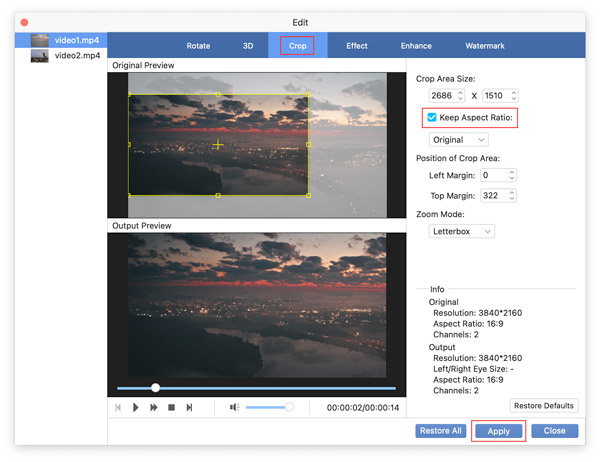
Step 3. Click the Apply button to save all your changes. Click the Restore All button to remove all changes applied.
Adjust Effects
Step 1. Launch the software and add your video to it, and then click the Edit icon. And then switch to the Effect tab.
Step 2. You can control the volume and modify your video's brightness, contrast, saturation, and hue. And in the left Output Preview window, you can see what your video will look like.
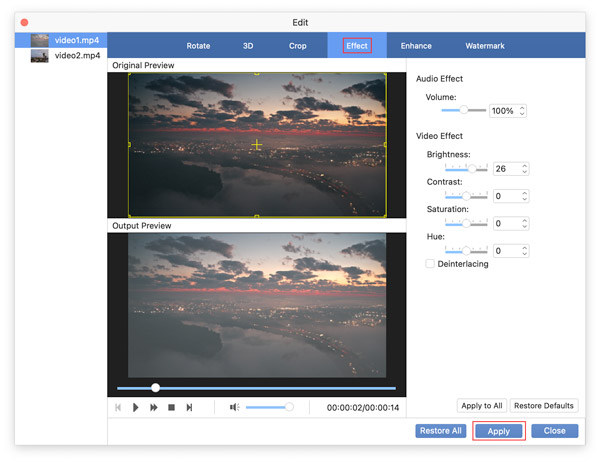
Step 3. Click the Apply button to save all your changes. Click the Restore All button to remove all changes applied.
Enhance
Step 1. Launch the software and add your video to it, and then click the Enhance icon. Besides, you also can click the Enhance option in the Edit window.
Step 2. The Enhance feature gives you four solutions to improve your video quality: Upscale resolution, Optimize brightness and contrast, Remove video noise, and Reduce video shaking. You can choose to apply which solution to your video according to your need.
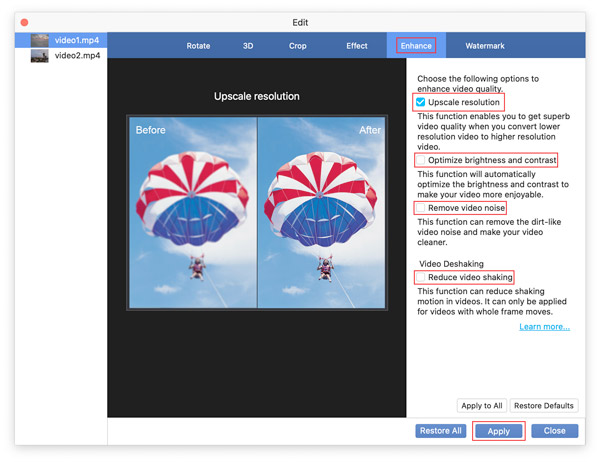
Step 3. Click the Apply button to save all your changes. Click the Restore All button to remove all changes applied.
Add Watermark
Step 1. Launch the software and add your video to it, and then click the Edit icon. And then switch to the Watermark tab.
Step 2. When you upload your video to social network websites, you can use this function to add a unique watermark to your video. Check the box of Enable watermark, and select Text or Picture as the form of your watermark. Moreover, you can customize the text style, size, color and adjust the position and transparency of your watermark.
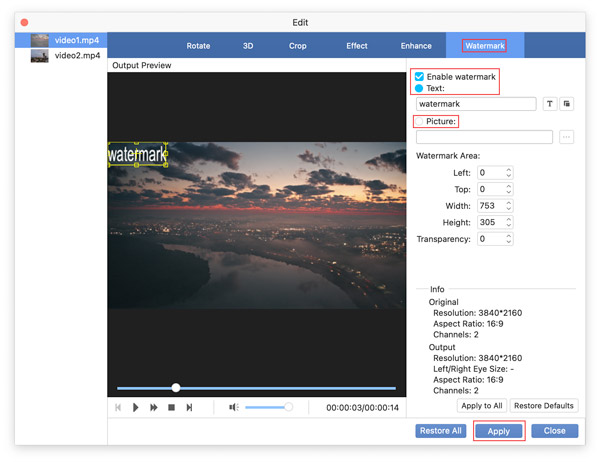
Step 1. Click the Apply button to save all your changes. Click the Restore All button to remove all changes applied.
Trim
Step 1. Launch the software and add your video to it, and then click the Trim icon.
Step 2. You can set the starting and ending point by moving the progress or editing the time. Then you can click the New Clip icon to get a video/audio clip from the original one. Or you can click the Split icon to separate your file into two clips.
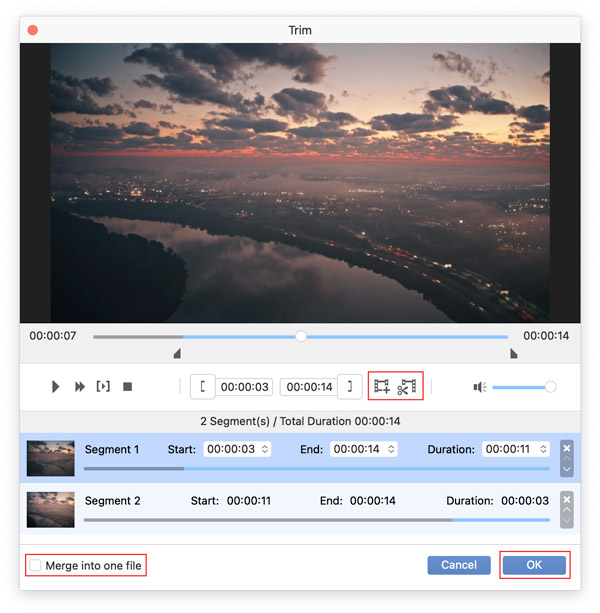
In addition, you can check the box of Merge into one file to turn all these segments into a whole file.
Step 3. Finally, click the OK button to save your file.