Store
Store- Multimedia
For Windows
- Converter Tools
- Video Converter Ultimate

- Video Converter
- 4K Converter
- MP4 Converter
- Audio Converter
For Mac
- BD/DVD
For Windows
- DVD Tools
- DVD Ripper
- DVD Copy
- DVD Creator
- DVD Converter
- DVD Toolkit
For Mac
- Mobile
For Windows
For Mac
- Utility
- Freeware

User Guide
Get Started
Download & Install
Download the installer of AnyMP4 MXF Converter and follow the instructions to install the program on your computer. After that, open the converter to start the next process.
Register
If you haven’t registered the software, you can use a trial version. But there are several limitations while using the app. So, you’d better register it with your email address and the registration code if you want to enjoy full features.
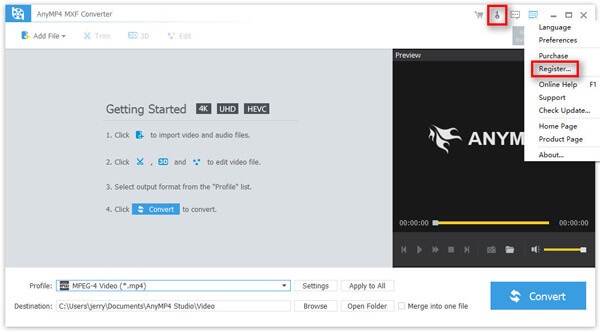
Step 1. Generally, the Registration window should appear automatically once you open the program. If it doesn’t show up, please click the Key icon to go to the Registration window directly. Or you can open the menu and select the Register option from the dropdown list instead.
Step 2. Then enter the email address that you used to purchase the software and the registration code that you received. Click the Register button to activate the registration.
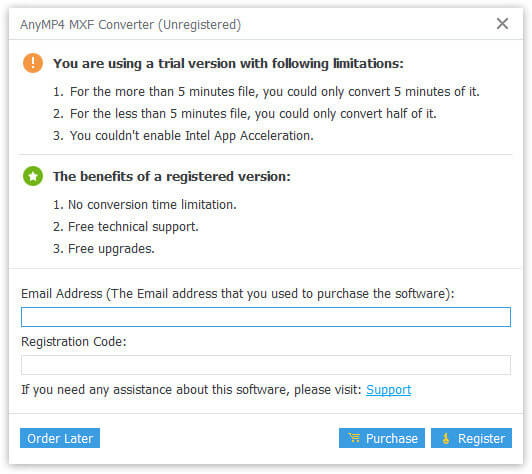
Note: One thing you need to make sure is that your computer should be connected with the Internet during the registration.
Update
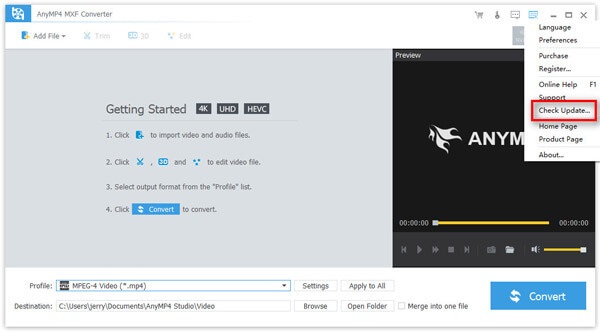
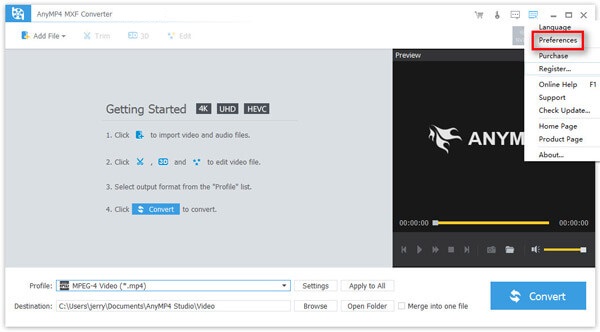
If you need to update AnyMP4 MXF Converter, you can go to the menu in the top right corner and select the Check Update... option. When there is a new update, you can manually download and install the latest version.
But if you prefer checking for updates automatically, you can go to Preferences and enable the Check for Updates Automatically setting. Then you can get a message if an update is available every time you launch the program.
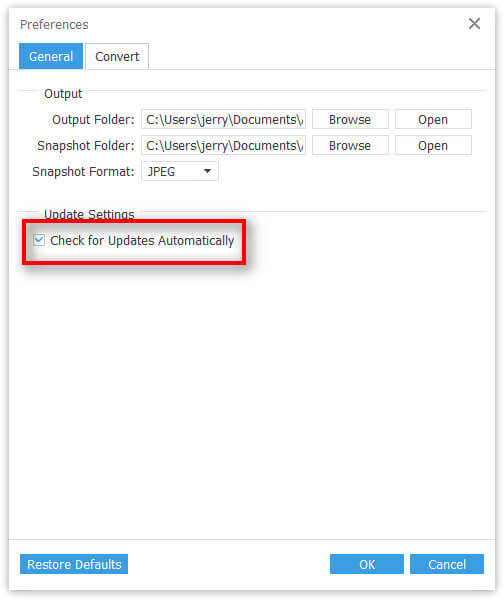
Preferences
The Preferences option is located in the dropdown menu at the top right corner.
You are able to adjust the output folder, snapshot folder, and snapshot format as you like. You can also find the update setting we have mentioned above.
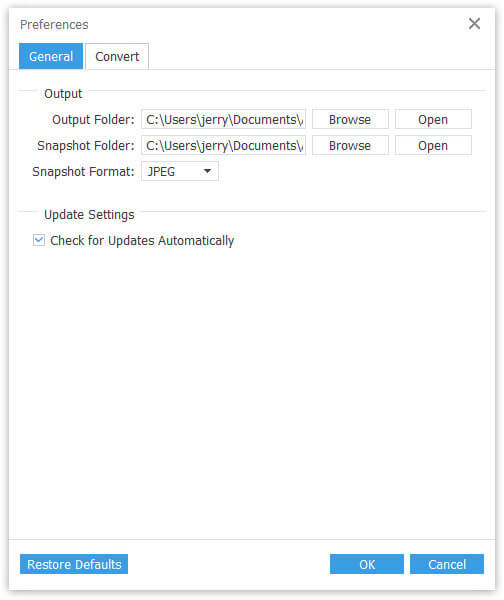
Navigate to the Convert tab if you want to adjust converting settings. You can enjoy the high converting speed using the GPU acceleration technology. You are also able to change the value for the maximum simultaneous running processes from 1 to 8.
How to Convert MXF Video
Want to convert MXF video files to other formats? Then AnyMP4 MXF converter is the best choice for you. It can help you convert your videos to the video/audio format you need without quality loss.
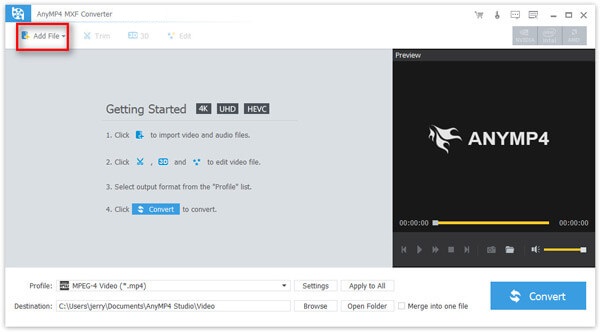
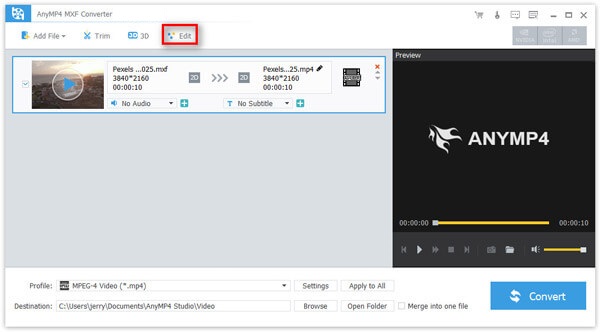
Step 1. Add video file(s)
After you open the converter, you will enter the main interface. Find the Add File button from the toolbar. Select all the MXF video files that you want to convert in the Select Video File window. Click the Open button to import those videos. You can also drag and drop them into the converter directly.
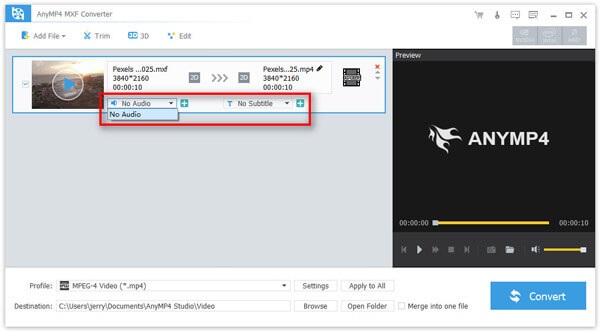
Step 2. Adjust Audio Track & Subtitles
You are allowed to adjust the audio track and subtitle as you like. Just open the dropdown list under the video information. If you want to add local track to the current video, just click the Plus icon next to the dropdown and import the file.
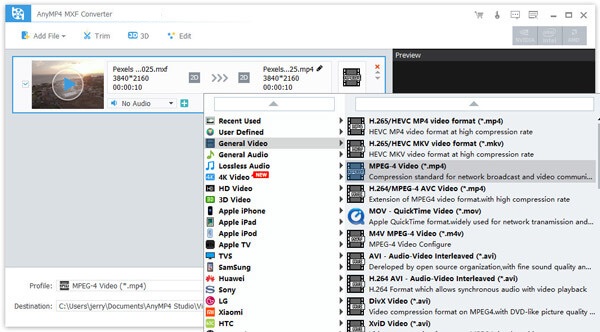
Step 3. Set the output file format
Click the Film icon behind the video, and you can change the output file format separately according to your need. You can also change the format for all videos using the Profile list at the bottom.
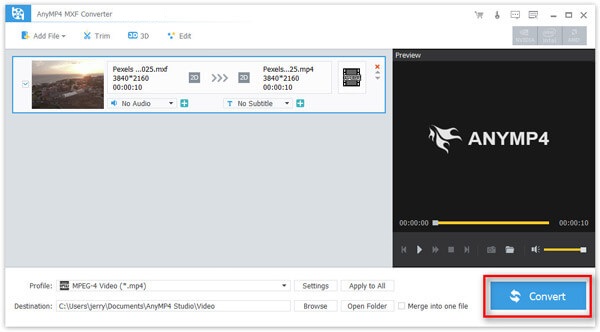
Step 4. Convert MXF video file
Find a destination to save the output file(s). If you have multiple video clips, you can merge them into one file by checking the Merge into one file option. Click the Convert button to start converting MXF video files.
How to Edit Video
AnyMP4 MXF Converter can not only convert MXF videos to other formats, but also assist you in editing your videos like a pro.
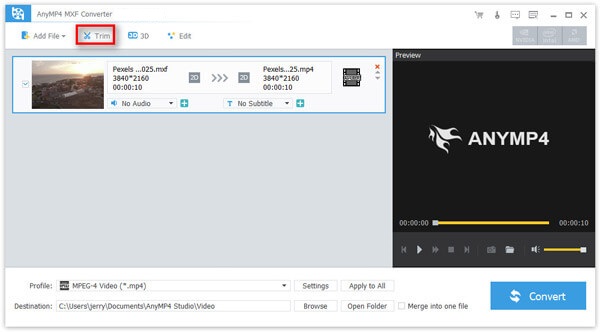
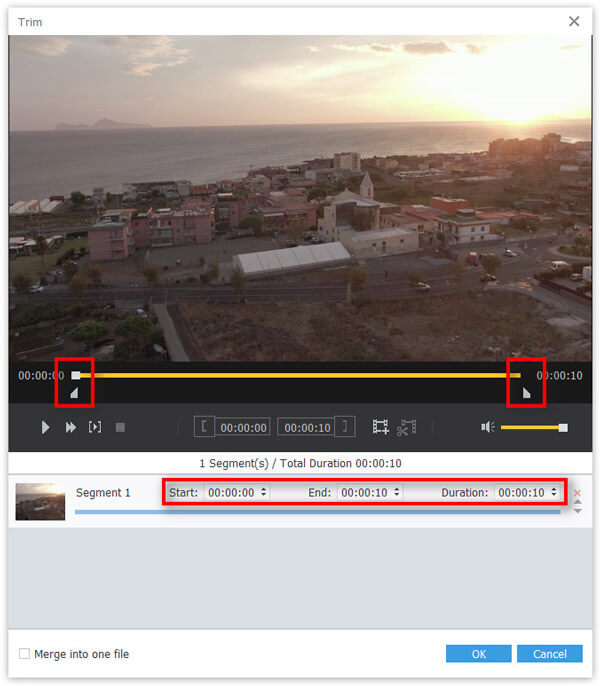
Trim Videos
Step 1. Select the video you want to trim. Then click the Trim button from the toolbar above.
Step 2. You can adjust the start and end time by enter the time value to the Start, End, and Duration boxes. You can also drag the time points below the video to adjust the starting and ending time directly.
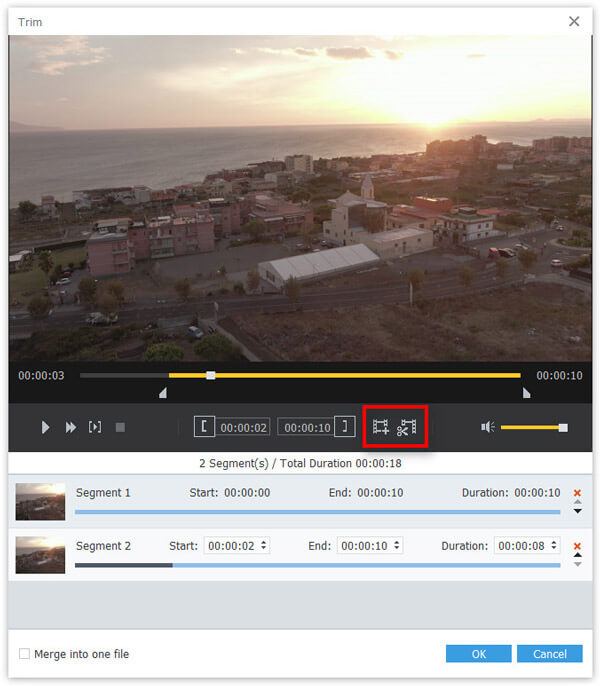
Step 3. Click the New Clip icon in the progressing bar and clip the video. Then you can get a new video clip. If you click the Split button, then your video will be divided into two segments accordingly.
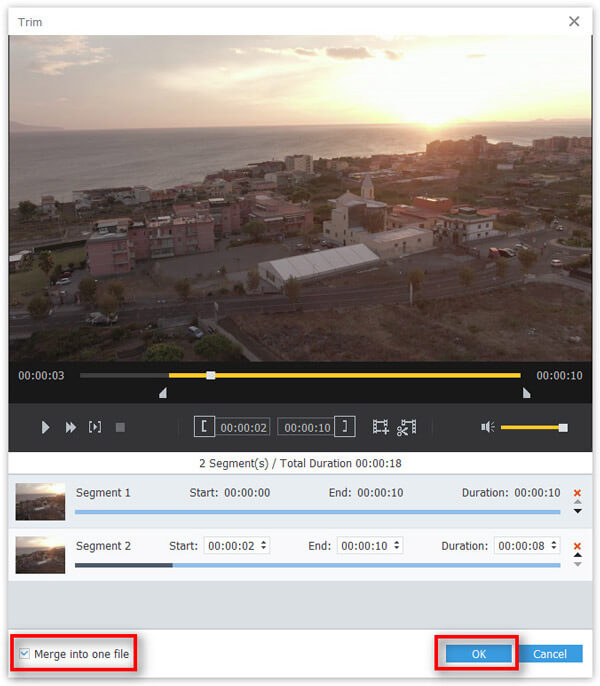
Step 4. Click the OK button to confirm your changes. As for the Merge into one file function, it can combine these new clips together after you adjust their order.
Make 3D Video
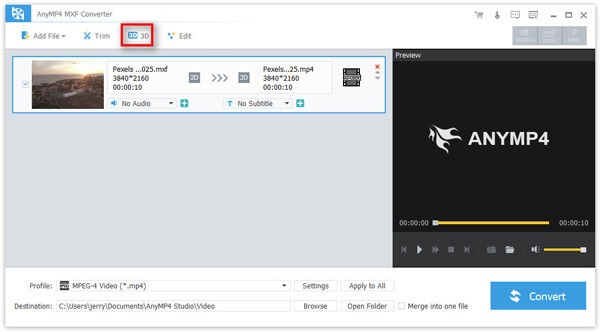
Step 1. Select the video you want to add 3D effect to. Then click the 3D button from the toolbar above.
Step 2. Check the Enable 3D Settings option. You can either choose to apply Anaglyph or Split Screen according to your need. The former is the stereoscopic 3D effect that can encode the image using filters of different colors. Besides, you can change the Depth of 3D effect and switch the effect to the right or left.
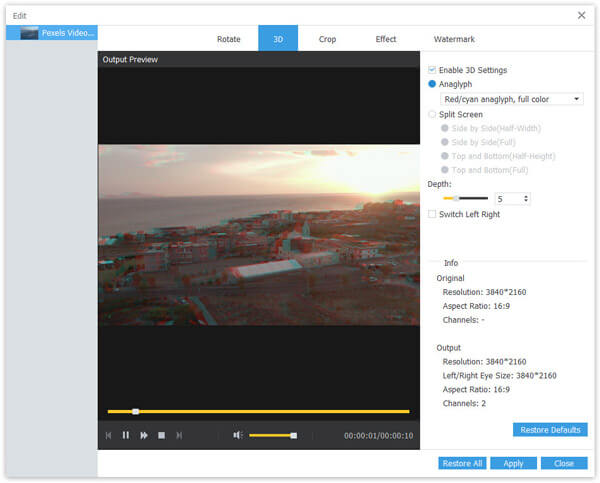
Step 3. After that, click the Apply button to create a stunning 3D movie.
Rotate Video
Step 1. Select the video you want to rotate. Then click the Edit button from the toolbar above.
Step 2. To rotate or flip the video, just navigate to the Rotate tab. Click the Play icon at the bottom to preview the effect in real time. Then you can choose to flip the video vertically/horizontally or rotate the video 90 degrees clockwise/counterclockwise.
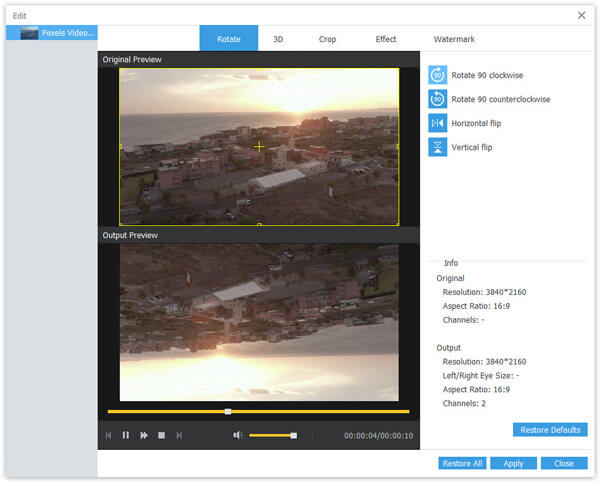
Step 3. Click Apply to confirm your changes.
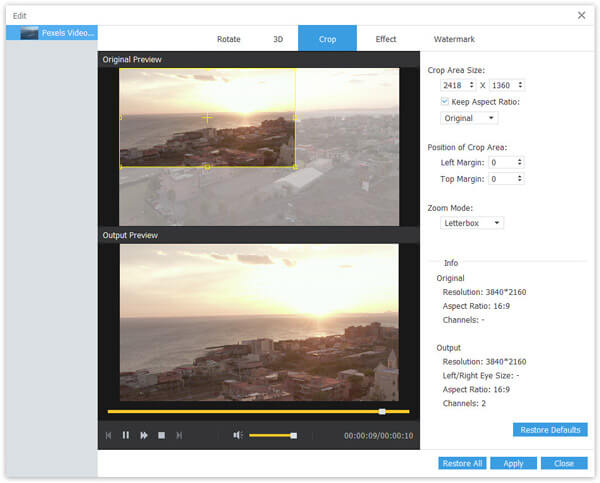
Crop Video
Step 1. Open the Edit window. To crop the video image, just switch to the Crop tab.
Step 2. You can enter the Crop Area Size to crop the video accurately. Or you can drag the frame on the image to adjust the size as you wish. And Zoom Mode can help you change the screen size with movie standards.
Step 3. Click Apply to save the changes.
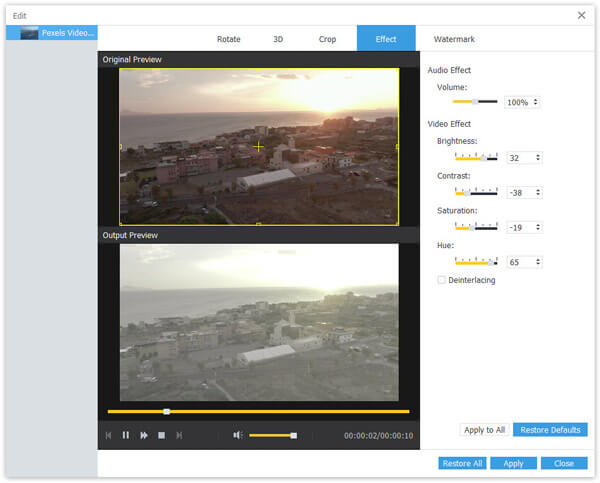
Adjust Video/Audio Effect
Step 1. Open the Edit window. To adjust video or audio effects, just navigate to the Effect tab.
Step 2. You to change the audio volume, and adjust video effects like brightness, contrast, saturation and hue without any hassle.
Step 3. Click Apply to keep the changes.
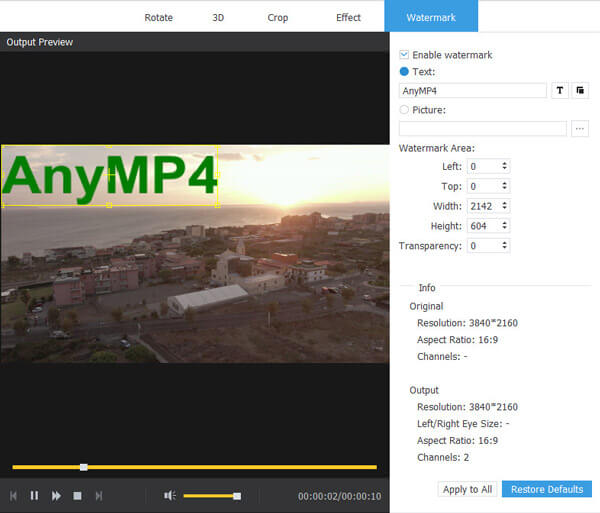
Add Watermark
Step 1. Open the Edit window. To add a watermark, just find the Watermark tab.
Step 2. Check the Enable watermark option. You can add either text or image watermark with custom transparency, color and font. Please drag the watermark to the right position.
Step 3. Don’t forget to click the Apply button below.