Store
Store- Multimedia
For Windows
- Converter Tools
- Video Converter Ultimate

- Video Converter
- 4K Converter
- MP4 Converter
- Audio Converter
For Mac
- BD/DVD
For Windows
- DVD Tools
- DVD Ripper
- DVD Copy
- DVD Creator
- DVD Converter
- DVD Toolkit
For Mac
- Mobile
For Windows
For Mac
- Utility
- Freeware

User Guide
Introduction
AnyMP4 Audio Recorder for Mac is the most professional audio recording software which allows you to record high-quality audio from sound card, microphone, voice calls, and more easily. You can save any captured audio file as MP3, M4A, WMA, or AAC and then upload it to YouTube, Facebook, Instagram, etc.
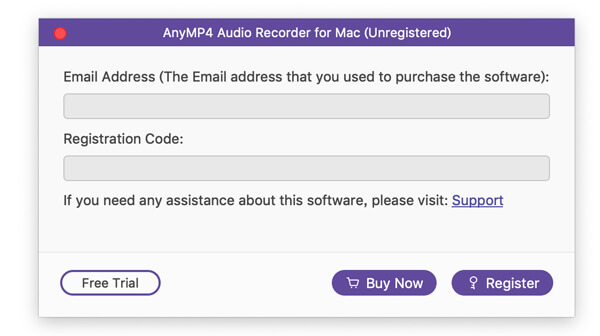
Register
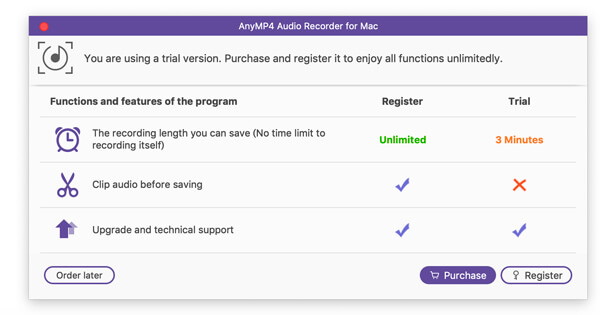
AnyMP4 Audio Recorder for Mac offers the trial version which has limitations. If you want to record over 3 minutes audio or clip audio before saving, you would need to register the software.
Or you can click Register from the Help option on the top bar.
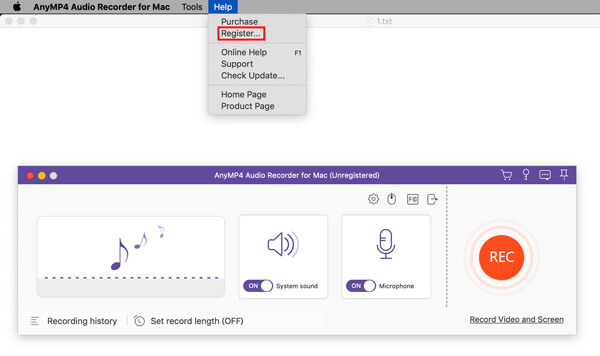
Then, enter your email address and paste registration code in the box and click the Register button to register this software.
Update
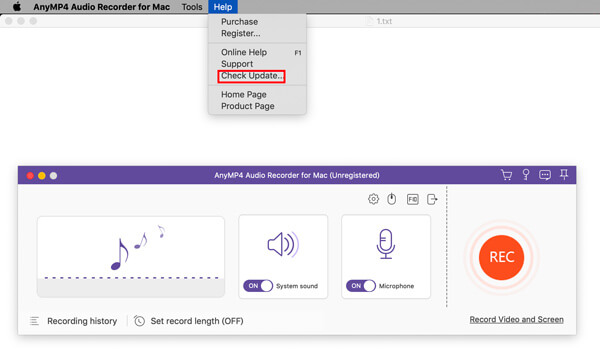
Way 1 Choose the Way option and choose Check Update. If there’s an update, you can download and install it immediately.
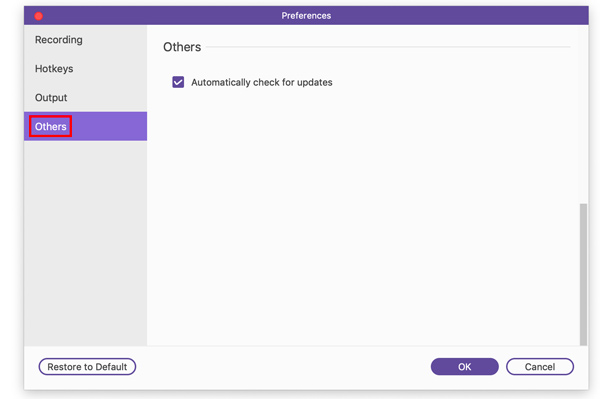
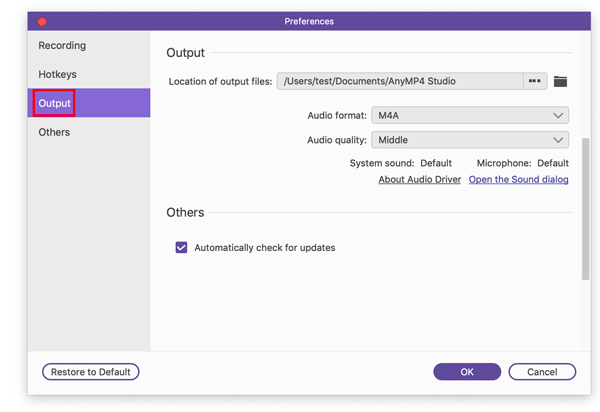
Way 2 Click the Recording setting button to enter into the Preferences Window. Then, choose the Others tab from the left bar. C heck the box behind Automatically check for updates. Then you can receive the automatic update notification if there is an update.
Way 3 Or you can go to our product page and download the latest version.
Preferences
You are provided with four parts to configure the audio settings: Recording, Hotkeys, Output, and Others.
Recording: Click the Recording setting button and you will enter into the window of the Recording.
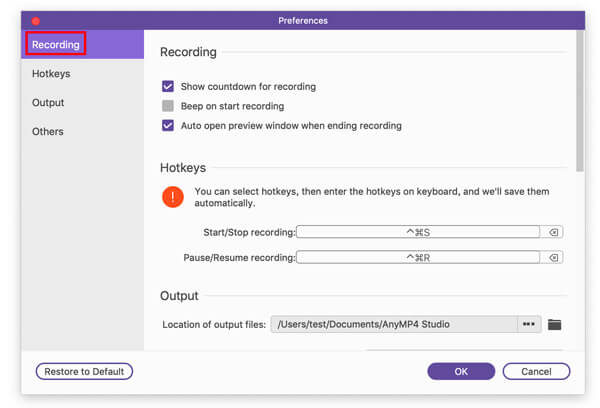
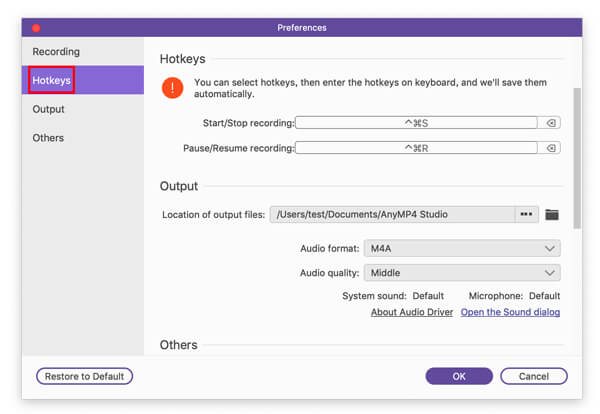
Hotkeys: By clicking the FIQ icon, you will see the window of Hotkeys setting. Here you can select hotkeys for Start/Stop record and Pause/Resume record.
Output: Click the Output setting button to enter into the window of Output. Here you are able to set the audio format, adjust the audio quality, and decide the location of output files.
Others: To enter into in this part, you need to open one of the other three preferences and click the Others tab on the left bar.
Record Audio
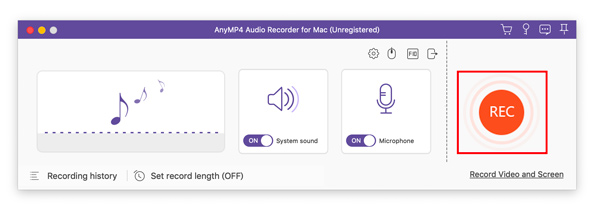
Step 1 Launch Audio Recorder for Mac
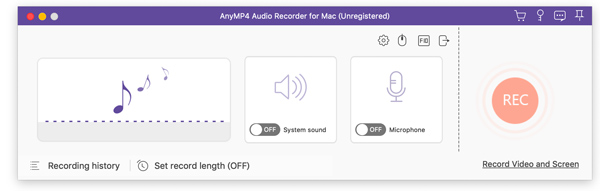
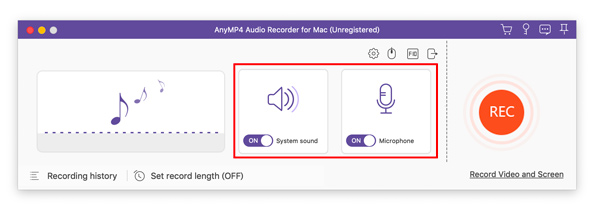
After downloading and installing Audio Recorder for Mac, you need to open this software on your Mac. On the main interface, you can turn on or turn off System Sound and Microphone, and adjust the volume.
For recording the sound from your computer, you just need to toggle on System Sound.
For recording your voice from microphone, you should toggle on Microphone.
For recording the audio from your computer and microphone simultaneously, you should toggle on both.
Step 2 Set the output format
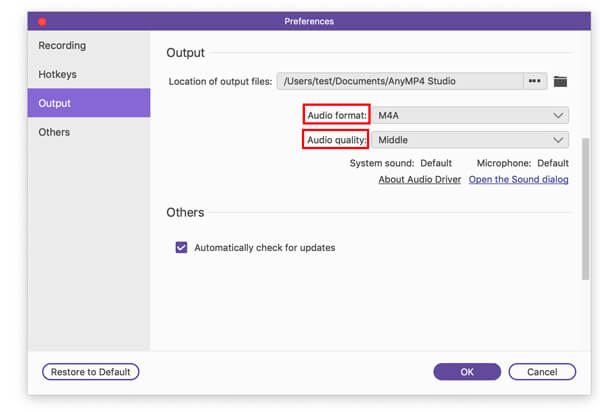
By default, the output format is MP3, and the audio quality is High.
On the Output setting window, you are able to choose to save the audio format as MP3, WMV, M4A, or AAC. And you can adjust the audio quality varied from Lowest to Lossless.
Step 3 Record audio
Click the REC button to start recording the audio file on your Mac.
Step 4 Save the captured audio
Click the Stop button to preview the recorded audio file.

Featured by the Clip function, this software enables you to cut the unwanted part from this file.
You can also adjust the volume or decide to re-record or save the audio.
Then, click Save to export it to your Mac.
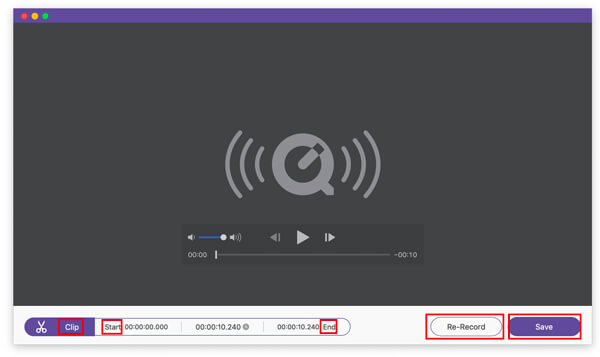
After that, it will remind you of setting the path for your file. Then, you will be navigated to the audio files archive where you can manage your files.
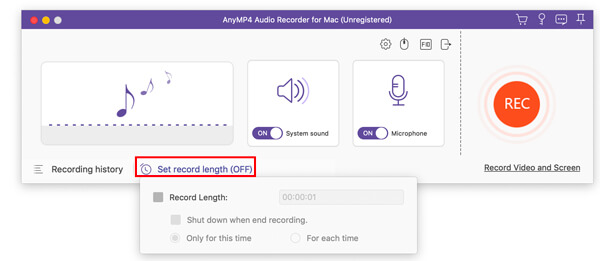
Set Record Length
You can also set the length of recording by clicking Set recording length.
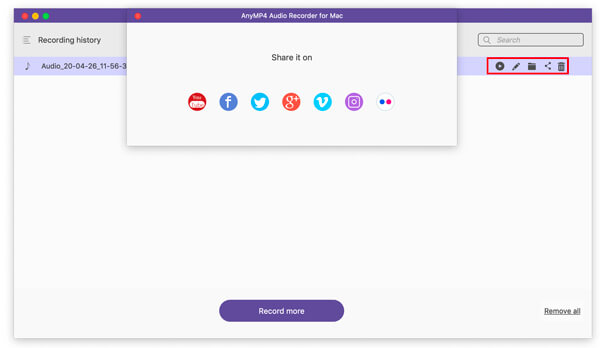
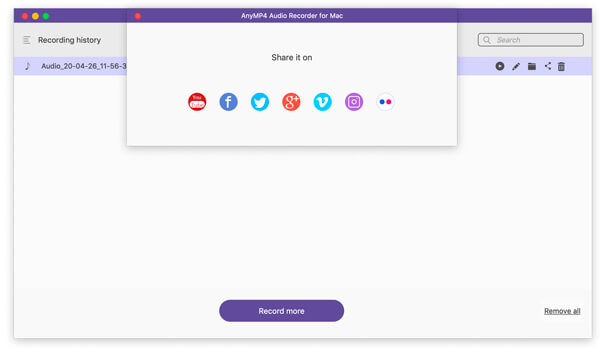
Manage Recording History
You can view your captured audio files from Recording history.
Then, you can rename, play, or share the recorded file as you want.