 Store
Store- Multimedia
For Windows
- Converter Tools
- Video Converter Ultimate

- Video Converter
- 4K Converter
- MP4 Converter
- Audio Converter
For Mac
- BD/DVD
For Windows
- DVD Tools
- DVD Ripper
- DVD Copy
- DVD Creator
- DVD Converter
- DVD Toolkit
For Mac
- Mobile
For Windows
For Mac
- Utility
- Freeware

User Guide
Get Started
Download & Install
Free download iPhone Data Recovery for Mac. After downloading, please follow the on-screen instructions to install this recovery tool on your Mac.
Register
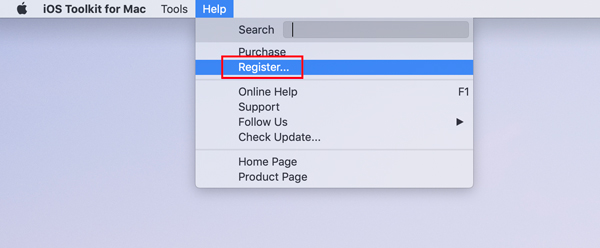
If you want to preview and recover your files with no limit, you should register iPhone Data Recovery for Mac first. Open the Help menu in the upper left corner of your Mac and find the Register option from the list. Then the Registration window will pop up.
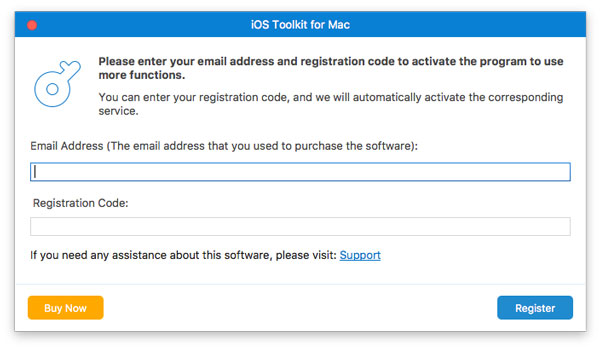
Here, please enter your Email Address and the Registration Code that you have received. Click on the Register button to complete your registration.
Update
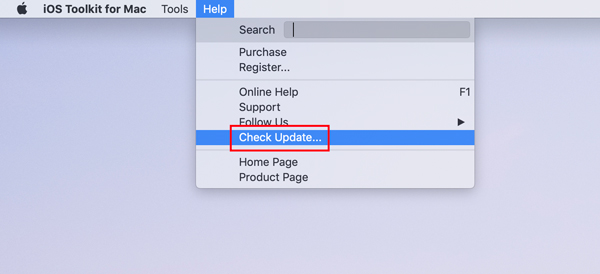
To check if the software is the latest version, you can go to the Help tab. Then select the Check Update option. We will inform you if there’s an update. You can download and install the latest program immediately.
iPhone Data Recovery for Mac
Recover from Your iOS Device
Using iPhone Data Recovery for Mac, you can recover your contacts, messages, call history, calendar, notes, reminder, Safari bookmarks, Safari history, WhatsApp Chats, and more. And it supports any popular iOS devices, including iPhone 17/Air/17 Pro/17 Pro Max/16/16 Plus/16 Pro/16 Pro Max/15/15 Plus/15 Pro/15 Pro Max/14/14 Plus/14 Pro/14 Pro Max/13/13 Pro/13 Pro Max/13 mini/12/12 Pro/12 Pro Max/12 mini/11/11 Pro/11 Pro Max/XS/XS Max/XR/X/8/8 Plus/7/7 Plus/6s/6s Plus/6/6 Plus/SE/5s/5c/5/4s/4, iPad, iPad Pro/mini 4/mini 3/mini 2/mini/Air 2/Air/4/3/2 a, and iPod touch/nano.
You’d better stop using your iOS device after the data loss. Because your operation may generate new data that will cover the original data you want to recover. In that case, it will be quite hard to get your important data back.
Step 1 Connect Your Device to the Program
First, please run iPhone Data Recovery for Mac on your computer. Then select Recover from iOS Device and connect your device to your Mac through a USB cable. At this step, you may need to trust the computer on your device.
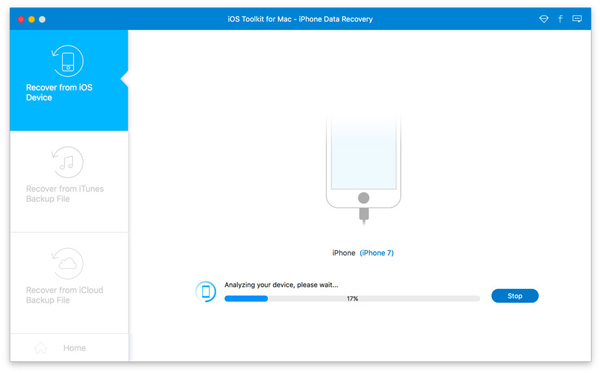
After connecting successfully, you can see the model name of your device and a big blue Start Scan button on the screen.
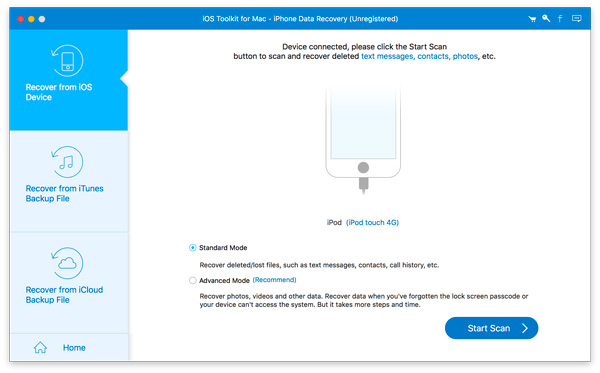
If you are using iPhone 4, iPhone 3GS, iPad 1, and iPod touch 4, you will see two extra modes for scanning – Standard Mode and Advanced Mode. The latter can retrieve more types of content.
Step 2 Scan Your Device to Detect the Lost Data
Here we can choose Standard Mode. Then click Start Scan to go into the device scanning process. This software will start scanning your iOS devices in a few seconds.
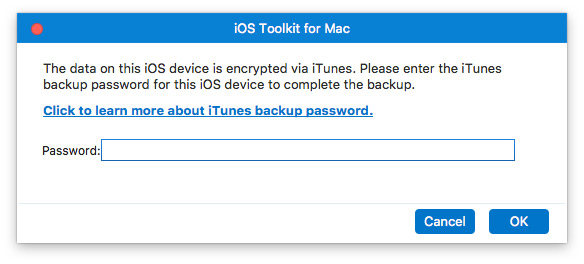
And if you have ever created an iTunes backup to your computer with an encrypted password for this iPhone, then here you should input the encrypted password in this software to unlock the local backup file from this iPhone.
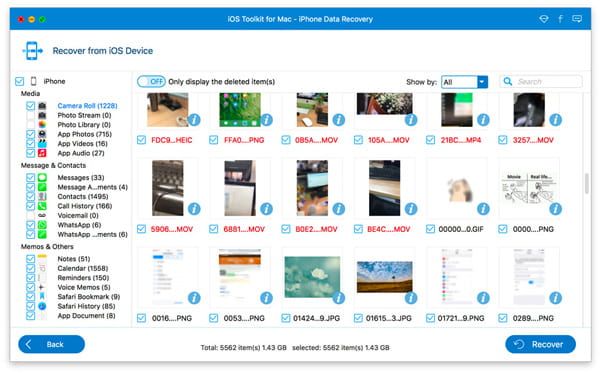
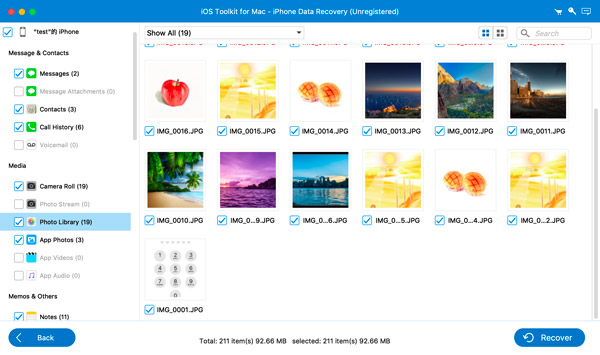
Step 3 Preview and Recover the Lost Data
After scanning, users can see all the data types in the left panel. And specific files (both lost and existing) of each category are shown in the right panel for preview. Select files you want to recover, then click Recover to get the lost data back. Also, you can freely export the existing data.
Recover from iTunes Backup
Want to get back lost Camera Roll, Photo Library, Photo Stream, Message attachments, Voice memos, WhatsApp Attachments, Voicemail, App Photos, App Videos, App Audio, and export other existing files from iTunes? Then you should try the Recover from iTunes Backup File mode.
Don't sync your device with iTunes after the data loss, otherwise the iTunes backup file will be updated after the sync.
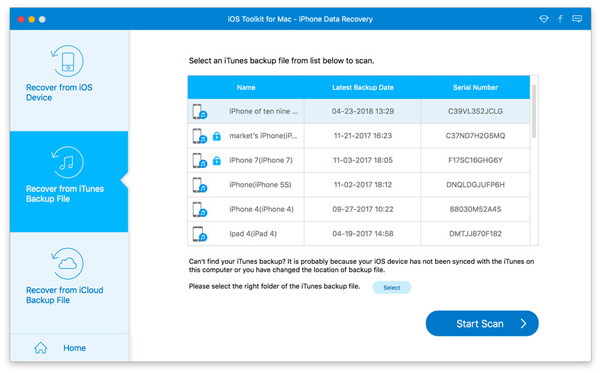
Step 1 Select iTunes Backup File to Start Scanning
Choose Recover from iTunes Backup File. Then all the backup files of your iOS devices that have been sync with the iTunes on your Mac will be detected. Choose one file according to your need, then click Start Scan to analyze the backed-up file.
Step 2 Preview & Retrieve Lost Files
If the scanning process is completed, you can view all the files that have been extracted from your iTunes backup file.
Before the recovery, you can preview specific files for precise recovery. Users can recover the lost data and output the existing data, including Contacts, Messages, Call history, Calendar, Notes, Reminder, Safari bookmark and WhatsApp. As for other data types, the program supports exporting existing data alone.
Recover from iCloud Backup
You are also able to recover deleted files from the iCloud backup file with AnyMP4 iPhone Data Recovery for Mac.
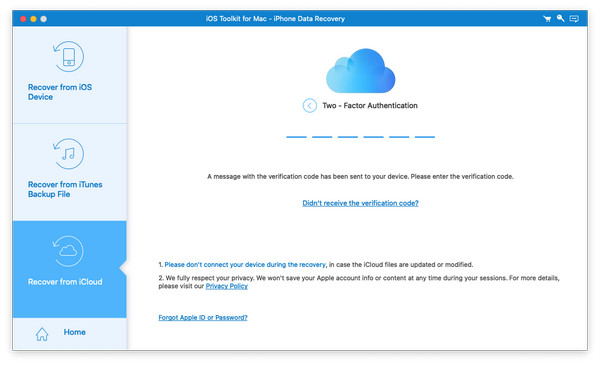
Step 1 Log in to iCloud Account
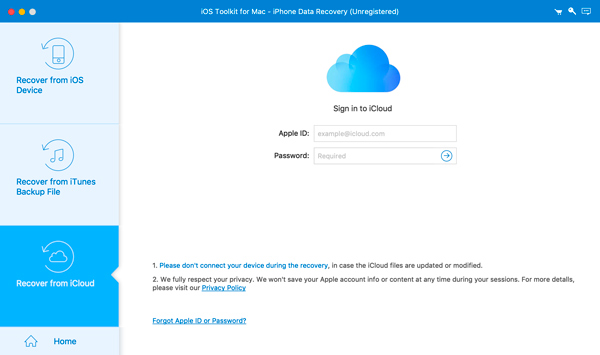
Choose Recover from iCloud Backup File on the main interface. And type in your iCloud account and password to sign in.
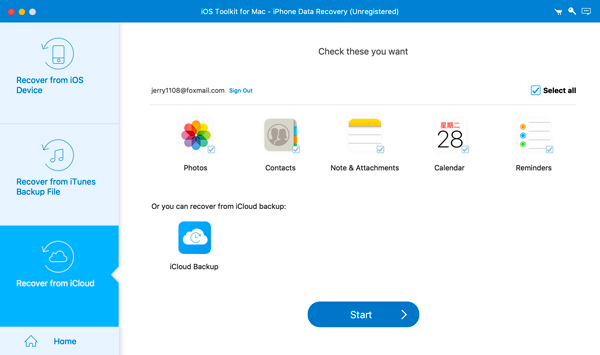
Step 2 Choose iCloud Backup
You can view all available iCloud backups for your device. Choose one appropriate backup and select the file types to download.
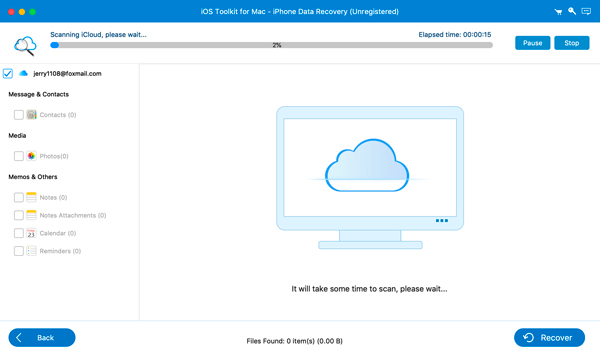
Step 3 Recover from iCloud Backup
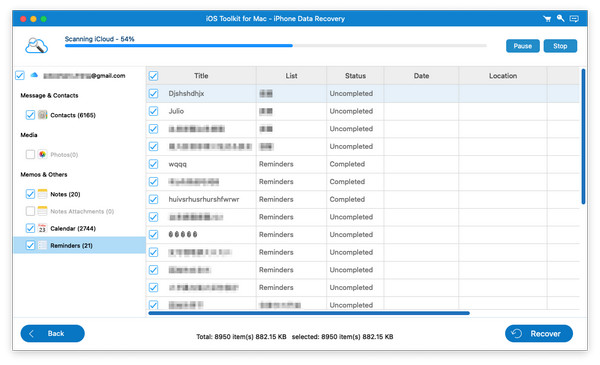
After downloading, the program will scan the files and display the available file for your iOS device. Choose what you want to recover, and finally click the Recover button.
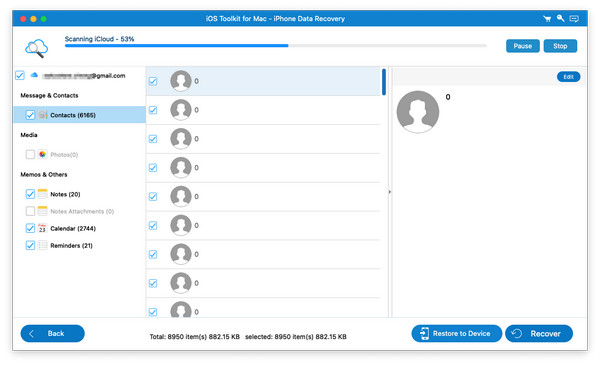
Step 4 Choose the file type to recover
1. You can choose the Contacts option from the left menu bar and check the messages you want to recover. Then, click the Recover button at the bottom right corner to proceed.
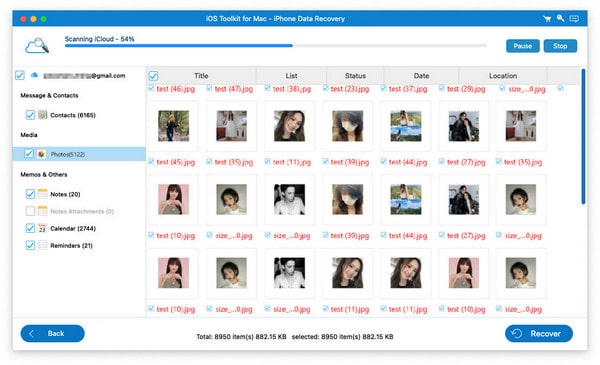
2. To recover the pictures, click the Photos from the left menu bar.
3. To restore your old notes, click the Notes option.
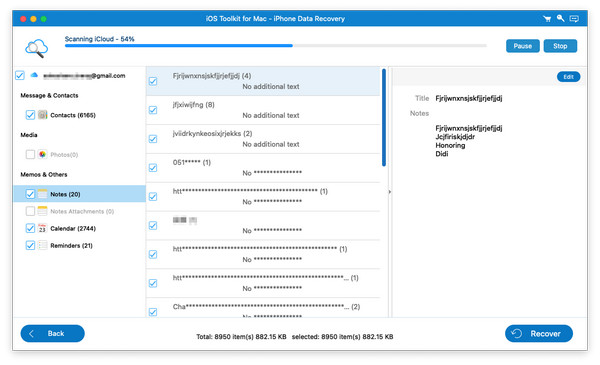
4. Click Notes Attachments to recover them.
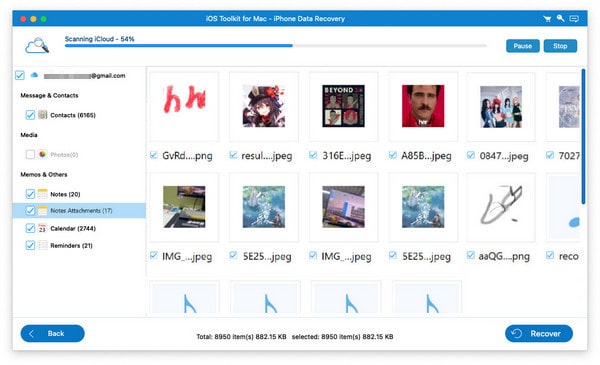
5. Choose Calendar to recover the old data.

6. Click Reminders to recover the data.
iOS System Recovery for Mac
AnyMP4 iOS System Recovery for Mac is designed to repair over 100 iOS system issues, and kick out abnormal iPhone OS to normal. It can help you upgrade and downgrade iOS, fix iOS issues like Apple logo, DFU mode, Recovery mode, and more problems.
Free Quick Fix iOS
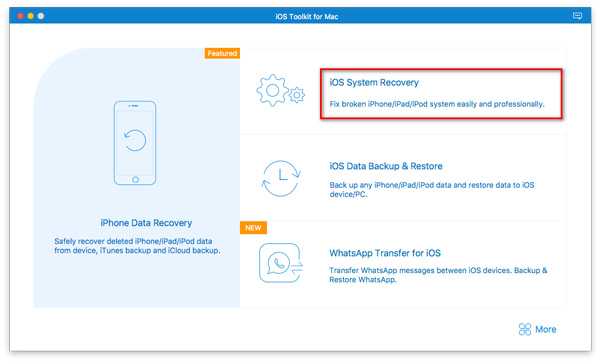
Step 1 Select iOS System Recovery
Free download iOS Toolkit to your Mac computer. Launch it after a successful installation. From the main interface, select iOS System Recovery.
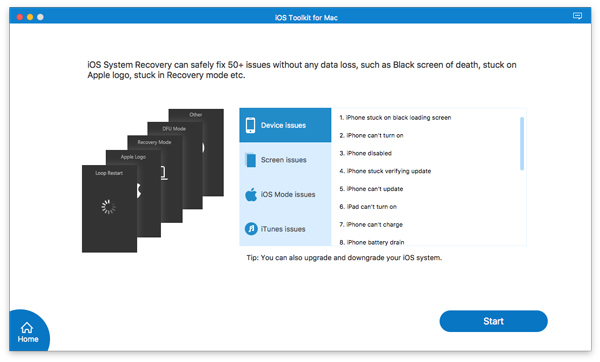
Step 2 Check iOS system issues
Then you will see various iOS system issues in the pop-up window. Click the Start to continue. Get the USB cable to plug your iOS device to your Mac.
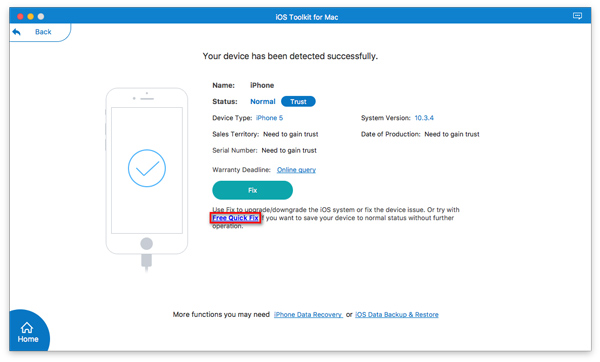
Step 3 Free quick fix iOS device
Before you start a standard or advanced repair mode, you can use the Free Quick Fix option, which can fix your iOS device quickly to fix some simple issues.
Downgrade/Upgrade iOS
Step 1 Select iOS System Recovery
Free download iOS Toolkit to your Mac. Open it after a successful installation. From the main interface, select iOS System Recovery.
Step 2 Check iOS issues
Here, you can see numerous iOS system issues that this software can deal with. Click the Start button after you connect your iOS device to your Mac with the USB cable.
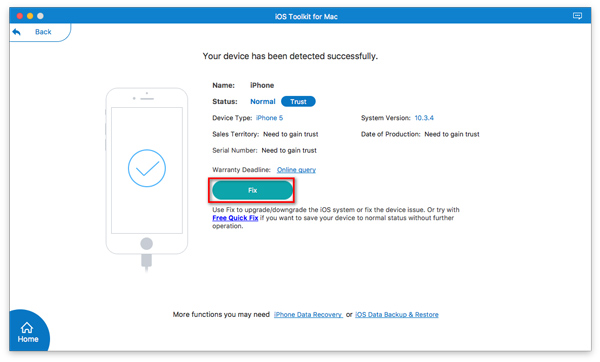
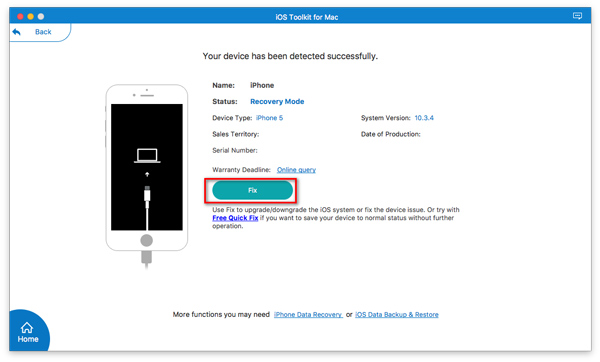
Step 3 Choose Fix
To upgrade or downgrade a normal iOS device, here you should click the Fix button.
 >
>
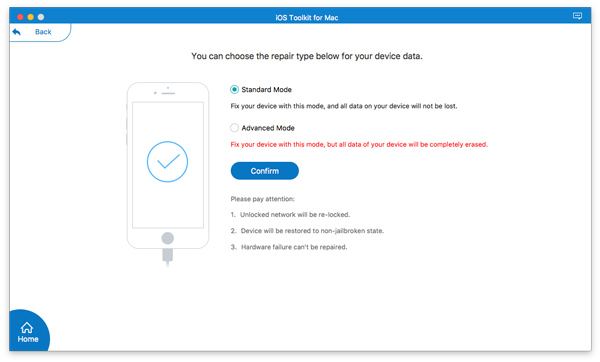
Step 4 Choose standard mode
In the pop-up window, select Standard Mode, and click Confirm.
 >
>
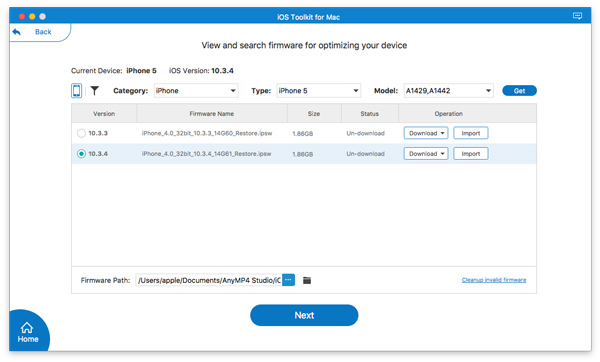
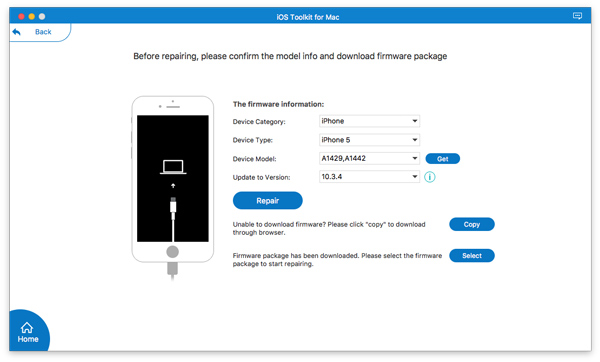
Step 5 Downgrade or upgrade iOS
Confirm your iOS device model, and modify the information if they are not correct. Choose the iOS version that you want to install on your iOS device, and click Next to start downloading the firmware and downgrading/upgrading your iOS device.
Fix iOS System
Step 1 Select iOS System Recovery
Free download iOS Toolkit to your Mac. Open it after a successful installation. From the main interface, select iOS System Recovery.
Step 2 Check iOS issues
Here, you can see numerous iOS system issues that this software can deal with. Click the Start button after you connect your iOS device to your Mac with the USB cable.
Step 3 Choose Fix
Here, this software will detect the abnormal status of your device, if it is. Click the Fix button after a repair failure of Free Quick Fix.
Step 4 Choose the repair mode mode
In this step, you should select either repair mode from Standard Mode or Advanced Mode, and click Confirm.
Step 5 Select iOS version and fix
Confirm and modify your iOS device model information. Then choose the iOS version you want to install on your iOS device. Finally, click Repair to fix your iOS device.
iOS Data Backup and Restore for Mac
iOS Data Backup and Restore for Mac can help you to backup various data types from iOS device to Mac, and allows you to restore iOS backup from computer to iOS device and Mac.
Backup iOS Data to Mac
Step 1. Select iOS Data Backup & Restore
After installing iOS Data Backup and Restore, open it on your Mac. From the main interface, select iOS Data Backup & Restore.
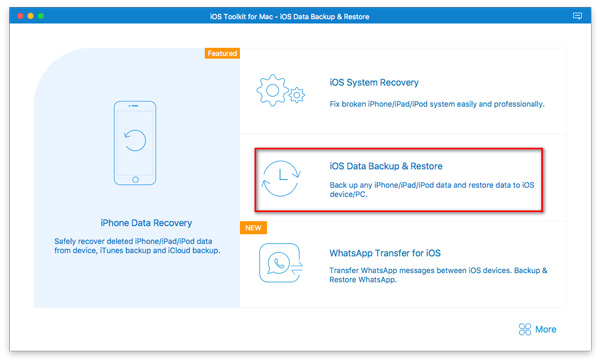
Step 2. Choose iOS Data Backup
To backup iOS files to Mac computer, you need to select iOS Data Backup.
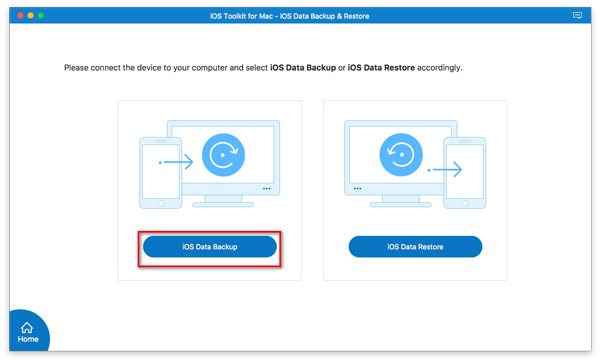
Step 3. Select backup mode
Get the USB cable to connect iPhone to your Mac, and this software will detect it automatically. Select the backup mode, Standard backup, and Encrypt backup.
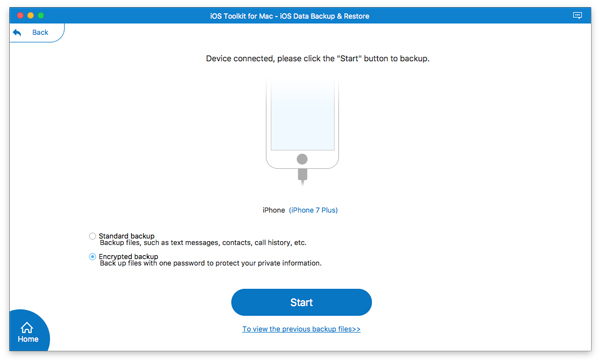
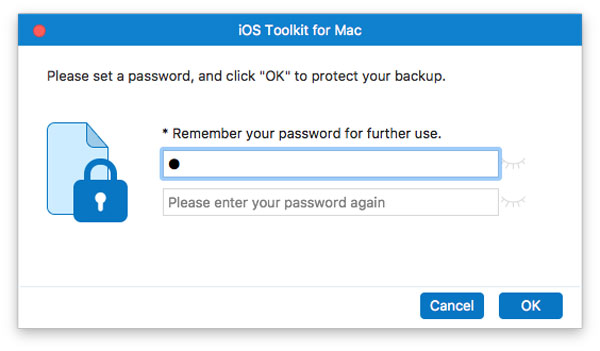
If you want to encrypt a backup with a password, here you should input your password. While you restore iOS backup in future, you need to input it again to confirm that.
Step 4. Backup iOS data to Mac
In the pop-up window, check the box of the data types you want to copy to Mac, and click Next.
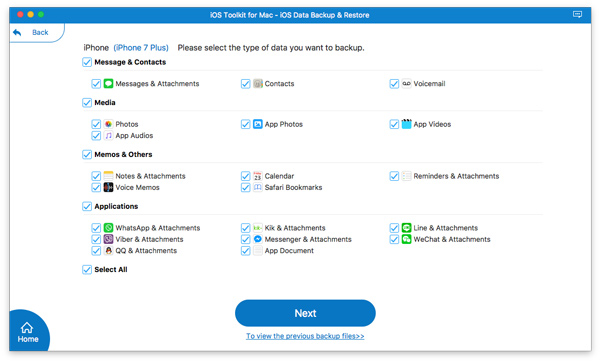
Then choose the location to save the iOS backup on your Mac. Then this program will starting backup iOS device.
Restore iOS Backup on Mac
Step 1. Select iOS Data Backup & Restore
Launch iOS Data Backup and Restore again on your Mac computer. From the main interface, select iOS Data Backup & Restore.
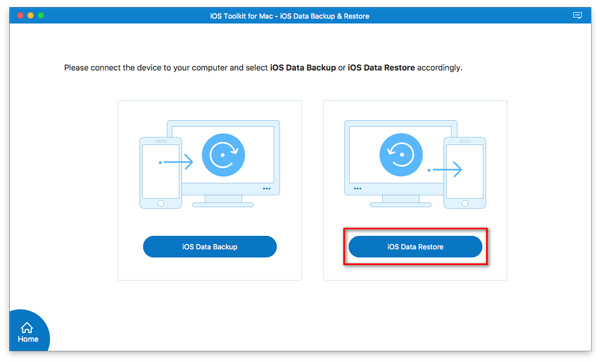
Step 2. Choose iOS Data Restore
To sync data from iOS device to Mac computer, just select iOS Data Restore.
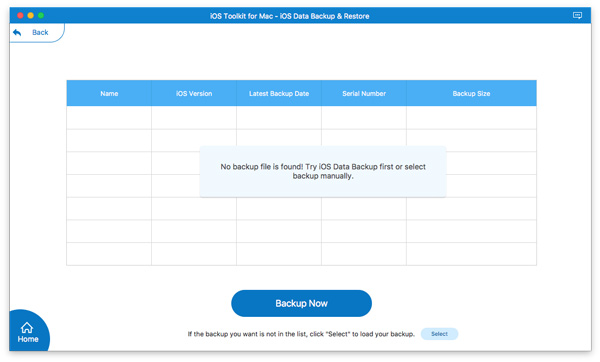
Step 3. View iOS backup on Mac
Then all the iOS backup files with this software will be shown in the list. If you have stored the iOS backup on other locations, just locate and select it. Select the backup file you need and click View Now.
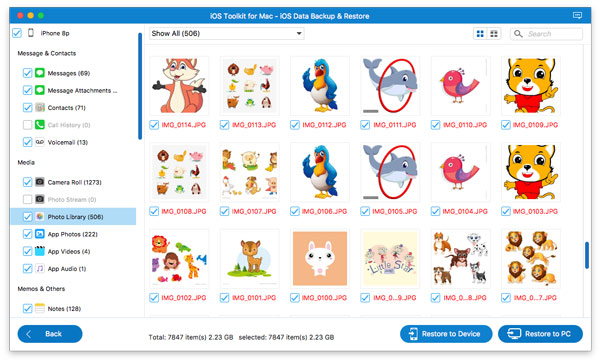
Then this program will take some time to analyze the backup. Once the analysis is done, all the data types will be shown in the interface.
Select the data type you want to restore from the left pane, and view the details on the right workplace.
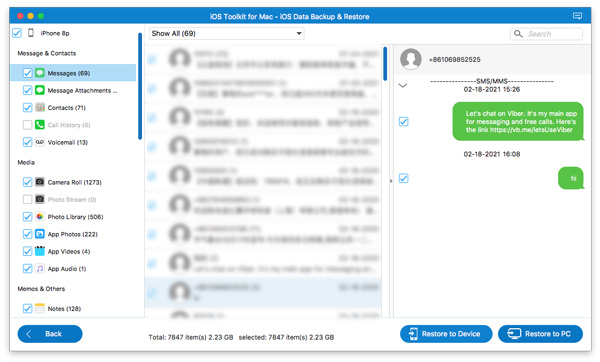
Step 4. Restore iOS data
Check the box before the detailed items to select, and click Restore to Mac to export the iOS data to this Mac immediately.
For restoring iOS contacts and notes to another iOS device, you should connect your iOS device, and click Restore to Device.
WhatsApp Transfer for iOS
AnyMP4 Mac WhatsApp Transfer for iOS helps you transfer WhatsApp messages, videos, photos and attachments between iPhone and iPhone. In addition, you can back up WhatsApp data to computer, or restore WhatsApp backup to your iPhone.
Transfer WhatsApp
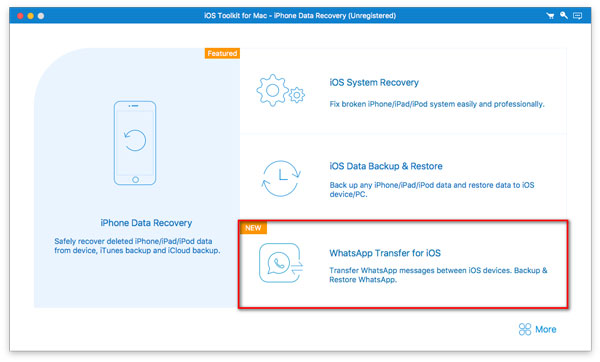
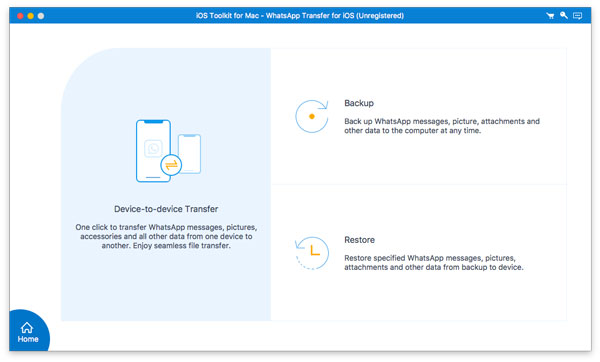
Step 1 Choose WhatsApp Transfer for iOS
Run AnyMP4 iOS Toolkit for Mac on your computer. Then choose the WhatsApp Transfer for iOS feature on the home interface.
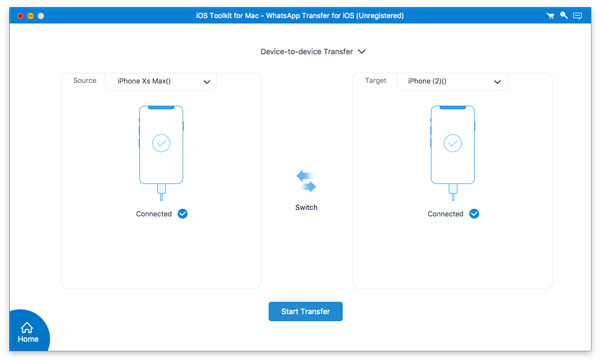
Step 2 Connect iOS devices
Select Device-to-device Transfer to move WhatsApp data from on iPhone to another. You can connect your two iOS devices to Mac via USB cables. Tap Trust on your iPhone if it is needed.
Click Switch icon to place your source device and the target device in the right place. The source device will be displayed in the left side, and the target device will be in the right side.
Step 3 Transfer WhatsApp
Then click the Start Transfer button to start transferring the WhatsApp data to another phone. The time for transferring WhatsApp depends on the size of the data on your source device.
Back up WhatsApp
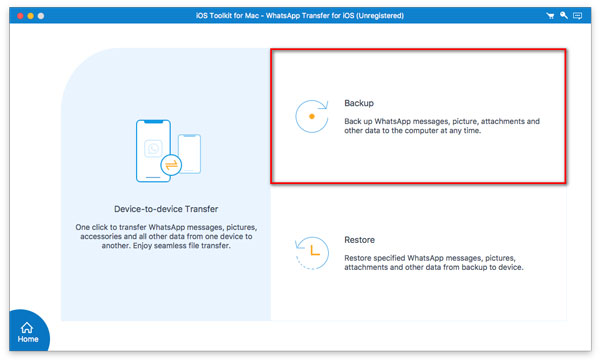
Step 1 Choose WhatsApp Transfer for iOS
Launch the program and choose the WhatsApp Transfer for iOS feature on the main interface.
Step 2 Connect your devices
To backup WhatsApp data to your Mac, you can select the Backup option to proceed. Then, connect your iPhone to Mac via the USB cable.
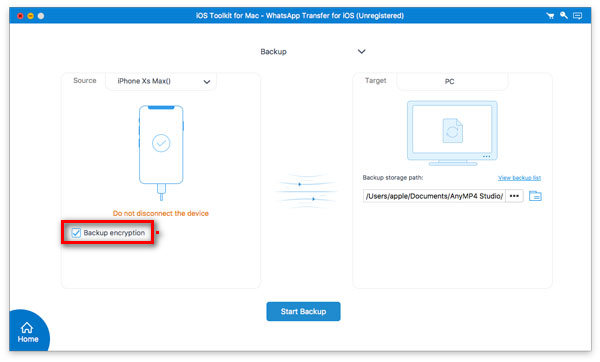
Step 3 Back up WhatsApp to Mac
When your iPhone is well connected, you can select the backup location by clicking on the three-dots icon at the right side of the window. Then click Start Backup button to back up WhatsApp data to Mac.
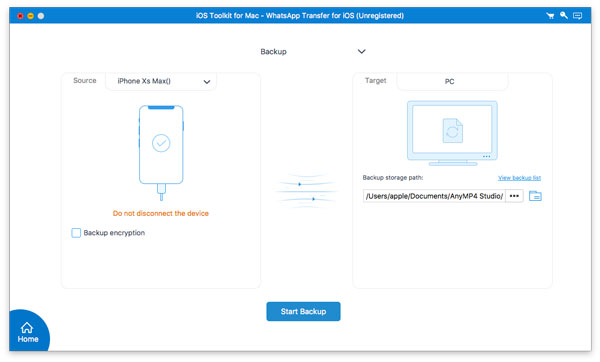
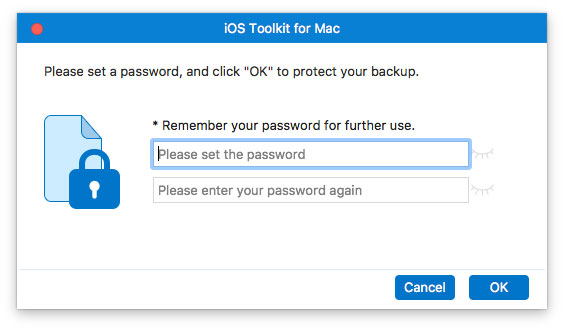
If you’d like to encrypt the backup file, you can tick the box next to Backup encryption.
After that, you are required to set a password for the WhatsApp backup file.
Restore WhatsApp
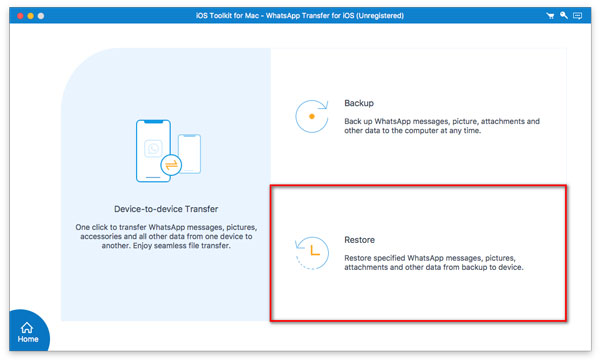
Step 1 Choose WhatsApp Transfer for iOS
On the home interface, choose the WhatsApp Transfer for iOS feature.
Step 2 Connect your devices
To restore WhatsApp data to your iPhone, select the Restore option. Then, connect your iPhone to Mac via the USB cable.
Step 3 Choose the backup file
In the left part of the window, you will see all your WhatsApp backup files. Choose one from the list and then click on the Restore button.
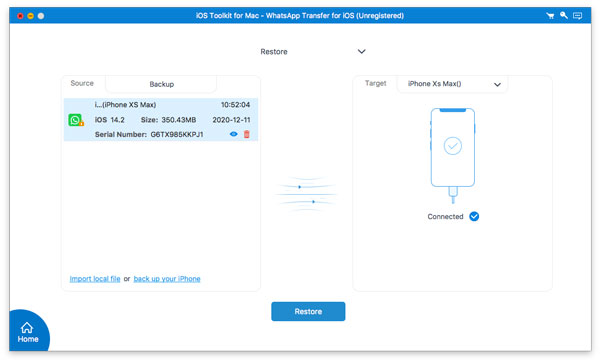
If there is no backup file detected, just click Import local file to select the location of the WhatsApp backup file you saved previously, then all your WhatsApp backup files on this computer will be loaded.
Before restoring, you can click the View icon to check the WhatsApp backup file. If your backup file is encrypted, you will be required to enter the password.

Step 4 Restore WhatsApp to Device/Mac
Option 1. Restore to Device
After that, click the Restore to Device icon to save your WhatsApp data to your iPhone.
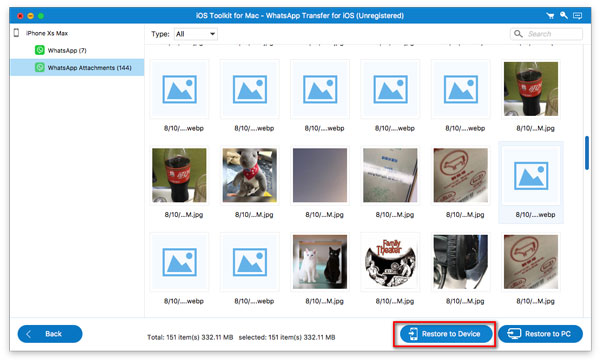
Make sure your iPhone is well connected, and click Start button to retrieve WhatsApp data to your iPhone.
Option 2. Restore to Mac
Click the Restore to Mac icon to restore the WhatsApp backup file to Mac. Then choose the location to save the restored data, and click Restore button to start the process.

When the restore process is over, the data will be saved as CSV and HTML, and then you can view it on your Mac easily.