Store
Store- Multimedia
For Windows
- Converter Tools
- Video Converter Ultimate

- Video Converter
- 4K Converter
- MP4 Converter
- Audio Converter
For Mac
- BD/DVD
For Windows
- DVD Tools
- DVD Ripper
- DVD Copy
- DVD Creator
- DVD Converter
- DVD Toolkit
For Mac
- Mobile
For Windows
For Mac
- Utility
- Freeware

User Guide
Get Started
Download & Install
Download Blu-ray Creator and then follow the on-screen instructions to install it on your computer.
Register
To better enjoy the full features of Blu-ray Creator, you need to install it. After initiate this program on your computer, you can see a comparison between the free version and the registered version.
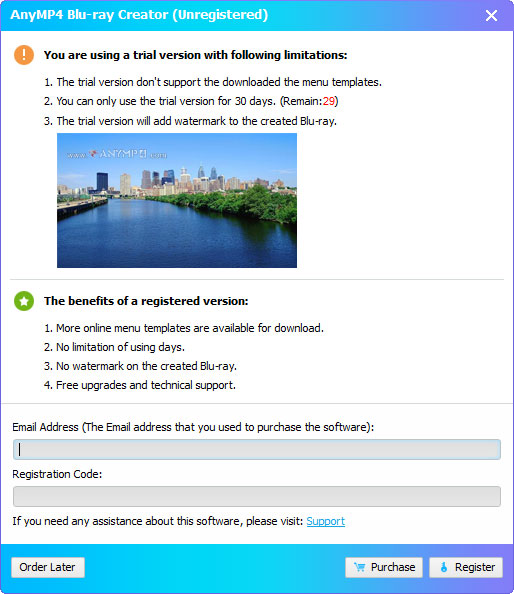
You can easily find the Register button at the right side of the interface. You can also click Help and select Register to enter the registration Center.

Enter your E-mail address and your registration code. Then, click the Register button to complete the registration. Please make sure that your computer has a valid internet connection while you register AnyMP4 Blu-ray Creator.
Update
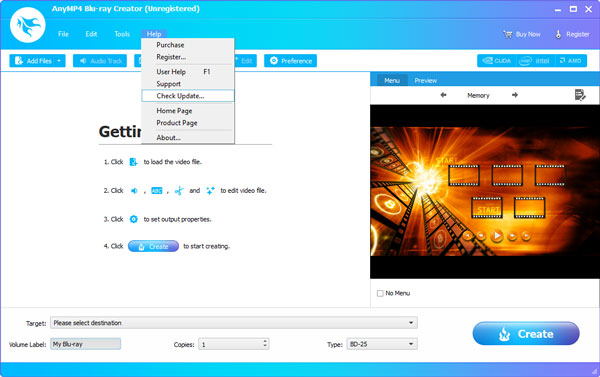
AnyMP4 Blu-ray Creator will be constantly updated with bug fixes and new features. If you want to check if it is the latest version, you can try the methods below.
Method 1: Click the Help menu and choose Check Update. If there’s an update, you can download and install it immediately.
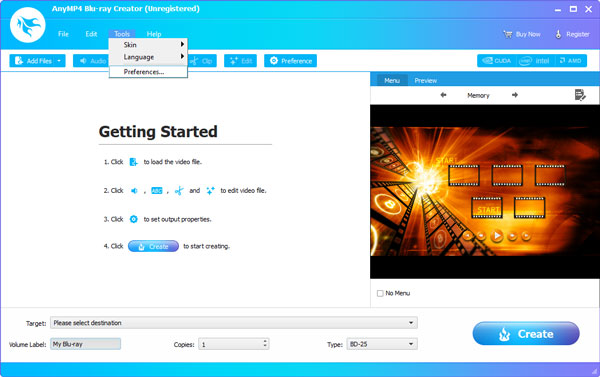
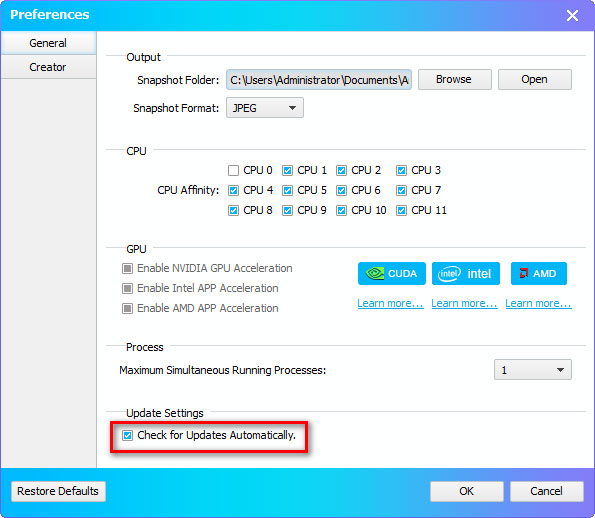
Method 2: Click the Tools menu and choose Preferences.
Check the box of Check for updates automatically. Then, you’ll get a message when an update is available.
Method 3: Go to our product page and download the latest version.
Enter your E-mail address and your registration code. Then, click the Register button to complete the registration. Please make sure that your computer has a valid internet connection while you register AnyMP4 Blu-ray Creator.
Preferences
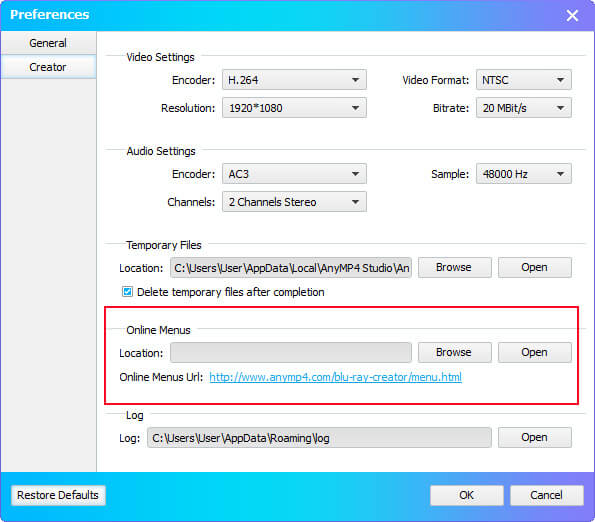
The Preferences window enables you to adjust settings in advance. Just click Tools menu and select Preferences to open Preferences window.
You are given choices to adjust general settings like output folder, snapshot format, enable CUP acceleration, and set the maximum simultaneous running processes.

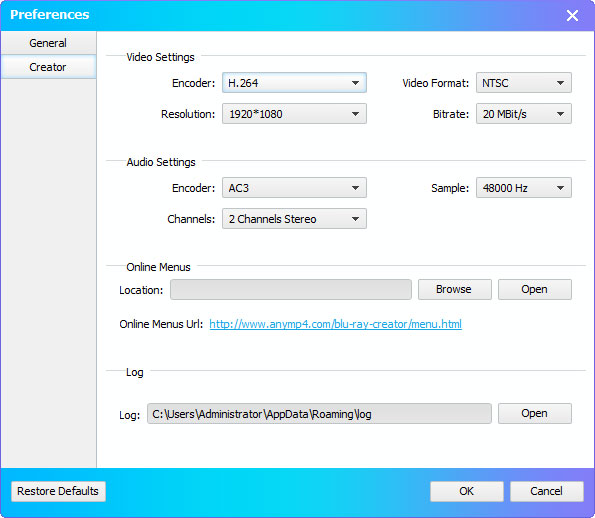
You can also adjust Creator settings like video settings, audio settings, choose online menus, or open Log folder.
Create Blu-ray
Blu-ray disc is a great way to share videos with friends, especially if you have some high-definition videos. Have you thought about creating Blu-ray disc by yourself? Follow the steps to learn how to create Blu-ray disc/folder or ISO image file with Blu-ray Creator.
Step 1 Connect Blu-ray disc
Connect the BD drive to your computer and insert a blank Blu-ray disc to the BD drive.
Step 2 Add video files
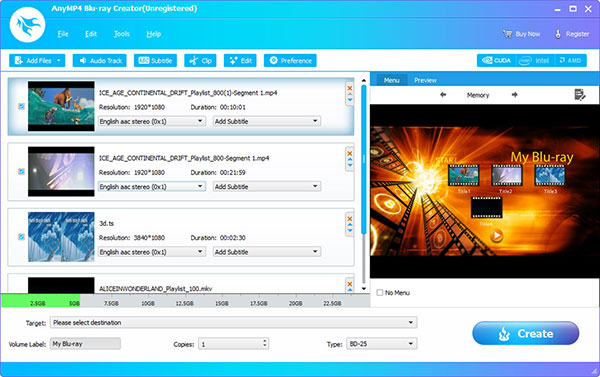
Download, Install and launch AnyMP4 Blu-ray Creator on your computer. Click Add Files on the top bar to load the video you want to burn to Blu-ray disc.
Step 3 Add audio track and subtitle
Check the video file and click Audio Track or Subtitle, you come to the Edit Audio/Subtitle window. Here you can hit the Add icon and insert an external audio track or subtitle, and adjust just setting by dragging the progress bar.

Step 4Edit videos
Back to the main interface, check the video and click Edit. In the pop-up Edit window, you'll be given Crop, Effect and Watermark and more editing functions to enhance the video as you want.
Step 5Adjust video settings
Back to the main interface again, check the video and click Preference button. In the Preferences window, you are allowed to change Video Settings, Audio Settings, get Online Menus and more.
Step 6Create Blu-ray
Select target format and destination file folder. If you want to burn video to Blu-ray disc directly, choose the Blu-ray disc as the target. If you want to create a Blu-ray folder or ISO image file for further use, choose the target folder as destination. Then click Create button to start.
Edit Video
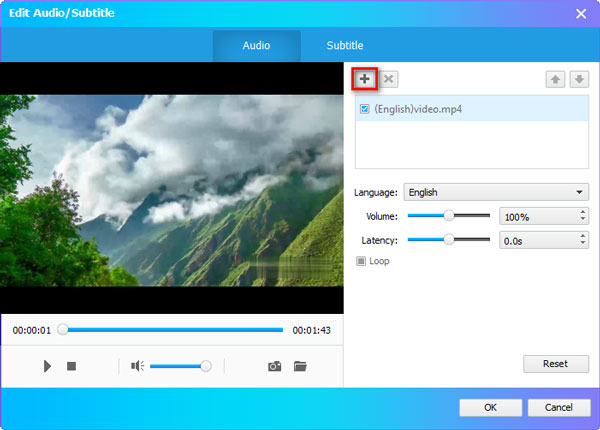
Add Audio Track
Step 1 Select your video and click Audio Track button to adjust the audio track for the new created Blu-ray file.
Download and install AnyMP4 Blu-ray Player, and then launch it on your computer.
Step 2 Click Add audio track icon to add an external audio track to the video. You can also choose language, adjust volume and latency, take snapshot while previewing.
Step 3 Click OK button to apply the changes.
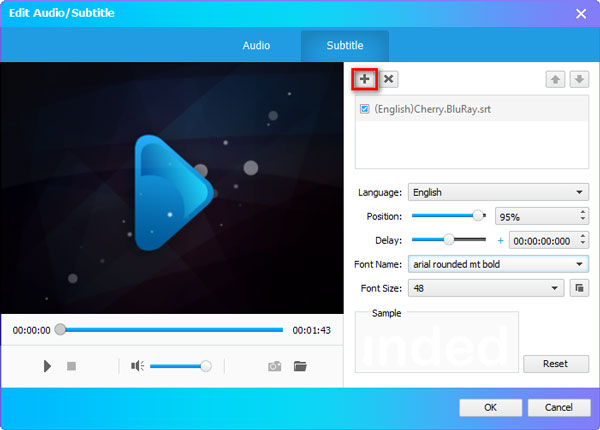
Add Subtitle
Step 1 Select your video and click Subtitle button to add subtitle for the video.
Step 2 Click Add subtitle icon to insert your subtitle file (*.srt, *.ssa, *.ass). You can change the language, adjust position and delay, change font name and font size, or preview the subtitle in the sample area.
Step 3 Click OK button to save the adjustments.
Clip Video
Step 1 Select the video and click Clip button to cut a whole video into pieces.
Step 2 Drag the sliders at the start or ending part to adjust the video length. You can also adjust the Start, End or Duration time to cut the segment.
Step 3 Click OK button to cut the video to several segments.

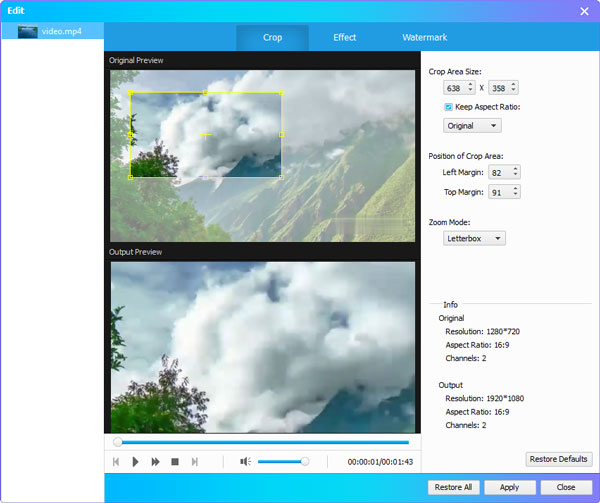
Crop Video
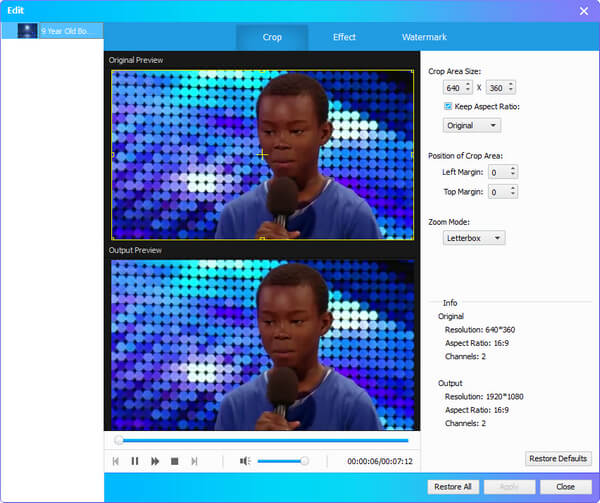
Step 1 Select the video and click Edit button. You can crop the video in the Crop tab.
Step 2 In the Crop tab, you can adjust the Crop area size, change the position of Crop are, and set the Zoom mode from Letterbox, Medium, Pan & Scan or Full.
Step 3 Click Apply button to apply the changes.
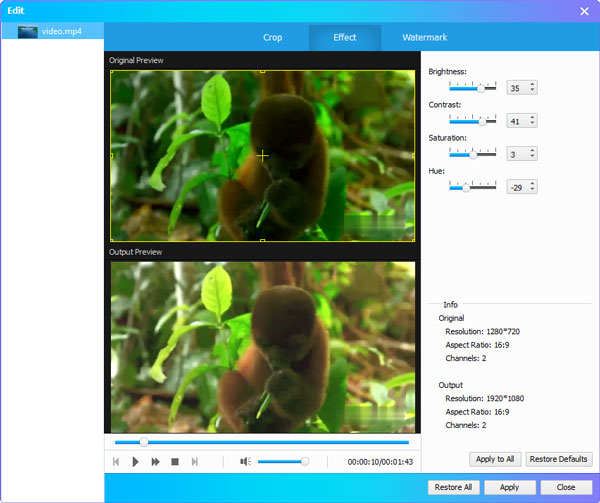
Adjust Video Effects
Step 1 Select the video and click Edit button. You can adjust video effects in the Effect tab.
Step 2 In the Effect tab, you can adjust the brightness, contrast, saturation and hue to make the output file perfect.
Step 3 Click Apply button to keep the adjustments.
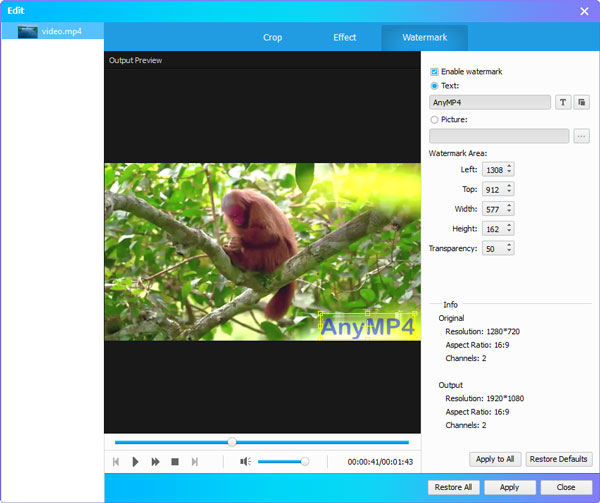
Add Watermark
Step 1 Select the video and click Edit button. You can add text watermark or picture watermark to the video.
Step 2 In the Watermark tab, tick Enable watermark option. You can adjust the watermark area bit by bit, and change the watermark transparency.
If you want to add a text watermark, you can select Text and adjust enter your text in the space. You can select the font, font style or font size.
If you want to add a photo as a watermark, you can select Picture and click the three horizontal dots button to select the picture from local.
Step 3 Click Apply button to add the watermark to your video.