 Store
Store- Multimedia
For Windows
- Converter Tools
- Video Converter Ultimate

- Video Converter
- 4K Converter
- MP4 Converter
- Audio Converter
For Mac
- BD/DVD
For Windows
- DVD Tools
- DVD Ripper
- DVD Copy
- DVD Creator
- DVD Converter
- DVD Toolkit
For Mac
- Mobile
For Windows
For Mac
- Utility
- Freeware

 4K Converter
User Guide
Get Started
Download & Install
Download AnyMP4 4K Converter. Follow the on-screen instructions to install and launch it on your computer.
Register
AnyMP4 4K Converter provides users with free trial version. But the trial version has limited functions. If you want to enjoy the full functions, you can register the software.
Step 1: Each time when you open the software, the registration window will pop up. If you close it by accident. You can still find it in the main interface. Click Register this product (a key icon). You’ll see the registration window.
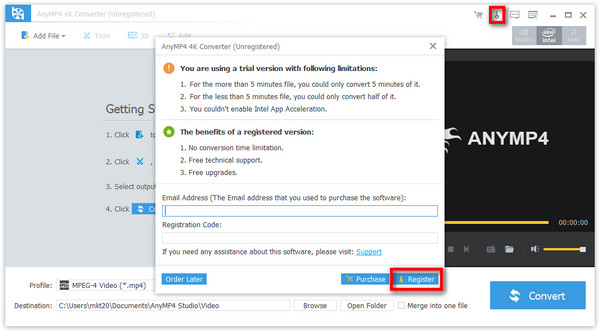
Step 2: Enter the Email Address you used to buy this software and then the Registration Code. Then click Register.
Update
AnyMP4 4K Converter updated from time to time to improve users’ experience. Please make sure you have the latest version on your computer.
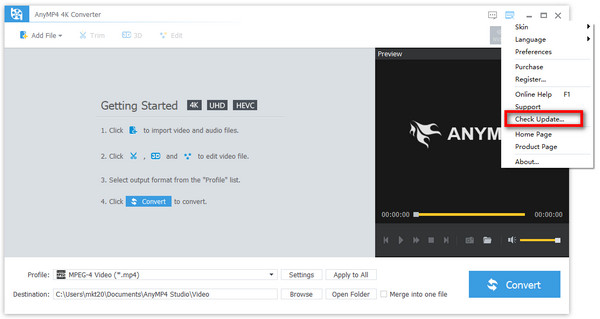
Method 1: Click the Menu button and choose Check Update… from the drop-down list. You can click OK if there is no updated version or install the latest version if there is.
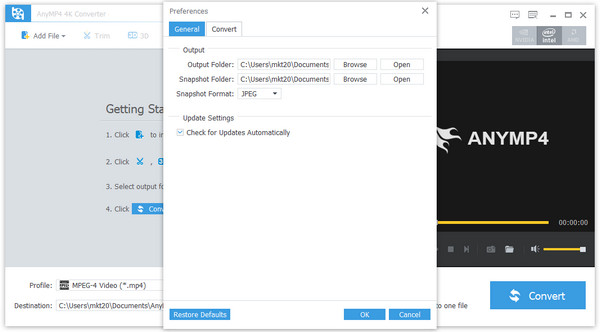
Method 2: If you do not want to check update on your own. You can click the Menu button and choose Preferences. In the general setting, you can check Check for Updates Automatically and click OK. When there is a latest version, the software will update automatically.

Preferences
This software allows you to adjust the settings according to your preference.
Step 1: Click the Menu button and choose Preferences. In the General setting, you can change Output Folder, Snapshot Folder/Format, and update setting, of course.
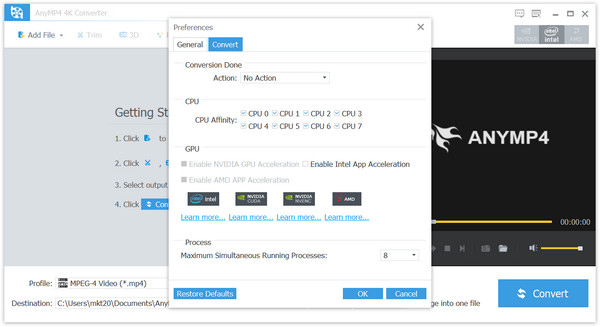
Step 2: Choose Convert at the top menu bar to switch to the conversion settings. Here you can adjust CPU and GPU settings. You can choose No Action or Shut Down when the conversion is done. You can also change the number of Maximum Simultaneous Running Processes according to your need.
How to Convert Video/Audio
AnyMP4 4K Converter provides users with high-speed conversion and multitasking function. Follow the steps to convert your video/audio files.
Step 1 Add File(s)
Start the software. Click Add File at the top-left of the main interface. Select the wanted file from your computer and open it. Or you can drag your file into the converter directly.
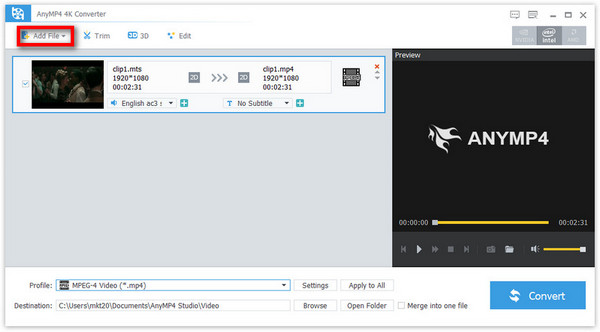
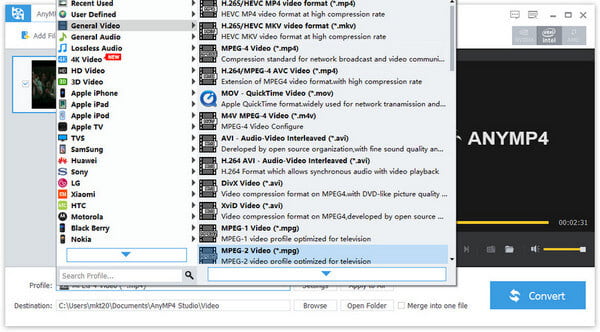
Step 2 Select Output Format
Click the Profile list, select your wanted output format. You can convert your file to any popular formats.
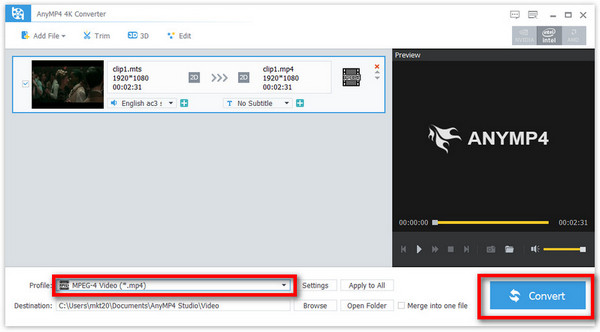
Step 3 Start Converting
Before conversion, you can change the Destination where your converted file is stored. Then you can click Convert to get your converted file.
How to Edit Video
One of the stunning functions of this 4K converter is the editing feature. You can edit your video file before conversion to meet your need.
Change Audio Track and Subtitle
Step 1 In the main interface, you can change the audio track and subtitles from the drop-down list.
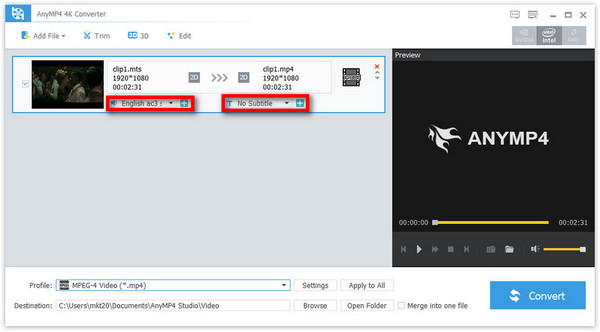
Step 2 If the original video file doesn’t contain any of them, you can click the Plus icon to add audio track and subtitles from your computer.
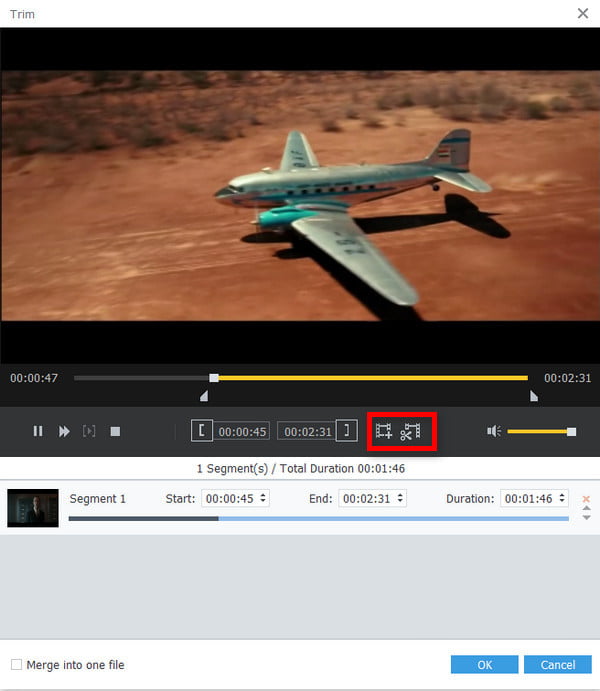
Trim and Merge Videos
Step 1 Click Trim from the top menu bar and you’ll enter the trimming window. You can adjust the progress bar below the preview window to cut a part off the video. You can also set the time of Start, End, and Duration.

Step 2 You can click the New clip icon to add clips to get the same part of your video file. You can also click Split next to it to get two trimmed segments.
Step 3 When everything is done, you can click OK In addition, you can check Merge into one file to merge the clips into one video. Before merging, you can click the Arrow icon to adjust the order.
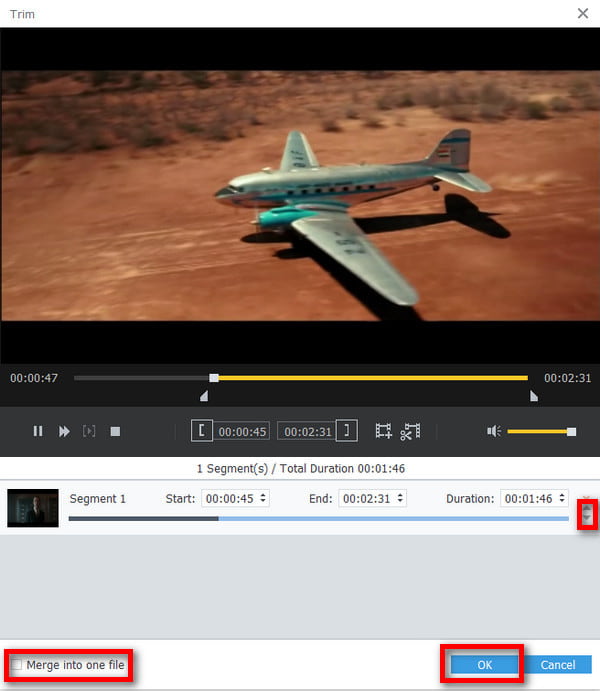
In addition, if you add multiple files at the first place, you can also choose Merge into one file in the main interface.
Create 3D Video
Step 1 Choose 3D from the top menu bar.
Step 2 You should check Enable 3D Settings first to continue the settings following. You can choose Anaglyph or Split Screen according to your need. They both have drop-down options and you can choose the preferred one. At the same time, you can preview the output video on the left. Besides, you can also change the Depth and Switch Left Right to adjust the output effect.
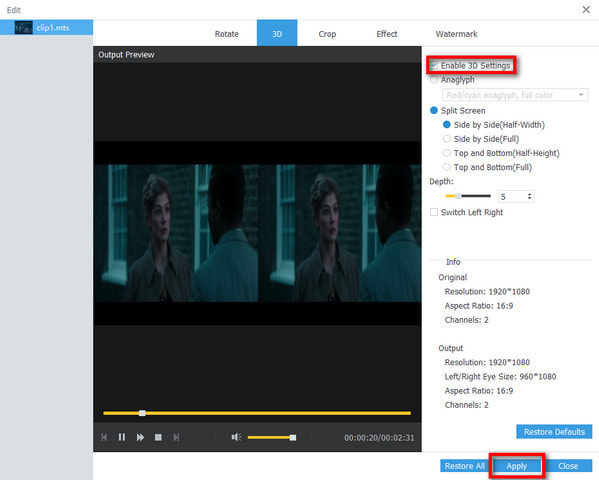
Step 3 If you are satisfied with the result, you can click Apply. If not, you can click Restore All to reset the video.
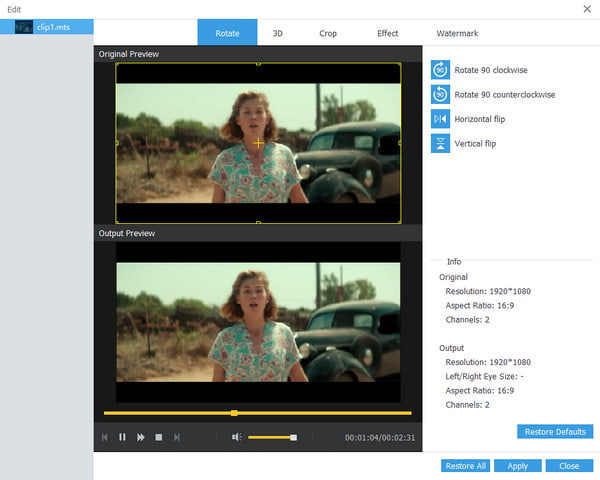
Rotate Video
Step 1 In the editing window, click Rotate at the top.
Step 2 You can choose Rotate 90 clockwise, Rotate 90 counter clockwise, Horizontal clip, and Vertical flip according to your need. The Original Preview and Output Preview is on the left.
Step 3 After that, hit Apply to apply these settings to your video.
Crop Video
Step 1 Navigate to Crop in the editing window.
Step 2 You can adjust the display range of the video by dragging the yellow rectangle. You can also change the number of Crop Area Size. Check Keep Aspect Ratio and choose Original, Crop Area, 16:9, or 4:3. The Zoom Mode and the Position of Crop Video like Left Margin and Top Margin are also can be changed.
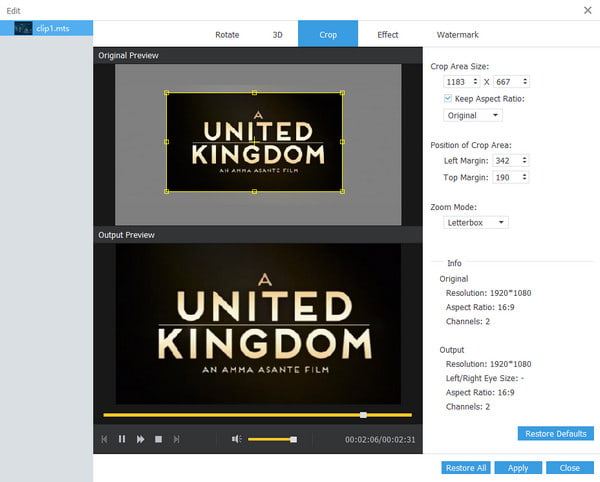
Step 3 Click the Apply button below to make sure that all the changes have been saved.
Change Video/Audio Effect
Step 1 Choose Effect from the top menu bar.
Step 2 You can change the Audio Effect – Volume and Video Effect, including Brightness, Contrast, Saturation, and Hue. You can also check the Deinterlacing to improve video quality. In the whole process, you can preview the output video on the left.
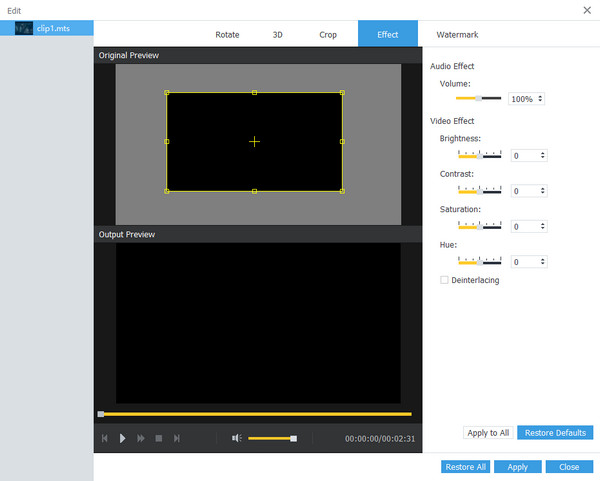
Step 3 After all that, you can click Apply to save the changes.
Add Watermark
Step 1 Choose Effect from the top menu bar.
Step 2 Check Enable watermark at the first place. You can choose to add Text or Picture as watermarks. The Watermark Area can be changed, including Left, Top, Width, Height, and Transparency.
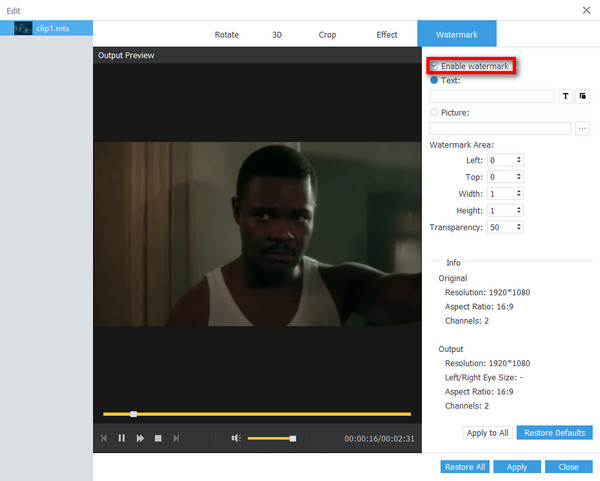
Step 3 If you are satisfied with output preview, you can click Apply to save the changes.