Subtitles make videos more accessible, understandable, and engaging for audiences worldwide. Whether it’s for non-native speakers or those with hearing difficulties, subtitles ensure that your message reaches everyone clearly. These days, adding subtitles to videos has become easier than ever. With advanced video editing tools, you no longer need to rely on complicated software or manual syncing. Several platforms now provide quick and accurate subtitle insertion features, including CapCut. This video editor supports both automatic and manual subtitle creation. In this post, you’ll learn how to add subtitles in CapCut in different ways. We will help you easily master the effective use of CapCut’s captioning tools. By the end, you’ll know everything you need to create clear, stylish, and professional subtitles.

CapCut Auto-Caption is an AI-powered feature that automatically generates subtitles for your video. It listens to the speech in your video, converts it to text, and synchronizes the captions with the spoken words. With it, you don’t have to spend hours typing each line manually.
Here’s how to add automatic subtitles in CapCut:
1. On the CapCut homepage, click the Click to Upload button to add the video file. You can also drag and drop the file or import it from Google Drive or Dropbox.

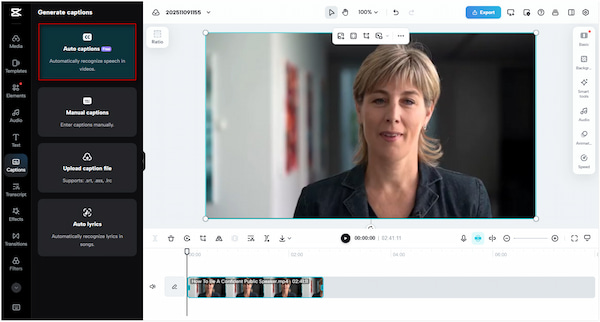
2. Navigate to the Captions tab, and you’ll see different captioning options. Proceed with the Auto Caption option for automatic subtitle generation using AI.
3. Select the language of your video’s audio and click Generate. CapCut will start analyzing the video’s speech and automatically produce synchronized captions.

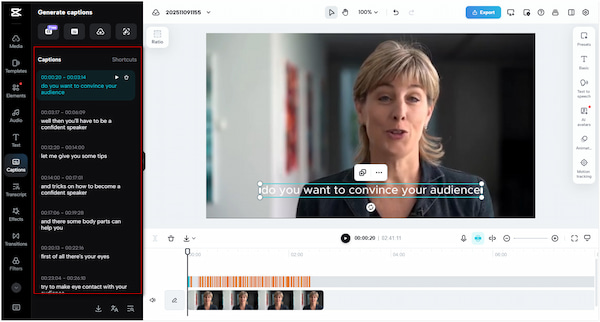
4. When the captions are generated, they’ll appear in the left sidebar as text segments. You can also use the timeline sliders to adjust when captions appear or disappear.
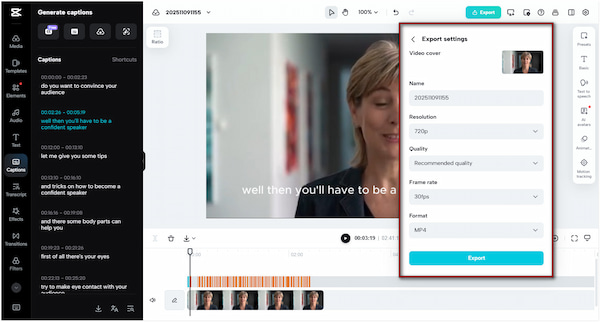
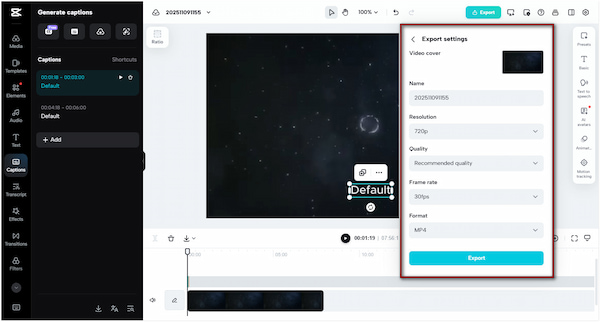
5. Once your captions look perfect, click the Export button and click Download. Configure output settings, then click Export to download your video with the captions burned in.
The Auto Caption automatically detects and transcribes speech, saving you from manually adding subtitles line by line. While CapCut multi-language subtitles are supported, the transcription accuracy depends on the clarity of your video’s audio. If there are strong accents, the captions may contain errors or missing words.
The Manual Caption feature in CapCut enables you to manually add a subtitle to a video. It gives you full control over every detail, from wording and timing to placement. It requires you to type in your subtitles yourself, ensuring maximum accuracy and creative freedom.
Here’s how to manually add subtitles in CapCut:
1. From the CapCut main page, click the Click to Upload button to import your clip. Alternatively, drag and drop your file or import it from Google Drive or Dropbox.

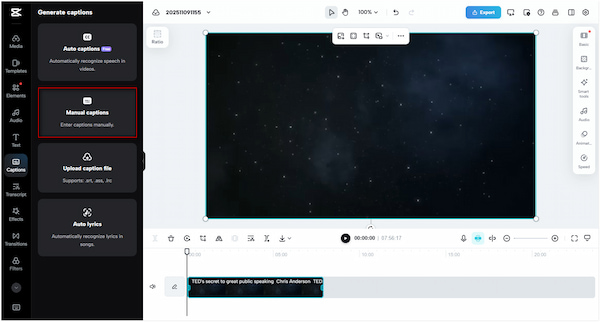
2. On the left sidebar, click the Caption tab to access different captioning options. This time, select the Manual Caption option to add subtitles to your video manually.
3. Move the playhead to the video portion where you want your first subtitle to appear. Click the + Add button to insert a text field where you will type your subtitle text.
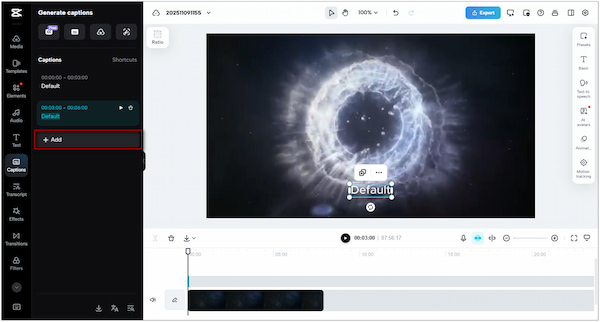
4. To synchronize your subtitles with the video, enter the duration of the spoken words that you want to subtitle. Repeat this process for each line of dialogue in your video to ensure captions are perfectly aligned.

5. When everything looks perfect, click the Export button and click Download. Specify your output settings and click Export to download your video with the manually added subtitles.
The Manual Caption feature ensures that no misheard words or awkward phrasing appear in your video clip. However, creating captions manually requires you to type every line, adjust timing, and format each subtitle individually. It can take multiple previews to get the perfect timing.
Subtitles are more than just text on a screen; they’re a key element of your video’s accessibility. CapCut surpasses simple captioning by providing a comprehensive range of subtitle customization tools. It allows you to choose unique fonts, colors, sizes, animations, positioning, timing, and more.
Here’s how to add subtitles in CapCut and customize them:
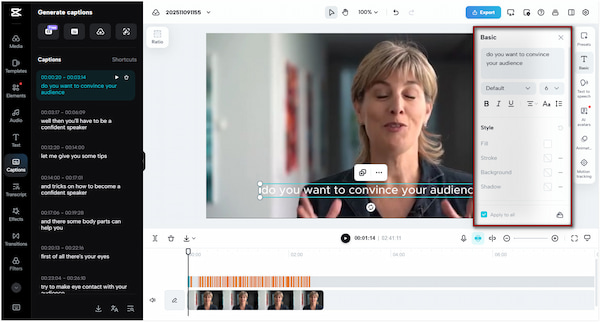
1. After you add subtitles to MP4, be it automated or manual, you can proceed with customization. Click on any subtitle segment on the timeline to activate the editing panel.
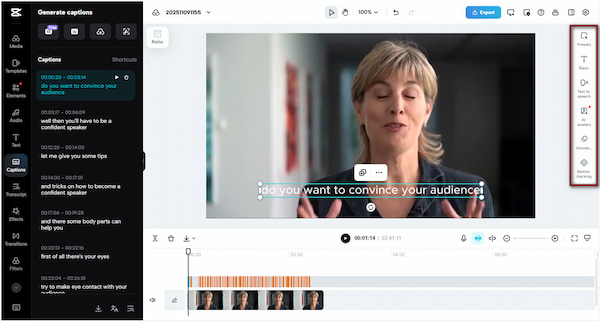
2. CapCut offers several tools to make your subtitles engaging and visually appealing:
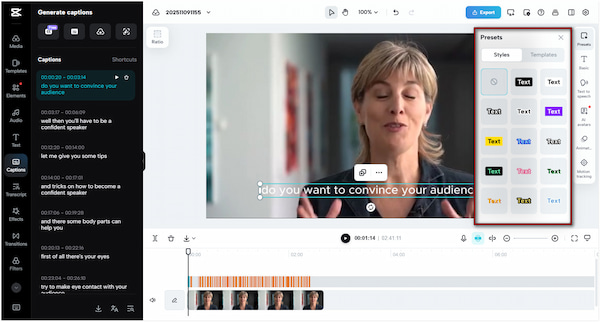
Preset: This tab contains ready-made subtitle styles designed by CapCut. These presets combine specific fonts, colors, outlines, backgrounds, and animations to create a cohesive look.
Basic: This tab allows you to fine-tune the visual appearance of your subtitles. This section allows you to select your preferred font style, color, size, background, outline, spacing, and more.
Animation: This tab brings your subtitles to life through motion effects. You can animate how your text appears, moves, or disappears on your screen.
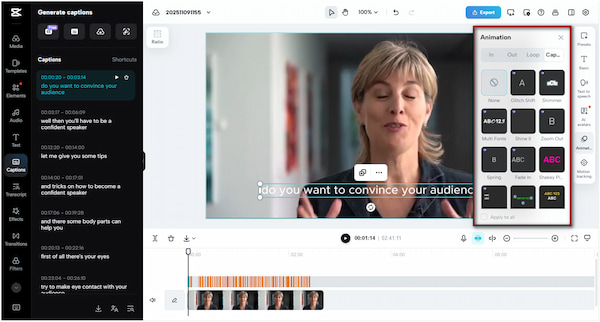
Motion Tracking: This tab lets subtitles or text follow a moving object or person in the video. When enabled, CapCut analyzes the video and attaches the text to the tracked movement.
3. Once you’ve customized your subtitles, play back the video to check the placement, timing, and effects. When you’re satisfied, export the video to your local drive.

Subtitle customization in CapCut enables you to create subtitles that are both visually appealing and seamlessly integrated with your videos. However, most of the attractive fonts, presets, and effects are only accessible in the CapCut Pro subscription.
While you can add subtitles in CapCut, it's not the only option available. AnyMP4 Video Converter Ultimate is a full-featured media software bundle compatible with Windows and Mac. It supports nearly all subtitle formats, including commonly used SRT, SSA, SCC, ASS, and others. For media inputs, it can handle formats such as MP4, MOV, MKV, AVI, WMV, and over 500 more. It allows you to easily put subtitles and customize every aspect of the subtitle display. You can configure the font style, size, color, outline, position, opacity/visibility, and even delay settings. Additionally, it allows you to rotate, crop, flip, adjust effects, add filters, insert a watermark, and more.
Here’s how to add captions on CapCut alternative:
1. Get started by securing a free download of AnyMP4 Video Converter Ultimate. Install the CapCut subtitle editor alternative and finish the installation process. Once completed, run the software to access the main dashboard.
Secure Download
Secure Download
2. As it opens, you’ll be headed to the Converter tab by default. Click the +Add Files to import an individual clip or multiple videos. The software supports the most popular formats, including MP4, MOV, WMV, AVI, MKV, etc.

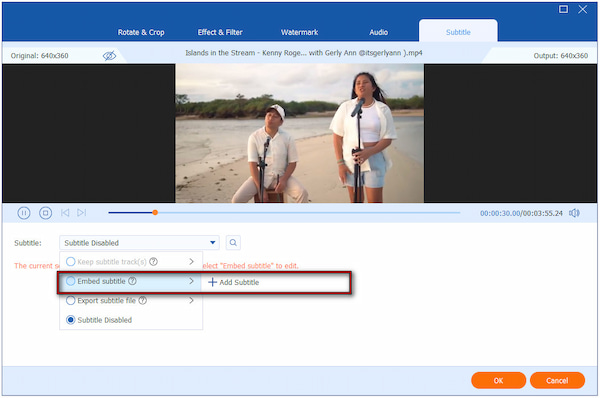
3. After importing your video, click the Edit (Magic Wand) button next to the video preview. In the Edit window, proceed to the Subtitle tab and click the Subtitle selector. Select the Embed Subtitle option and click + Add Subtitle to import existing subtitle files.
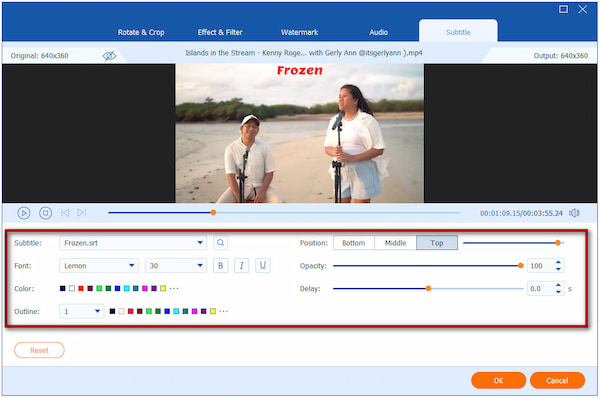
For the best subtitle preview, change the font style, size, color, outline, position, opacity/visibility, and delay. This helps your caption stand out over complex backgrounds. Once you’re satisfied with your subtitles, click OK to apply all the changes made.
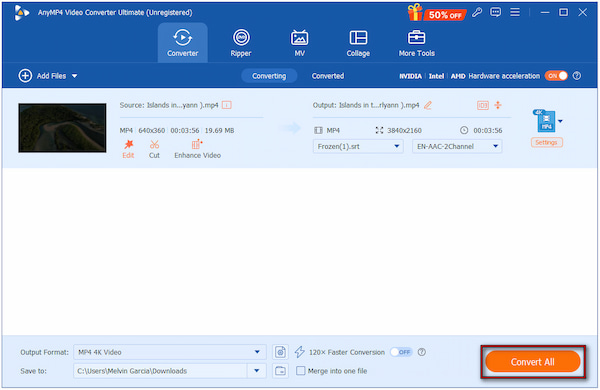
4. Preview the video to ensure the timing and style are accurate before exporting. Next, specify your output format and configure settings such as video quality, resolution, and encoder. Finally, click the Convert All button to embed the subtitles into your video.
AnyMP4 Video Converter Ultimate is not just a subtitle tool; it’s a complete software with multiple built-in editors. Optionally, use the text watermark in the Edit window to embed simple captions. You can also explore the More Tools tab to access more than 20 editing tools.
Can CapCut generate subtitles automatically?
Yes. CapCut features a built-in Auto Captions function that automatically generates subtitles for your video. It uses AI to detect and transcribe the spoken words in your video into text.
Can I add subtitles in multiple languages?
Yes, CapCut allows you to add subtitles in multiple languages. However, you need to create them manually or upload different subtitle files for each language.
Does CapCut add watermarks to subtitles?
No, CapCut does not add watermarks to subtitles themselves. However, if you are using the free version of CapCut, the exported video will contain a CapCut watermark.
Mastering how to add subtitles in CapCut makes your videos more engaging, accessible, and professional. With its Auto and Manual Caption features, it enables you to create captions that suit your style and content needs. However, if you’re looking for a more advanced and versatile solution to handle subtitles, AnyMP4 Video Converter Ultimate is the best choice. It supports a wide range of subtitle formats and lets you fine-tune timing and styles. It even offers a built-in preview window to ensure your captions perfectly match your video.
Secure Download
Secure Download
 Updated by Mark Cristobal to Edit Video
More readings
 How to Add Text in DaVinci Resolve [Easy-to-Follow Guides]
If you want to add text in DaVinci Resolve and don’t know how to accomplish it, don’t stress. Check our post and learn a simple guide for adding text to videos.
 How to Add Text to Video Make a Video with Words for TikTok
Can I add text to video at different times? How do you add text to different clips for TikTok? Get a full guide on how to add text to video for TikTok.
 Edit CapCut Background: Add, Remove, Blur, and White
Do you want to edit your image background with ease? Learn how to use CapCut tools with this full guide to add, remove, blur, or change the background to white.
 How to Zoom In On a Capcut Clip Using Effective Methods
Read this article for a complete guide on three different options that you can use to zoom in on videos that are edited using Capcut or an alternative tool.