How to Add Subtitles in DaVinci Resolve in Free & Studio Version
If you’re looking to learn how to add subtitles in DaVinci Resolve, you’re in the right place. The software provides multiple options for adding DaVinci Resolve captions to your video. From manual captioning and automatic subtitle generation to importing pre-timed SRT files, DaVinci Resolve can handle every workflow. In this post, we will cover all subtitle creation methods, including manual, automatic, and SRT file import, for both the Free and Studio versions. By the end of this post, you’ll know exactly how to add, style, and export subtitles efficiently.

Method 1: Automatic Subtitle Generation (Studio Version Only)
The Studio version of DaVinci Resolve enables you to automatically add subtitles to a video. DaVinci Resolve's auto subtitles generation feature is powered by advanced speech-to-text technology. It works by listening to your audio and instantly creating accurate subtitles.
Here’s how to create automatic subtitles in DaVinci Resolve:
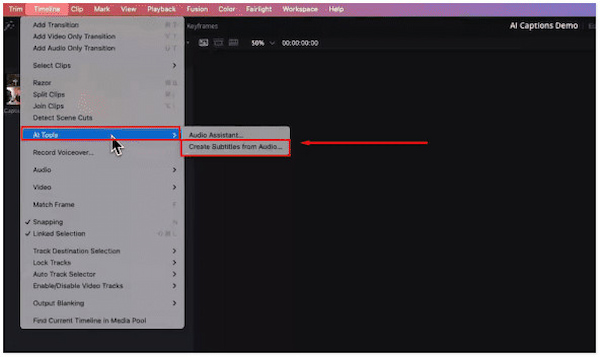
1 In the Fairlight page, navigate to the Timeline menu and click the AI Tools option. Select the Create Subtitles from Audio option to activate DaVinci’s voice recognition.
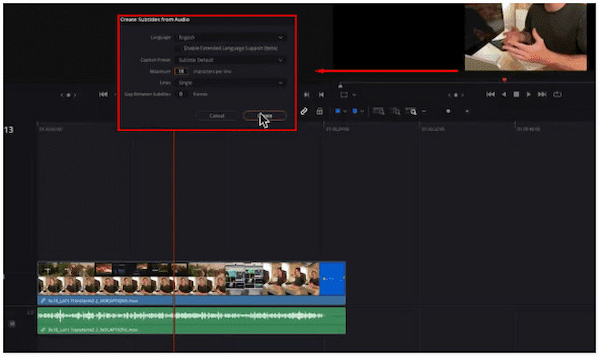
2 Configure the Language, Caption Preset, and Maximum Characters Per Limit in the pop-up window. Click Create and let DaVinci generate the subtitles.
DaVinci Resolve’s automatic subtitle generation converts speech to text effortlessly, eliminating the need for manual transcription. It uses speech-recognition models to produce accurate captions. However, poor audio can lead to incorrect words, missing phrases, and misaligned timing.
Method 2: Manual Subtitle Track Creation (Free & Studio)
DaVinci Resolve manual subtitles creation provides the most precise method for accurate translations. It eliminates recognition errors and gives you authority over how each subtitle appears on screen. Good thing? The Free and Studio versions support manual subtitle creation.
Here’s how to do subtitles in DaVinci Resolve manually:
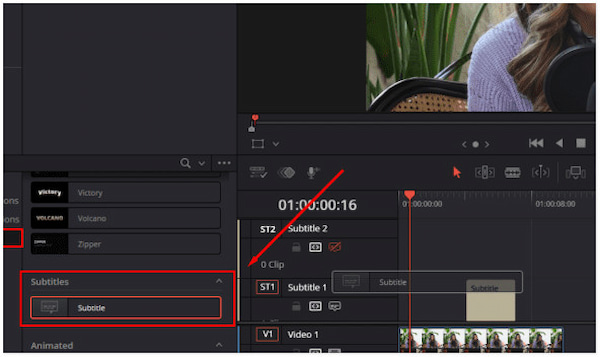
1 In the Edit workspace, navigate to the Effects tab to add subtitles to MP4. In Effects, open the Titles category, scroll to the bottom until you see Subtitles. Click and drag the Subtitle onto a new subtitle track above your main timeline.
2 Select the subtitle block you just created and open the Inspector panel on the right. Under the Caption section, type the dialogue that corresponds to the current frame.
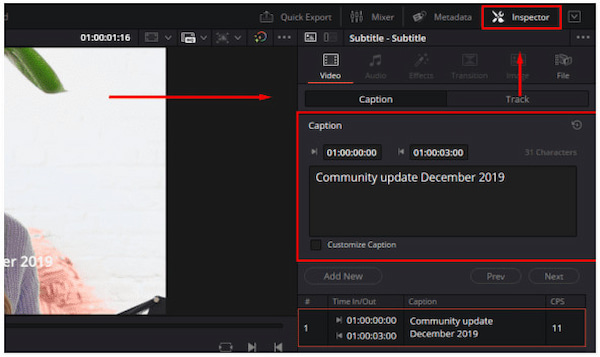
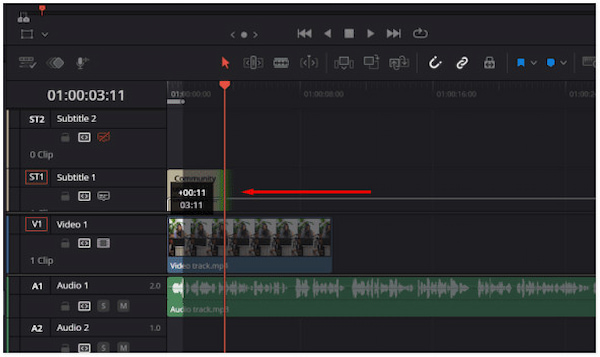
3 To sync your text with the audio, hover over the right edge of the subtitle block. Click and drag to extend or shorten it until it aligns with the spoken words on your audio track. Repeat the process until your entire video is captioned.
The manual subtitle track creation method allows you to control every word and punctuation mark. Additionally, you can perfectly sync subtitles with pauses, overlapping speech, fast dialogue, etc. However, this process can take hours, especially for longer videos.
Method 3: Import a Pre-Timed SRT File
If you already have a subtitle file prepared, you can easily add it to DaVinci Resolve for editing, styling, or exporting. This method is extremely helpful when subtitles are created externally through transcription tools.
Before importing, it’s essential to understand the difference between hard sub vs soft sub.
Here’s how to import subtitles in DaVinci Resolve:
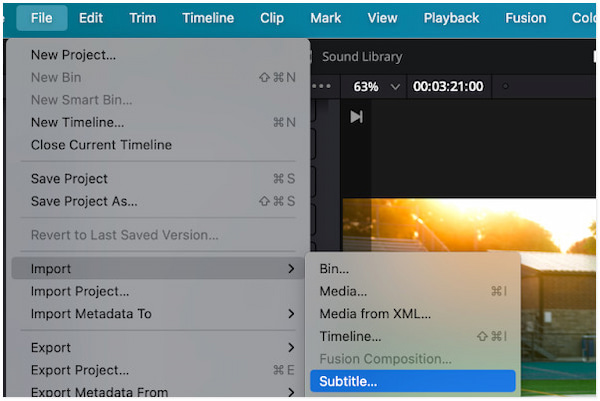
1 Navigate to the File tab, click Import, and click Subtitle to add your SRT file. Open the Media Pool, then drag and drop the SRT subtitle file directly into your timeline.
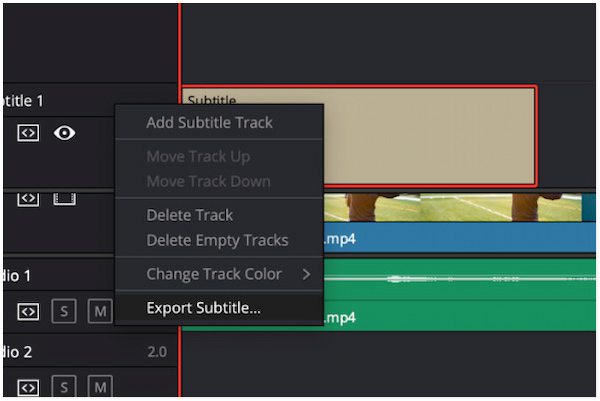
2 Optionally, DaVinci Resolve also allows you to export your subtitles, either as soft subs or burned-in hard subs. Right-click the subtitle track and select Export Subtitle to save.
Since SRT files are created from captioning tools or services, they come with precise timestamps, correct line breaks, and accurate punctuations. However, if the SRT contains typos, those errors will appear in DaVinci and need manual fixing.
Customize and Style Your DaVinci Resolve Captions
Once your subtitles are added, you can fully customize their appearance and even animate them. Whether you add it manually, through AI generation, or via a pre-timed SRT file, DaVinci Resolve offers powerful styling tools through the Inspector panel.
Here’s how to animate subtitles in DaVinci Resolve:
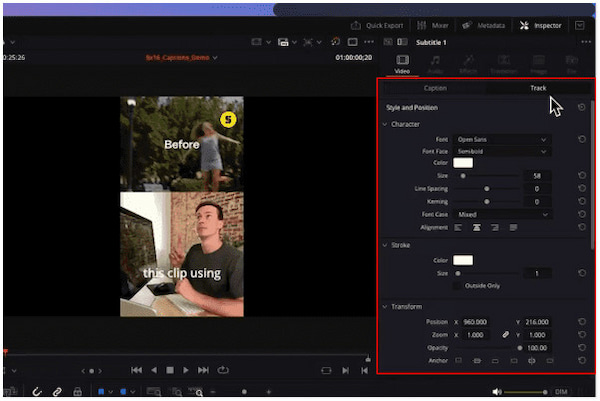
1 Select your subtitle track in the timeline and open the Inspector panel on the right-hand side. Inside the Inspector, choose a font, adjust its size, and modify line spacing. You can also change the text color, add an outline, apply background fills, etc.
2 In addition to stylizing the subtitles, you can also animate your captions using built-in effects. Open the Effects panel, search for Word Highlight, and drag and drop it onto your subtitle. This effect highlights each word as it’s being spoken.
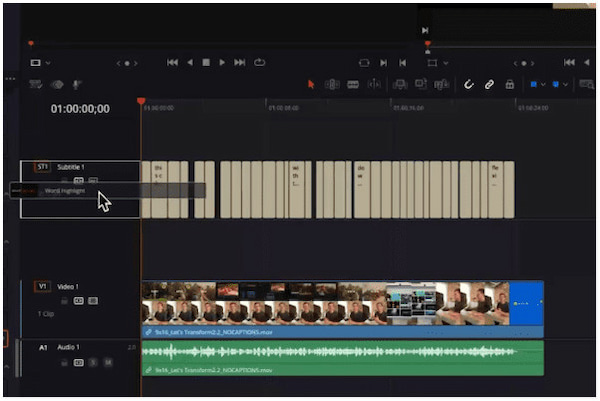
Custom styling helps your captions stay visible even on busy or bright footage. This ensures viewers can read your subtitles clearly in any scene. However, some effects, such as Word Highlight, only function when subtitles are treated as text titles, not SRT soft subtitles meant for export.
Alternative Subtitle Tool: AnyMP4 Video Converter Ultimate
AnyMP4 Video Converter Ultimate is an all-in-one software bundle that goes beyond conversion. This software supports MP4, MOV, MKV, and over 500 other formats for subtitling. It supports various subtitle formats, including SRT, ASS, SSA, SCC, and many more. It features auto-syncing subtitle timing, ensuring subtitles appear in sync with spoken words. Best of all, it is equipped with GPU acceleration for fast rendering, achieving speeds up to 120 times faster.
Here’s how to add subtitles in DaVinci Resolve alternative:
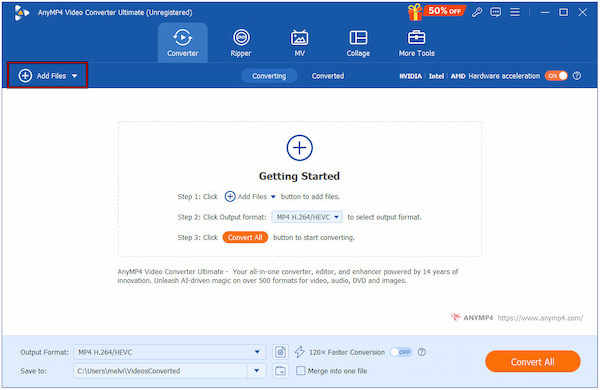
1 Start by securing a free download of AnyMP4 Video Converter Ultimate. Install the subtitle editor and complete the setup process. Once finished, run the software on your system to access the main dashboard.
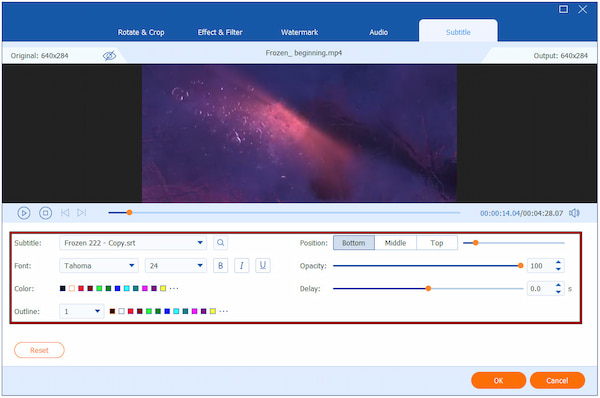
2 In the Converter tab, click +Add Files to import individual or multiple video clips. After you’ve added the video, click the Edit (Magic Wand) button next to the video preview. Proceed to the Subtitle editor, click Embed Subtitle, and select +Add Subtitle to import a subtitle file.
Inside the Subtitle editor, modify the font style, size, color, outline, position, opacity/visibility, and delay. Click OK to apply the changes.
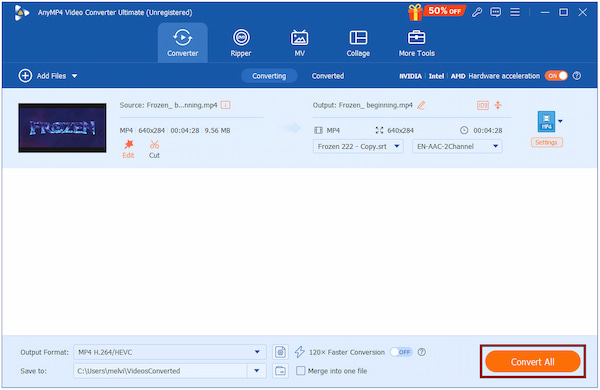
3 Preview the video to confirm that both timing and styling are correct. Next, navigate to the Output selector to configure video quality, resolution, and encoder settings. After finalizing everything, click the Convert All button to embed the subtitles permanently into your video.
AnyMP4 Video Converter Ultimate is a complete media tool for all your video project needs. In addition to the built-in subtitle editor, you can also use the Text Watermark tool to add simple captions. Furthermore, you can explore the More Tools tab to access more than 20 additional editing tools.
FAQs about Adding Subtitles in DaVinci Resolve
Q1: Can I import SRT files into DaVinci Resolve?
A1: Yes, DaVinci Resolve allows you to import pre-timed SRT files directly into your project. Once imported, the subtitle track appears in your Media Pool, where you can style and animate.
Q2: Does DaVinci Resolve auto-generate subtitles?
A2: Yes, the Studio version of DaVinci Resolve includes an automatic subtitle generation feature. It uses AI-based speech recognition to convert your audio into subtitle blocks.
Q3: Can I export subtitles separately?
A3: Yes, DaVinci Resolve allows you to export subtitles as standalone files. To export the subtitle track separately, right-click it and select Export Subtitle.
Q4: What’s the difference between subtitles and captions?
A4: Subtitles primarily translate or transcribe spoken dialogue for viewers, often in a different language. Meanwhile, captions are designed for accessibility, including all audio information.
Conclusion
Now that you have mastered how to add subtitles in DaVinci Resolve, you can easily add captions to your videos. DaVinci Resolve offers a powerful, multi-faceted approach to subtitling. It allows you to produce professional captions in Resolve through manual entry, AI-powered automatic generation, or by importing pre-timed SRT files. By leveraging these tools, your content reaches a wider audience through accessible content. Additionally, DaVinci Resolve makes it easy to share your work with others via SRT file export. If you’re looking for a robust alternative to add, edit, and customize subtitles, AnyMP4 Video Converter Ultimate is a highly recommended solution. It supports multiple subtitle formats, auto-syncing, and advanced styling features.