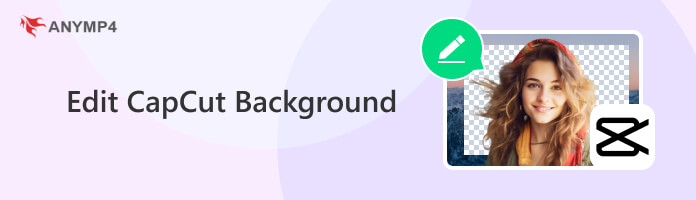
How to Edit CapCut Background: Full Guide to Adjust Images
CapCut is primarily known as a video editing platform that is optimized for producing short-form content. However, most of its users are unfamiliar with the tool’s dedicated background editor which is ideal for photo editing use, ID making, and other multimedia purposes. With that in mind, this article will serve as your guide to help you learn how to edit CapCut background on images that are processed in the platform. We will explore how to add, remove, change to white, and blur image backgrounds no matter what photo you are editing. We will also provide an alternative that is much easier to use than CapCut’s photo editor. Continue reading this article to learn more.
Part 1. How to Add a Background in CapCut
We will start this article first by learning how to add a photo to be used as a background in CapCut. This is the perfect first step in this guide since the background must be set first before adding the subject that you want to highlight in your photo.
Please follow our guide below to learn how to add a background:
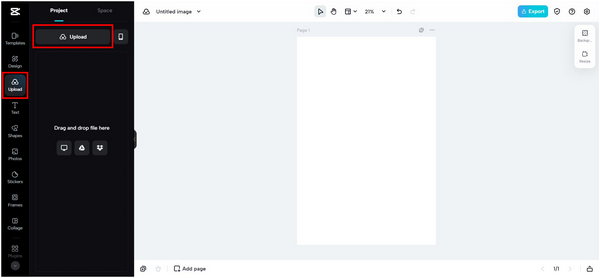
1. Open CapCut’s website then click on the Image section. Select New Image to move to the image editor interface.
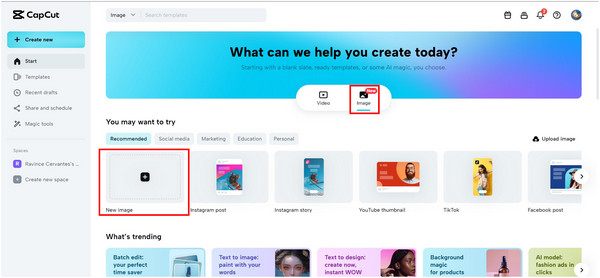
2. In the photo editor window, move to the Upload section. Click on Upload and then select the file source that you want to use. Choose a photo that can be used as a background.
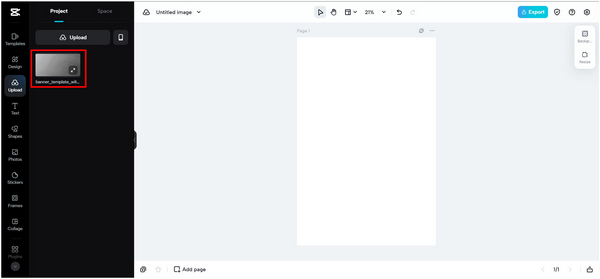
3. Click the uploaded photo to add it to the editor window.
This step will serve as the foundation of your photo editing session since the background can define the overall mood and aesthetics of the photo.
Part 2. How to Remove Background in CapCut
Before using the uploaded background, you must first find a subject that will be used as the centerpiece of an image. To make a subject stand out, its background must be removed first. Luckily, background removal in CapCut can be done with a single click.
To learn how, please follow the guide below:
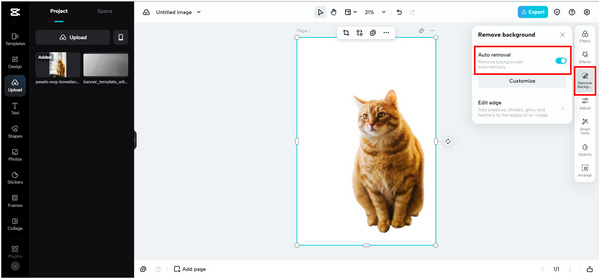
1. Upload an image with a clear subject and background.
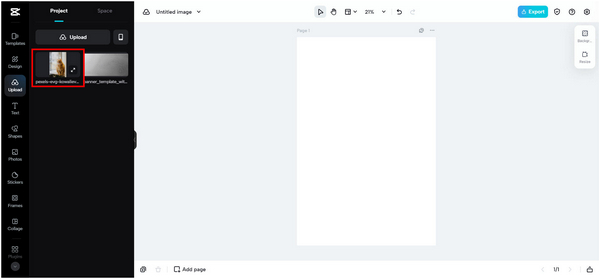
2. Add the image in the photo editing window.
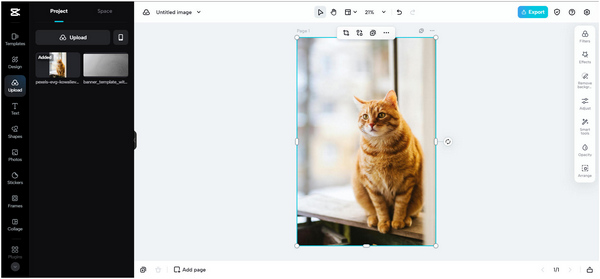
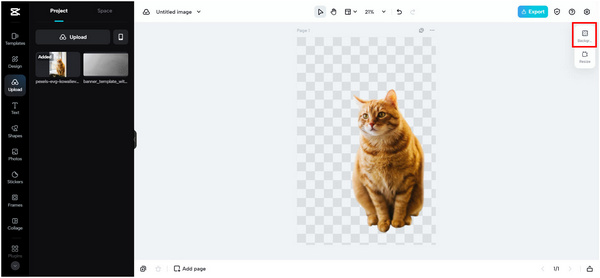
3. Once the photo has been added, select the Remove Background option on the right side of the editor. Turn on the auto-removal option. This will automatically clear the background of the image that you uploaded.
Compared to adding a background, removing a background using CapCut is also simple to do since it only requires the user to select the auto-removal button that works almost instantly. For more image background remover tools, you can find them here.
Part 3. How to Change Background to White in CapCut
After removing the background of your original image, a smart idea to do next is to add a solid color background. In this case, white is the most commonly used since this is the default color for professional IDs and other important documents.
To learn how to change background to clear white, please follow the simple guide below:
1. Add a transparent PNG or a picture with its background removed.

2. Select the Background tab on the right side of the screen.
3. Choose the White Box in the available solid color selections.
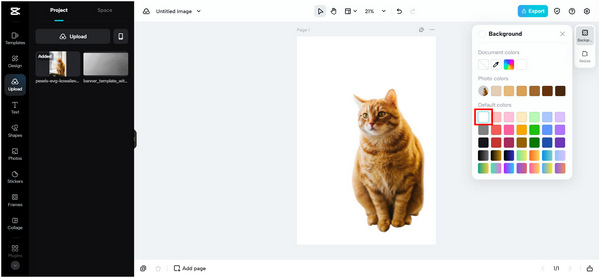
Clicking on the white box will instantly apply a solid color background to the image that you are processing. Aside from the white and other solid color options, you can also customize the solid color background yourself by clicking the square that looks like a color wheel. If you need more CapCut similar apps to change the image background, this article helps.
Part 4. How to Blur Background in CapCut
Unlike the other background editing options, there is no selection to instantly blur the background of the photo in CapCut. With that in mind, we will use an alternative that is similar to professional photo editors by using image layers. This section is more complicated than adding, removing, and changing the background to white so make sure to take note of our guide below.
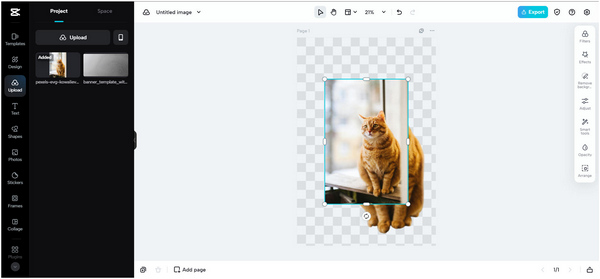
1. First, remove the background of the photo that you want to edit. Follow the auto-removal guide in the second part of the article.

2. Right-click on the photo and then select Lock.
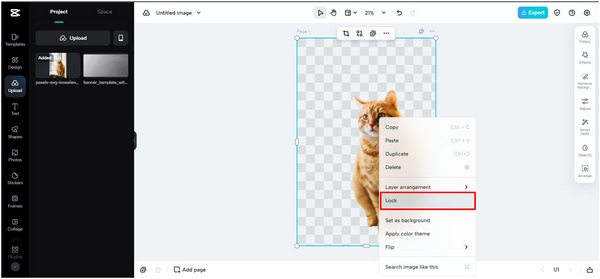
3. Add the original and unedited version of the locked photo.
4. Enlarge the original photo to fit with the one that has its background removed. Click on it and then select Effects. Select Blur and set the intensity to your desired level.
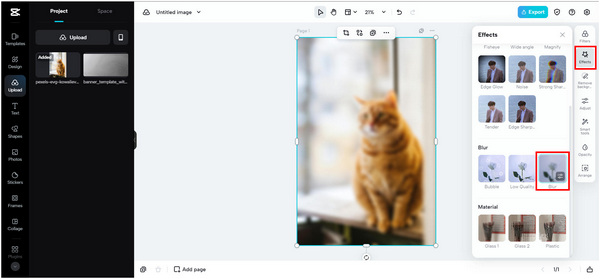
5. Right-click on the blurred picture and then click Layer Arrangement. Select the Send to Back option.

6. By sending the blurred picture to the back layer, the locked photo with its background removed will now move forward and will take the place of the subject that is now blurred. It is important to place the blurred and background-removed picture in the exact position for this technique to work.

Because of the absence of the instant blur background option, this procedure is much more complicated to do than previous background editing options. Because of that, learning the basic techniques in photo editing such as layer arrangement is a must.
Part 5. Alternative to CapCut to Edit the Image Background
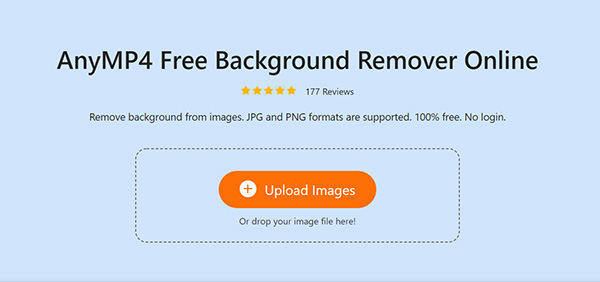
Since CapCut’s background editing procedure still requires adequate skills to use effectively, users who only seek to edit their image background for professional purposes would be smarter to use a dedicated background remover online. Thankfully, this section of the article will focus on highlighting AnyMP4 Free Background Remover Online, an instant background remover that can clean or edit images with just one click.
Unlike CapCut’s, this tool has no dedicated editing window and the most basic option to remove the background of an image can be done by simply uploading the file that you want to edit/ That’s right, this platform will instantly remove the background of the picture that you uploaded once it was added in their simple editing window. In this following window, adding a solid color or image background can be done in as simple as one click. This much-simplified option was made possible because the tool is built to be a background remover itself.
To provide a further understanding of how AnyMP4 Free Background Remover Online works, please refer to our detailed guide below:
1. In the site’s main interface, simply click on Upload Images. You can also drag and drop the file that you wish to edit.
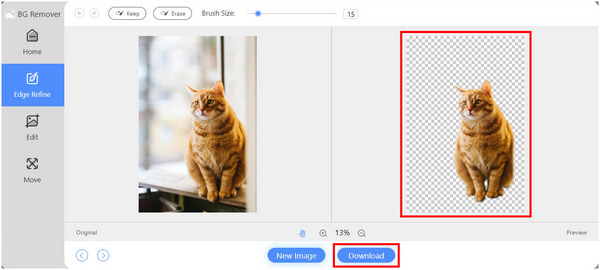
2. As we mentioned before, the uploaded image will instantly have its background removed. If you wish to use transparent photos, you can down-click on the Download button to save it on your computer.
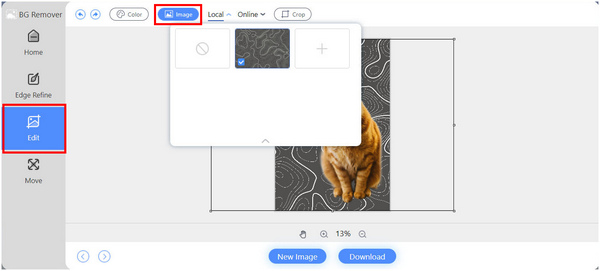
3. Alternatively, you can add an image that can be used as a background for the transparent image. To do this, move to the Edit tab and then select Image. Simply upload the photo that you want to use as a background.
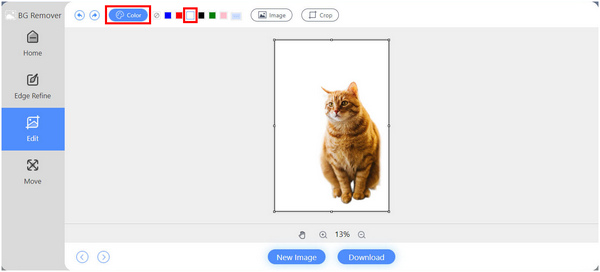
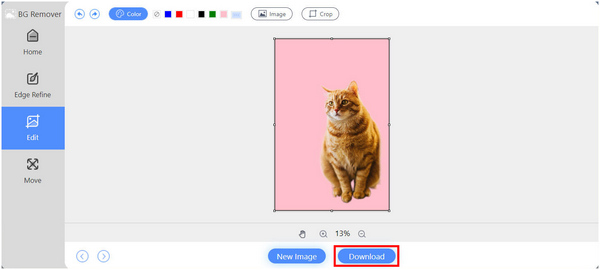
4. For the third option of a solid color background, stay on the Edit section and then select Color. Choose the solid color that you want to use and it will be instantly applied to the photo.
5. No matter what type of background you wish to use, downloading the edited photo can be done by clicking the Download button which is available in all sections of the simple editing interface of the platform.
Since this alternative automatically applies all kinds of background editing options, this instantly makes it a smarter option than the CapCut photo editor. With that in mind, AnyMP4 Free Background Remover Online stands out as the most intuitive background remover tool in the market.
Part 6. FAQs About Editing CapCut Image Background
How do you overlay a background image in CapCut?
You can only set an image as a background in CapCut. Unfortunately, there is no option to set an image as an overlay. This can only be done by more advanced photo editors.
Does CapCut have a background remover?
Yes, there is a CapCut remove background option. The tool has a dedicated background remover. It can be applied within one click.
How do I make my CapCut background transparent?
Upload the image that you want to edit. Then, add it to the image editor. Click on it and then select the remove background option on the right side of the editor window.
Is CapCut photo editor easy to use?
Yes, it is. CapCut photo editor is easy to understand and use. However, editing image backgrounds is much simpler on other sites such as AnyMP4 Free Background Remover Online. You can also do CapCut change background to white.
Is there a blur background option in CapCut?
No, there is not. A blur background option is not available in CapCut. You need to apply basic editing knowledge such as layer arrangement to apply blurry backgrounds on images.
Conclusion
Now that we have explored how to use the different background editor options in CapCut, using them in the right way should be your next priority. To do this, be mindful of where you are going to use the photo and set the appropriate background accordingly. You can also use AnyMP4 Free Background Remover Online for a more easier background editing procedure.
Please share this article online to help other CapCut users who want to learn how to edit their image background using the tool.