If you use macOS Mojave and later, macOS Catalina and newer versions, you can get more on-screen controls to take screenshots. In spite of pressing the traditional Shift, Command, 3/4/Space keys on keyboard, you can get new Mojave screen capture options. Well, it is Shift, Command and 5 keyboard shortcut that brings a small menu bar. You can screen capture and screen record on Mojave. Furthermore, you can get an alternative tool to capture macOS Mojave and later screen with on-screen drawing tools. You can draw on your Mojave screenshot before saving. Whatever, let's see how to take a Mojave screen capture image step by step.

If you are using a step-by-step tutorial, online course or other instructional media files, AnyMP4 Screen Recorder is a great help. There is a specific screen capture tool for Mac users. You can hover your mouse above any window to take a screenshot. The Mac screen capture software will recognize the certain browser or window smartly. Or you can draw on the Mac screen to screen capture on Mojave with any selected region.
Different from the default macOS Mojave and later screen capture options, you can make drawings to a screenshot with custom size and color. There are multiple output options to save or manage your Mac Mojave screenshots. Thus, you can save, copy, preview, pin or delete the current screen capture image directly.
Secure Download
Secure Download
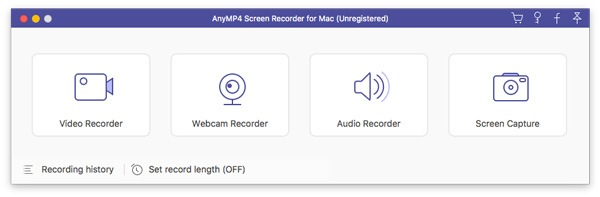
Step 1: Free download and install AnyMP4 Screen Recorder. Launch the program after the installation. To get macOS Mojave and later screen capture, you can choose Screen Capture in the main interface.
Step 2: Hover your mouse above any active window. Or you can select the area you want to capture by dragging. There will be a small bar once you release the left-click mouse.
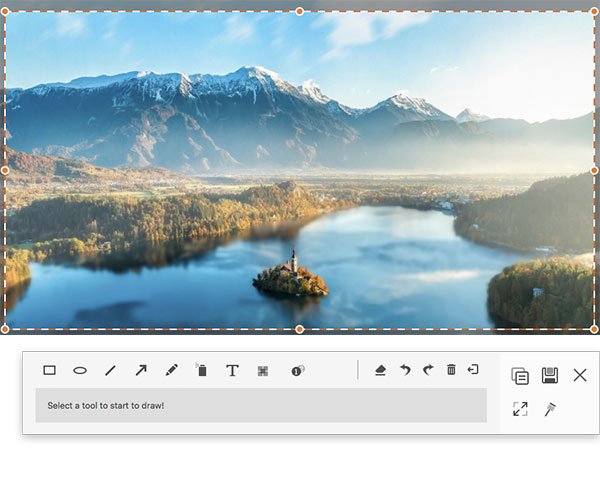
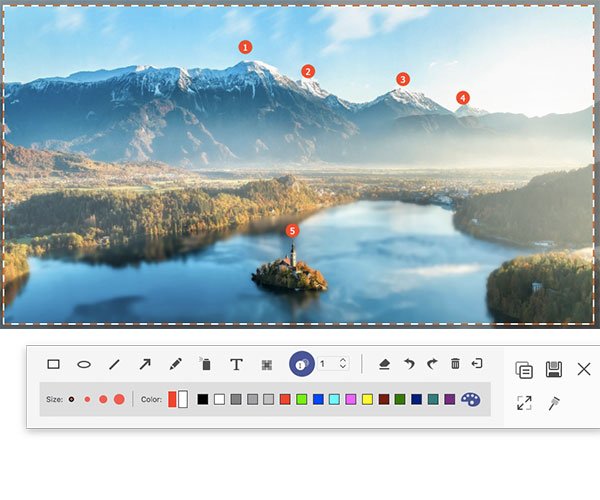
Step 3: Choose from the following annotating tools. For instance, choose Callout and set its color and size. Then you can draw on the Mojave screen capture directly. Click Redo or Undo to quickly remove unwanted effects.
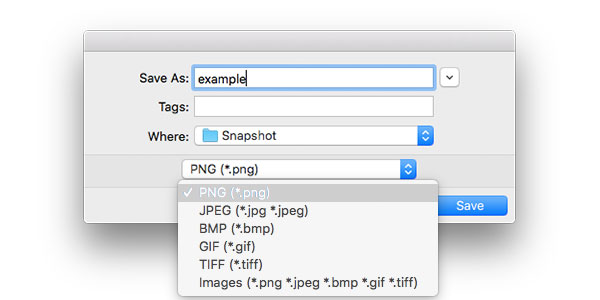
Step 4: After the customizations, click Save to export the Mojave snapshot as PNG or other formats. Specify the screen capture file name, location, tag and format. At last, click Save to confirm. That's all to screen capture and edit Mojave screenshot images.
Note: If you are looking for a free tool to screen record on Mac Mojave, you can use AnyMP4 Free Online Screen Recorder as well. It is 100% free and safe to use. The Mojave screen recording file will be saved as MP4 or WMV format.
Mac Mojave users can take a screenshot with default screenshot keys. The screenshot toolbar can be activated without a few steps. Just do as the following paragraphs show.
Step 1: Press Command, Shift and 5 keys on your keyboard at the same time.
Step 2: To screenshot on Mojave, choose from Capture Entire Screen, Capture Selected Windows and Capture Selected Portion.
Step 3: Select the certain window or screen portion you want to capture.
Step 4: The screenshot thumbnail appears on the lower right corner of your screen. Right-click on it and choose Save to Desktop, Save to Documents, Save to Clipboard, Open in Mail and more to export your Mojave screenshot image.(Check why screenshots can't be saved on Mac?)

Where are macOS Mojave and later screenshots saved?
All Mac screenshots are saved to desktop by default. The original screenshot file is named with Screen Shot [date] at [time].png. You can change the default Mac screenshot settings from the Options drop-down menu in Screenshot app.
How to crop a screenshot on Mac?
If you want to extract a part of Mojave screenshot, you can copy it into clipboard. Then use any image editor to crop a Mac screenshot. Moreover, you can use Preview to annotate, rotate and flip Mac screenshots as well.
How to screen record on macOS Mojave and later?
AnyMP4 Screen Recorder and its free online tool can be your screen recording software. If you don't want to install anything on your computer, you can screen record on Mac Mojave with QuickTime Player as well. Just run QuickTime Player and choose New Screen Recording from the File menu bar on the top. Set the input audio source and quality from the drop-down arrow list. At last, click Record to screen record with QuickTime Player on macOS Mojave and later.
That's all to screen capture on macOS Mojave and later. You can use AnyMP4 Screen Recorder and Shift + Command + 5 keys to take a screenshot on Mojave and other versions successfully. If you still have other questions, you can feel free to contact us or leave messages below.
 Posted by Ted Klarso to Recorder
Related Articles
 How to Screen Capture on Mac – 8 Best Methods You Should Know
How to take a screen capture on your Mac? When you need to print screen on your MacBook, here are the 8 efficient methods to get the desired files with ease.
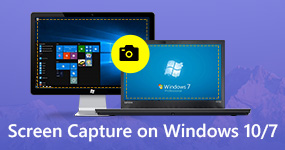 Screen Capture for Windows 10 – 8 Best Methods You Should Know
How to take a screen capture on Windows 10/8.1/8/7? When you need to record the activities of your Windows computer, you can learn more about the best methods from the article now.
 7 Best GIF Screen Recorders Available to PC, Mac, iOS and Android
This is a complete tutorial to take a screenshot on macOS Mojave and later. You can create Mojave screen capture images with Shift + Command + 5 keys or third-party screen capture software with ease.
 How to Record Videos on Mac – 4 Best Methods You Should Know
How to record a video on Mac with sound? When you want to make some video tutorial and capture the online videos, you can find top 4 efficient methods from the article.