For Mac users, QuickTime Player is the default media player for playing videos and audio files. However, beyond playback, QuickTime also doubles as a screen recording tool. Whether you want to create tutorials, record webinars, or save video calls, QuickTime offers a simple way to record your screen. This post provides a full overview of QuickTime screen recording. We'll show how to set up and run screen captures on Mac and address common recording limitations. Our goal is to make screen recording with QuickTime simple, clear, and accessible.

If you need a quick way to capture a Mac screen, QuickTime Player is the easiest tool available. Since it's preinstalled on macOS, you don't need to download or install any additional software. It works perfectly for simple screen recordings, quick demos, and presentations.
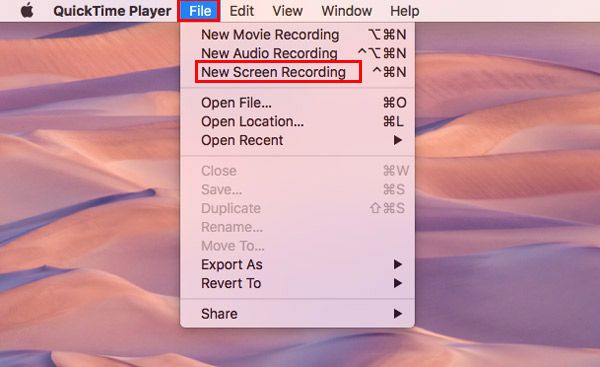
1. Launch QuickTime Player, click File in the menu bar, and select New Screen Recording. When the recording toolbar appears, click Options to configure your audio source. Under the Microphone section, select Aggregate Device, Internal Microphone, or Line In as your input.
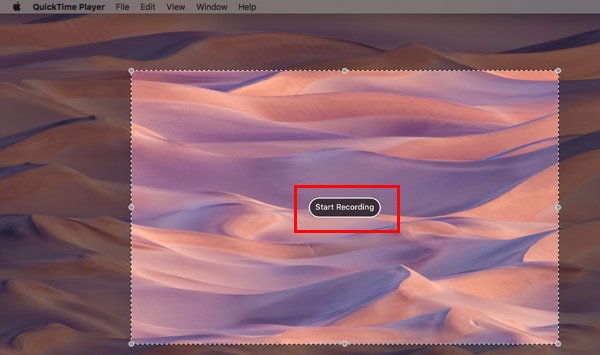
2. Next, define the capture area. Select Record Entire Screen to capture your whole display, or choose Record Selected Portion to click and drag over a specific area of the screen. After selecting your preferred option, click the Record button to start recording.
3. After finishing recording, click the Stop button in the menu bar. Alternatively, press Command + Control + Escape to stop the recording.
QuickTime Player is a convenient and beginner-friendly screen recorder for Mac users. It is ideal for quick recordings, simple tutorials, and occasional screen captures. However, if you need advanced recording features, consider a more powerful screen recording tool.
By default, QuickTime Player cannot record internal system audio (the sound coming from applications or videos). To overcome this limitation, many Mac users install a virtual audio driver, such as BlackHole. This tool allows QuickTime to capture system audio by routing your Mac's internal sound as an input source.
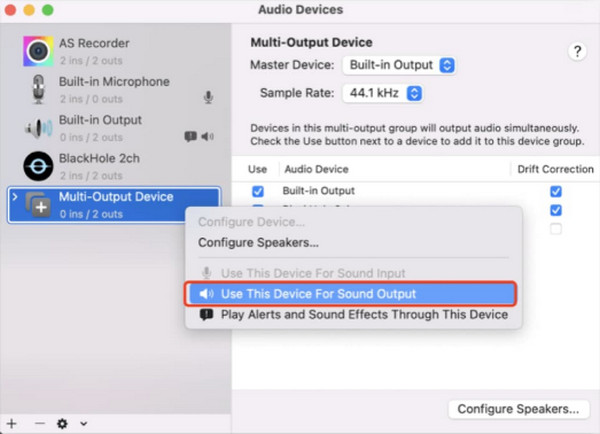
1. After installing BlackHole (BlackHole 2ch), open Audio MIDI Setup. Click + and select Create Multi-Output Device. In the device list, check both Built-in Output and BlackHole 2ch options. Right-click the Multi-Output Device and select Use This Device For Sound Output.
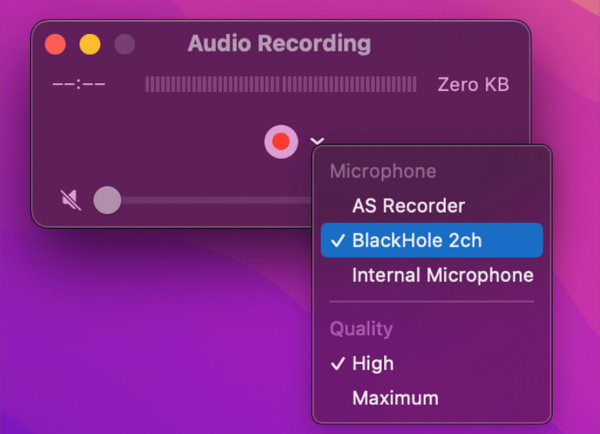
2. Open QuickTime Player, click File, then choose New Audio Recording. Click the arrow next to Record, choose BlackHole 2ch, then click Record. Click Record again to end the recording, then preview and save the audio file.
Because QuickTime Player does not support internal audio recording by default, tools like BlackHole are required to capture system sound on Mac. However, this setup process can be slightly more complex than that of dedicated screen recording software.
The common limitation of QuickTime Player is that it saves recordings in the .mov format, which can result in very large file sizes. A simple way to minimize the file size is to export the recording at a lower resolution after finishing.
1. After completing your screen recording in QuickTime Player, the video will automatically open for preview. In the menu bar, click File, and select Export As. You will see several export options, including 1080p, 720p, 480p, and Audio Only.
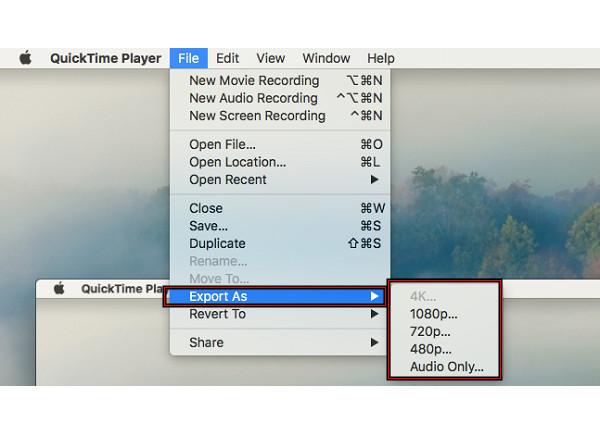
2. Select a medium or lower resolution, such as 720p or 480p, to reduce the recording's file size. Choose your preferred save location and export the video. The new file will be smaller and easier to store or share.
Because QuickTime Player records videos in .mov format, files can become large and sometimes cause lag during playback. You can also export QuickTime as MP4 by adjusting the codec settings to reduce file size and improve compatibility with more devices.
While QuickTime Player is reliable for screen recording on Mac, you may occasionally encounter issues such as recording permission errors, disappearing controls, or app crashes. Below are some quick troubleshooting methods to resolve these common problems.
Recording Permissions
If QuickTime Player cannot capture your screen, it is because the app does not have permission to record your screen on your Mac.
1. Open System Settings/Preferences, scroll down, and click Privacy & Security. Locate and select Screen Recording in the list of permissions.

2. Find the QuickTime Player and toggle the switch to enable it. If the app was already open, restart it so the permission changes take effect.
Disappearing Controls
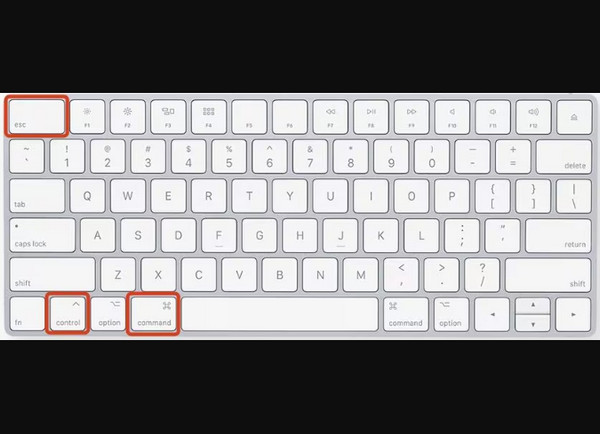
Sometimes the recording toolbar or stop button may disappear during recording. In this case, keyboard shortcuts (hotkeys) can help you quickly control the recording process. Press Command + Control + Escape to stop the screen recording. Using shortcuts can speed up the recording process and prevent interruptions when the controls are not visible.
QuickTime Crashes
In some cases, QuickTime Player may become unresponsive during recording. If the app freezes, you may need to force-quit it.
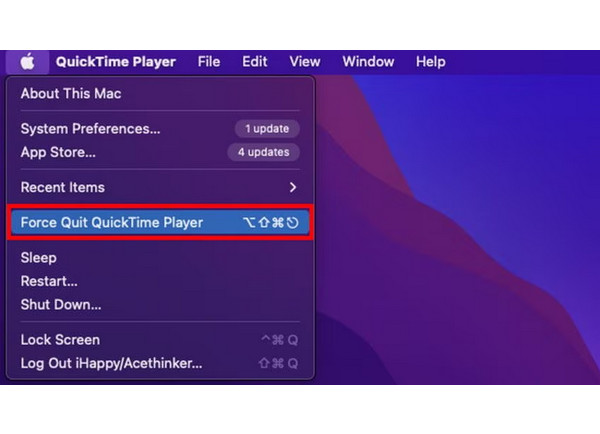
1. Open Apple menu and choose Force Quit QuickTime Player from the pull-down menu. This action will bring up the Force Quit Applications dialog box.
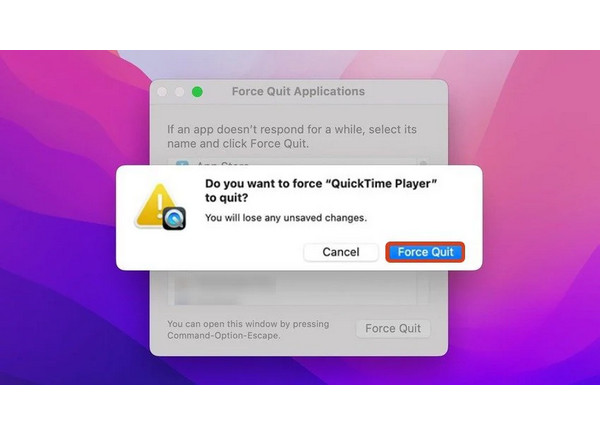
2. Select QuickTime Player from the list and click Force Quit to confirm the action. You can also press Command + Option + Escape simultaneously to open Force Quit Applications.
By enabling the correct permissions, using keyboard shortcuts to control recordings, and force-quitting the app when necessary, you can resolve most QuickTime recording problems and continue capturing your screen successfully.
If you find QuickTime Player limiting, a more flexible solution is AnyMP4 Screen Recorder. It is a professional multimodal screen recording software fully compatible with Windows and Mac. Unlike QuickTime, it allows you to capture system audio and microphone input simultaneously without additional drivers. This software supports 4K resolution and up to 120 fps recording, ensuring smooth, high-definition video. In addition to MOV, it can output recordings in multiple formats, such as MP4, MKV, WMV, WebM, F4V, MPEG-TS, and GIF. It helps reduce file size while maintaining the original quality of your recordings.
FEATURES
1. Begin by securing a free download of AnyMP4 Screen Recorder. Install the software and be sure to complete the setup process. After completing the installation, run it on your Mac to access its Main dashboard.
Secure Download
Secure Download
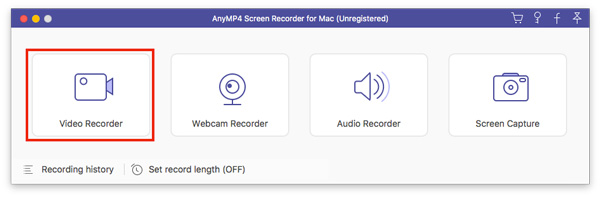
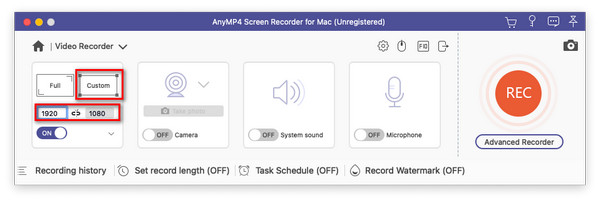
2. In the main interface, click Video Recorder to capture the screen with audio. In the Display tab, choose Full to capture everything on your display. Alternatively, click Custom to select a specific window or portion of the screen.
Essentially, turn on System Sound to capture internal audio and Microphone to capture voice or commentary. You can enable both, either, or none, depending on your needs.
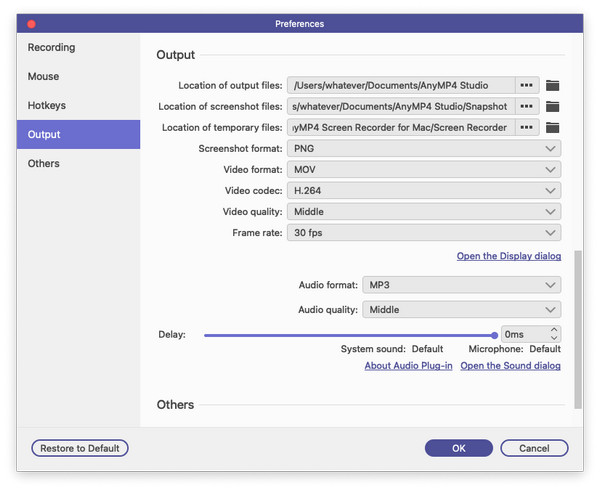
To specify your output format, click Settings and navigate to the Output section. Choose a video format such as MOV, MP4, MKV, WMV, WebM, F4V, MPEG-TS, or GIF. You can also configure other parameters, such as codec, frame rate, and quality.
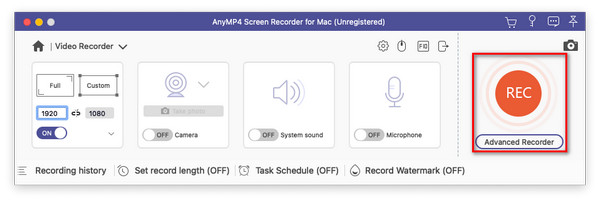
3. After configuring the recording area, audio source, and output settings, you can now start recording. Click the large red REC button to start recording. A three-second countdown will begin. During recording, you can pause and resume as needed. Also, you can use the built-in annotation tools to draw lines, add captions, or insert callouts.
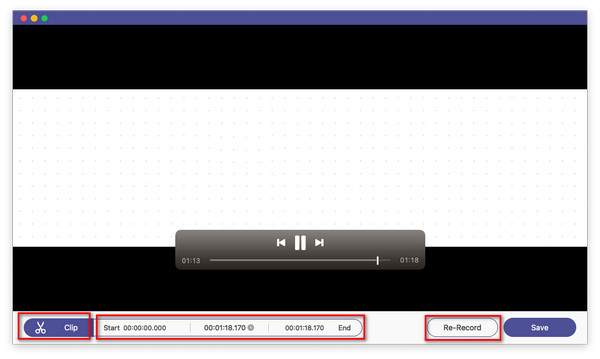
4. Once you decide to end your recording, click the Square (Stop) button. The recording will open in the Preview window, where you can trim unwanted sections. Click Save to export the screen recording to your system in the selected format.
AnyMP4 Screen Recorder provides a complete solution for high-quality screen recording. It allows you to capture full-screen or custom areas, record system and microphone audio simultaneously, edit in real time, and save in multiple formats. It's a flexible alternative to QuickTime screen recording, especially for users who need internal audio capture, smaller file sizes, and more professional features.
| QuickTime Player | VS | AnyMP4 Screen Recorder |
| System Audio Recording | ||
| MOV | Output Video Formats | MP4, MOV, MKV, WMV, WebM, F4V, MPEG-TS, and GIF |
| Up to 1080p | Max Video Quality | Up to 4K |
| 60 fps | Max Frame Rate | 120 fps |
| Webcab Overlay | ||
| Screen Combo (Screen, Audio, & Webcam) | ||
| Annotation Tools | ||
| Schedule Recording | ||
| Auto Stop | ||
| Built-in Editor |
How long can you screen record on QuickTime?
You can record on QuickTime Player for as long as you like, provided your Mac has enough storage space to save the resulting video file. QuickTime does not impose any strict time limits. You can determine the recording duration by the available space and your system's performance.
Is QuickTime a good screen recorder?
Yes, it is an excellent option for basic, occasional screen recording on Mac. It allows you to record full screen or custom areas and capture audio from a microphone. However, it cannot natively record internal system audio and lacks webcam overlay features.
Can I screen record for 2 hours?
Yes, you can record for up to 2 hours with QuickTime Player. The only limiting factor is your Mac's available storage. Long recordings can produce very large video files, which can slow down your computer during recording or delay saving afterward.
Where do QuickTime screen recordings go?
By default, QuickTime Player saves screen recordings to your desktop. When you stop a recording, a preview window appears, prompting you to choose a save location and file name. You can also manually move or organize recordings after saving.
What happens if you screen record for too long?
Recording for extended periods can create potential risks. The most common issue is data loss if you run out of storage before saving the recording. Long recordings can also cause system slowdowns, lag during recording, and QuickTime crashes.
QuickTime screen recording is a convenient and free solution for capturing the screen quickly and easily. It works well for basic tutorials, presentations, and simple screen capture tasks. However, QuickTime has notable limitations, such as no native system audio recording, lack of webcam overlay, and large .mov files for long recordings. These factors make it less suitable for professional or extended screen recording projects. For a more powerful and flexible screen recording solution, AnyMP4 Screen Recorder is an excellent alternative. It supports system audio capture without extra drivers, 4K resolution, webcam overlay, annotations, scheduling, and multiple output formats.
Now, have you grasped what you want to know in this post?
Do not hesitate to share this post, and let me know if you have any ideas by leaving your comments.
Secure Download
Secure Download
 Posted by Riley Mitchell to Record Video
More readings
 Top 5 Chrome Audio Recorders – How to Record Audio on Websites
Want to save appealing music on Chrome? What you need is just an audio recorder that enables you to capture audio on Chrome.
 Top 3 DivX Screen Recorder to Capture High-Quality AVI/DivX
Look for a DivX recorder for legacy compatibility? Get the best 3 tools to capture small-sized, high-quality videos in DivX, H.264, and HEVC.
 [Best 15-list] Free AVI to MP4 Converter for Windows/Mac/Online
How can I convert AVI to MP4 for free? Which is the best freeware to change AVI to MP4? Check the updated list of best 15 open source software.
Top 15 AVI to MP4 Free Converters You Really Want
This article introduces top 15 Free AVI to MP4 Converters for users to convert AVI.