How to Quickly Create A Slideshow in PowerPoint: Step-by-Step Guide
When it comes to slideshows, Microsoft PowerPoint is one of the pioneer options for creating digital presentations. Unfortunately, cloud-based tools like Google Slides are gaining popularity as online tools become increasingly accessible. With that in mind, learning how to create a slideshow in PowerPoint is still essential, as the traditional software is not reliant on an internet connection and remains a solid choice for both professional and academic use. In this article, we will explore the four steps that you need to learn how to use to create PowerPoint presentations. We will also provide practical tips for creating PowerPoint projects, as well as reviewing the best alternative to the program.

PowerPoint Slideshow Creation Introduction
PowerPoint is the pioneer digital presentation maker that has made digital presentations more streamlined and easier to produce since its release in the late 1980s. Since then, it has developed a reputation as the most reliable option for creating visual aids, whether for professional or academic use.
Unfortunately, its popularity was affected by the increased performance and reliability of modern presentation makers that are commonly available online. Despite that, PowerPoint remains one of the best options for creating presentations.
As such, learning how to make a photo slideshow in PowerPoint remains a valuable asset and skill. To discover the basics of PowerPoint presentations, please read our guide below.
Step 1. Create A New Presentation
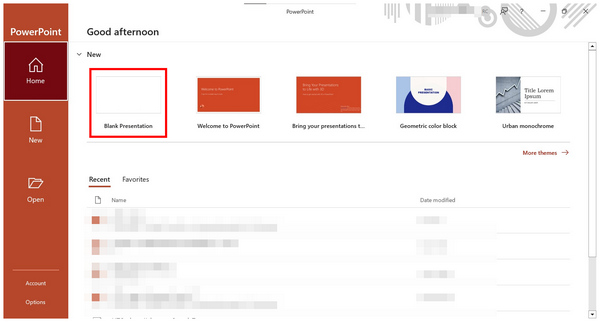
1. Open Microsoft PowerPoint and select a template from the available options under the New Presentation tab. Select Blank Presentation to start with the basic option.
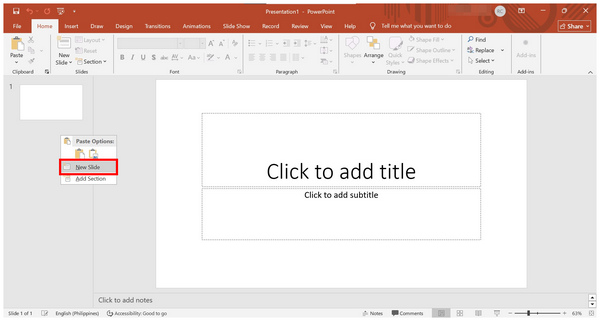
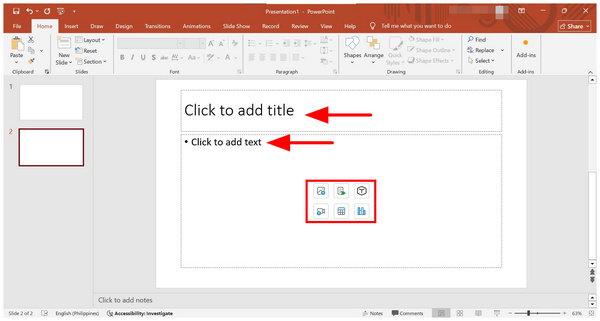
2. Inside PowerPoint’s main slideshow creation menu, right-click on Slides and select New Slide to create a new page.
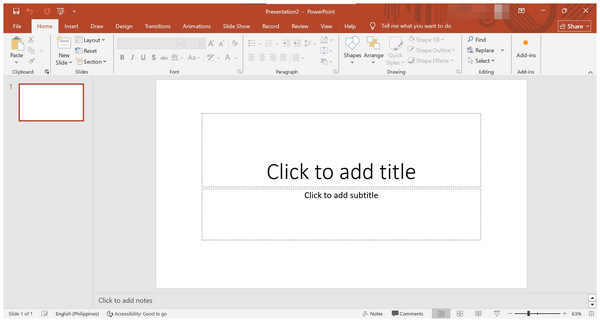
3. In each slide of PowerPoint, you may add content such as Texts, Images, tables, Graphics, and more. These elements may be added to each slide, including the first page.
If you are experienced with PowerPoint, using the pre-made templates in the New Presentation tab is also advisable. However, a blank presentation is more advisable if you plan to edit and design your work personally.
Step 2. Make It Dynamic: Transitions and Timing
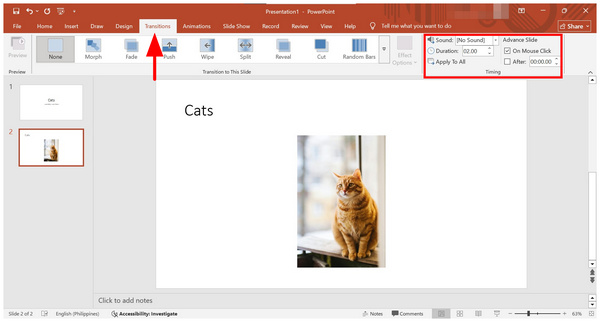
1. To add a transition between each slide, select the Transitions tab and choose among the available effects from the taskbar. You may adjust the effect using the Sound, Duration, and other options from the Timing menu.
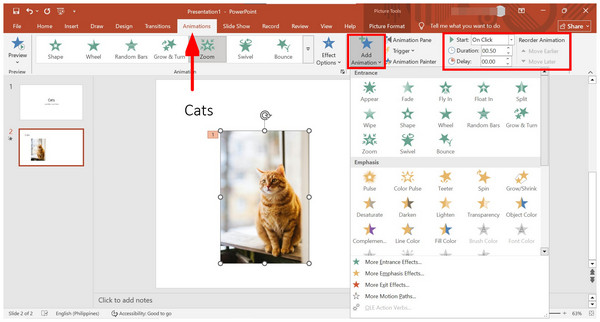
2. However, if you plan to add more flair to your project, you can also add Animations by selecting the named tab. Then, click on an object on your slide and select the Add Animation option. You may edit the effect timing using the Start, Duration, and Delay settings.
Among the editing options in PowerPoint, the Transition and Animation tools are the most suggested if you want to add creative value to your slideshow. However, be careful not to overload your presentation with too many effects, as it may appear childish.
Step 3. Advanced Features: Narration and Interactivity
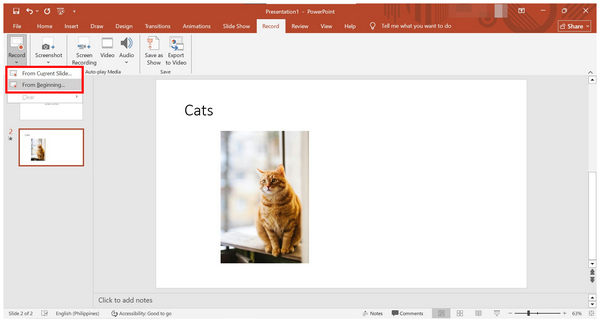
1. To add audio effects such as narration recordings to your slideshow, go to the Record tab.
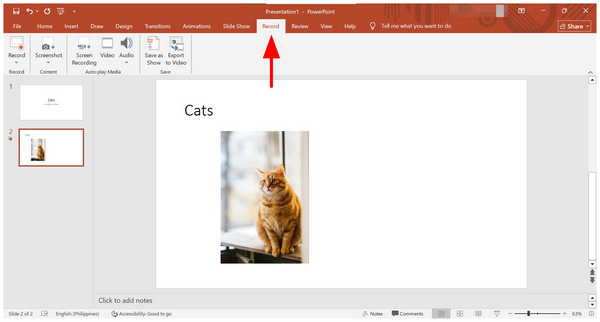
2. If you plan to record your presentation, select the Record option and choose where you want the recordings to begin: From the Current Slide or From the Beginning.
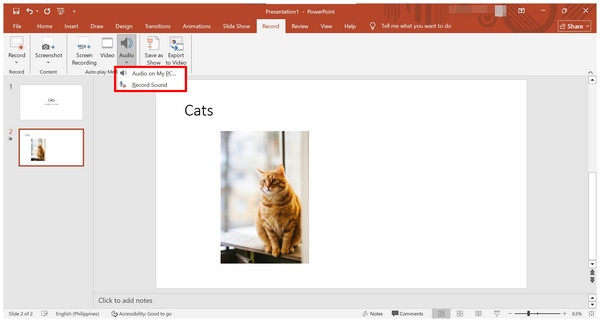
3. To add narrations or other forms of music, click on Audio, then select whether you want to add an Audio File from your PC or choose Record Sound to capture your microphone input.
Although it is not commonly used, adding music to a PowerPoint presentation can enhance its engagement value for your target audience. This is a great addition once you have learned the basics of learning how to create a picture slideshow in PowerPoint.
Step 4. Save Your Presentation
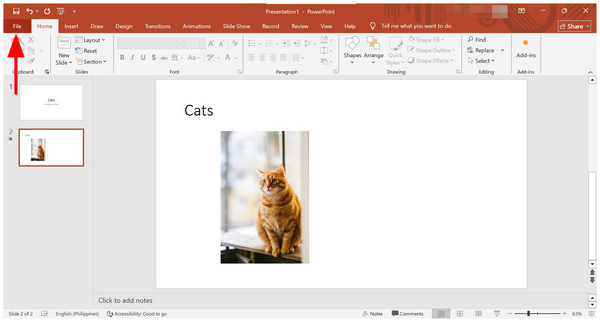
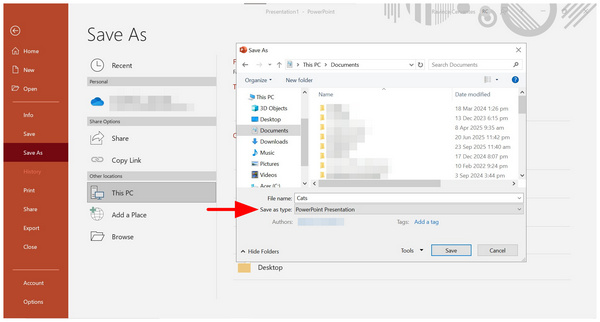
1. Click on File.
2. In the File menu, select Save As. Then, select the location where you want to save your presentation.
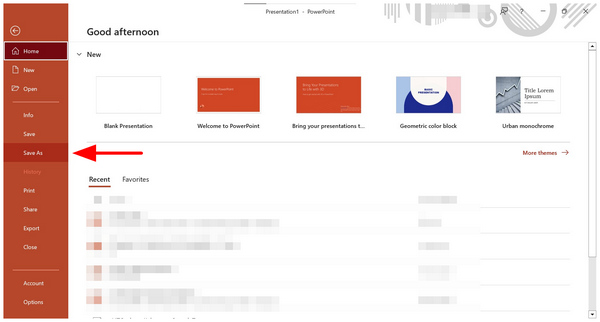
3. After setting where you want to save your slideshow, ensure that you select PowerPoint Presentation from the Save as Type tab. Then, confirm Save to produce your slideshow.
Once your file has been saved, you can now present it by opening it from another presentation software. You may even upload the file to Drive and open it on Google Slides.
More Tips for PowerPoint Slideshow Creation

Design Best Practices
Use A Consistent Theme and Font
Although playing around with premade themes and fonts is fun, avoid using too many visual elements in your presentation, as they may create overwhelming visual clutter in your project.
Select Readable Fonts and Proper Coloring
Ensure that the font you choose complements your presentation’s theme and topic perfectly. Moreover, its color should contrast with the one you have selected as the background of your presentation.
Use High-quality Images
When creating slideshows with only static images, ensure that their quality and resolution are high enough to be visually pleasing to your audience. This is particularly important since presentations are intended to serve as visual aids.
Delivery and Presentation Tips
Don't Just Read from the Slides
Presentations are designed primarily as visual aids. As such, you should avoid simply reading its content, as the audience can do that themselves. Ensure that you present the slideshow yourself, not the other way around.
Practice Delivery Timing
Since you are the one who produced your slideshow, you have to practice how to deliver your point in the major sections of your presentation. Add flair, emphasize, play, and do anything it takes to engage your audience.
Rehearse and Practice
The tips mentioned above will only be effective if you have rehearsed and practiced them enough. If you manage to do so, both your message and your presentation will stand out equally.
PowerPoint Alternative to Create Slideshows
Aside from traditional presentation makers like PowerPoint and online-based tools like Google Slides, multimedia editing software is also equipped with adequate features to create presentations. In terms of video slideshows, AnyMP4 Video Converter Ultimate is the best alternative option.
Equipped with a fully functional MV Maker feature, AnyMP4 Video Converter Ultimate enables the creation of video slideshows using its pre-designed templates, editing tools, audio plug-ins, and video effects that can be added with just a few clicks.
The combination of these editing templates makes video slideshows much easier to produce compared to traditional presentations saved in PPT format. Additionally, the software supports more advanced file types, including MP4, MOV, WMV, AVI, MKV, and GIF.
Once you are done creating your slideshows, you won’t have to worry about manually operating them since presentations produced with AnyMP4 Video Converter Ultimate are saved in a video file.
To learn more about what makes the program a solid choice for creating slideshows, please read its key features below. Then, download the software using the provided link and follow our three-step guide to learn how to use the tool for slideshow production.
Recommendation
- The beginner-friendly MV Maker feature is designed for creating high-quality video slideshows easily.
- It can rip DVD videos for easier conversion to digital media.
- It features a professional video format converter that can read and process files from 500+ formats.
- The Toolbox tab is equipped with over 20 multimedia tools for niche adjustments, including a watermark remover, cropper, merger, trimmer, and more, for refining videos.
- It supports editing videos up to 4K quality, making it easy to compress UHD files to a manageable file size.
1. Open AnyMP4 Video Converter Ultimate and go to the MV Maker tab. Next, click on Add file button to import the media you want to use for the slideshow.
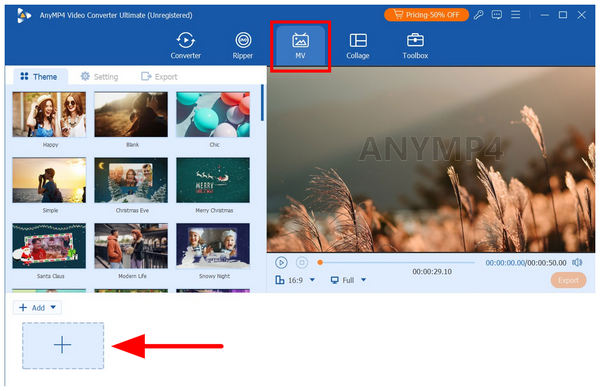
2. Now that the slideshow files are added to the MV Maker editor, you can edit each media individually using the available tools, such as Edit, Trim, and Order Adjustment. If you wish to add visual effects, graphics, or text, select the Edit tool.

3. Once you are done editing each media file using the editing options, proceed to the Export tab. In here, you can change the output project’s Format, Frame Rate, Resolution, and Quality. Finally, select Start Export to begin producing the slideshow video.

Although not as conventional as PowerPoint presentations, using video slideshow makers is often the better option for social events, as they eliminate the need for manual presentation control typically found in software like PowerPoint, Google Slides, or similar tools. These include weddings, birthdays, reunions, and other similar events.
FAQs About Creating Slideshows on PowerPoint
Can I add music to a PowerPoint slideshow?
Yes, you can. Adding music in PowerPoint may be done within the Record tab. You can add local audio or record a live one. This is also the tab where you can record the PowerPoint presentation.
What’s the best way to add transitions and animations in PowerPoint?
Add transitions that suit the audience you will be presenting to. In terms of animations, it should work well with the transition. These two factors work hand-in-hand.
Can I export a PowerPoint slideshow as a video?
Yes, you can. However, it is not advisable since PowerPoint lacks essential editing tools. We recommend using other multimedia files, such as AnyMP4 Video Converter Ultimate for slideshow videos.
Can you create a slideshow in PowerPoint?
Yes, you can. In fact, PowerPoint is one of the pioneers of slideshow production. The program is designed to function in this manner.
How to create a photo slideshow with music in PowerPoint?
Simply add photos to the slides you want to use. Then, add text and other effects to provide additional context. Ensure that the images you use can convey clear messaging.
Conclusion
Now that we have provided our readers with the most essential steps in creating slideshows in PowerPoint, we hope that the guide and tips in this article will be enough to equip you with the essential skills in producing presentations with the industry-leading software. If you are looking for an alternative or plan to use video slideshows, be sure to download AnyMP4 Video Converter Ultimate.