In this visual era, where the compilation of images is prevalent, sharing memories, showcasing products, or delivering presentations has become more captivating and effective through slideshows. With the existence of smartphones, one of the most accessible tools for creating impressive slideshows is the Photos app of iPhone. In this guide, we will tell how to use iPhone slideshow, and outline the intricacies of utilizing the power of iPhone slideshows, from creating and customizing to saving and sharing them easily. So, if you want to enhance your presentations or curate unforgettable memories, this comprehensive guide will help you make the most of your iPhone’s slideshow features.
The Photos app, available on iOS devices like the iPhone, iPad, and Mac computers, offers a straightforward way to create slideshows from your photos. It is a built-in application that helps you manage and organize your photos and videos. It also allows you to create simple slideshows from your photo library.
Here’s how to make a slideshow on iPhone:
1. Open the Photos app on your iPhone.
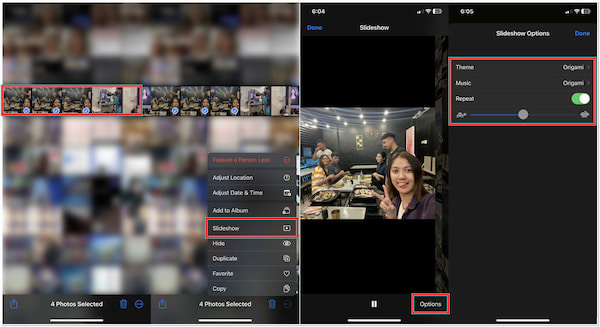
2. Select the photos you want for the slideshow.
3. Tap the Share button, represented by a square with an arrow.
4. Choose Slideshow from the Share menu.
5. Customize settings like Theme, Music, Speed, and Repeat.
The Photos app is convenient for creating simple slideshows on Apple devices. However, if you need to create complex slideshows, consider using third-party video editing software for greater flexibility and creative control.
Saving a slideshow on your iPhone using the Photos app is typically straightforward. The Photos app seamlessly integrates with your device’s photo library, making it convenient to access and organize your saved slideshows. However, if you encounter issues saving a slideshow, we will also provide some troubleshooting tips to try in this section.
1. After customizing your slideshow, tap Play to start the slideshow.
2. Tap the screen anywhere to display the slideshow controls.
3. Tap Save Video at the bottom of the display to save the slideshow.
4. The saved slideshow will be accessible in your Photos app under the Video section.
Then you are done using the built-in photo slideshow maker on the iPhone to make your presentations.
Solution 1. Check Storage Space
To ensure your iPhone has enough storage for the slideshow, follow these steps:
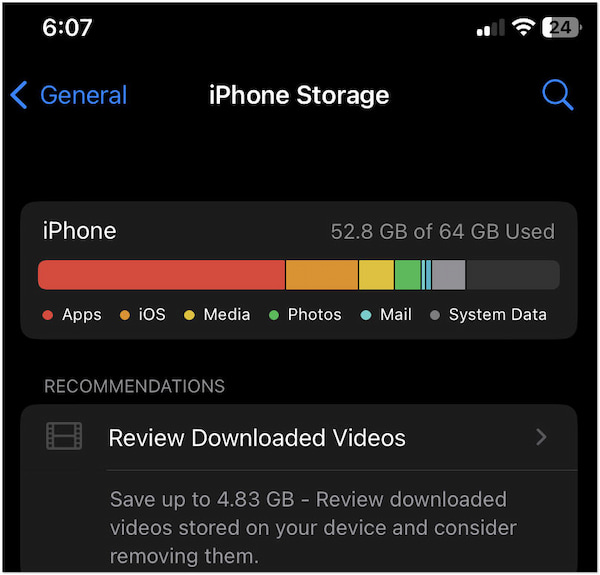
1. Open the Settings app.
2. Scroll and select General.
3. Tap iPhone Storage to check your available storage capacity.
Note: If it’s low, consider deleting unnecessary files or apps to free up space.
Solution 2. Update iOS
Keeping your iPhone’s software up-to-date is essential:
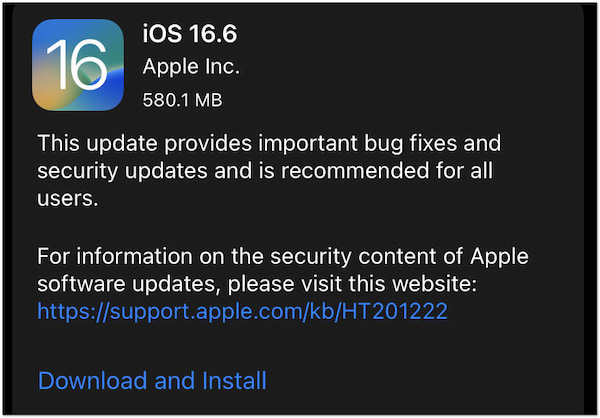
1. Head to the Settings app.
2. Scroll and look for the General option.
3. Tap the Software Update option to check for available updates.
Note: If prompted, install the latest iOS version. (iPhone gets stuck in iOS update?)
Solution 3. Try a Different Album or Set of Photos
If a specific album or set of photos is causing trouble, try this:
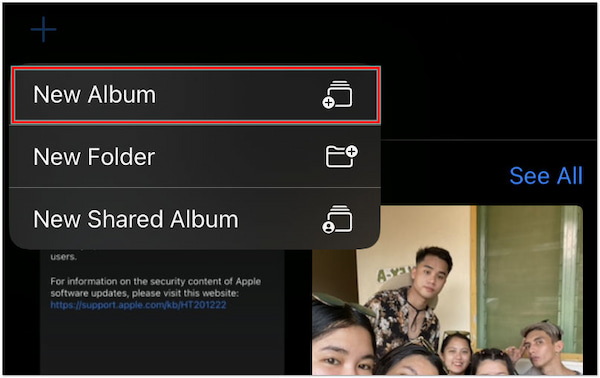
1. Create a New Album in Photos app.
2. Add the desired photos to the new album.
3. Create the slideshow using photos from the new album.
Solution 4: Clear Cache
Temporary data or cache can sometimes lead to issues:
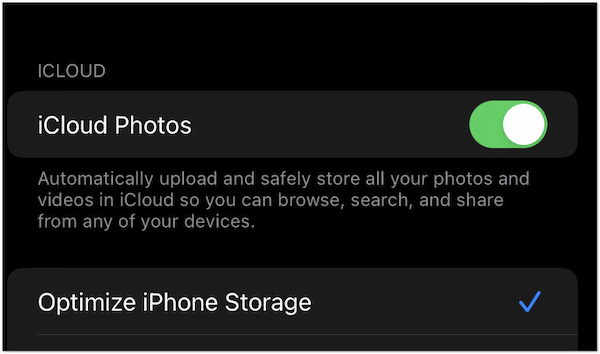
1. Navigate to the Settings app.
2. Scroll down and go through the Photos.
3. Select Optimize iPhone Storage to clear the cache.
Note: Wait a few minutes before attempting to create the slideshow again.
Solution 5: Use a Different App
If the Photos app continues to be problematic, explore other slideshow apps from the App Store or download third-party software for PC. Choose an app or software that offers advanced customization options and try creating your slideshow with one of them.
The Photos app on iPhone or iPad lets you easily share and send slideshows. You can share slideshows through various methods, including messages, email, social media, and cloud storage, making it easy to reach a wide audience. Since it’s a built-in app, you don’t need to download additional apps for sharing.
Here’s how to share a slideshow on iPhone using various methods:
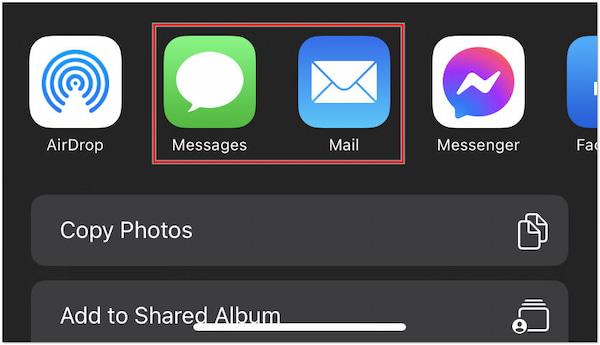
1. In the Photos app, create and start the slideshow.
2. Tap the Share button and choose Slideshow.
3. Customize settings, and tap Play. While playing, tap Share again.
4. Select Messages or Mail. Next, add recipients, compose, and send.
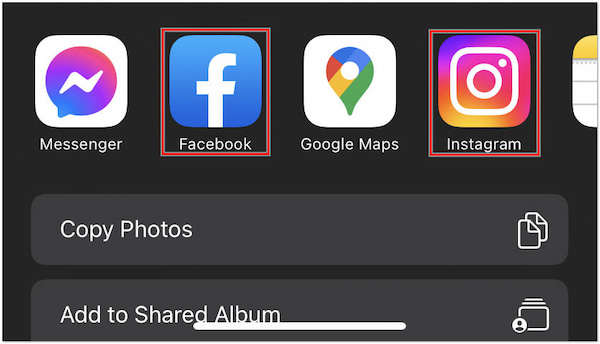
1. Start creating the slideshow in the Photos app.
2. While playing, tap Share.
3. Choose the social media app, then compose your post and share.

1. Make a slideshow using the Photos app.
2. Tap Share while the slideshow is playing.
3. Select a cloud storage app, choose a location, and save/upload.
4. Share the link via messages, email, or social media.
As mentioned, the Photos app limits your control over precise editing in making slideshows. So, if you are creating a more intricate slideshow, it would be best to use AnyMP4 Video Editor.
AnyMP4 Video Editor is an alternative to the native Photos app for creating slideshows on your computer. It’s a dedicated video editing software that offers more advanced features and customization options. With AnyMP4 Video Editor, you can import photos and videos, arrange them in your preferred order, add transitions, music, and text, and apply various effects to create engaging and personalized slideshows.
Recommendation
Here’s how to create a slideshow on iPhone’s Photos app alternative:
1. Beforehand, acquire AnyMP4 Video Editor by clicking the Free Download button below. Launch it on your computer after completing the installation process.
Secure Download
2. In the AnyMP4 Video Editor interface, click Add photo(s) and video(s) here to import the photos you want to include in your slideshow.
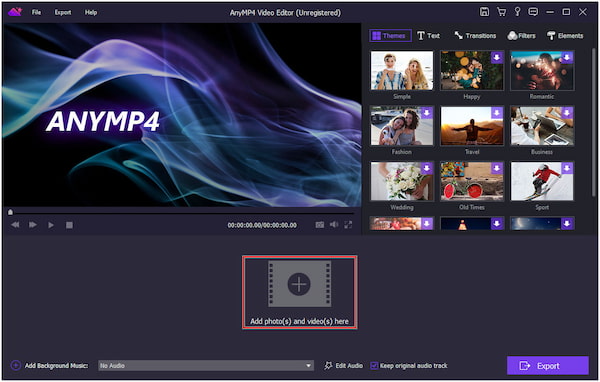
Note: After importing your photos, arrange them in the order you want them to appear in the slideshow. Drag and drop to rearrange the photos as needed.
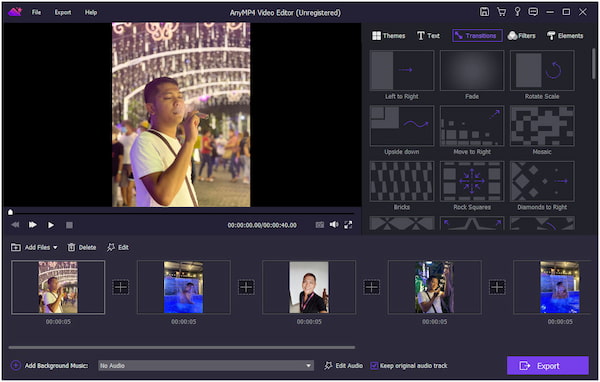
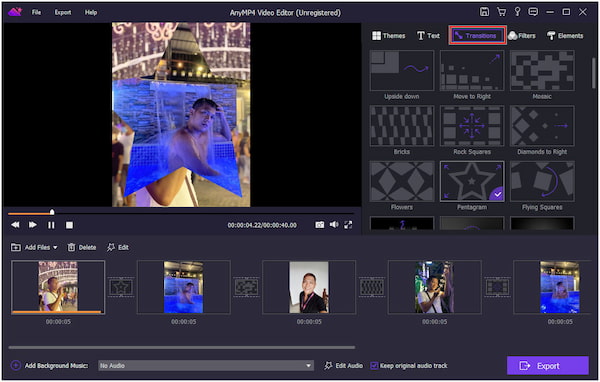
3. Navigate to the Transition tab to add transitions between your photos. Select a transition effect and drag it between the photos where you want the transition to occur.
4. Optionally, you can add background music to your slideshow. To accomplish it, click the Add Background Music to import audio from your computer.
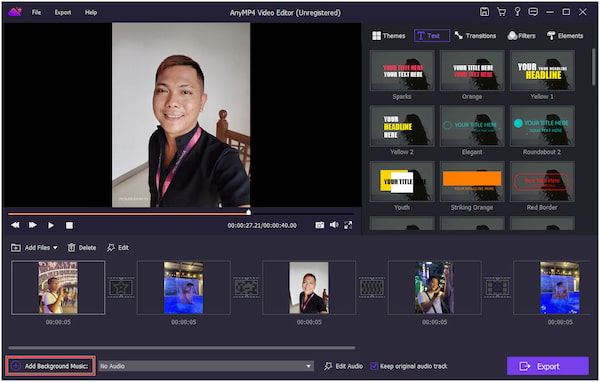
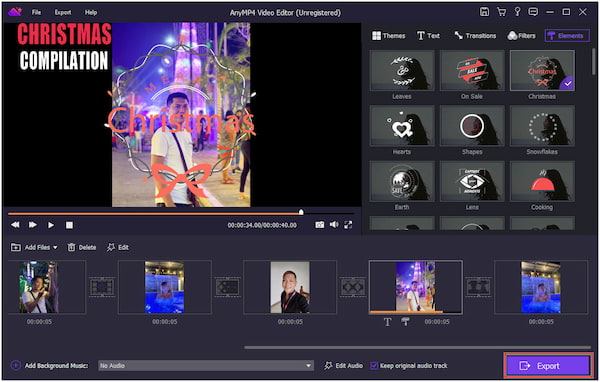
Note: You can add Themes, Text, Filters, and other Elements to your slideshow. Explore the various tabs and options available to customize your slideshow further.
5. Once you’re satisfied with your slideshow, click Export to save it. Choose a suitable format for your iPhone (e.g., MOV) and set the output settings like resolution and quality.
6. Connect your iPhone to your computer to copy the slideshow to your iOS. After transferring your creation, open the Photos app to access the slideshow you transferred.
AnyMP4 Video Editor is a robust alternative to the Photos app for creating slideshows, offering advanced editing features and customization options. It’s a great choice if you want to create more intricate and personalized slideshows with transitions, effects, and precise control over the timing of each element.
How to save a slideshow on iPhone 13?
To save a slideshow on iPhone 13, follow these steps:
1. Open the Photos app.
2. Open the slideshow you want to save.
3. Tap anywhere to reveal the slideshow controls.
4. Tap the Share button.
5. Select Save Video in the share menu.
How many photos can you use in an iPhone slideshow?
It depends on the available storage space on your device and the iOS version you’re using. In general, you can include many photos in a slideshow. Still, it’s essential to consider that a very long slideshow with many high-resolution photos may consume more storage space.
How to add music to a slideshow on iPhone?
Unfortunately, the native Photos app on iPhone does not allow adding music directly to a slideshow. However, if you’re looking for a solution that allows you to add music to your slideshows, you can consider using software like AnyMP4 Video Editor on your computer.
How long should a picture last in a slideshow?
It depends on the content and the purpose of your slideshow. A good guideline is to keep each photo on the screen for about 5-10 seconds. However, you can adjust the timing according to your preferences and the tempo of your slideshow.
What is the best software for creating slideshows on Mac?
There are several excellent software options for creating slideshows on Mac. Some popular choices include iMovie and Final Cut Pro. Also, AnyMP4 Video Editor is a good option, offering user-friendly slideshow creation and editing features.
In this How to Use iPhone Slideshow guide, you’ve discovered the versatility and accessibility of the Photos app. The iPhone’s slideshow lets you unleash your creativity, from personal photo montages to professional presentations. However, for greater customization, advanced transitions, and professional-level slideshows, consider exploring AnyMP4 Video Editor on your computer. These tools can take your slideshows to the next level, ensuring that your presentations leave a lasting impact.
 Posted by Riley Mitchell to Edit Video
More readings
 10 Slideshow Video Makers for Windows, Mac, and Online
Are you looking for a program you can use to make a slideshow video? If yes, you are lucky indeed! Check the ten Slideshow Video Creators we have listed here.
 How to Make Short Video with Music and Pictures
Are you looking for the easiest way to make a short video? If yes, click this post and learn how to make a recap video effortlessly.
 How to Make Funny Videos to Create Comedy Content
This post will teach you how to make funny videos for your audiences. We will outline ideas, techniques, and specialized tools to add humor to your content.
 3 Ways to Make a Recap Video: A Step-by-Step Guide
This post will explore three different approaches on how to make a recap video. Learn the step-by-step process to create impressive recap videos easily.