Have you ever considered using OBS to record desktop audio on a Mac? After all, OBS is a free, open-source live streaming and recording software available for Windows, macOS, and Linux. In fact, this is indeed a viable solution. Of course, it will inevitably come with some limitations. This article will introduce you to its detailed steps and some potential limitations, as well as troubleshooting and solutions for recording desktop audio on a Mac with OBS. If you are interest in it, read on!
To record desktop audio on a Mac using OBS, you need to enable desktop audio in OBS on Mac first. The specific steps for it depend on whether your macOS version is new or old.
• macOS 13 (Ventura) or newer:
OBS Studio version 30 and later has a built-in feature called macOS Audio Capture that simplifies this process. Here are the brief steps:
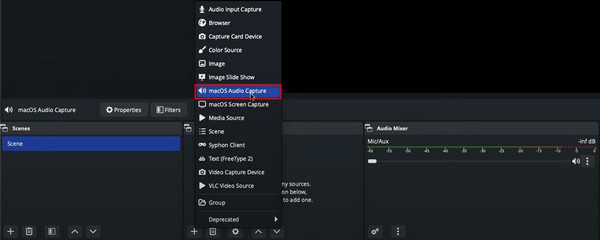
1. Go to the Sources section in OBS. Click the plus button, select macOS Audio Capture, and then click OK in the pop-up window.
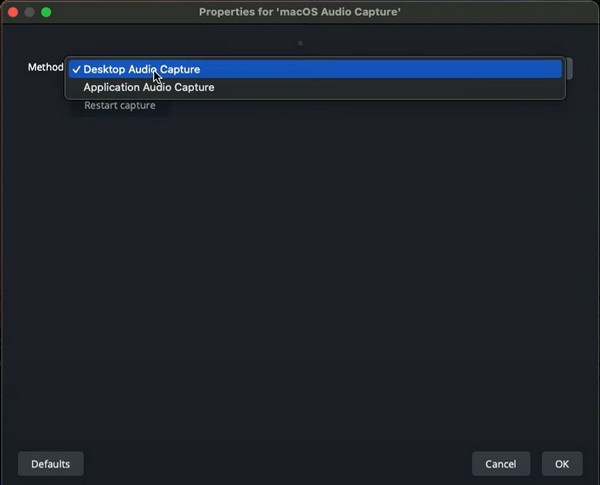
2. Then, you can capture all desktop audio by selecting the Desktop Audio Capture option. The audio will appear in your OBS audio mixer, where you can also adjust the volume.
• Older macOS versions:
For users of macOS versions prior to Ventura (13), no version of OBS can capture desktop audio on its own. In this case, an additional third-party virtual audio routing tool to record desktop audio is needed. In the next section, we will use a specific tool to show you the steps.
Since previous versions of macOS did not support direct capture of desktop audio in OBS, in this section, we will focus on the method of installing third-party audio capture software and its specific steps. We will use a software called VB-CABLE, produced by VB-Audio. It can be used to record macOS desktop audio. After installing it, you will be able to configure OBS to use this tool as an audio input source, allowing it to capture audio output from Mac applications. However, it must be set up manually and does not support audio capture for each application.
The following is the detailed step-by-step guide:
1. Download and install VB-CABLE for macOS, then run the installer. After installation, open the Audio MIDI Setup application.
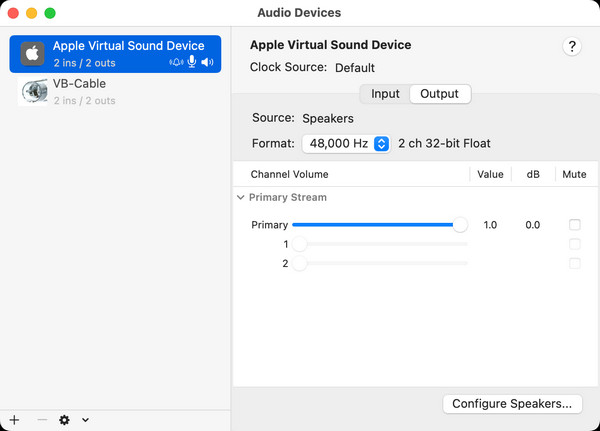
2. Click on the plus button at the lower-left of the window > Select the Create Multi-Output Device option.
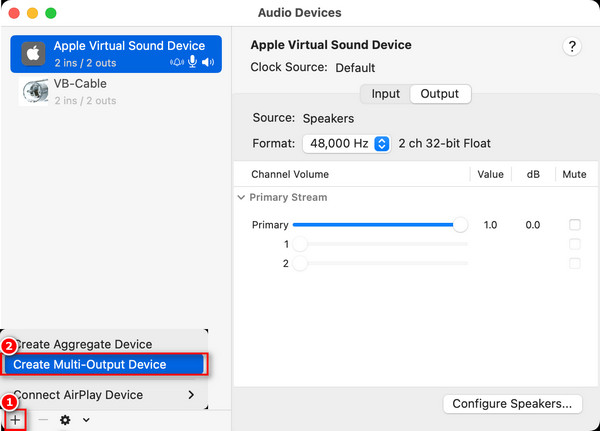
3. Uncheck VB-Cable in the list to the right and check one device from which you want to hear audio.
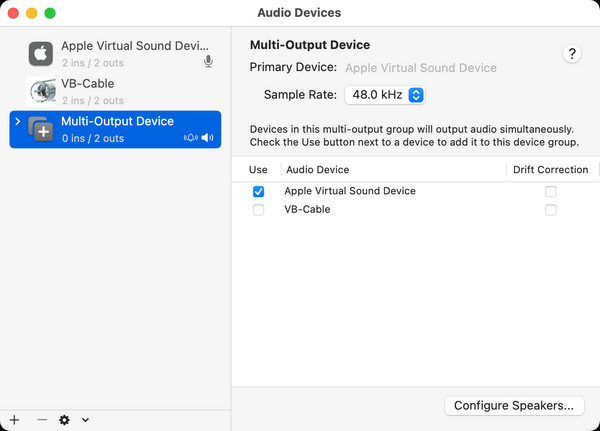
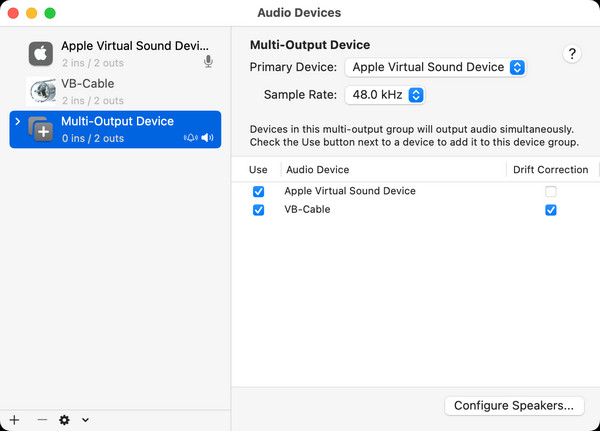
4. Re-check VB-Cable. Make sure the device you selected is set as the Master Device at the top of the window. Then, close Audio MIDI Setup.
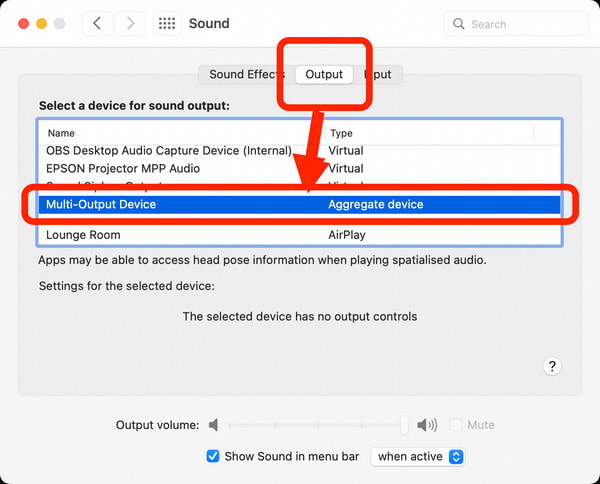
5. Open System Preferences and click on Sound. Then, click the Output section > the Multi-Output Device you created.
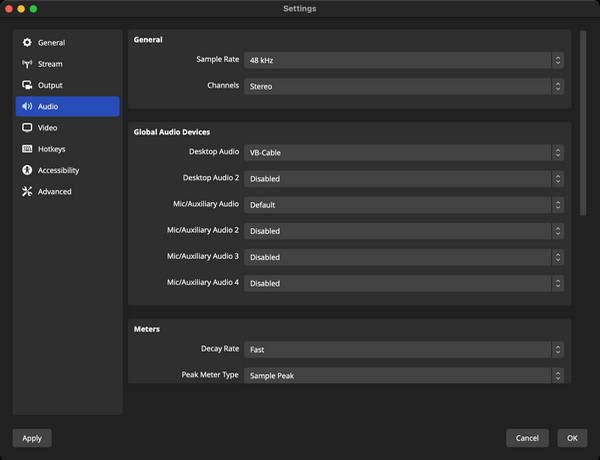
6. Open OBS Studio and go to Settings > Audio. Change the Desktop Audio device to VB-CABLE. Finally, click Start Recording to record audio on a Mac with OBS.
By following the step-by-step guide in the previous section, you can now record desktop audio on your Mac using OBS. However, recording audio on a Mac using this method may occasionally encounter issues, such as OBS not recording desktop audio, only partial audio being captured, audio being distorted, etc. Below, we will troubleshoot these issues one by one to help you.
Issue 1: OBS not recording desktop audio.
Solution: The most common cause of this issue is incorrect audio settings on your Mac. Since macOS does not have a native way for applications such as OBS to capture system audio directly, you need to use a specific method to route the sound.
Issue 2: Only partial audio is being captured.
Solution: This may occur if you have configured multiple audio sources and they are not all routed to the same location. You can try to resolve the issue by checking your OBS sources and Mac output settings.
Issue 3: Audio is being distorted.
Solution: Audio distortion can be caused by various issues, including incorrect settings and software conflicts. Check that the sample rate of OBS matches that of your Mac audio device, and try closing other audio-related programs that may conflict with OBS.
Recording audio output from a Mac using OBS is an available option, but the steps and potential issues involved can be a bit complicated for beginners, right? So, we will provide you with an easy alternative to OBS: AnyMP4 Screen Recorder. It is a recorder compatible with macOS 10.12 or later, capable of capturing any activity in audio without delay. With it, you can choose to record system audio, microphone audio, or both simultaneously. The recorded audio files can be saved in various output formats, including MP3, M4A, WMA, AAC, OPUS, FLAC, WAV, and more. Additionally, it features the task schedule, auto-stop, real-time editing capabilities, and the sound boost tool for adjusting audio effects.
Here are the steps for using it:
1. Click the download button to download and install it on your Mac computer. After installation, launch it.
Secure Download
Secure Download
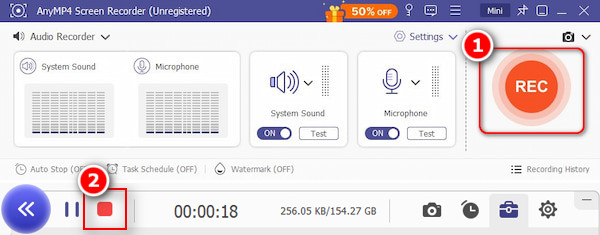
2. Select the Audio Recorder option in the upper left corner of the main interface to start recording audio.
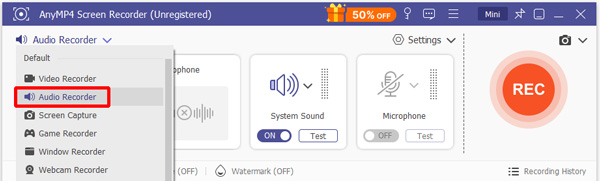
3. Prepare the desktop audio you want to record on your Mac and start playing it. Then, instantly turn on the System Sound button to record the audio from your computer.
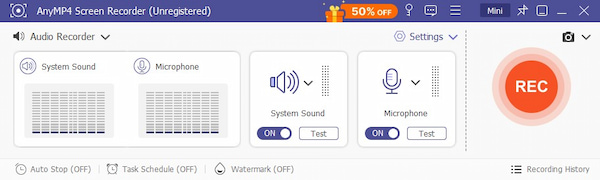
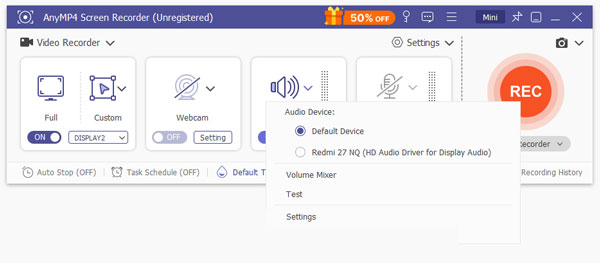
For System Sound recording, you can change the sound source, adjust the volume mixer, and check the system sound.
4. Click the REC button on the right side to begin recording. After completing the recording, click the red square button to finish recording. The recorded audio file will then be automatically saved to your computer.
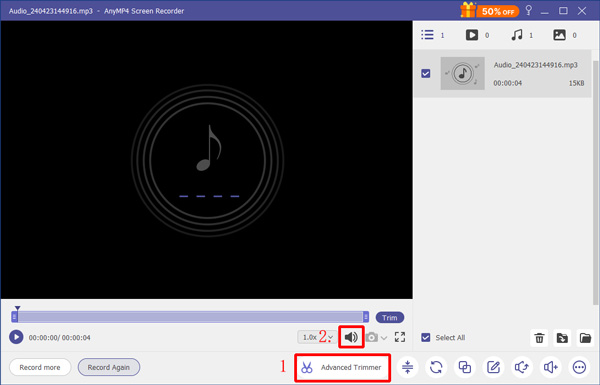
5. After the recorded audio is saved, it will automatically open a window that allows you to preview and edit the recorded audio file. Then, you can use the tools in the toolbar below to customize your edits if necessary.
OBS Studio is a great video and audio recording tool. However, the complex steps in recording desktop audio on a Mac with OBS may be a bit unfriendly for beginners (especially when you need to use additional third-party tools if your macOS version is not high enough), not to mention the issues that may occur during use. AnyMP4 Screen Recorder is the best alternative: its steps are simple, and it is compatible with macOS 10.12 and above. Click the download button below to download and try it for free now!
 Posted by Alice Thorne to Record Audio
Related Articles
 5 Verified Solutions to Fix OBS Encoder Overload Problem
In some cases, OBS says Encoding overloaded on its status bar, meaning that your computer can't encode your video. Here are five solutions to fix this issue.
 Record Audio on iPhone (Music, Call, Voice, Live Stream, Meeting…)
This is the complete tutorial to record audio on iPhone from all sources, including app, browser, microphone and more. You can secretly record audio on iPhone.
 Verified Solutions to Fix Black Screen in OBS Studio When Recording
We did an extensive survey and analyzed why the OBS black screen occurs. This article helps you fix this problem and capture your favorite gameplay.
 How to Record Mac Audio on Adobe Audition: Full Guide
Want to learn how to record with Adobe Audition? Discover how to use it to capture system and microphone audio on your Mac computer by reading this guide.