If you need to record a video tutorial on your MacBook for another device, you should export QuickTime as MP4 instead of MOV. The default output format of QuickTime screen recordings is MOV format. Can you save the recorded video as MP4 directly? How to convert a QuickTime screen recording to a MP4 format? What should be the best alternative solution? Just learn more about the best methods about exporting QuickTime files to MP4 format from the article.
No. You can save QuickTime recordings as MOV instead of MP4. When you export the screen recording, you can save as 4K with 3840×2160 resolution, 1080P with 1920×1080 resolution, 720P with 1280×720 resolution, 480P with 640x480 resolution and even an audio file with an Apple MPEG 4 audio file with an AAC audio track.
Is it possible to convert a QuickTime screen recording to MP4? When you upgrade to QuickTime Pro to edit the MOV videos and export the desired screen recording to MP4 instead of MOV.
When you recorded screen recording as MOV file format, how to convert a QuickTime screen recording to MP4? AnyMP4 Mac Video Converter Ultimate is a versatile video converter to export QuickTime MOV to MP4. Moreover, you can also edit MOV videos, enhance the quality and even personalize the video as desired.
Secure Download
Secure Download
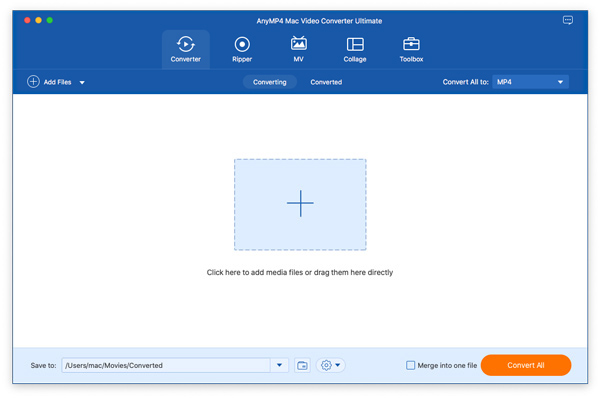
Step 1: Add video files
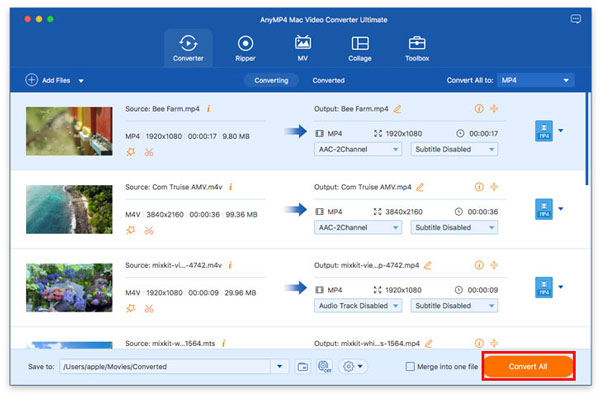
Download and install the video converter for Mac, launch the program on your MacBook. Click the Add File button to load the recorded MOV video into the program. You can also preview the imported MOV files within the built-in media player.
Step 2: Select MP4 as the output format
Click the Profile button at the right side and choose the desired MP4 files, such as the iPhone XS or Android phone. Moreover, you can also click the Settings icon to tweak the video settings and audio settings. It enables you to convert the QuickTime screen recording to MP4.

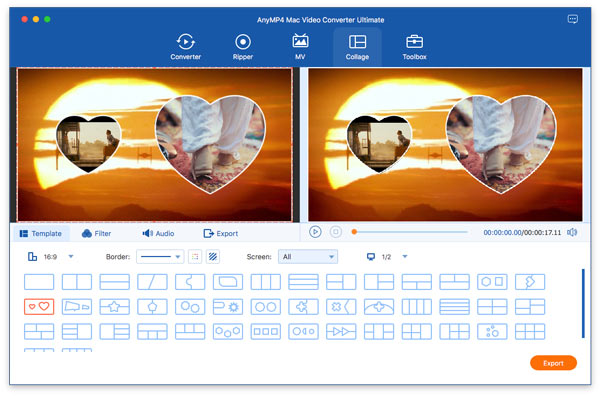
Step 3: Edit videos optionally
Moreover, you can also edit the videos, such as the trim the desired part of the recorded video, apply a 3D video effect, add the video watermark, collage videos, and even enhance the recorded videos with 4 different methods, such as upscale resolution, optimize brightness and contrast, etc.
Step 4: Export QuickTime as MP4
After that, you can choose the destination folder for the converted MP4 file. Click the Convert All button to export the QuickTime screen recording to MP4.
What should you do if you want to record your MacBook in MP4 directly? If you do not want to convert the recorded files, or need to apply more stunning effects, AnyMP4 Screen Recorder for Mac is a versatile screen recorder to export MP4 format as QuickTime alternative. It also enables you to tweak the video parameters, add annotations and manage the files.
Secure Download
Secure Download
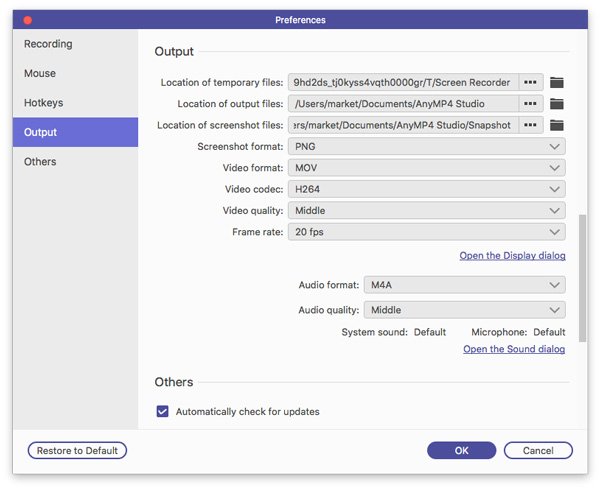
Step 1: Download and install the screen recorder, you can launch the program on your MacBook. Go to the Video Recorder menu to choose the Gear icon. After that, you can choose the output format as MP4, tweak video codec and more other settings.
Step 2: Go back to the home interface of the screen recorder. You can select the Custom option to select the recording area. It also enables you to record the audio files and webcam recording with the System Sound option and the Webcam option.
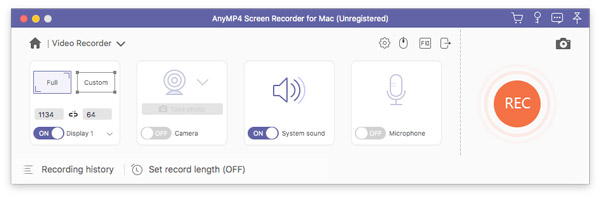
Step 3: After that, you can click the REC button to record the screen video as MP4. During the recording process, you can add annotations, watermark, arrows and line. Just click the red square button and export the recording file as MP4 on your MacBook.
1. What are The Differences between QuickTime and QuickTime Pro?
QuickTime Pro is a paid version of QuickTime, which allows you to author QuickTime videos and save the QuickTime movies downloaded from the web. Besides the basic video editing features, you can also export MP4 format with QuickTime Pro, as well as the other video formats.
2. How to Record Screen Video with QuickTime Player?
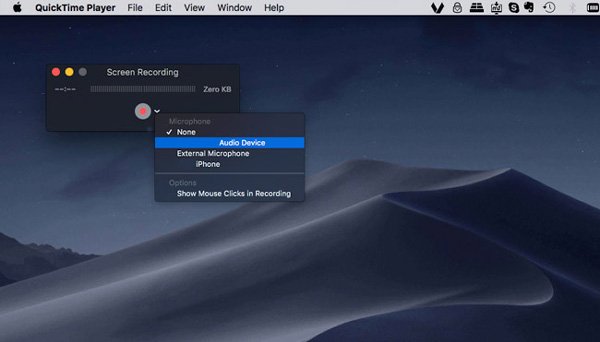
Open QuickTime application on your MacBook, you can click the Fil menu and choose the New Screen Recording option. Click the dropdown arrow next to the Record button to choose the microphone option before clicking the Record button to save screen video with QuickTime as the MOV format.
3. What are the Best Alternatives to Convert QuickTime Screen Recordings to MP4?
If you have already captured the screen recordings as MOV, what are the best alternatives to convert a QuickTime screen recording to an MP4 format? Of course, you can also use iMovie, VLC Media Player, KMPlayer and more other media players to convert the files into an MP4 format.
To export the QuickTime screen recordings to an MP4 format, you can learn more about the 2 efficient methods from the article. You can either convert the recorded MOV video to MP4 format, or choose a screen recorder to capture the screen on MacBook as MP4 directly. If you have any query about exporting QuickTime files to MP4, you can choose a desired solution from the article.
 Updated by Ted Klarso to Convert Video
Related Articles
 How to Convert QuickTime to MP3 with 5 Best Methods
Want to know how to convert QuickTime to MP3? Just follow this article and get these 5 useful methods to convert MOV to MP3.
 QuickTime Screen Recording – How to Stop QuickTime Screen Recording as Desired
When you start the QuickTime recording on your MacBook, how do you stop QuickTime screen recording? Just learn more details about the process from the article.
 Why QuickTime Screen Recording Is Not Working and How to Fix the Problem
If you are having problems recording your screen using QuickTime on a Mac, then this troubleshooting may be able to resolve your problem as soon as possible.
 Tutorial to Convert Video and DVD to AVI Format with HandBrake
If you have difficulties converting to Handbrake AVI format, you can check this tutorial and get the detailed steps. This article will show you how to convert common video and DVD disc to AVI.