Free Download100% Clear & Secure
Free Download100% Clear & Secure
Saving videos is a great way to preserve our precious memories. Yet, sometimes we wish to edit the video to look more attractive and satisfying. Therefore, we need a video editor to fix the video’s imperfections. Regardless of the edit you want on your video, Windows has a video editor you can depend on. This article will show you some basic steps to edit videos on Windows. So, if you’re ready to learn simple techniques, let’s dig deep into this post.
|
Compress |
Watermark remover |
Reduce shakes |
Remove Noise |
Split |
Trim |
Merger |
Crop |
Add text |
Color correction |
Speed controller |
Reverse |
Rotate/Flip |
Filter |
Effects |
Transition |
Add music |
Record Screen |
Remove original soundtrack |
Green screen effect |
|---|---|---|---|---|---|---|---|---|---|---|---|---|---|---|---|---|---|---|---|
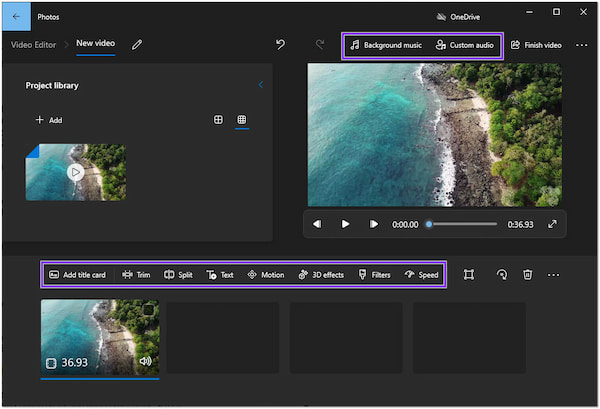
Windows 10 is integrated with a free video editor, which many people don’t know about. This built-in video editing software for Windows 10 works like a regular video editor. It comes with basic video editing tools, such as trim, split, text, motion, 3D effects, filters, etc.
Moreover, the Windows 10 built-in video editor doesn’t require users to do additional downloads and installations. Besides that, it uses a storyboard instead of a timeline, which is more beneficial for a beginner. However, not all video formats are acceptable. It only supports limited video formats, including MP4, MOV, AVI, MKV, M2TS, and WMV.
PROS
CONS
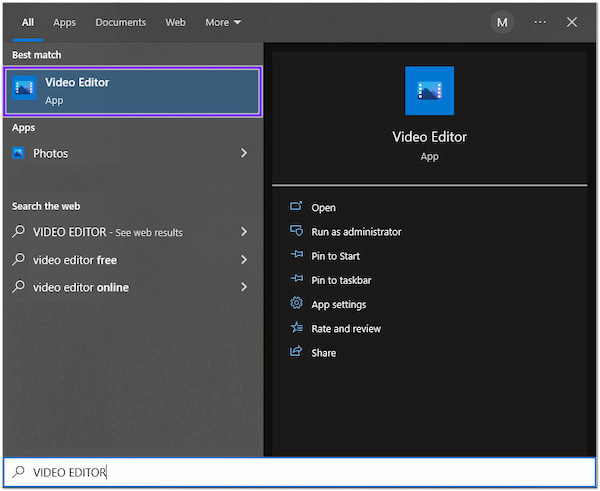
1. On your Windows 10, navigate your cursor to the Start menu. Type the Video Editor and click it afterward to open the app.
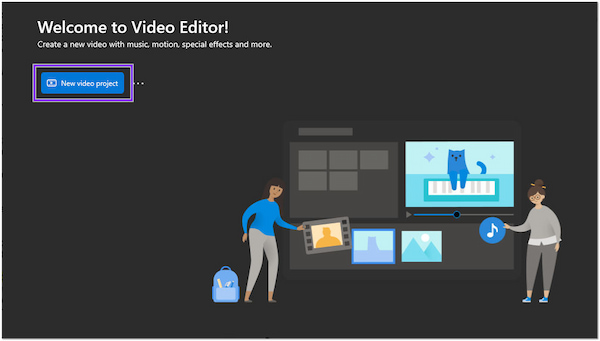
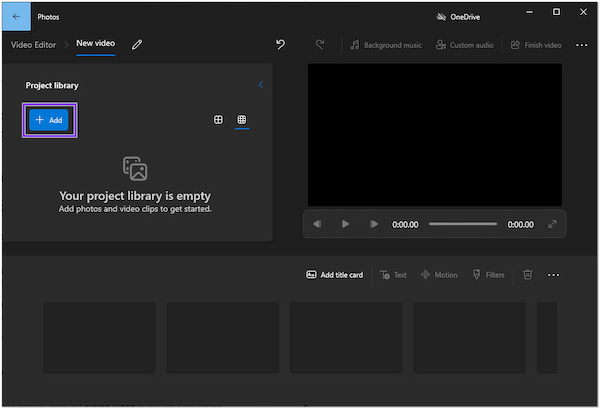
2. Once you’re in, click the New video project button. Name your video appropriately to your preference, then click the OK button.
3. Next, click the + Add button on the left side panel to add a video to the project library. Choose a video file from your computer’s local or web file.
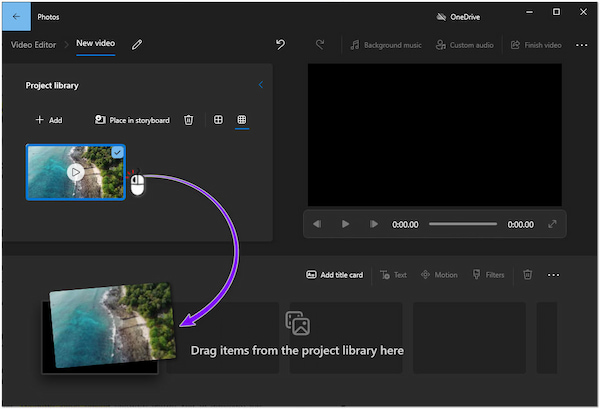
4. After loading the video file to the project library, drag the video and drop it into the Storyboard.
5. After that, you can now edit your videos according to your needs. Select a video editing tool provided by the program.
6. When you have completed your project, click the Finish video in the top right corner. Choose a video quality and click the Export button afterward to publish your video.

Besides exporting your video, Windows video editing software allows you to duplicate the project to copy the video. On the other hand, you can use the backup project option to share the project or save the progress to share between multiple devices and users. These two options are available once you click the Meatballs button on the top right corner of the screen.
For more free video editing software for Windows, you can refer to this article.
The best free video editing software for Windows 11 available is ClipChamp. This program comes with great features required for creating videos. Aside from that, it has a user-friendly drag-and-drop interface intended for beginners. The advanced video editing features of ClipChamps will help you to cut, crop, resize, edit the green screen, record the screen, etc.
Furthermore, you can save your output directly on your computer in 480p, 720p, or 1080p video quality. Otherwise, you can share your videos directly on social media or cloud drives, like YouTube, TikTok, OneDrive, etc. On top of that, if your computer is low in storage, you can save your videos in ClipChamp’s secure content backup option.
PROS
CONS
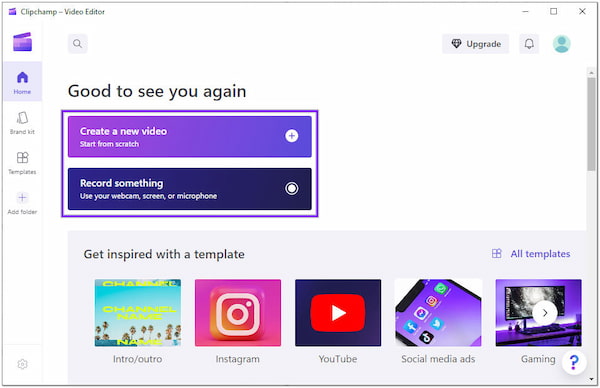
1. Open the ClipChamp on your Windows 11 and create an account for free. Click the Create a new video button from the homepage to start creating the video from scratch. Alternatively, click the Record something button to use a webcam to record a video on your screen. In this demonstration, we use Create a new video option.
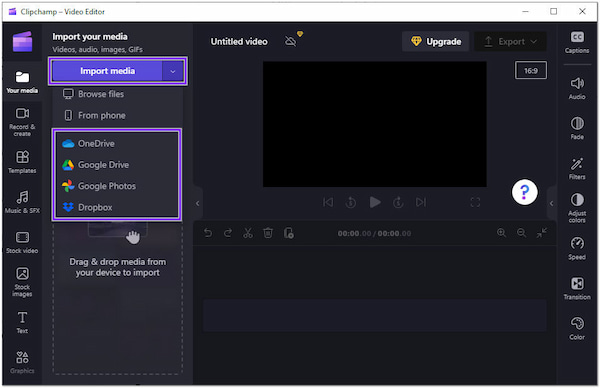
2. Afterward, it will direct you to the next window, which is the timeline. Click the Import media button on the top-left corner to add a video from a local drive. On the other hand, you can import video from ClipChamp’s integrations, such as Dropbox, Google Drive, Google Photos, or OneDrive.
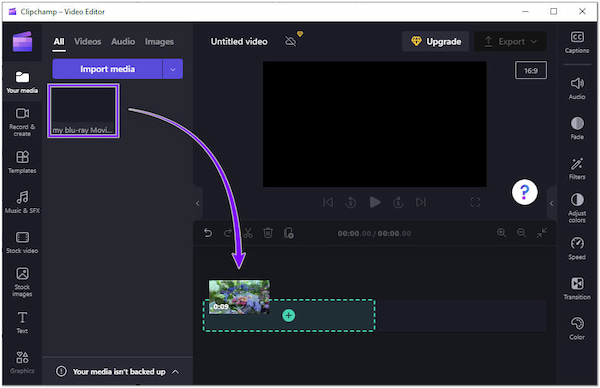
3. Next, click the + button to add the video to the timeline. Otherwise, drag the video down to the timeline and drop it.
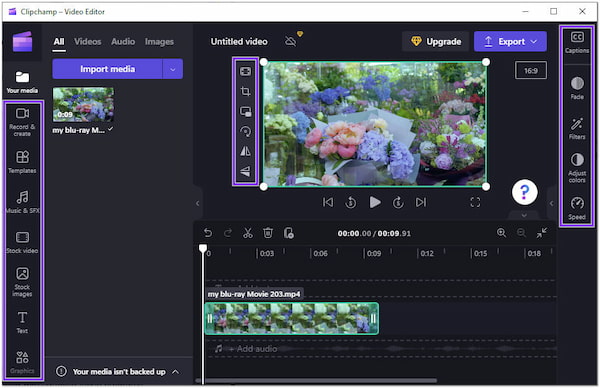
4. Once the video is added to the timeline, you can now start editing your video file. Choose a desired feature you would like to use to edit your video. All the necessary video editing tools are available on both sides of the main interface.
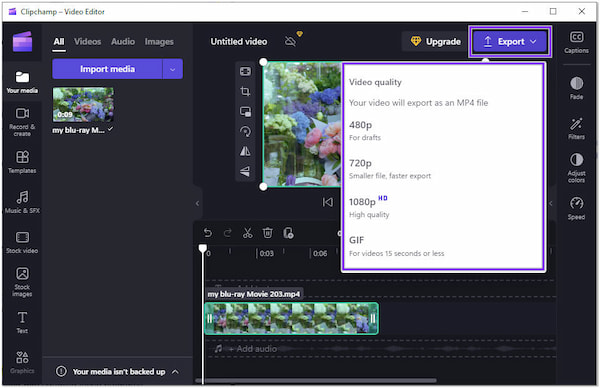
5. After editing the video, click the Export button to save the output; choose 1080p for the best video quality.
After exporting your video output, ClipChamp will allow you to save the project in various ways. You can choose Save to your computer, Generate a link to share your video with anyone, or save and share your video in various cloud storage or social media sites.
For a full review of whether ClipChamp is a good video editor, you can check it here.
Windows 10 built-in video editing software and Windows 11 ClipChamp are great for editing. You can rely upon these two programs to edit video on Windows 10 and 11, which provide stunning video output. Nonetheless, some users are not satisfied with handling these programs. Particularly they lack advanced and extensive editing features. That said, we recommend AnyMP4 Video Converter Ultimate as an alternative.
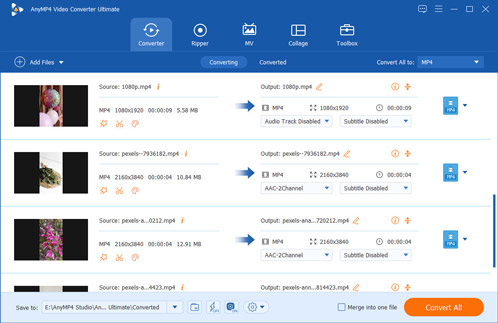
AnyMP4 Video Converter Ultimate is a feature-rich video editing solution for Windows 11/10/8/7. This program has more advanced functionalities and features than the previous Windows video editor. As for the program’s name, it works as a video converter and a professional video editor, video collage maker, MV maker, and more. You are allowed to convert your videos to other more compatible formats, like MP4, MKV, MOV, FLV, etc. In addition, it has many other video editing tools for you to trim, cut, flip, reverse, and create videos with ease.
For good measure, the program’s Toolbox is full of powerful advanced features besides basic video editing tools. You can use it to compress a video, remove a watermark from a video, reduce video shakes, remove unnecessary noise, and much more.
PROS
CONS
1. First, click the Free download button and install AnyMP4 Video Converter Ultimate on your PC. Once you are done with the installation process, launch it to take advantage of its powerful features.
Secure Download
Secure Download
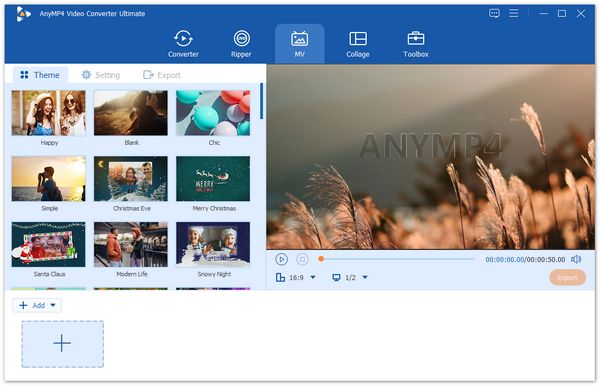
2. Choose the MV section on the top menu bar. Then, click the Add button or the plus icon to import the video files you want to edit.
Note: There are many themes, and you can choose one to apply.
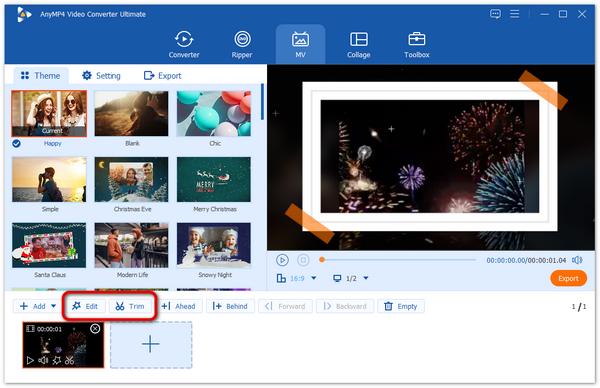
3. Click the Edit or Trim choice to enter the corresponding window to adjust video effects with ease.
4. Lastly, select Export to adjust the various output settings, and click the Start Export choice to save your videos.

Before saving the video output, you can change the file format that suits your requirement. You can choose MP4, MOV, MKV, AVI, WMV, WebM, and more. On top of that, you can save your video to the highest resolution, up to 4K.
1. Is Windows 10 built-in video editor good?
The free video editing software for Windows is fairly good at editing. They have a nice selection of editing tools for those who want to create short clip movies. Yet, it has limitations if you want more extensive video editing features.
2. Why is ClipChamp too slow in exporting files?
A video fails to export because the input file is too large for the computer you are using. ClipChamp cannot handle the processing of large files, such as 4K. However, you can use a third-party app like AnyMP4 Video Converter Ultimate to compress your video file while maintaining its original quality.
3. Is ClipChamp free?
ClipChamp is free, yet you must sign up first or create an account to access it. However, you can only use limited access to its features in the free version. If you want to use the advanced features and access the stock video, audio, and music, subscribe to its paid plan, which will cost you $11.99 monthly.
In today’s time, video is one of the most well-known ways to record every moment. We live in an era where we enjoy technological innovation, including video editing. This post mainly focused on the best free video editing software for Windows. With these video editors, we can produce impressive video output. For the best video editing experience that offers plenty of features and functionalities, AnyMP4 Video Converter Ultimate is your go-to tool.
 Posted by Angelica Liwanag to Edit Video
More readings
 How to Edit Video on Android with Top 10 Free Android Video Editors
How to Edit any favorite videos on Android? We introduced top 10 free methods to help you. Editing your video files with Best Android Video Editors now.
 Page Not Found | AnyMP4
The page you are looking for has been removed or may not exist. Please return to homepage or browse other popular AnyMP4 pages.
 Best 10 Video Editing Apps for Chromebook
Here are top 5 best video editors for Chromebook. You can edit videos, like crop, rotate, clip, add filters/effects, and change home-made videos to art.
 3 Simple Ways How to Make a Boomerang Video
How to Boomerang a video for Instagram? Check out this post to learn three easy ways to Boomerang an existing video.