How to Crop a Video File on Mac Without Losing Quality
Quick Answer:
- Photos App: Quick, reversible edits for Instagram Reels, TikTok, and other social media platforms.
- iMovie: Cinematic storytelling with dynamic zoom using the Ken Burns effect.
- AnyMP4 Video Converter Ultimate: Professional batch cropping, high-speed GPU acceleration, and lossless 4K output.
- Canva: Creative social media videos, adding templates, and AI-assisted auto-crop.
- VLC Media Player: Detailed analysis and real-time zoom for frame-specific editing.
Cropping video is a great way to remove unwanted areas from your footage. It allows your audience to focus on the most important parts of your content. It's also essential for sharing videos on social media, where recommended aspect ratios like 9:16 for TikTok or 16:9 for YouTube ensure a polished, professional look. This guide covers five easy ways to crop video on Mac, including built-in apps like Photos and iMovie, web-based tools like Canva, advanced options like VLC, and professional software AnyMP4 Video Converter Ultimate. All methods are compatible with the latest macOS versions, including Sequoia and Sonoma, ensuring smooth operation without glitches.
|
Platform |
Price |
Usability |
Crop Method |
Black Bars After Crop |
Batch Cropping |
Best When |
| Photos App |
Mac |
Free |
Easy |
Frame drag and preset ratio |
 |
|
Quick social edits |
| iMovie |
Mac |
Free |
Moderate |
Fit, Crop to Fit, and Ken Burns |
|
|
Dynamic crops |
| AnyMP4 Video Converter Ultimate |
Mac and Windows |
Free and Paid |
Easy |
Visual frame, exact pixels, preset ratios, and zoom mode |
|
 |
Professional batch processing |
| Canva |
Mac and Windows |
Free and Pro |
Moderate |
Canvas crop, preset ratios, and auto-crop |
|
|
Social media design |
| VLC Media Player |
Mac, Windows, and Linux |
Free |
Professional |
Pixel value crop and playback zoom |
|
|
Real‑time zoom |
Method 1: Use Photos App – The Fastest Way to Crop for TikTok & Reels
The Photos app is the easiest way to crop a video on a MacBook Air for free. It supports non-destructive editing, meaning all changes are reversible at any time. With one-click social presets, you can instantly switch to aspect ratios like 9:16 for TikTok or 1:1 for Instagram.
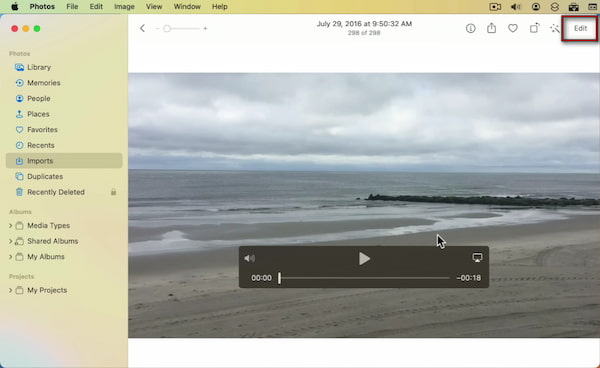
1. On the Photos app, click Edit to access the built-in video editor with multiple options. Choose the Crop tab from the top toolbar.
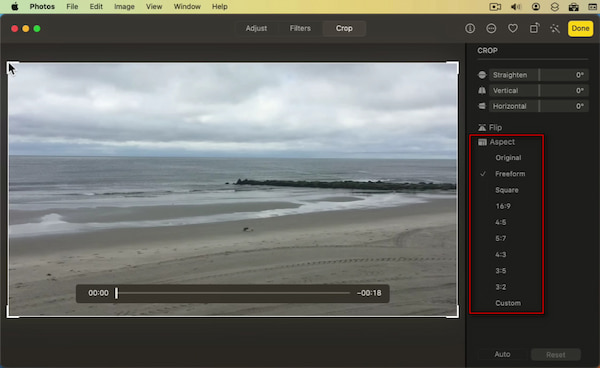
2. Once the crop frame appears, click the Aspect pulldown menu. Select preset ratios such as 9:16 (TikTok/Reels), 1:1 (Instagram feed), or 16:9 (YouTube).
Editor's Tip:
In real-world use, the Photos app stands out for its reversible edits and speed. If you frequently create short-form content, its one-click social presets can save a lot of time compared to manual cropping in other tools.
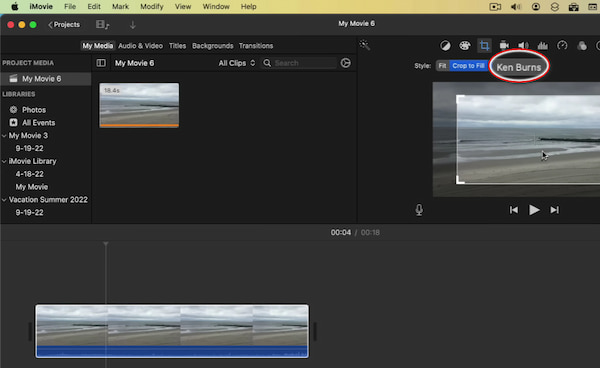
Method 2: iMovie – Master Cinematic Crops with Ken Burns Zoom Effects
iMovie is a preinstalled video editor on Mac. Unlike static tools, it offers a cinematic motion crop using the Ken Burns effect. It allows you to define a start and end frame to create smooth zoom-in animations, making it perfect for dynamic focus and storytelling with zoom.
Here's how to crop video on Mac using iMovie:
1. In the iMovie interface, click Import Media to add the video file. Drag your video to the timeline, and it will appear in the preview window.

2. Click the Cropping option, then select Ken Burns to add motion. Adjust the start and end frames to define how the zoom effect moves across your video.
Editor's Tip:
In practice, iMovie is one of the best tools for adding visual storytelling to your edits. The Ken Burns effect is useful when you are zooming into a subject or creating a dramatic reveal. However, it may take slightly longer to process than the Photos app.
Method 3: AnyMP4 Video Converter – Pro-Level Cropping Without Quality Loss
AnyMP4 Video Converter Ultimate is the best video cropper for Mac without a watermark. Unlike basic tools, it supports lossless 4K batch processing, allowing you to crop dozens or even hundreds of videos simultaneously using the Apply to All feature. With pixel-perfect accuracy and 120× faster GPU acceleration, it delivers high-quality results without compromising performance. Remarkably, it combines multiple cropping methods in a single location. You can crop using an adjustable frame, input exact pixel values, or apply preset aspect ratios like 9:16 (TikTok) and 16:9 (YouTube). It even includes AI-powered video enhancement, so you can improve quality while editing.
Why Choose AnyMP4 Video Converter Ultimate
- Adjust or keep the original aspect ratio.
- Preserve original video quality automatically.
- Crop single or multiple videos on Mac easily.
- AI-powered upscaling and video enhancement.
- Support 500+ formats, including MP4, MOV, MKV, etc.
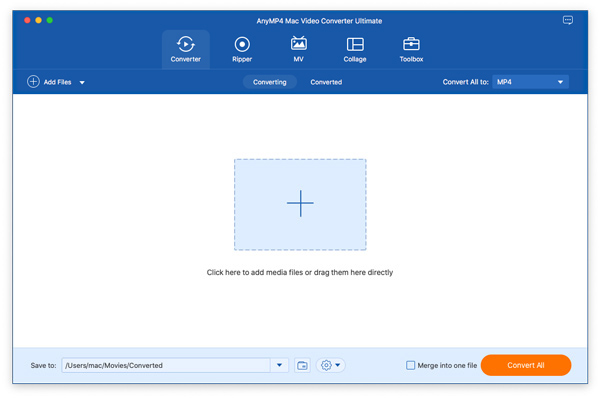
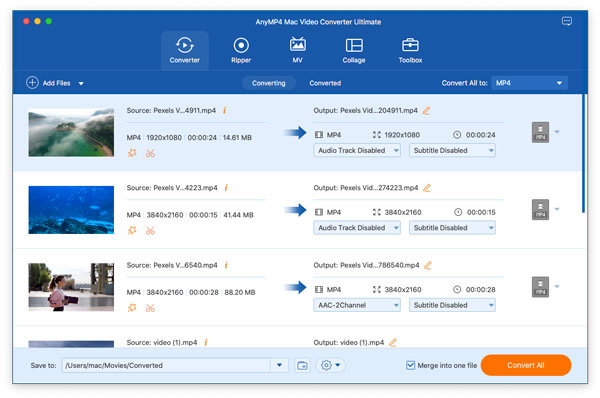
1. Upon opening AnyMP4 Video Converter Ultimate, click the + Add Files button. You can upload a single video or choose Add Folder to batch import multiple files. All imported videos will appear in the main interface.
2. Click the Edit (magic wand) button next to your video thumbnail. In the Rotate & Crop tab, you'll find several cropping methods:
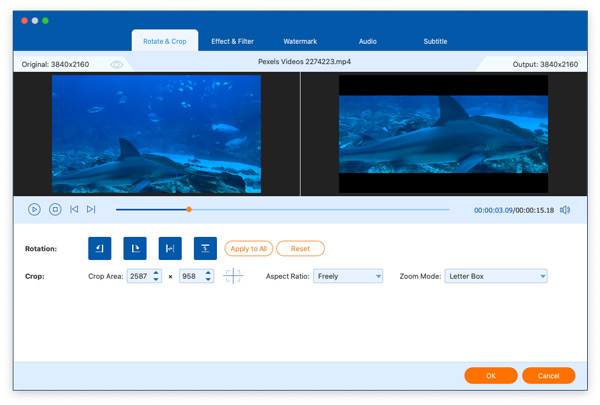
- Interactive Crop Frame: Drag and resize the frame to remove unwanted areas.
- Crop Area Values: Enter exact width and height values for pixel-perfect accuracy.
- Aspect Ratio Presets: Choose ratios like 9:16 (TikTok), 1:1 (Instagram), or 16:9 (YouTube).
- Zoom Mode: Select Letterbox, Pan & Scan, or Full to set how the video fits.
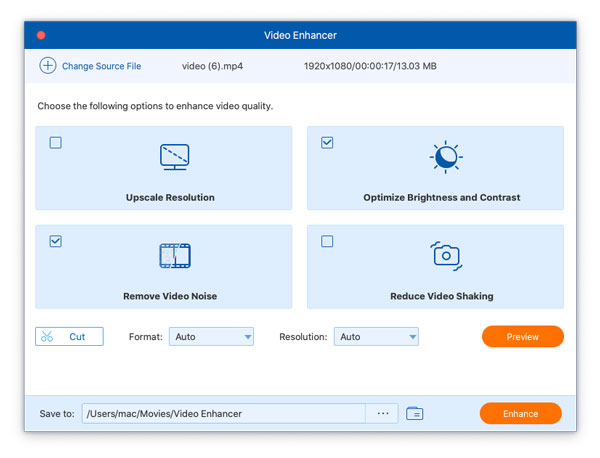
Click the Enhance Video option to access AI tools. You can upscale resolution, reduce noise, stabilize shaky footage, and optimize brightness and contrast before exporting.
3. Preview your edits in real time. Once satisfied, click OK to apply changes. Switch back to the main interface and select an output format. Then, click Convert All to export, which is perfect for efficiently batch-processing multiple files.
Editor's Tip:
In real-world testing, this tool stands out for handling large-scale projects. The Apply to All feature, combined with GPU acceleration, makes it efficient when working with dozens of clips. If you need consistent framing across multiple videos while maintaining original quality, this is easily the most reliable option available on Mac.
Method 4: Canva – Crop, Resize, and Design for TikTok & Reels in Seconds
Canva is a powerful browser-based editor that offers more than simple cropping. Its AI-powered auto-crop and Magic Resize feature can quickly adjust videos for different platforms while maintaining proper framing. Unlike traditional tools, it reconstructs the layout using social media templates, backgrounds, text, and motion graphics.
Here's how to change the aspect ratio of a video on a Mac using Canva:
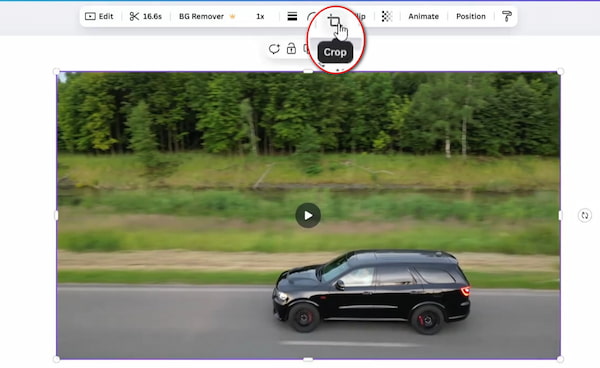
1. In Canva, click the video, then select Crop. Adjust the frame by dragging the edges or repositioning the video within the canvas. Alternatively, select an aspect ratio template.
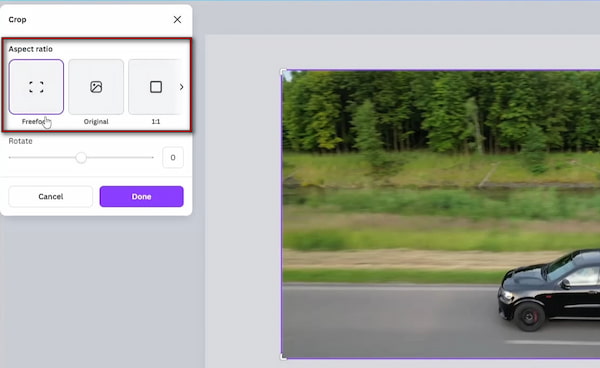
2. In addition to manually adjusting the cropping frame, you can select a preset like 1:1, 9:16, or 4:3. If cropping removes important parts, you can add background colors or blurred fills.
Editor's Tip:
Canva is perfect for creating platform-ready content quickly. In real-world use, its biggest advantage is flexibility. If a strict crop cuts out key details, you can redesign the layout rather than compromise your video.
Method 5: VLC Media Player – Advanced Pixel-Level Precision (For Power Users)
VLC Media Player is a free, cross-platform tool known for its versatility. Though it's not the most beginner-friendly option for crop and move recordings on Mac, it offers advanced pixel-level control and a unique real-time playback zoom feature. This tool makes it a powerful analysis tool for users who want to inspect details without always needing to export a new file. In some cases, VLC even allows zero-export required zooming during playback.
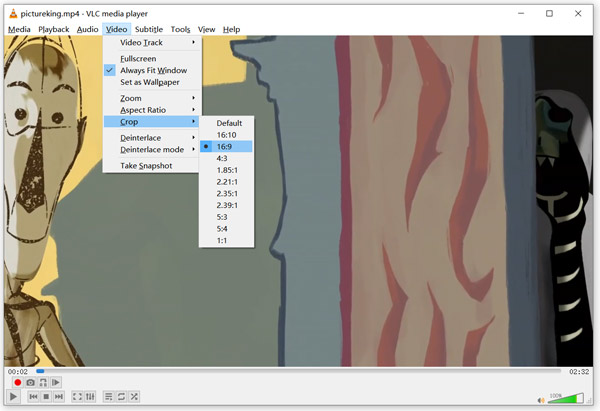
1. In VLC, click the Video menu, then select Crop. Choose a preset ratio such as 16:9, 16:10, 1:1, or 2.21:1. Selecting a preset instantly resizes the visible frame during playback.
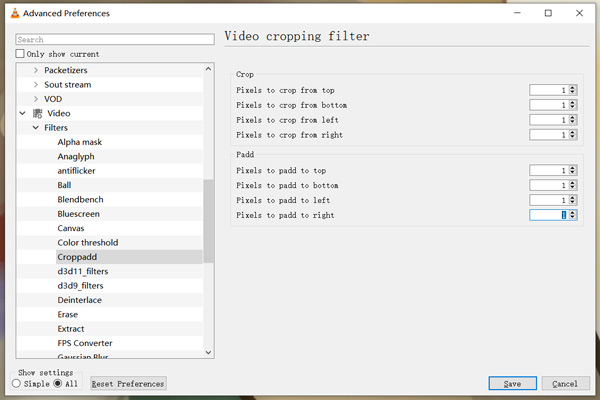
2. For more control, click Tools and select Preferences. Then select All in the bottom-left corner, then navigate to the Video option. Click Filters, select Cropadd, and enter pixel values for top, bottom, left, and right cropping.
Warning: VLC's cropping process is permanent and requires manual pixel calculation. For a more visual and beginner-friendly workflow, the Photos app is highly recommended.
Editor's Tip:
In practice, you can use VLC as an analysis tool rather than a primary editor. Its real-time playback zoom is extremely useful for inspecting fine details without having to export a file.
FAQs about Cropping Video on Mac
What is the easiest free way to crop a video on a Mac without downloading software?
The easiest free way is to use the built-in Photos app on Mac. It requires no installation and offers a simple editing interface with one-click social presets like 9:16 and 1:1. You can crop videos quickly, preview changes in real time, and undo edits.
How do I crop a video in the Mac Photos app for Instagram Reels?
Open your video in the Photos app, tap Edit, then tap Crop. Select the 9:16 aspect ratio, which is ideal for Instagram Reels. The app ensures your video is properly formatted for vertical viewing without distortion.
Why can't I find the crop tool in QuickTime Player?
QuickTime Player does not include a crop feature in modern macOS versions. It only supports basic editing, such as trimming and splitting clips. The older QuickTime Pro version that allowed advanced editing is no longer supported.
What's the best video cropper for Mac that doesn't add a watermark?
AnyMP4 Video Converter Ultimate is one of the best options because it offers watermark-free exports, high-quality output, and batch processing. It also supports precise cropping with manual pixel input and GPU acceleration.
Can you crop a video on a Mac without iMovie?
Yes. If you do not like iMovie, the preinstalled Photos app is also available on Mac to crop a video. Moreover, you can use third-party photo cropping software to edit your videos.
How do I crop a QuickTime screen recording?
Although QuickTime Player can record the screen as a video, it cannot crop it. After recording, you can open the recording in iMovie and easily crop it.
Can you crop a video on a MacBook/MacBook Pro/MacBook Air?
Yes. You can crop your video using the default tools like iMovie, QuickTime, and Photos. Or you can download third-party software to help you on your Mac.
Conclusion
Now you know that it's not difficult to crop a video on a Mac. Whether you prefer built-in tools or more advanced software. The Photos app is perfect for quick edits with one-click social presets, while iMovie adds cinematic zoom effects for storytelling. Canva offers flexible, template-based editing with AI-powered resizing. VLC Media Player suits advanced users needing precise control or playback zoom. For the best overall performance, AnyMP4 Video Converter Ultimate is the top choice. It enables lossless 4K batch processing, precise cropping, and fast performance with GPU acceleration.