Have you ever found a video on a website that you wanted to keep? But you didn’t want to go through the hassle of downloading it? How to record a video without downloading it is a common question. The good thing is that multiple ways exist to accomplish it across different devices. In this post, we will show you various approaches to record video from websites. Whether you’re using Windows 10/11, Mac, or mobile devices, an option is available. This makes it easier to keep the videos you love and access them at all times.

Can I record a video from a website? Yes!
Recording a video from a website is possible, and you can do it on any device. Regardless of the device you are using, there is a screen recorder available. This includes third-party software, Chrome extensions, and built-in recording tools. You can use these to capture videos playing on a website effortlessly. However, you should be aware that some websites restrict screen recording. So, use the tools for personal use and ensure you have permission.
AnyMP4 Screen Recorder is a one-stop screen recording software to take a video from a website. It lets you capture website videos in your preferred area, size, and resolution. This software can record on-screen activities without limit, allowing you to record the video completely. Plus, you can include multiple inputs in your recordings, including system sound and microphone. The best part? You can save the recorded website video in various formats, such as MP4, MOV, MKV, and more.
Here’s how to record video from a website on Windows:
1.Get started by downloading the AnyMP4 Screen Recorder for free. Install the website video recorder and wait for the installation process to complete. Once the installation finishes, launch AnYMP4 Screen Recorder on your computer right away.
Secure Download
Secure Download
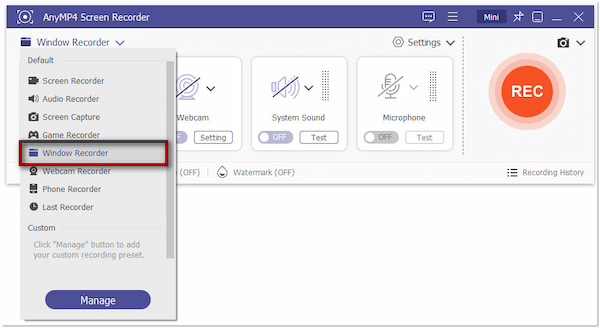
2.By default, you will be taken in the Screen Recorder mode upon opening the software. Although it can capture video from the website, there is a specific mode for recording website video. Click the dropdown arrow and select the Window Recorder mode. This mode is optimized for recording specific window tabs; it focuses only on the specified window.
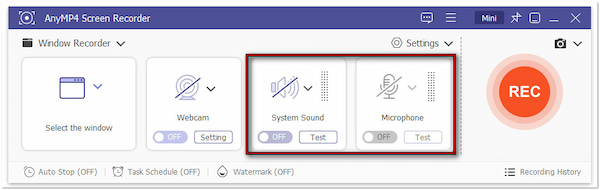
Pro Tip: Website video isn’t complete without a sound. So, toggle on the System Sound button to capture the audio from the website video. You can also include narration or commentary by turning on the Microphone if needed.
3.In the Select the Window tab, locate the website video window you want to record. Once you have selected the window, it will record the entire window. Still, you can adjust the recording area by dragging the border’s edges in the preview.
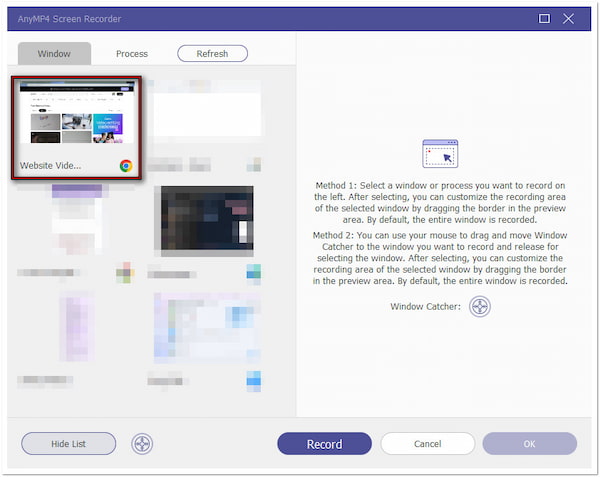
On the other hand, use your mouse and move the Window Catcher to the website window you want to record. After placing the Window Catcher, release the mouse to select the window.
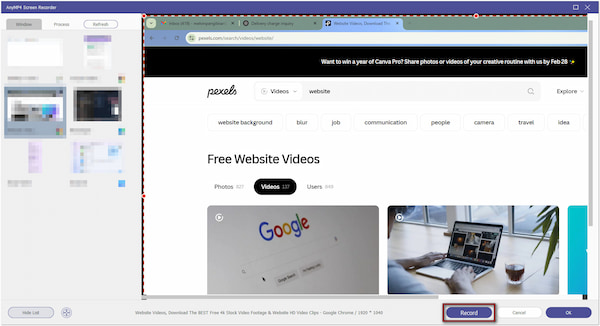
4.After configuring the recording settings, click the Record button. The selected website video window will appear, and the three-second countdown will begin. During recording, you will notice the floating bar somewhere on your screen. This bar comes with several tools that you can use to:
5.Upon completing the website video, click the Red Square button in the floating bar. This will end the website video recording, which will be saved locally. You will be headed to the preview window afterward, where you can rewatch the recording and make edits.
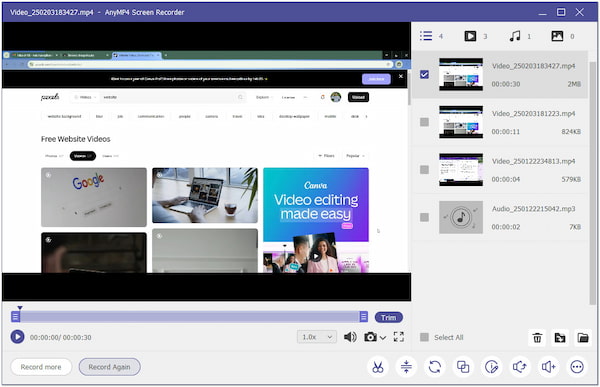
That’s how to record a video from a website on Windows! AnyMP4 Screen Recorder is not just about screen recording. It also includes editing tools to edit and enhance your recorded website video. Some tools available are Advanced Trimmer, Video Compressor, Sound Booster, File Merger, Media Converter, etc.
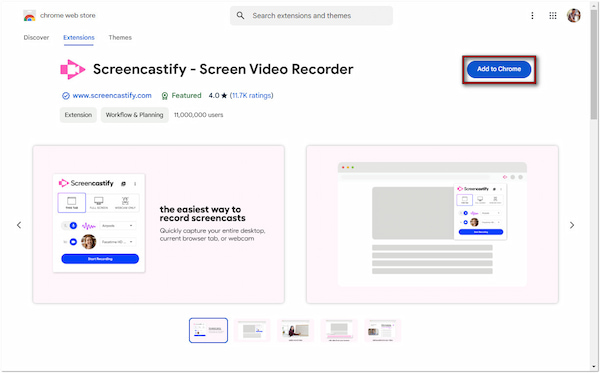
Screencastify - Video Screen Recorder is a Chrome screen recorder extension that captures and shares videos. It allows you to capture video from a website right from your browser. Aside from a browser tab, it can also record your desktop and webcam.
1.Head to the Chrome Web Store, search for Screencastify, and click Add to Chrome. In the popup notification, click Add Extension to install the extension. Then, click the Screencastify logo on the address bar to open it afterward.
2.Upon opening the extension, it will present you with different recording options:
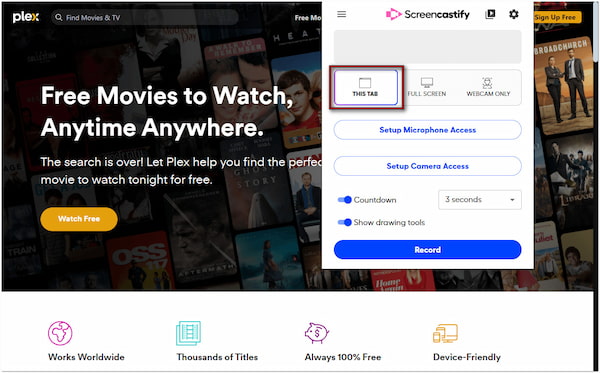
Since you’re recording a website video, select the This Tab option. Configure other settings for your recording, such as countdown length and activation of drawing tools if needed.
3.Click blue Record to start recording your selected website tab. Enable the countdown timer; you’ll see it before the recording begins. After you have captured what you need, click Stop in the toolbar to end the recording.

Screencastify provides a convenient solution to record video from streaming websites. However, the free version only provides 10 free credits, which requires an upgrade afterward.
iMovie is known for editing multimedia files but can also record video from the web. You can record video directly on iMovie using the built-in FaceTime HD camera. This is useful for making reaction videos for your website video recordings.
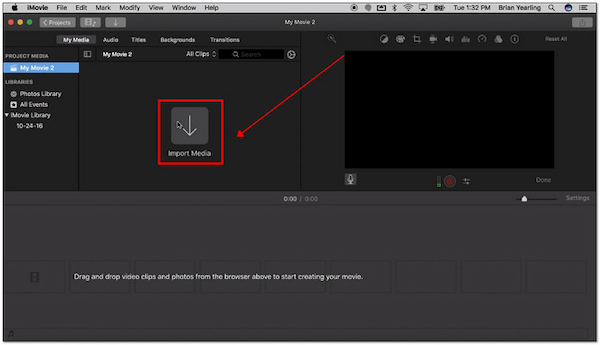
1.In the iMovie app, click the Import button in the toolbar to access the Import window. If a photo app like Image Capture or Photos opens instead, close it to continue with iMovie. Proceed to the Camera section of the Import window and select the built-in camera.
Note: A live video preview will appear, allowing you to see what will be recorded.
2.Before recording, specify where you should store your video:
3.Click the Record button below the live video image to start the recording. It will create a new clip for each recording. Repeat the same process to capture as many videos as you like. Once done, click Record again to end the recording.

Although you can record video on a Mac, it doesn’t include sound. Not to mention, Mac does not allow internal audio recording for safety consideration purposes.
iPhone and Android devices are integrated with built-in recording tools, allowing you to record videos from any website. You can easily extract video from the website in just a few taps. As the best free screen recorder, it requires no additional application download.
For iPhone:
1.Swipe down from the upper-right of your display to access the Control Center. Tap the Gray Record button and wait for the three-second countdown. Close the Control Center and move to the website with the video you want to record.
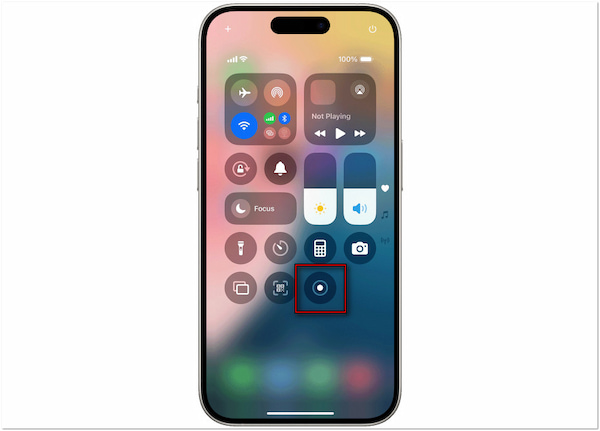
2.After the countdown, the red recording indicator will appear at the top of your display. This indicates that the website video is being recorded. Once you’ve recorded all the content, tap the Stop button to end the recording.

For Android:
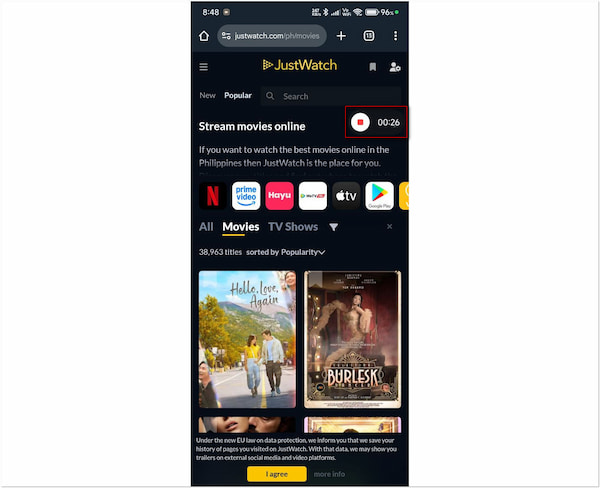
1.Swipe down from the top of your display to access the Quick Settings. Tap the Screen Recorder button to activate the floating bar on your display. Once the tool is activated, navigate to the website video you want to capture.
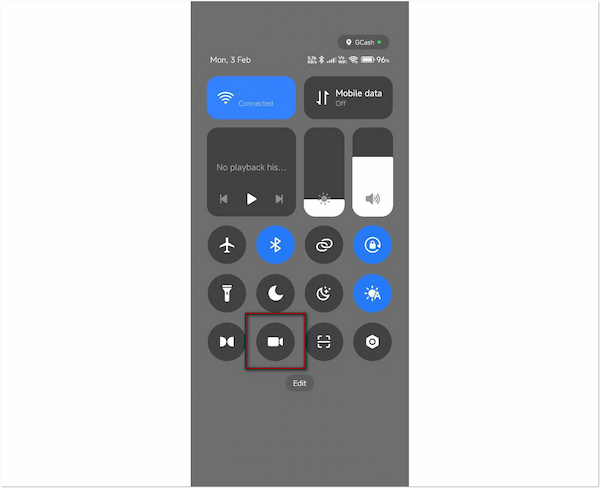
2.Some Android devices usually have a countdown timer, giving you time to prepare. An indicator will pop up once the website video recording begins, confirming the video recording process. Once the video has been recorded, tap the indicator to end the recording.
That’s how to capture video from websites on iPhone and Android devices! If you’re an iPhone user, your device should be iOS 11. Meanwhile, you should know that not all Android devices have a built-in recording tool, so check your phone features first.
Now, you have the knowledge to record video from websites. Recording a video that you found on a website is a fun and straightforward process. Which tool you found easy to use? If you’re exploring AnyMP4 Screen Recorder, you made the right choice. With its flexible recording modes, built-in tools, and high-quality output, you can easily record website videos. Grab yours now and record the website video you love.
 Posted by Riley Mitchell to Record Video
Related Articles
 4 Approaches to Record Xbox One Gameplay with The Best Quality
It's easier than ever to share your gameplay with the world. Here's how to record gameplay on Xbox One and Xbox 360 with a variety of different options.
 A Comprehensive Guide: How to Record Video on Mac
Learn how to record video on Mac computer using third-party and built-in tools. Capture screen activities, record yourself, and create engaging videos.
 3 Proven Ways to Record FaceTime on Mac and iPhone XR/XS/X or Earlier
In this article we show you how to record a FaceTime call on your iPhone, iPad or Mac. With our guide, you can save important video conversations simply.
 Full Guide on How to Record and Download Zoom Meeting as Attendee
Want to save some important Zoom meeting videos? In this post, we will show you full solutions to record Zoom meeting videos on Windows/Mac/iOS/Android.