Want to record video meeting or call on Lifesize?
Lifesize Record and Share provides you with a simple way to record and share video calls, conferences, online meeting, conversations, events, and more. Lifesize has a built-in recorder to help you capture various activities on its platform.
This post gives you a detailed guide of how to use Lifesize Record and Share. Moreover, we like to introduce you with a Lifesize recorder to better capture video meetings, calls and other activities on Lifesize.
Lifesize Record and Share is a default cloud-based recording feature for users to capture, share, or auto-publish Lifesize meetings. It enables you to record and share important meetings, conferences, conversations, calls, events, ideas and even milestones instantly. Lifesize Record and Share feature offers a simple way to quickly share contents with everyone in the Lifesize conversation.
Lifesize comes with various solutions including Click-to-Call, PTSN audio conferencing, conference analytics, screen sharing, video recording, and more. You can use the Lifesize Record and Share to easily capture online meetings on Lifesize.
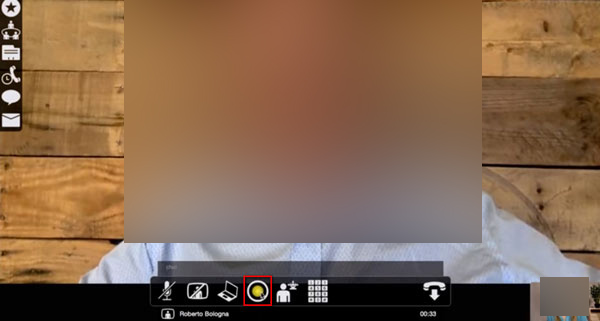
Step 1: When you are having a meeting in Lifesize, you can see a circular Record button appears on the central part of the bottom window. If you are not the owner of the meeting, you need to enter a recording key to get the permission and start the Lifesize recording.
Step 2. When the Lifesize meeting is over, or you want to stop the recording, you can click on the Stop recording button. After that, the recorded Lifesize video will be automatically saved to your account.
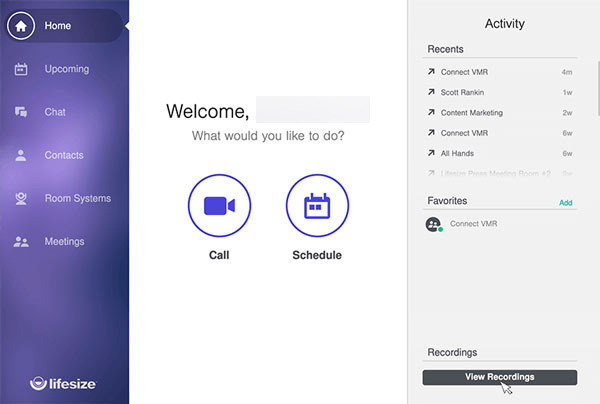
To check and view your captured Lifesize meetings, you can back to the home page, and then choose View Recordings. My Recordings will display all the recordings you own. You can also go to Recordings Feed to check the recordings you own or that have been shared with you.
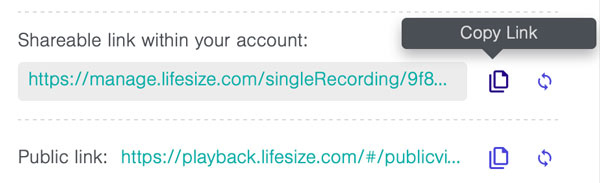
If you want to share a Lifesize recording file, you can select it and then click the Share icon in the bottom right corner. Lifesize will generate a recording link for you to copy and share.
Lifesize Record and Share can be used on laptops, tablets, smart phones and Lifesize Icon conference room systems. It is available across all of the devices.
If you are not the owner of the meeting, or you prefer to capture the Lifesize meeting secretly, you can rely on the Screen Recorder. It is able to capture high quality Lifesize videos even up to 4K. This Lifesize recorder allows you to capture from webcam, system audio and microphone. Moreover, you are allowed to directly view, edit and share the captured Lifesize meetings.
Secure Download
Secure Download
Step 1: Free download, install and run this Lifesize recorder on your computer. Choose the Video Recorder feature to capture your Lifesize meeting or video call.
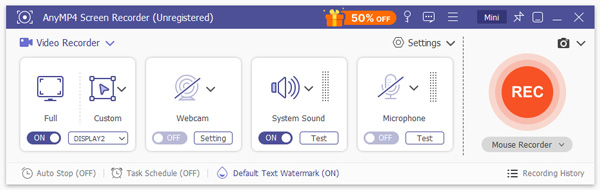
Step 2: Adjust the video recording area based on the Lifesize window. Turn on Webcam and choose to capture sound from System Sound, Microphone or both. It has a noise suppression feature to automatically remove the background noise for you.
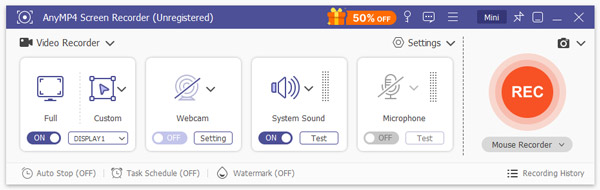
Step 3: To record on Lifesize, you can simply click on the REC button. This meeting recorder app has a Real-time Drawing feature that enables you to directly add text, line, arrow and specific labels while the recording.
Step 4: After the Lifesize recording, you can view the captured video and edit it. Then click Save button to save it in MP4 or another format you need.
Question 1. Who is the Lifesize recording owner?
The Lifesize meeting owner is the recording owner regardless of who starts the recording. For the point-to-point call, the person who starts the recording is the recording owner.
Question 2. What format does Lifesize recording saved in?
Lifesize will capture meeting and save the recording file in MPEG-4 format. When you download a Lifesize recording, you will get an MP4 file. Or you can use an MP4 converter to extract MP3 from MP4 to save the audio recording only.
Question 3. How to invite attendees to a meeting on Lifesize?
You can go to the Meetings page, choose or hover over the meeting room, and then select how to send the invitation. Here you can also invite attendees through G Suite, Google Calendar and Microsoft Outlook.
You can learn more useful information about Lifesize Record and Share from this post. You can learn how to record, view, and share your recorded Lifesize meetings with ease.
 Posted by Riley Mitchell to Record Audio, Record Video
Related Articles
 Full Guide on How to Record and Download Zoom Meeting as Attendee
Want to save some important Zoom meeting videos? In this post, we will show you full solutions to record Zoom meeting videos on Windows/Mac/iOS/Android.
 How to Join RingCentral Meeting Through an App or a Web Browser
The development of global network communication makes RingCentral meetings happen a lot. You can learn how to join RingCentral meetings on App and web and how to solve the problems you met in the joining process.
 Top 11 Webcam Recorders Available to Windows, Mac and Linux
Here is a complete list of top 11 best webcam recording programs available for Windows 10/8/8.1/7, Mac OS 12/11/X and Linux users to capture everything in front your webcam.
 [Solved] How to Compress Large Videos for Email on Windows/Mac
When you want to send large videos through email, you may encounter the error saying "The file exceeds the 25MB attachment limit. Sorry." Here, you can learn 3 easy ways to compress videos for email.