Free Download100% Clear & Secure
Free Download100% Clear & Secure
Quick Summary:
You’re watching a hilarious video, and there’s that one perfect three-second moment that deserves to be on loop forever. Whether it’s a cat falling off a sofa or a cinematic reaction shot, GIFs are the universal language of the internet. They are smaller than videos, play automatically, and express emotions better than words ever could.
But if you’ve ever tried to convert a GIF from video files, you might have run into some annoying roadblocks. Maybe the file was too big, the quality looked like a blurry potato, or the watermark was covering the best part of the frame. In this guide, I’m going to show you exactly how to create a GIF from a video using methods I actually use, from the best free web-based options to some powerhouse paid software for when you need that professional, crisp look.
If you just need to convert a GIF out of video clips for a quick Slack message or a tweet, you don’t need to open your wallet. These three tools are my go-to emergency converters when I'm in a rush and working on a laptop that isn't mine.
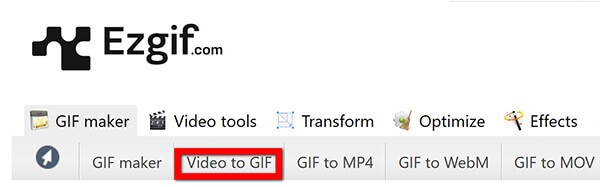
Ezgif has been around forever, and for a good reason. It isn’t the prettiest website you’ll ever visit—it looks a bit like the internet, but it is incredibly powerful. It’s an online toolset that allows you to do more than just convert video to GIF; you can crop, resize, optimize, and even add text. What I love most about it is the granular control it gives you over the frame rate and the dithering (which helps convert colors look smoother). It supports almost every video format, so you can convert a video to a GIF without worrying about compatibility issues. I find myself returning to this tool specifically for its Optimization features, which are rare to find for free.
1. Upload Your Video Source
Navigate to the Video to GIF tab on the Ezgif website. Click Choose File and select your video from your local drive.
Ezgif has a 100MB limit. If your video is large, use a video trimmer first; otherwise, you'll just get an Upload Error after waiting 5 minutes.
2. Initialize the Upload
Hit the Upload video! button. You’ll need to wait a moment while the blue bar moves across the screen.
Don't refresh the page! It looks like it’s frozen sometimes, but it’s just processing your data on their server.
3. Set Your Start and End Points
Once the video appears, you can select the start and end time to trim video in Ezgif. I suggest keeping it under 5 seconds for the best results.
Use the Current Position buttons under the video player to get pixel-perfect timing. It's much easier than typing in the seconds manually.
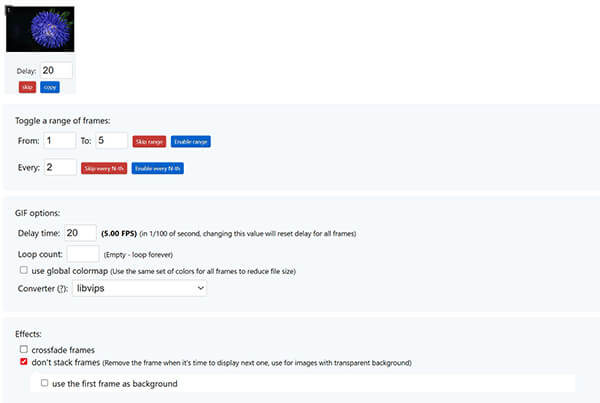
Configure output settings: Choose your Size and Frame rate (FPS). While 10 FPS is the default, 20 FPS is usually the sweet spot for smooth motion.
If you choose 25 FPS, the file size explodes. Stick to 20 FPS unless you absolutely need cinematic smoothness.
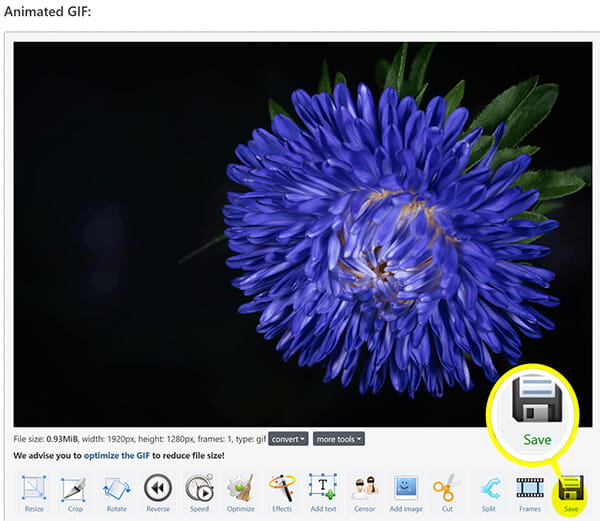
4. Convert and Save GIF
Click Convert to GIF! and then scroll down to see your creation in the Output GIF box. If it looks good, hit the Save (floppy disk) icon.
If you click Save before the image fully renders, you might download a corrupted file. Wait for the Estimated size to appear first.
Personal Experience Summary:
In my experience, Ezgif is the king of customization for free users. I’ve used it hundreds of times to generate a GIF from a video, and I've had to manually adjust the file size to fit under Discord’s upload limits. The best like for me is the lack of a watermark—it’s totally clean. However, the biggest limitations are upload speed and the 100MB file limit. If your internet is slow or your video is a 4K monster, this might feel a bit sluggish and frustrating.
GIPHY is more than just a search engine for memes; it has a very slick GIF converter tool. If you want to create a GIF from a video that is destined for Instagram or Twitter, this is the place to be. It is designed for creators who want to add flair, think stickers, captions, and filters. It’s very intuitive, and if you’ve ever used a basic photo editor on your phone, you’ll feel right at home here. It’s the fastest way to covert an animated GIF to a video if you want to join a trending conversation.
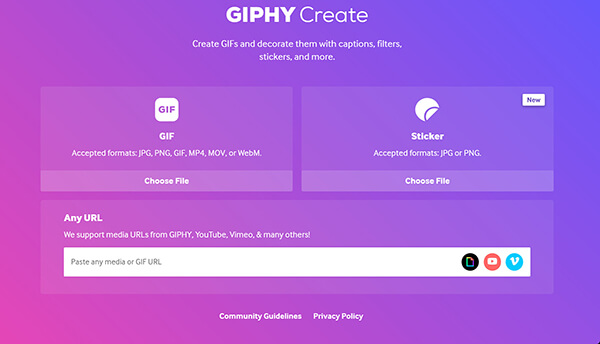
1. Access the GIF Converter
Go to GIPHY.com and click the Create button in the top right corner. You'll need to log in to access all the features.
You can actually just paste a YouTube link here. You don't even need the video file on your computer!
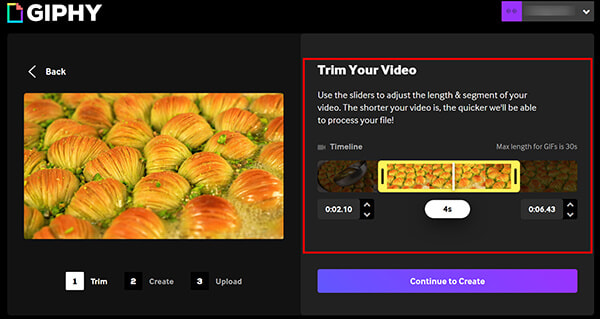
2. Import and Trim
Drag and drop your video file into the upload area. You'll immediately see a timeline where you can drag the sliders to set the Start Time and Duration.
GIPHY limits you to 15 seconds. Don't try to make a mini-movie here, or the quality will drop to almost zero.
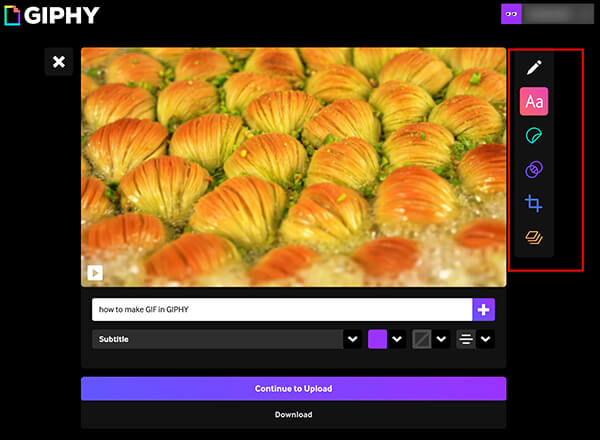
3. Decorate Your GIF
Click Continue to Decorate. This is where you add text, stickers, or filters like Spooky or VHS.
The stickers are fun, but don't overdo it. Too many stickers make the GIF file size massive and slow to load on mobile data.
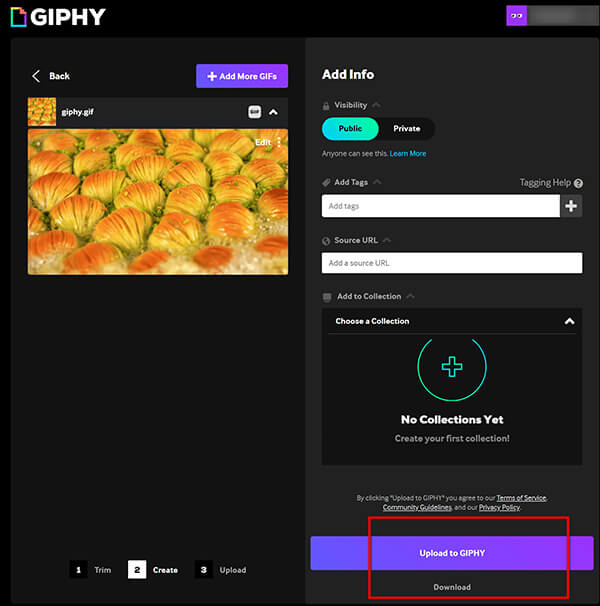
4. Upload and Finalize
Once you’re happy, click Continue to Upload. You can add tags so other people can find your masterpiece.
If you want your GIF to stay private, make sure to toggle the Public switch to Off before hitting upload.
5. Download the File
Once uploaded, right-click the final GIF and select Save Image As. To download GIF from GIPHY. Besides, you can upload the generated GIF to GIPHY.
GIPHY often provides different Versions of the GIF. I always look for the Social version for the best balance of quality and size.
Personal Experience Summary:
GIPHY is fantastic for the fun side of the internet. I love the sticker library—it’s huge and updated daily. It’s definitely the best tool for how to create a GIF from a video that needs a pop-culture touch. The limitation? Quality and privacy. GIPHY compresses files quite aggressively, so if you need a high-resolution GIF for a professional presentation, you might end up feeling a bit disappointed by the pixelation. Also, your content is technically on their servers, which might not be ideal for private clips.
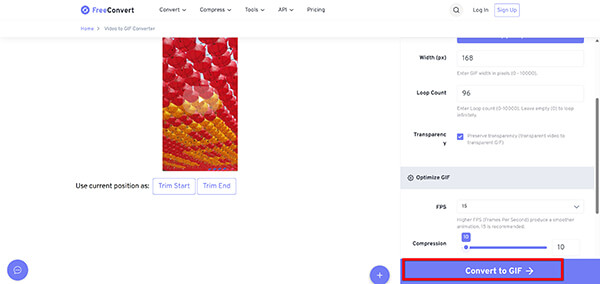
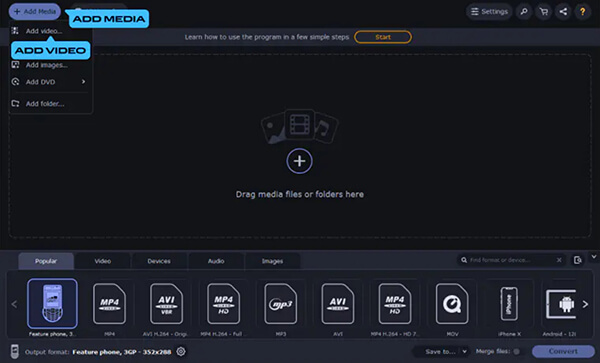
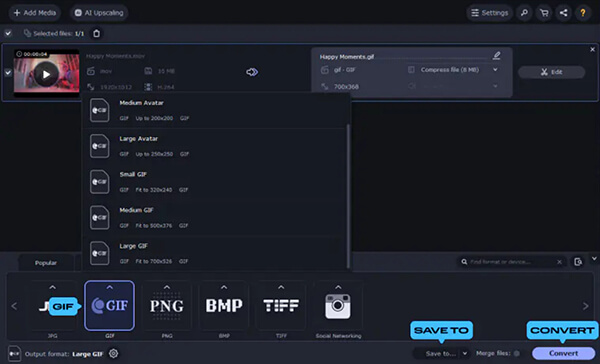
FreeConvert is a heavy hitter in the world of file conversion. Unlike the other two, this feels more like a professional utility. When you convert video to GIF here, you get access to advanced settings that usually stay hidden in free tools. You can change the aspect ratio, the codec, and even the screen orientation (great for turning horizontal videos into vertical GIFs). It’s a very clean experience, though you will see some ads.
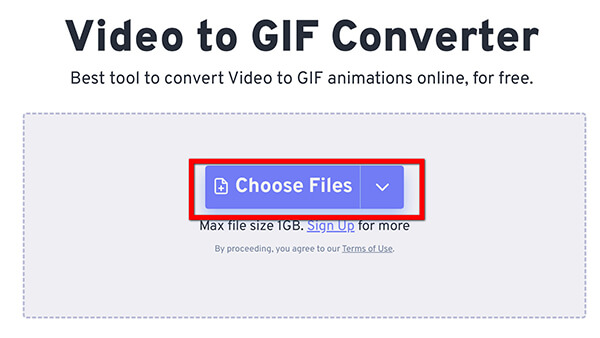
1. Upload Your Files
Head over to the FreeConvert Video to GIF page (https://www.freeconvert.com/convert/video-to-gif). Click the blue Choose Files button to find your video and add GIF to this free GIF converter.
You can select multiple files at once here. It’s one of the few free sites that allows basic batching.
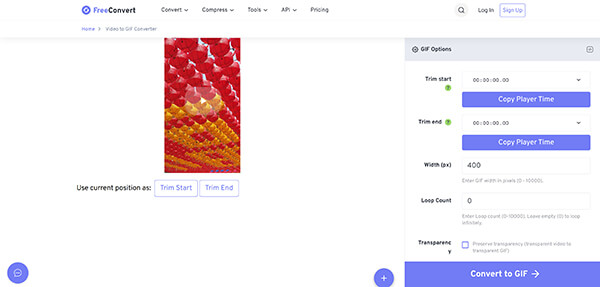
2. Configure Advanced Settings
Before clicking convert, click the Gear icon (Settings). This is where you can force a specific resolution or frame rate.
I always set the Resize option here if I know the GIF needs to fit into a narrow blog sidebar. It saves me from having to resize it later.
3. Start Conversion
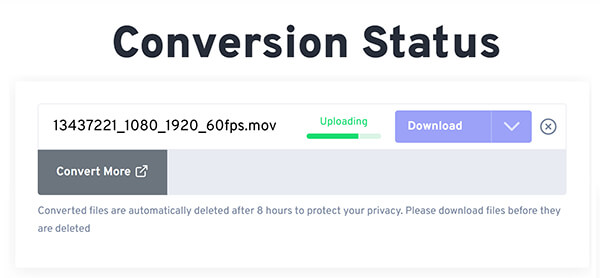
Click the Convert to GIF button. You’ll see a progress bar while the cloud servers do the work.
If you have a slow connection, don't close the tab. FreeConvert requires the connection to remain open to complete the handshake after the server finishes.
4. Download and Save
When the Done status appears, click Download.
You can also save it directly to Google Drive or Dropbox, which is a lifesaver if you're working on a phone and don't want to use up your local storage.
Personal Experience Summary:
I often turn to FreeConvert when I have a video format that other sites reject, like an old MKV or a rare AVI file. It’s very reliable and handles larger files (up to 1GB!) better than Ezgif. The best part is the batch feature. The limitation is that you only get a certain number of conversion minutes per day on the free plan. If you’re trying to convert a GIF to a video for an entire library of clips, you’ll hit a paywall eventually.
Sometimes, you need more than just a simple conversion. You need high resolution, privacy, and the ability to edit the video properly before it becomes a loop. Here are the professional choices to create a GIF from a video.
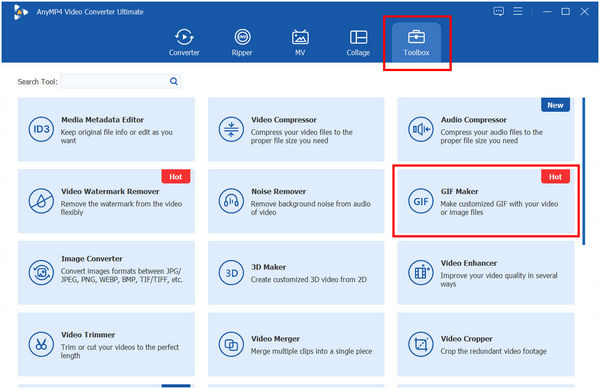
If you are looking for a desktop solution that can handle anything you throw at it, AnyMP4 Video Converter Ultimate is a top-tier choice. This isn't just a simple converter; it’s a full-featured media suite. It has a dedicated GIF converter in its Toolbox section, specifically designed to convert videos in MP4, MOV, WMV, MKV, AVI, etc., to animated GIFs with zero quality loss. It’s incredibly fast because it uses hardware acceleration. I use this when I'm working on client projects where the GIF needs to look indistinguishable from the video.
Secure Download
Secure Download
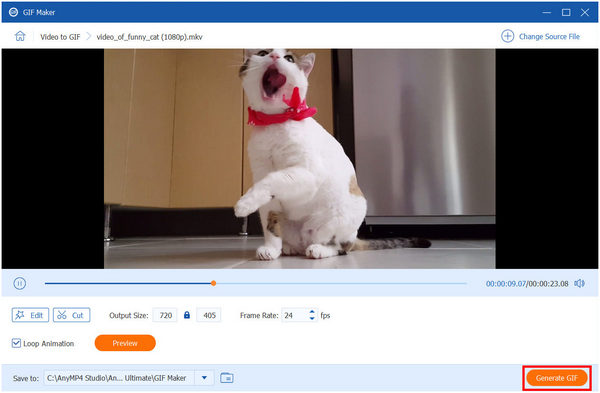
1. Open the Toolbox
Launch the software and navigate to the Toolbox tab at the top. This is where all the one-click magic happens.
Don't get distracted by the 20 other tools! Go straight for the GIF converter icon.
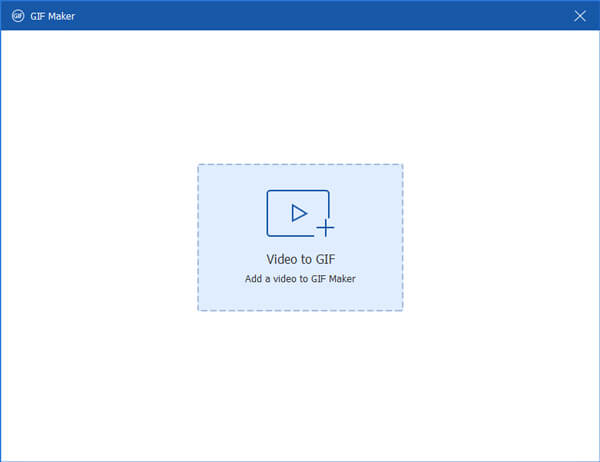
2. Import Your Video
Click the Video to GIF button to import your clip. The software will instantly create a preview window.
This software handles 4K video like it's nothing. If you're a gamer trying to create GIFs of your 4K gameplay, this is your best bet.
3. Trim and Edit
Use the Cut tool to trim the video. You can also use the Edit button to add filters, rotate the video, or add a watermark.
Make sure Loop Animation is checked! A GIF that plays once and stops is just a very short, silent video.
Set the Output Size and Frame Rate.
Check the Preview button. It will show you exactly how the GIF will look (and its file size) before you spend time generating it.
4. Generate and Save
Click Generate GIF. The file will be saved to your computer in seconds.
Ensure your output folder has enough space. High-quality GIFs can surprisingly take up 50-100MB if you aren't careful with settings.
Personal Experience Summary:
This is my daily driver for professional work. When I need to convert a GIF to a video for a website hero image or a high-quality email campaign, this is what I use. The likes are clear: the output quality is significantly higher than any online tool, and it’s private. The only limitation is that it’s paid software, so there’s an initial investment, but for the speed and quality, it’s worth every penny.
Descript is a game-changer for creators. It’s an AI-powered editor where you edit video by editing text (the transcript). If you want to create a GIF from a video that includes a specific line of dialogue, Descript is the most efficient way to do it. You just highlight the sentence in the transcript, and Descript allows you to export that specific clip as a GIF. It’s perfect for making reaction GIFs of yourself or your podcast guests.
1. Upload and Transcribe
Upload your video to a new project. Descript will take a minute to transcribe the audio.
If the transcription isn't perfect, you can quickly fix it, but for a GIF, the text accuracy only matters if you're using Captions.
2. Select Your Quote
Highlight the text in the transcript that corresponds to the video section you want to turn into a GIF.
Make sure you don't highlight just the words; select the entire span of the video you want.
3. Create a New Composition
Right-click and select Duplicate to new composition. This keeps your main edit safe while you work on the GIF.
I use this to quickly grab soundbites for LinkedIn. It’s so much faster than scrubbing through a timeline.
For more GIF editing features, you can try GIF editor software.
4. Export as GIF
Go to Export tab -> Publish -> GIF.
Descript allows you to add a Progress Bar to your GIF, which is great for social media engagement.
5. Final Render
Adjust your resolution and hit Export.
The Free version of Descript has a watermark. If you're using this for a professional brand, you'll need the paid plan.
however, Descript does not generate an animated GIF directly, but you can easily use a video to GIF converter to output GIF.
Personal Experience Summary:
Descript feels like magic. If you do a lot of talking head videos, it’s the best way to make a video into a GIF because you don't have to hunt through a timeline for the right clip. The limitation? It has a steep learning curve if you’re used to traditional editors, and the subscription model can get pricey if you only use it occasionally.
Movavi is known for one thing: speed. If you have a folder full of 50 videos and need to convert them all to GIFs, Movavi is your best friend. It has a very modern, friendly interface that doesn't overwhelm you with buttons. It’s a great middle-ground between a simple web tool and a heavy-duty editor. It excels at batch processing, which is a lifesaver for content creators.
1. Drag and Drop
Launch Movavi Video Converter and drag your video files into the main window.
You can drag an entire folder. It will automatically list every video inside.
2. Choose GIF Output
Click the Images tab at the bottom and select GIF.
Don't just click GIF. Choose the size (Small, Medium, or Large) that fits your target platform. Large is usually too big for emails.

3. Quick Trim
If you need to trim the clips, click the Edit button next to each file and use the scissors icon to cut out the boring parts.
The trim tool in Movavi is very snappy. It doesn't lag as some browser-based editors do.
4. SuperSpeed Conversion
Click the Convert button at the bottom right.
If you see the SuperSpeed logo, it means the conversion will be near-instant because it's not re-encoding the whole file.
5. Retrieve Your Files
The folder containing your new GIFs will pop open automatically once finished.
Check the first few GIFs to make sure the Loop looks right. Sometimes batch processing can be tricky when it comes to start/end points.
Personal Experience Summary:
I love Movavi’s simplicity. It’s the tool I recommend to my friends who aren't tech-savvy but still want to generate GIFs from videos for their blogs. It’s reliable and almost never crashes, even with 4K files. The limitation is that it lacks some of the deep tweaking options—you can’t really mess with the specific color palettes.
Choosing the right tool depends on your specific needs. Are you making a meme for a friend, or are you building a professional brand? Here is a breakdown based on my testing.
| Cost | Max File Size | Max Length | Watermark | Output quality | Batch Processing | Best For | Speed | |
|---|---|---|---|---|---|---|---|---|
| Ezgif | Free | 100MB | 60s | No | Medium | No | Quick Customization | Slow |
| GIPHY | Free | 100MB | 15s | No | Low | No | Social Media/Fun | Medium |
| FreeConvert | Free/Paid | 1GB (Free) | Unlimited | No | High | Basic | Large Files | Medium |
| AnyMP4 Video Converter Ultimate | Paid | Unlimited | Unlimited | No | Very High | Yes | Professional Quality | Very Fast |
| Descript | Subscription | Unlimited | Unlimited | Yes (Free) | High | No | AI/Speech Editing | Medium |
| Movavi Video Converter | Paid | Unlimited | Unlimited | No | High | Yes | Batch Processing | Very Fast |
What’s the best format for GIF conversion?
The best source format is usually MP4 with H.264 encoding. It’s widely supported and contains enough data to convert to a high-quality GIF without being a massive file.
Can I convert GIFs from YouTube videos?"
Yes! Tools like GIPHY and Ezgif let you paste a YouTube URL directly into their converters. Just keep in mind copyright rules—always give credit where it's due!
How do I reduce the size of a GIF file?
There are three levers you can pull: 1. Lower the Frame Rate: Drop it from 30 FPS to 12 FPS. 2. Reduce Dimensions: Keep it under 500px wide. 3. Lossy Compression: Use an optimizer to remove redundant data.
How long should a video clip be for a GIF?
Ideally, 2 to 6 seconds. Anything longer than 10 seconds will result in a massive file size that might not load on people's phones. If your GIF is too long, just cut GIF here.
Does converting video to GIF lose quality?
Technically, yes. GIFs are limited to 256 colors, whereas video has millions. High-end tools like AnyMP4 use advanced dithering to hide this and make it look as close to the original as possible.
At the end of the day, learning how to create a GIF from a video is a skill that will serve you well, whether you’re a professional marketer or just someone who wants to win the group chat.
If you’re just starting, I highly recommend playing around with Ezgif, and it’s the best way to understand how GIFs work. But if you find yourself making GIFs regularly and you’re tired of slow upload times and low resolution, upgrading to a tool like AnyMP4 Video Converter Ultimate will save you hours of frustration.
The most important thing? Have fun with it. The best GIFs aren't always the most high-def; they’re the ones that capture a perfect, relatable moment. So go ahead, grab your favorite video, and convert video to a GIF now.
Secure Download
Secure Download
 Updated by Mark Cristobal to Convert Video, GIF
More readings
 A Step-By-Step Tutorial to Download GIFs from Twitter in 3 Ways
Have you ever been tormented by Twitter’s inability to download GIFs? Today, we have prepared 3 most straightforward solutions to Download GIFs from Twitter.
 Top 11 GIF Players for Windows PC, Mac, iPhone, and Android
Here is a list of the best GIF players for Windows, Mac, iOS, and Android to help you watch and play animated GIF images frame by frame without losing quality.
 Best 10 GIF Background Remover to Get Transparent GIFs
Are you looking for a GIF background remover that works for you? In this article, we will offer 10 tools. You can make your choice after reading our content.
 Top 10 GIF Converters Online and Offline
Do you want to convert video to GIFs but don't know which tool to use? If yes, find out the ten GIF tools we have listed here.