5 Ways to Screen Record on iPad: A Detailed Tutorial
Are you wondering if you can screen record on an iPad? Read this article for a detailed guide on using five of the most reliable iPad screen recording software in 2026. This article will include programs built into the device, third-party apps from the App Store, and external screen recorders available on PC and Mac. For a quick overview of the tutorials below, we have included a quick guide on using the most practical external screen recorder for iPad. This option was selected due to its clear superiority over the default screen recording feature of the iPad. If you want to learn more about the best third-party recording tool in AnyMP4 Screen Recorder, a more detailed guide is available in the latter part of this article.
Part 1. How to Choose a Proper Screen Recorder for iPad
Before proceeding to the guides, keep all these considerations in mind when choosing the screen recorder you want to use if you want to learn how to record screen video on an iPad.
Recording Duration
Ensure that the recorder you will use has no time limit. This will ensure you can record any video without worrying about duration limitations. Learning the duration is important after learning how can you record your iPad screen.
Editing Features
For maximum practicality, editing features would be highly appreciated if integrated into the screen recording program. This feature will bypass the need for another exclusive editing software.
Ease of Use
Another consideration for users is whether the recording tool will be beginner-friendly. In this case, pick a screen capture option that caters to your skills.
Sharing Options
Integrated sharing options will always be practical for screen recording apps. However, providing multiple output format options that are well-supported is even more critical.
Price
Lastly, the tool's pricing also dictates the users you can attract. We decided to choose only the free programs, or at least ones worth it for the price point they are asking.
With these considerations now discussed, we also provided a quick table below to indicate the uses of each program and their functionality as recording tools.
- Screen Recording Tool for iPad
- Built-in Screen Recorder
- AnyMP4 Screen Recorder
- Record it!
- DU Recorder
- QuickTime Player (Mac)
|
Recording Presentations
|
Creating Tutorials and Guides
|
Recording Gameplay
|
Advanced Editing Tools
|
Personal Recording Needs
|
|
|
|
|
|
|
|
|
|
|
|
|
|
|
|
|
|
|
|
|
|
|
|
|
|
Part 2. Screen Record iPad with Built-in Recording Feature (Easiest Way)
Regarding mobile devices, taking screenshots is the second most-used function of the gallery, outside of selfies and other photos. However, people have wondered if you can screen record on an iPad since screen recording is similar enough to the widely popular screenshots.
Fortunately, Apple ensured a highly functional screen recording feature was accessible on its devices to record iPhone and iPad screens. With that in mind, the default screen recording feature of iOS devices has been available since the earlier versions of their tablet and smartphones. However, a little setup is required to make it more accessible to Apple users.
A detailed guide and the main features of Apple’s default screen recording app are provided below.
Main Features:
- Customizable controls.
- Available in the Control Center shortcut.
- Microphone audio support.
- Basic video trimming option.
- Full on-screen recording.
1. Open your iPad’s Settings and go to the Control Center tab. Scroll down to More Control and tap Add beside the Screen Recording option.
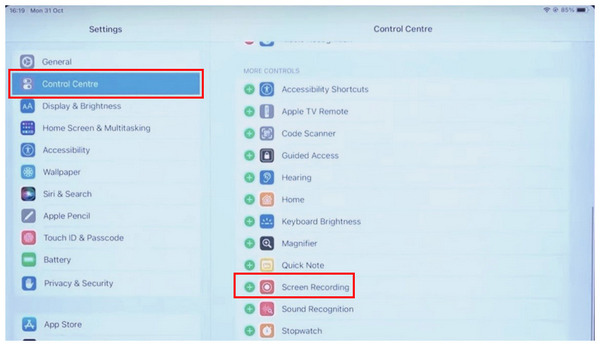
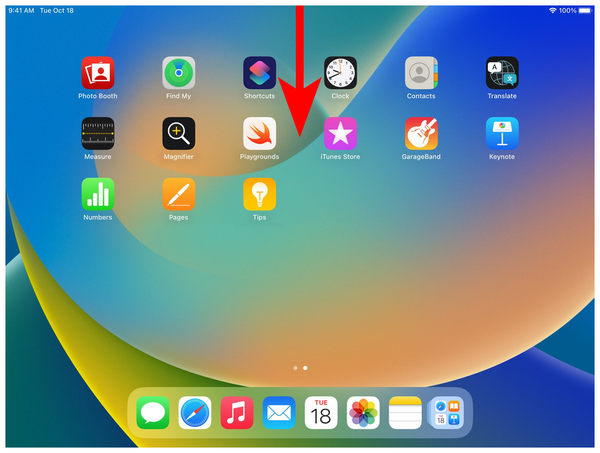
2. The Screen Recording tool has been added to the Control Center. Scroll down from the top of your screen to open the Control Center.
3. Inside the Control Center, locate the Screen Recording icon. Select it to start recording your screen.

Based on its capabilities, the default screen recording feature of iOS devices is undoubtedly enough to provide functional screen capture capabilities. Unfortunately, its limited editing options make it unsuitable for more advanced recording needs.
What Users Say About iPad’s Built-in Screen Recorder
The default screen recorder feature in iPad’s Control Center only applies to basic uses. It does not offer advanced features like editing tools and video format adjustments.
Part 3. Screen Record iPad Online with No Watermark
Although the default screen recorder of iPad Pro/Air/10 is functional at best, the lack of more advanced features may not be enough for more professional needs. If that is the case, an external screen recorder may be your best bet, such as AnyMP4 Screen Recorder, a PC and Mac-based program designed to be an exclusive screen recording tool with different modes, including a dedicated Phone Recorder option.
The Phone Recorder option of AnyMP4 Screen Recorder provides maximum compatibility with all iPad models and iOS versions. Due to its external nature, the apps being recorded on your device will not detect the recording process. It can also be controlled from within the computer where AnyMP4 Screen Recorder is running.
If you are wondering about the connection requirement between the iPad and your computer, multiple connection methods are available within the software, ranging from PIN, WiFi, and Apple’s screen mirroring.
The program also has no problem with audio capture due to its support for recording both system and microphone audio. Once the recording is done, the output format where the videos may be saved can be selected from various formats such as WMV, MP4, MOV, F4V, AVI, TS, MP3, WMA, AAC, M4A, MOV, M4V, GIF, and CAF.
If you are interested in learning the main features of AnyMP4 Screen Recorder and the steps required to record iPad displays, please continue reading our provided tutorial below after downloading the software for free.
Main Features:
- Real-time video recording editor.
- Simultaneous screen mirroring and recording.
- Simultaneous system and microphone audio recording.
- Customizable recording quality.
- Equipped with seven recording modes.
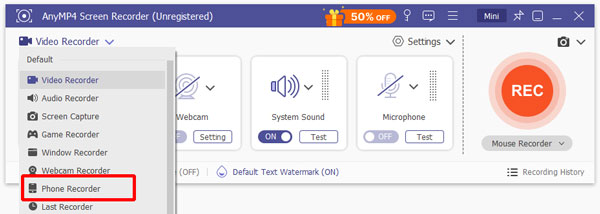
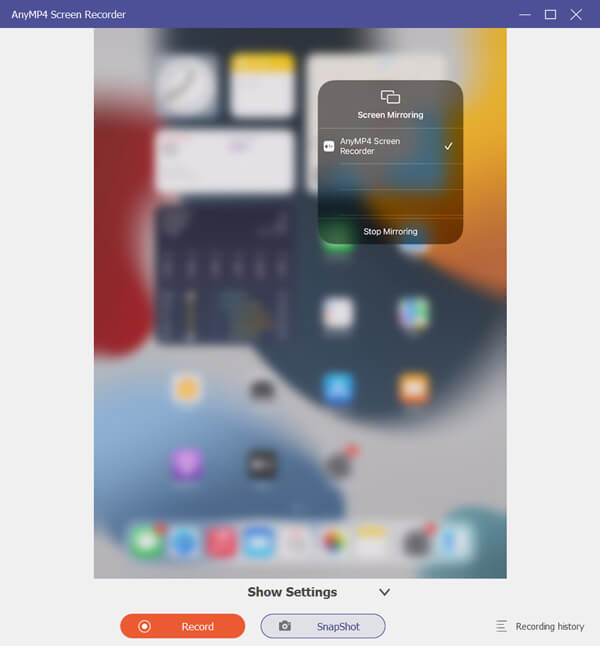
1. Start AnyMP4 Screen Recorder and click on the drop-down menu beside the Video Recorder mode. Select the Phone Recorder mode among the available options. Then, select the iOS Recorder option in the platform selector menu pop-up.
2. Once the iPad and AnyMP4 Screen Recorder connection has been established, select the Screen Mirroring option. Then, adjust the recording settings in the Resolution, Output Resolution, and Recording Content menu.
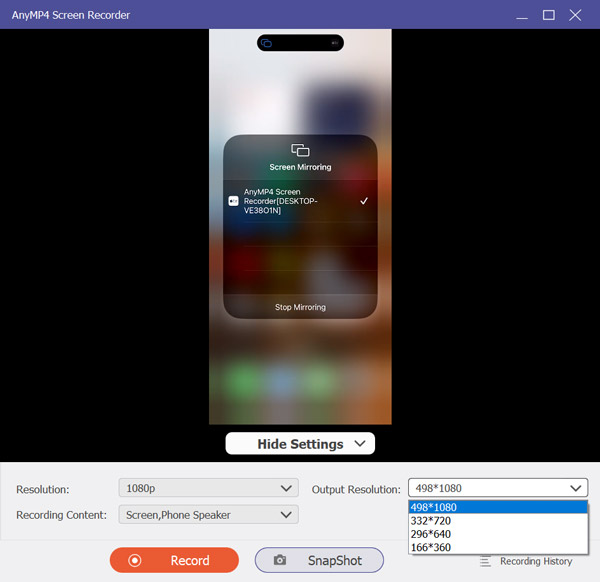
3. After adjusting the recording settings, click Record to start recording the phone mirror of your iPad device. You can now continue using your iPad as usual while controlling the recording settings externally on your computer.
Now that you can start screen recording on iPad using an external recorder, you can enjoy seamless screen recording without worrying about the hindrances of adjusting the recording app on your iPad. Controlling the recording adjustments outside your device makes the recording process simpler. These factors make AnyMP4 Screen Recorder one of the best free screen recorder tools on the market.
What Users Say About AnyMP4 Screen Recorder
AnyMP4 Screen Recorder is one of the most versatile screen recorder options for iPad devices. The external nature of the program allows its users to access more advanced recording tools and editing options from their computer.
Part 4. Screen Record iPad with FaceCam Reaction Function
Although unconventional for some, including a facecam option in your screen recordings might be a deciding factor for users who want to learn how to record screen on iPad, especially for content creation and recording presentations. These niches could be the reason why Record it! App has made an exclusive facecam and screen recorder for the iPhone and iPad platforms. Unfortunately, the lack of more advanced editing tools is also a problem for third-party apps. With that in mind, its users should ensure that their recordings will have close to no errors, especially if the facecam recorder is also used.
Learn the strengths and recording process of Record it! App by reading our guide about it below.
Main Features:
- Real-time video recording editor.
- Simultaneous screen mirroring and recording.
- Simultaneous system and microphone audio recording.
- Customizable recording quality.
- Equipped with seven recording modes.
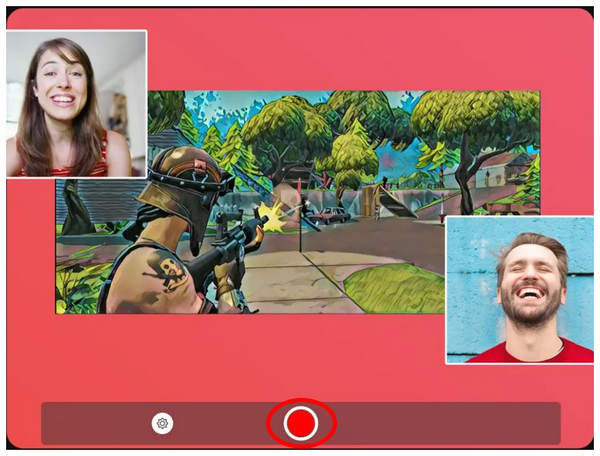
1. Open the Record it! and select the recording option you want to use from the modes available in Screen Recorder or Reaction Cam.

2. After selecting the mode you want to use, click the REC button on the screen. This option will start the screen recording process.
3. After the screen recording process, the app will automatically proceed to the Video Editor menu of the software, where you can use basic editing tools.
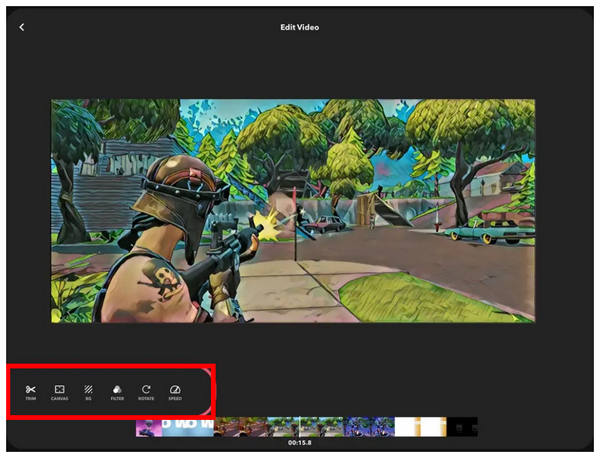
Once you are done editing your video recording, the app will save it in your iPad’s Photos app, where you can now share it online or use the recording for personal use.
What Users Say About Record it! Screen Recorder
Record it! screen recorder is a good option if you want additional personalization and recording options. The Facecam feature is also specifically designed for content creation and presentation recording.
Part 5. Screen Record iPad with Live Streaming
Live streaming has emerged as one of the newest forms of entertainment over the past decade. Since then, applications designed to provide direct streaming have entered the market. DU Recorder is one of them. Unfortunately, the program only offers a live streaming option for its paid version. The free version of DU Recorder suffers from the lack of its most significant promise.
DU Recorder is only a basic screen recorder app if you decide to stick to their free version, which is still not bad if you only want to learn how to record the screen on iPad Pro/Air/10.
Main Features:
- Built-in live streaming option.
- Microphone and system sound recorder.
- Multiple resolution options for live streaming.
- Custom watermark for premium version.
- Optional premium upgrades.
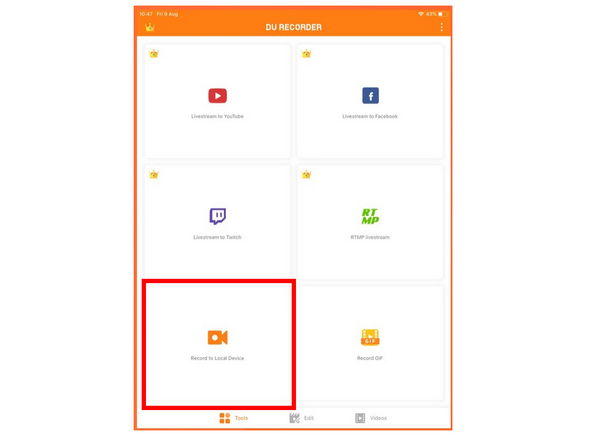
1. Open DU Recorder and select the option you want. You can choose the Record to Local Device option for a screen recording if you use the free version. You can livestream among the program's available options if you are a premium user.
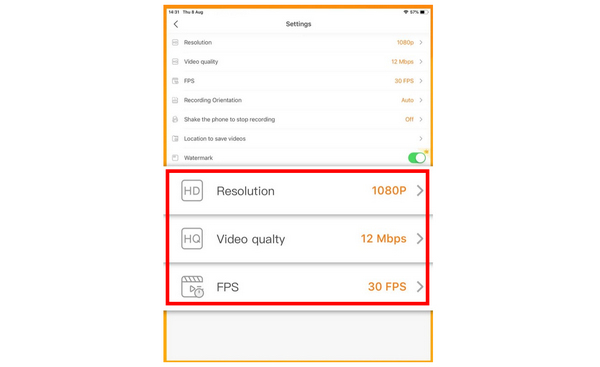
2. Before starting the screen recording process, adjust the app’s settings, especially the three critical adjustments directly affecting the video quality, with Resolution, Video Quality, and FPS.
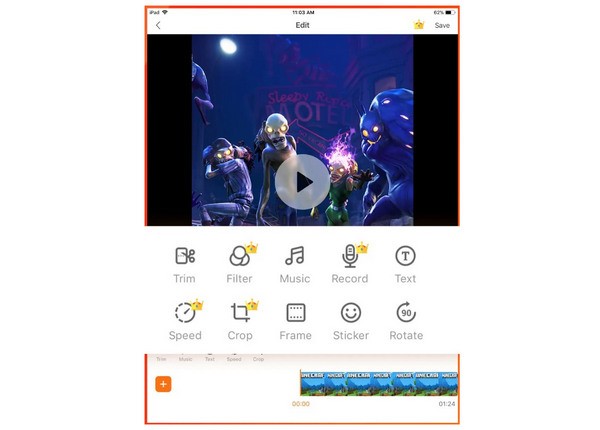
3. DU Recorder will automatically redirect you to the app’s video editor menu after the recording process. You can use the basic editing tools available in the program to enhance your recording. For premium users, more editing options are available.
Although DU Recorder might initially sound impressive due to its option to livestream directly, most of the premium features highlighted within the software are only available for users who subscribe to their premium plan. Free users only have the option to use DU Recorder as a generic screen recorder program.
What Users Say About DU Recorder
Due to the built-in livestreaming option, DU Recorder is especially advisable for users who want to start their streaming career. However, branding watermarks in the program’s free version might hinder some users.
Part 6. Screen Record iPad for Free (Need a Mac Computer)
For users who want to stick to Apple-centric usage, an alternative for AnyMP4 Screen Recorder may also be used, especially if you want to stick to external recordings. This is none other than QuickTime Player, the all-around multimedia software of Apple, which can also be used as a screen and video recording program.
Despite that, the screen recorder function of QuickTime Player is also basic at best. If you want to use an external recorder, we recommend using a third-party option instead, such as the program highlighted in the third section of the article.
Despite that, QuickTime Player is still a functional screen recorder and is serviceable for screen capture needs.
Main Features:
- Full-screen recorder.
- Record a specific screen region.
- Microphone audio recorder.
- Instant preview after the recording process.
- Built-in feature for Mac OS computers.
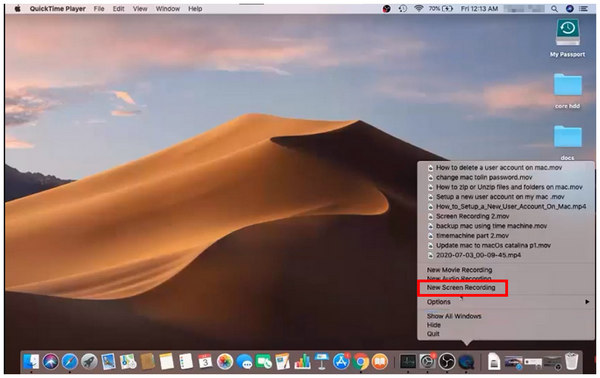
1. Find the QuickTime Player icon on your Mac desktop. Then use the Control + Click button combination to open QuickTime Player. In the pop-up menu that will appear, select New Screen Recording.
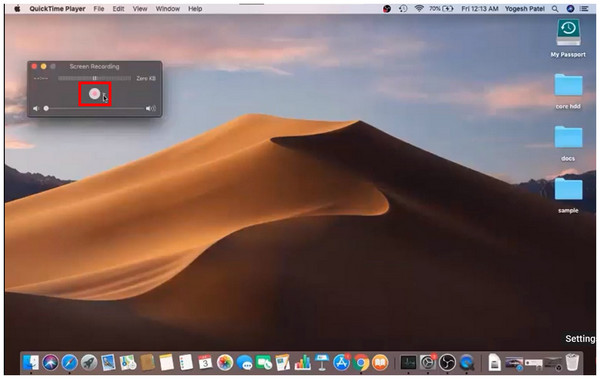
2. By clicking the New Screen Recording option, QuickTime Player will open a pop-up menu where the recording button may be accessed. Simply click on the REC button to start recording.
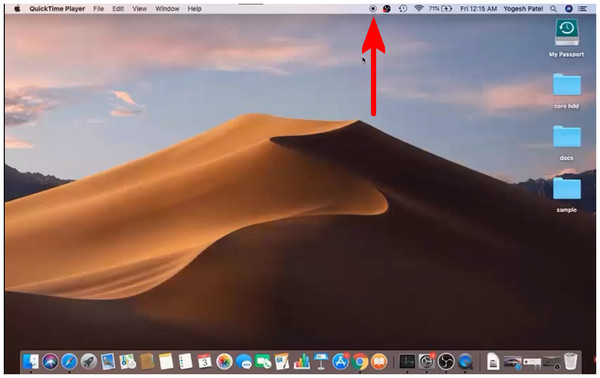
3. To ensure that the recording is in progress, check the top menu of your Mac computer if a small recording icon is present. Remember that this option can only record the current display of your iPad since you are mirroring its content to your Mac computer.
Due to the lack of advanced features in QuickTime Player, unlike AnyMP4 Screen Recorder, this option works as an obsolete choice to record your iPad’s screen externally. If you want to connect your iPad to a Mac, we recommend using a third-party tool instead.
What Users Say About QuickTime Player Recorder
Users who rely on QuickTime Player’s screen recorder function could expect an option that works as a basic screen recorder device. Because of this factor, using it as an external recorder might be inefficient since the difference between QuickTime and the built-in screen recorder of the iPad is too small.
Conclusion
We hope this article has proved helpful in your pursuit of the optimal screen recording software based on your needs, skills, and device. For screen recording needs for iPhone, iPad, Mac, or even Windows PC and Android, please consider using AnyMP4 Screen Recorder - the most versatile screen recorder software on the market.