Screen recording on smartphones has grown in popularity with the rise of content exclusively produced for modern cell phones. For example, mobile gaming has grown considerably, making gaming content a staple of contemporary media. Moreover, video editing applications on mobile devices are becoming competent enough to increase the need for high-quality screen recorders. The combination of these factors increased the importance of suitable screen-recording applications. In this article, we will provide a complete guide on how to screen record on Android using three different applications. To learn more about this topic, please continue reading the article below.
We will start this article by featuring the most accessible option for Android users to capture screen footage with Android’s built-in recording tool. As its name suggests, this feature is often available by default on most modern Android devices, especially for those running on version 11 or later.
Since this option is the most accessible, most built-in recording options can only capture recordings equal to the quality of the device’s native resolution. For example, entry-level smartphones running in 720p resolution only support less than or equal to 720p. Moreover, the framerate is commonly locked at 30FPS, making gaming footage subpar.
Despite the mentioned limitations, a built-in recording tool available on your smartphone by default is still good enough, especially for basic recording needs such as recording online classes or video call meetings.
Despite the mentioned limitations, a built-in recording tool available on your smartphone by default is still good enough, especially for basic recording needs such as recording online classes or video call meetings.
1.You need to access the drop-down menu of your Android device first. Swipe from the notification bar to reveal the drop-down menu and open it.
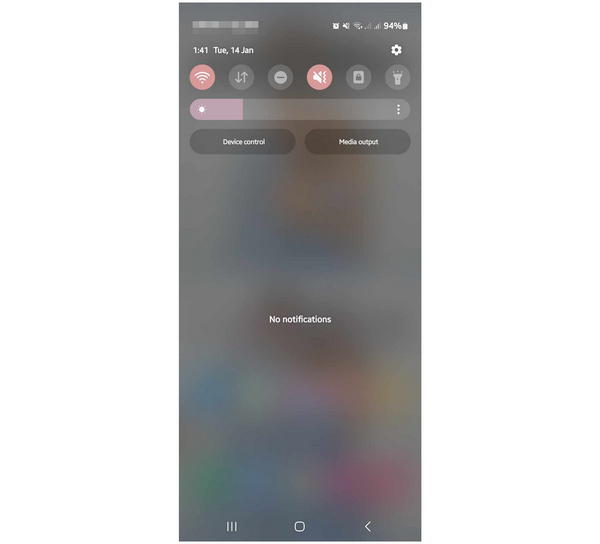
2.Once the drop-down menu is opened, expand the quick settings menu to reveal the more advanced settings available on your device. Find the Recording icon and select it.
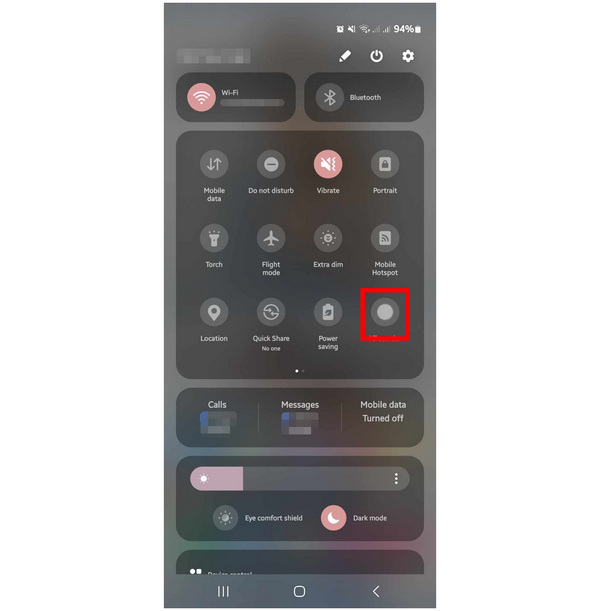
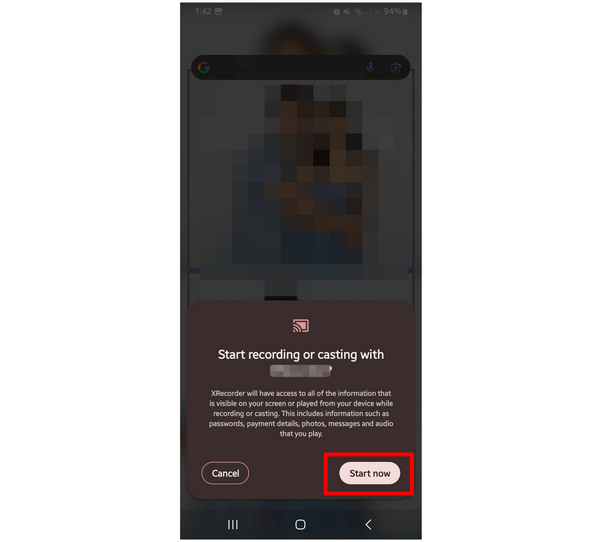
3.Tapping on the Recording icon in the menu will signal your device to open a notice that will ask the user to begin the screen recording process. To confirm, click on the Start Now button in the pop-up menu.
By following these three simple steps, you can now use the default screen recorder for Android, which is already available on your device. Unfortunately, this option may not be advisable for users looking for higher-quality recordings since the default recording on Android has limited quality and standard framerate. For more advanced needs, using a higher-quality recorder is more advisable.
PROS
CONS
As we have mentioned in the first section of the article, only a majority of modern Android devices have a built-in screen recorder feature, and they are unsuitable for more professional use due to their quality. With that in mind, using a third-party application such as AZ Screen Recorder is one of the more famous alternatives for users who want to record their smartphone screens.
This third-party application was selected since it is a good option if you are looking for one of the best free screen recorders for Android due to its impressive 4.8-star rating. Additionally, the software has an advanced screen recording setting, which can be adjusted to improve the quality of the recording that will be captured. Moreover, recording internal audio on Android will be a cakewalk since this program has crisp audio recording quality.
The feature that makes the software highly rated is that its video recording quality can be set up to 1080p, which can be partnered with a seamless 60FPS framerate. These parameters made the tool an excellent choice for editing mobile gaming recordings or capturing video editing assets.
To learn how to use AZ Screen Recorder, please follow our provided guide below:
1.Install AZ Screen Recorder on your device and wait to download it. During the initial setup, accept the permission requirement that the app requests on your device. Finally, open the installed AZ Screen Recorder app on your phone and wait for the recording overlay to appear.
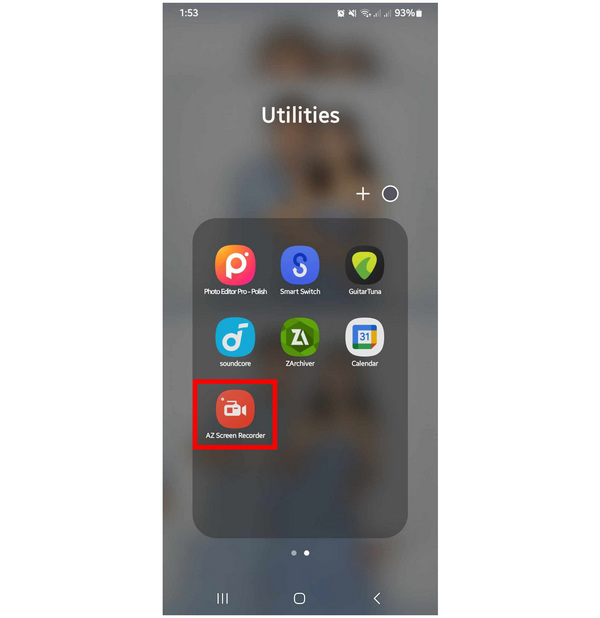
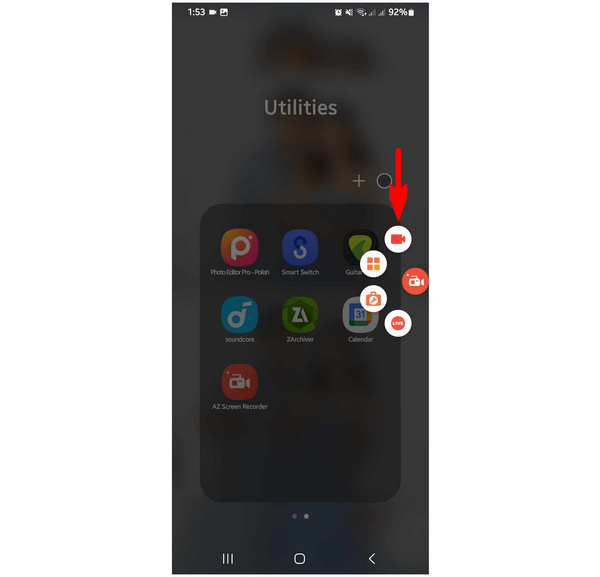
2.After the initial setup on AZ Screen Recorder, tapping on the app will automatically open the recording overlay of the software. Once the overlay menu appears on your screen, tap it. Then select the Record button, the icon in the shape of a camera.
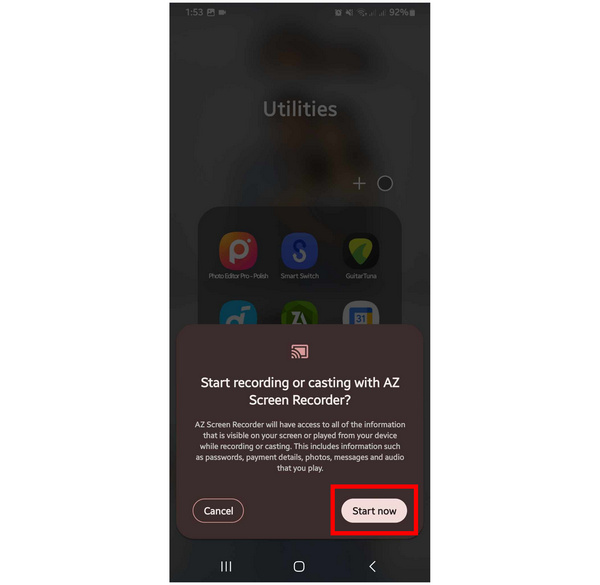
3.To start the recording process, accept the pop-up notification of the Android system that asks for permission to have your screen recorded. To start the recording session, click on the Start Now option.
By following these steps, you can now reliably record your screen with increased quality compared to the default option on your device. Despite the quality of AZ Screen Recorder, longer recordings on the software have an embedded watermark. The free version of the tool is also plagued by pop-up ads, which can significantly affect the productivity of its users.
PROS
CONS
Compatibility: PC, Mac
If you are looking for a third-party solution that can solve problems such as how to record Android screens on a Mac or PC, using AnyMP4 Screen Recorder is the number one solution that you can use. Unlike the two previous options, using recorder software running from a separate device will ensure that your smartphone’s performance stays consistent since the recording is done on separate hardware. This factor makes AnyMP4 Screen Recorder a better option for capturing hardware-demanding mobile games such as Genshin Impact or PUBG Mobile.
In addition to these benefits, this option also provides convenient editing tools for post-processing recorded videos, such as a file trimmer, volume booster, and video file compressor. Thanks to the denoising options in the tool's editing menu, videos can be enhanced in quality. All of these can be added to videos regardless of their duration.
Moreover, recording using a phone mirror is a far safer option to ensure that your device’s security is protected. It can also bypass applications with security measures that prevent built-in screen recorders from functioning, such as Google Meet, Snapchat, Zoom, etc. This is perhaps the most significant advantage of using this option to record Android screens on Windows or Mac.
To learn how to use AnyMP4 Screen Recorder as a far safer alternative, download the software on the provided link, and please read our step-by-step guide below:
Secure Download
Secure Download
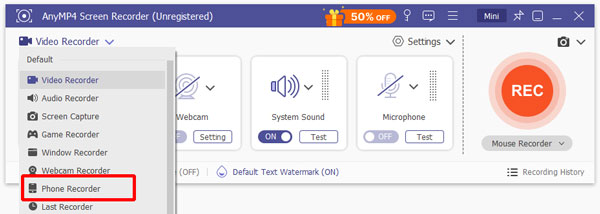
1.Open AnyMP4 Screen Recorder. In its main menu, click on the triangle icon beside the active recording mode to reveal the other available recording modes. Among the available options, select Phone Recorder. Then, choose Android Recorder in the device type selection menu.
2.In the connection selection window, you can select either the wireless WiFi Connection or the standard USB Connection option. Select the USB Connection mode for a more effortless and stable connection.
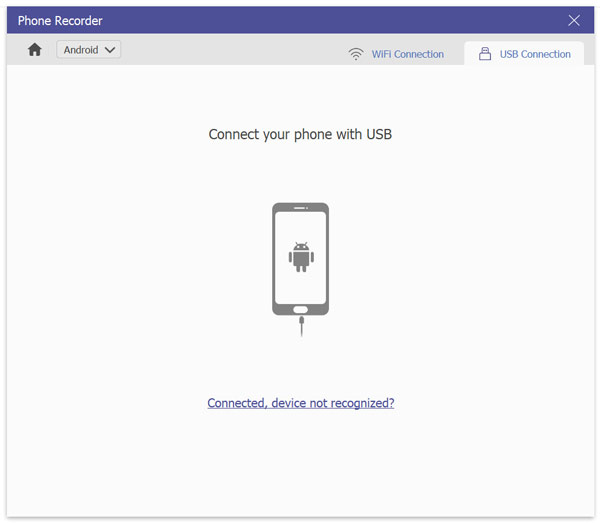
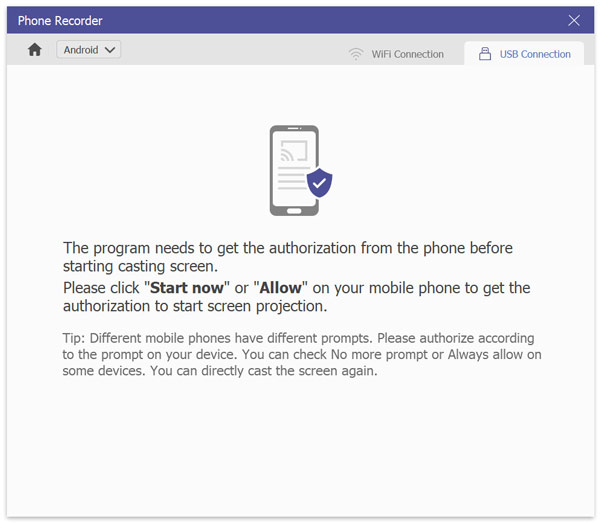
A recording confirmation screen on your Android device will pop up, asking the recording process to start. Like the previous recording options, click Start Now to begin the recording process.
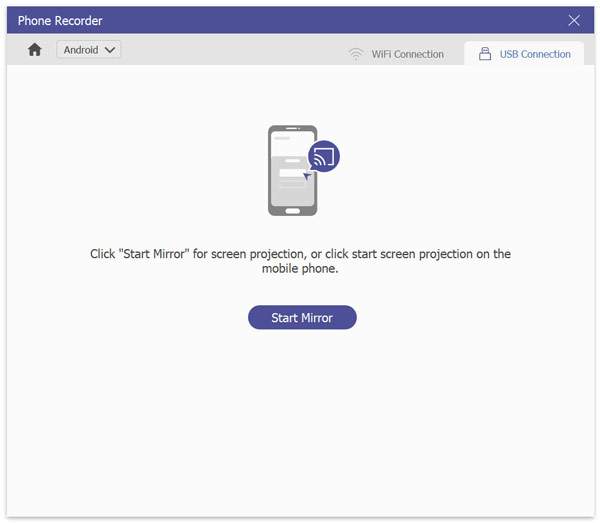
3.Once the recording confirmation is selected, return to AnyMP4 Screen Recorder and confirm the recording to start by clicking on Start Mirror. This option will start the phone mirroring between your Android device and PC.
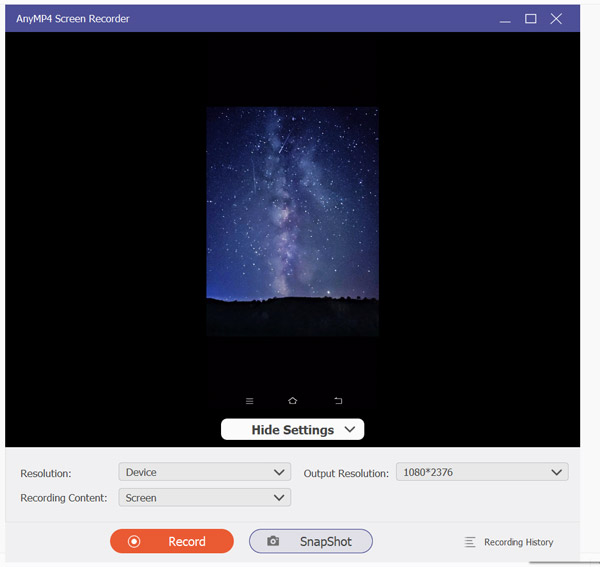
4.Now that your device’s screen has been connected to your computer, click Record to start recording the phone mirror. To stop the recording process, click the Stop button, the same button used to start recording.
Once the recording process is done, you will proceed to the preview menu. Click on the Export button to save your screen recording.
If you want to add more adjustments to the screen recording clip that you captured, the preview menu is also equipped with essential tools that can be used to edit your video. Three additional steps are provided below to learn how to use the tools available on this menu.
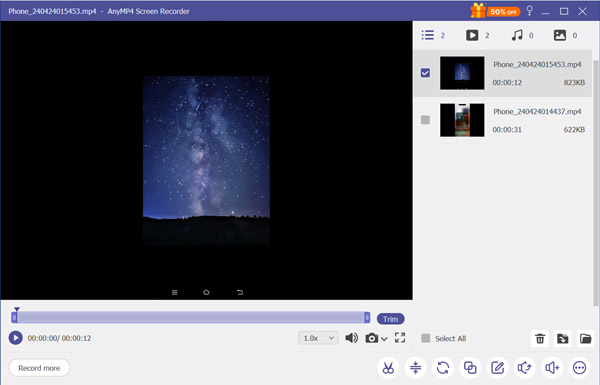
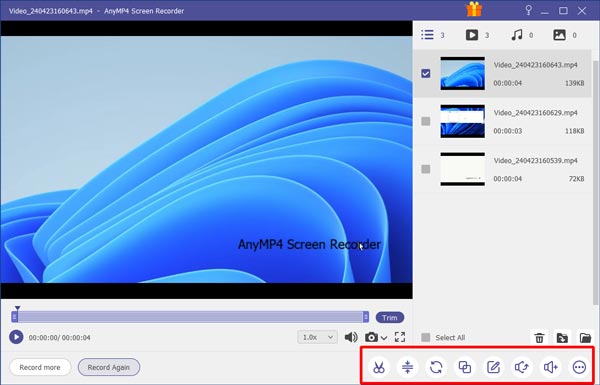
1.Once you are done recording, AnyMP4 Screen Recorder will transfer you to the software's post-recording menu. In that section, essential editing tools can adjust your recorded video.
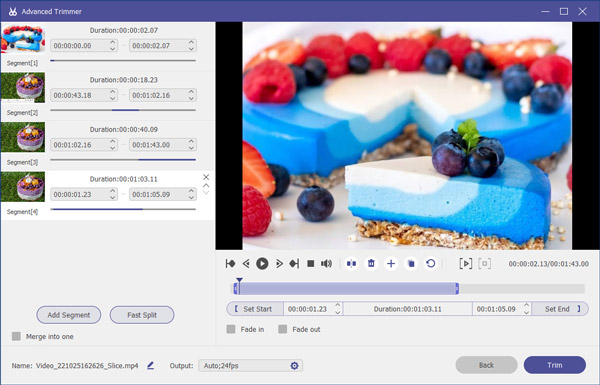
2.An Advanced Trimmer menu can split the video into segments or combine multiple footage for more complex editing.
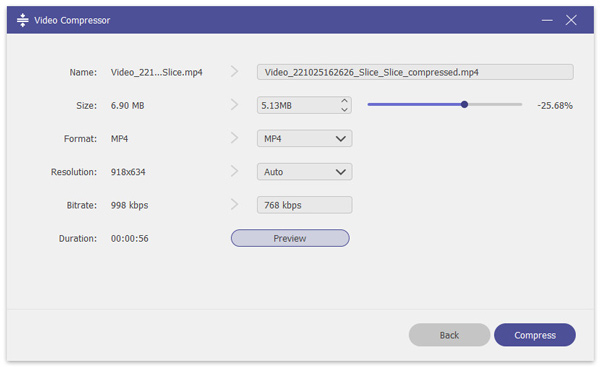
3.Finally, recordings can be adjusted to make them more compact using the program’s dedicated video compressor.
After following this setup, you can start recording your smartphone's phone mirror directly from your PC while enjoying the benefits of seamless recording and zero hardware limitations. For users looking to answer inquiries such as how to screen record protected videos on Android, AnyMP4 Screen Recorder is the answer you might be looking for.
PROS
CONS
Now that we have provided you with a full review and guide on using three of the most reliable screen recording options for Android, we hope this article has proved helpful in your pursuit of reliable recording software. Your device’s default recording option might be enough when looking for software to use immediately. However, users looking for a higher-quality screen recorder app might consider AZ Screen Recorder since its 1080p recording support provides more optimal quality. Moreover, the 60FPS recording support is the app’s most significant factor. Regarding security bypass and performance, a third-party option in AnyMP4 Screen Recorder could be the option that is designed for your needs.
If you are still unsure about which recording options to choose, consider using AnyMP4 Screen Recorder since the balance of the software in terms of security, performance, and recording mode selection offers the more convenient factors.
Secure Download
Secure Download
 Posted by Riley Mitchell to Record Video
Related Articles
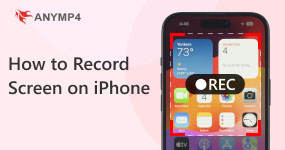 Easy Ways of How to Record Screen on iPhone Without Effort
Have you ever been very frustrated because you don't know how to record screen on iPhone? Want to master this technique easily? Just read this guide to learn!
 Top 9 Phone Call Recording Apps for Android Phones and Tablets
Phone call recorder apps have a variety of uses, but this feature is not found natively on Android. Here are top 9 phone call recorder apps for Android users.
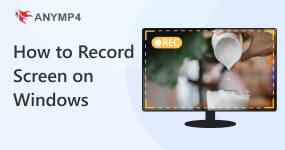 3 Ways to Record/Capture Screen on Windows 11/10/8/7
Learn how to record screens on Windows with ease. Follow our comprehensive guide to capture screens using built-in features and third-party tools.
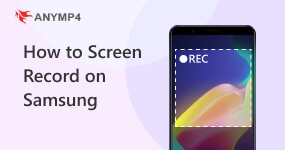 How to Screen Record Video and Audio on Samsung Devices
Capture your Samsung device’s screen effortlessly with our detailed guide. Learn how to screen record on Samsung devices, complete with easy-to-follow steps.