Blender is a free and open source 3D creation suite. It is mostly known for its animation and 3D effects, but it also comes with a built-in video editor. It's available on Windows, Linux and Mac OS. You can subscribe for Blender Cloud service on a monthly, quarterly, or yearly basis. There are two renewal types of subscription: manually or automatically. If you renew manually, the price is $17 per month, $37 every three months and $127 per year. If you renew automatically, the price will be cheaper. In this article our review will focus on its video editing feature and show you how to edit video with Blender.
Blender video editor offers a range of basic but efficient tools. You can perform basic actions like video cuts and splicing, as well as more complex tasks like video masking.
FEATURES
PROS
CONS
1.Launch Blender. Firstly you need to review its maximum memory size and set it to a value slightly less than the amount of physical RAM in the workstation. Note that if you set it too low, some operations in Blender may be slowed down. If you set it too high, it may take memory form other applications and lead to swapping.
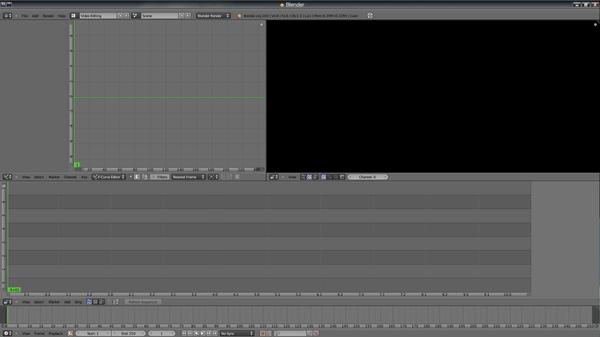
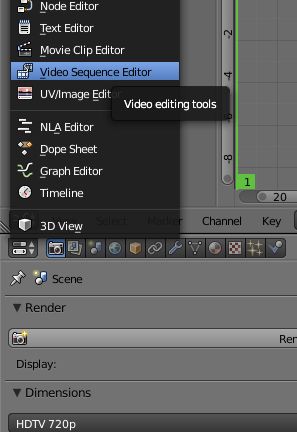
2.Choose Video Editing mode from the pull-down menu at the top of the window.You will see all the video sequence editor controls now.
3.Now start to play the video or move it frame by frame until you reach the end of the clip you want to cut. Then click the red record button again to stop recording. You can find the cut video in My Videos folder or the default video save folder in your computer. For example, when I test the cut function of VLC, the cut video was saved in the Videos folder in my PC.
4.Start video editing.
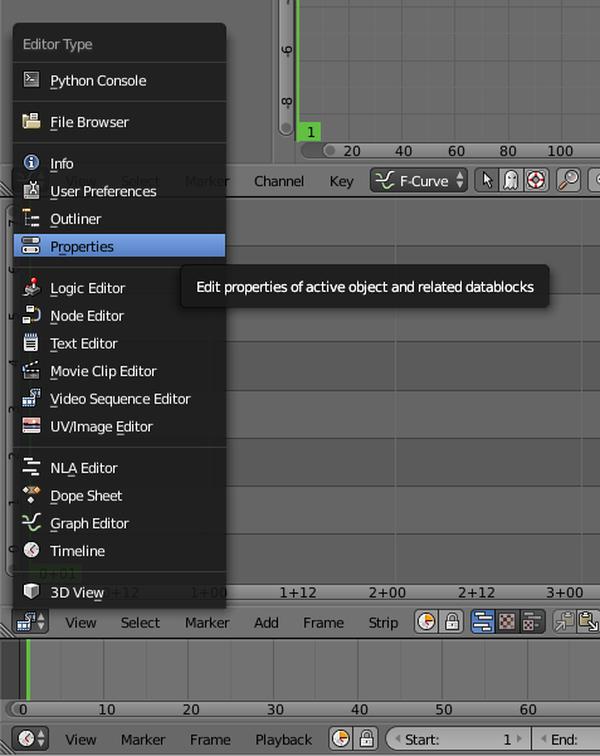
Use the context menu to change the properties panel back to the strip view panel.
Two strips will be created here: The audio trip in cyan, and video strip in dark blue.
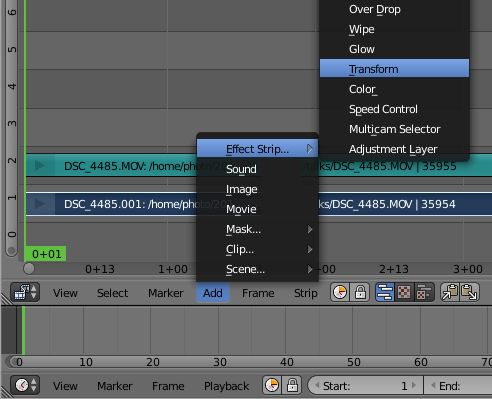
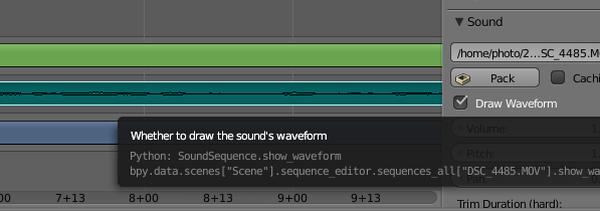
Right click the audio strip to highlight it and go to the properties on the right hand side and click to show the waveform.
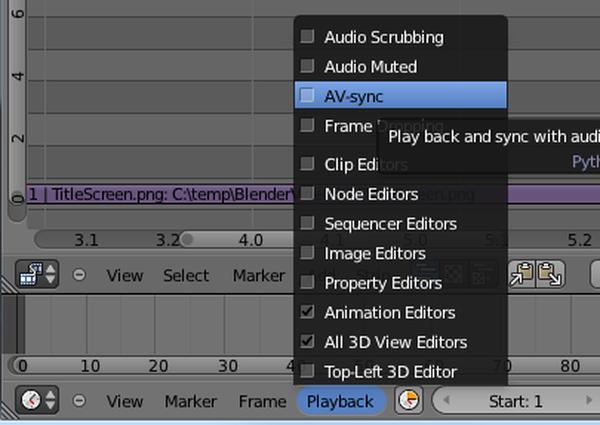
In case your video and audio are not in sync when you preview the video, set the AV-sync option at the bottom of the Timeline window. Select playback and check AV-sync option to make sure it's selected.
If you want to cut or trim a video, firstly select the point where you want to make the cut. You can use vcr style controls to do this. Left click anywhere in the timeline, left click anywhere on the VLA Editor sequence, or directly enter a frame in the current frame box. The green line indicates the currently selected frame. Once you get to the point where you want to perform the cut, hold down SHIFT and right click both the video and audio portions of the video strip. With both selected, hit 'K' to perform a hard cut. At this point, you have essentially "cut" the film and audio tracks into two separate entities.
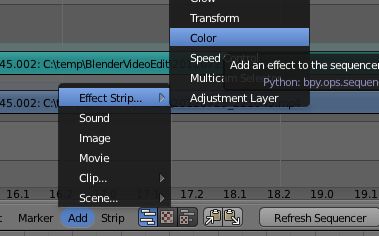
Here we take an example to add a color strip to your video.
Right click the video strip, choose Add > Effect > Color. You can set the color effect duration and transparent as you like.
You can also add other effects to your video in this way.
The tutorial above is just a very simple one to show you some basic operations to edit a video with Blender, but it's obvious that even simple operations are complex and difficult to learn compared with most common video editors in the market. This is mostly because that Blender is especially designed for 3D modeling and animation. It's a bit more professional for most users.
If you think Blender video editing is not what you are looking for, keep reading to find its best alternative.
AnyMP4 Video Converter Ultimate is a powerful but very easy-to use video editor. It has all the video editing features Blender video editor has and it's even more functional. You are able to edit the video like crop, clip, watermark, merge, filters, etc. Besides, the tool allows you to compress the SWF file, edit metadata and make GIF.
Secure Download
Secure Download
FEATURES
1.Download and install AnyMP4 Video Editor. Then launch it on your computer. /images/video-converter-ultimate/add-file.jpg
2.Click "Add Files" button to add video files to this software.
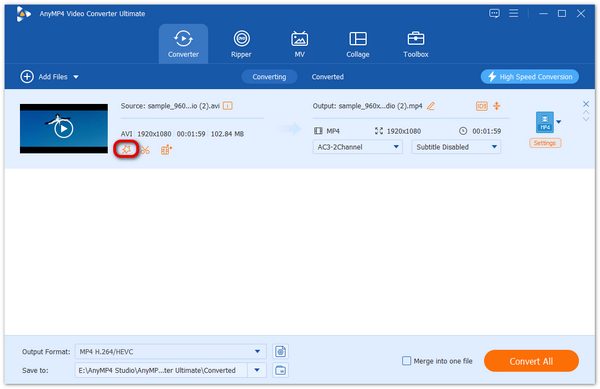
3.Start editing video.
Click the "Edit" (the magic stick icon) to open the Edit interface.
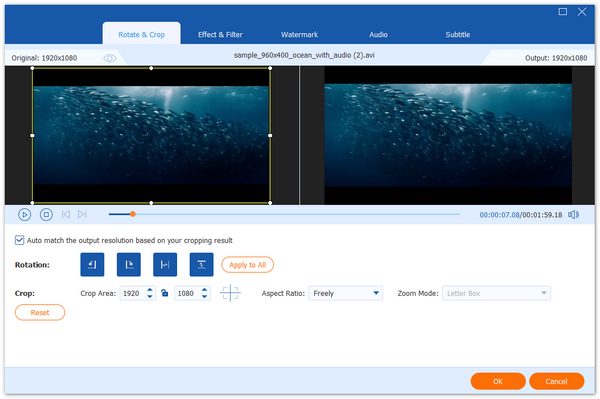
You are allowed to rotate the video to the right angle, and crop the video file to get rid of the edges. Then click "OK" button to finish the editing.
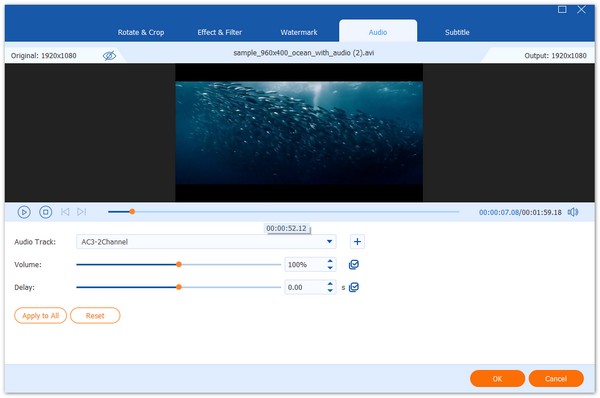
You are able to add background music to your video in the Audio section. You can also adjust the volume by turning it up or down. If the sound doesn't go up with the image, use the delay feature to match them up.
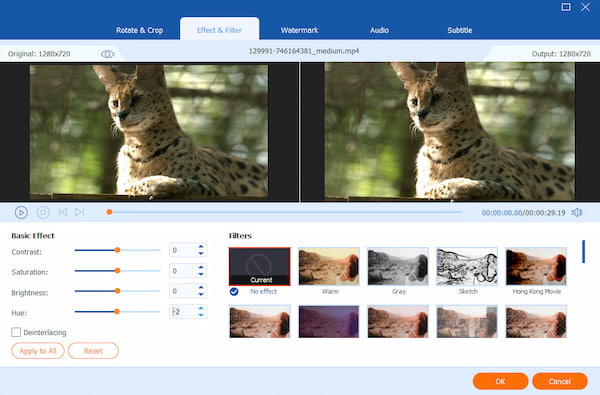
Add different effects to your video.
In the Effects & Filter tab, there are a wide range of ready-made filters for you to choose. You can also customize the video contrast/saturation/brightness/hue to make your video more perfect.
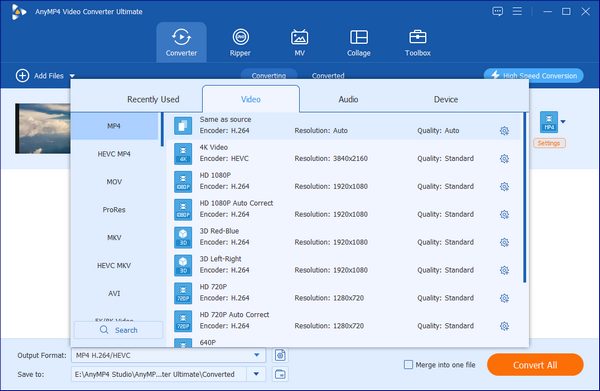
4.Choose output video format or device to export your video.
After finishing the editing process, you can click "Convert All to" drop down button to select the output format and resolution. And then click "Convert All" button to start video editing.
Is Blender good for video editing?
Blender is best known for its creative and advanced 3D animation capabilities. It also comes with basic video editing features like video cuts and splicing, as well as more complex tasks like video masking or color grading.
Is Blender video editor free?
Blender is the free and open-source program for 3D creation and video editing.
Does Blender have a watermark?
Some Blender templates may have a watermark, but you can remove them yourself within the video editor.
After learning the editing process of AnyMP4 Video Converter Ultimate, you can definitely find that it's more easy and intuitive to enhance video with AnyMP4 Video Converter Ultimate. This video editor is specially designed for professional video editing. Whether you are a movie expert or an amateur, AnyMP4 Video Converter Ultimate will not disappoint you. However, if you are an architect or professional artist, Blender's main feature will do you a great feature.
 Updated by Riley Mitchell to Edit Video
Related Articles
 Windows Movie Maker and Its Best Alternatives
Windows Movie Maker was a free video editing software developed by Microsoft. But it has been discontinued by Microsoft in last year. So what's its best alternatives? Check this article to find answer.
 Top 5 Microsoft Video Editors and the Best Alternative
In this article we will introduce 5 most recommended Microsoft Video Editors for Windows with details to let you learn more about their usage. You will also find the best alternative for Windows video maker here.
 Top 5 Alternatives to Sony Vegas Pro Video Editor
This post make a comparison among the main versions of Sony Vegas Pro. Since Sony Vegas is much expensive, here we also recommend 5 best alternatives.
 How to Edit Video With Adobe Photoshop Video Editor
Do you know that you can edit video with Adobe Photoshop CS and CC? There are a range of animation and video editing features in Photoshop that enable you to create a perfect video. Learn more details in this review.