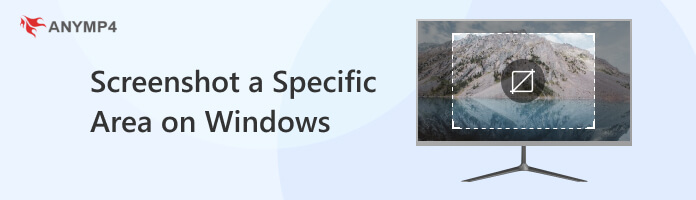
Working on a project or trying to capture a specific moment on your Windows computer screen? Perhaps an error message, a section of an article, or a captivating image? In scenarios like these, knowing how to screenshot a specific area on Windows becomes an advanced skill. Windows provides various tools to accomplish this task, offering flexibility and convenience. In this guidepost, we will discuss the step-by-step process of capturing a specific area on Windows using built-in utilities and the more modern AnyMP4 Screen Recorder. Continue reading this post to master these techniques.
Snip & Sketch is a built-in screenshot and annotation tool in Windows 10. It allows you to capture and annotate screenshots using key bindings. It provides various capture modes, including Rectangular Snip, Free Form Snip, Window Snip, and Full Screen Snip. But the common feature that is most used is the Rectangular Snip. It allows you to capture a specific rectangular area on the screen.
PROS
CONS
Here’s how to take a screenshot of a specific area using Snip & Sketch:
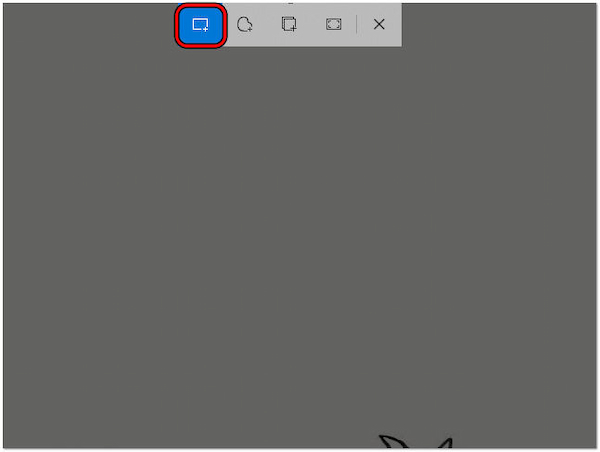
1Press Win + Shift + S key bindings to open the Snip & Sketch tool in snipping mode. After pressing the keys, your screen will dim. A small menu at the top center of your screen will be displayed. Choose the Rectangular Snip option for taking a screenshot of a specific area.
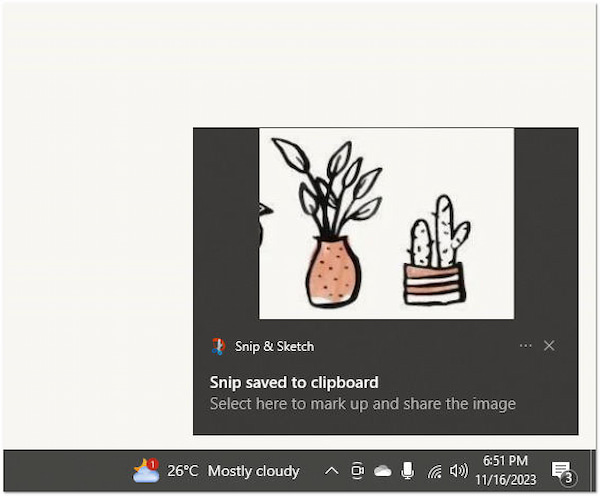
2Click and drag to select the specific area you want to capture. Once you’ve taken the screenshot, a notification will appear on the bottom right of your screen. Click the notification to open the screenshot in the Snip & Sketch editor.
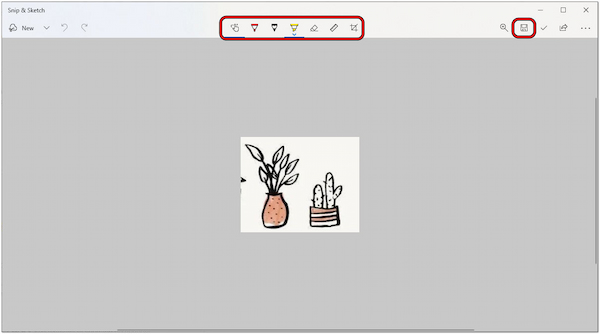
3Within the Snip & Sketch editor, annotate, crop, or make other edits to the screenshot if needed. After editing, click the Disk icon or press Ctrl + S key bindings to save the screenshot.
Snip & Sketch makes capturing screenshots easy for beginners. Additionally, it allows users to adjust their screenshots using basic editing features quickly. However, users who require highly precise snipping might find the freeform snipping tool-less accurate.
The Snipping Tool is a basic screen capture utility pre-installed with Windows. It allows you to take screenshots of your desktop or specific regions of your screen. It offers several capture modes similar to the Snip & Sketch tool, including free-form snip, Rectangular Snip, Window Snip, and Full Screen Snip. These modes provide flexibility in capturing different types of screen content.
PROS
CONS
Here’s how to screenshot specific area on Windows using the Snipping Tool:
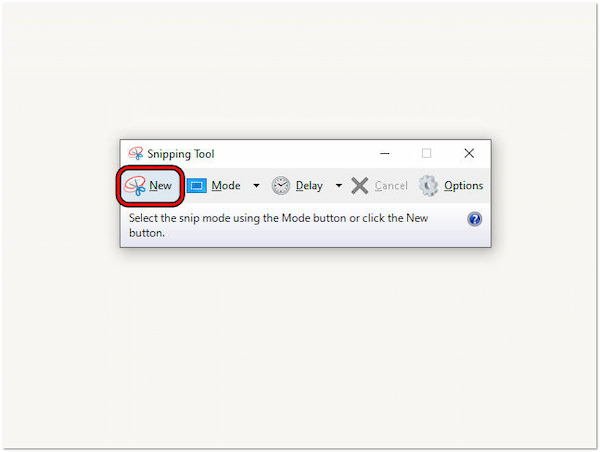
1Press Win + S, type Snipping Tool on the search bar, and press Enter to launch it.

2Select the New option, then drag the cursor around the area you want to capture.
3After capturing the screenshot, the Snipping Tool window will open with your snip.
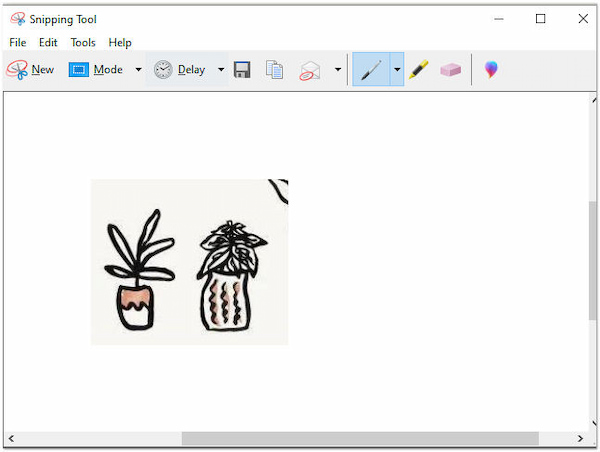
4If needed, annotate the snip. Afterward, click the Disk icon to save the snip.
The Snipping Tool is straightforward for quickly capturing screenshots of specific areas. Users can easily access it from the Windows search bar. While it allows for annotation, the tools are basic. Users seeking more sophisticated editing and annotation features find it lacking.
AnyMP4 Screen Recorder is a versatile software offering various screenshot and screen recording tools. It allows you not only to record on-screen activities but also to capture still images. It provides several capture modes, including Screen Capture for capturing your entire screen, a specific area, or a window. Additionally, it supports Popup Menu Capture and Scrolling Window.
What’s more, it allows you to drag the edges of the selection box to cover the portion of the screenshot that was not taken. After capturing the specific area, you can add annotation with your screenshot. You can add shapes, arrows, lines, texts, callouts, and more. Also, you can add images from your local drive, blur important details, and save them in various formats.
PROS
CONS
Here’s how to screenshot a specific area on Windows 7/8/10 and 11 using AnyMP4 Screen Recorder:
1Get started by clicking the Free Download to acquire the software. Install AnyMP4 Screen Recorder and complete the necessary installation process.
Secure Download
Secure Download
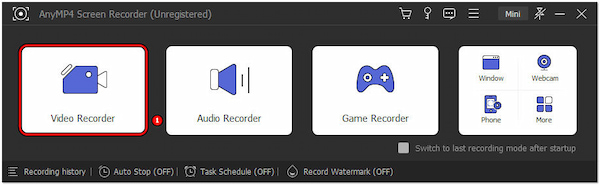
2Once installed, launch the AnyMP4 Screen Recorder on your Windows. Navigate to the Video Recorder option to locate the Screen Capture tool.
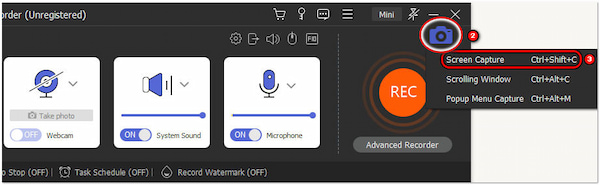
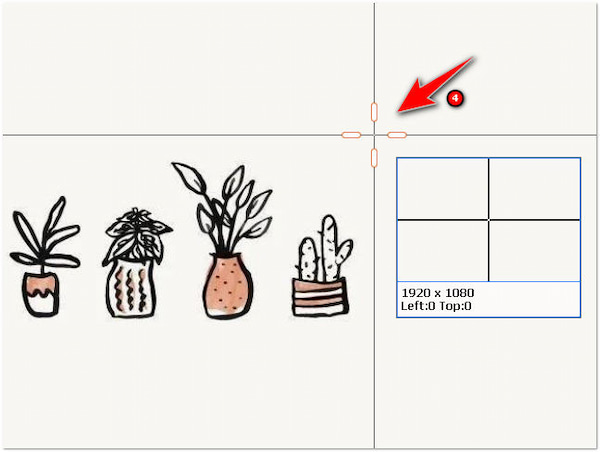
3Within the Video Recorder window, click the Camera icon dropdown menu. Choose the Screen Capture option from the selection. Otherwise, press Ctrl + Shift + S key bindings.
4Drag the crosshair to select the area you want to capture manually. If some portion wasn’t included, drag the edges of the selection box to cover the region you want to screenshot.
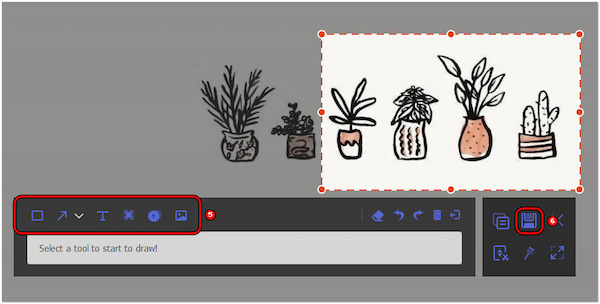
5After taking the screenshot, annotate it. You can add text, shapes, lines, and arrows. You can even blur out important information if there’s any.
6Once done with the annotations, click the Disk icon. Choose a path from your local drive where you want to save the taken screenshot.
AnyMP4 Screen Recorder is a convenient solution for taking screenshots of a specific area, even taking a scrolling screenshot on Windows. It can also capture the entire screen, a specific window, scrolling web pages, and more. In addition to the screen capture feature, it also offers powerful recording modes for various needs.
Where do Snipping Tool Screenshots go?
Snipping Tool screenshots can be saved on a specified path. It prompts you to choose a path to save the screenshot. If you forget to save immediately, it automatically saves to the clipboard, and you can paste it into an application like Paint to save.
How to take scrolling screenshots in Windows 11 using the Snipping Tool?
In actuality, the Snipping Tool does not natively support scrolling screenshots. However, you can use the video recorder feature and select the area you want to capture. While recording, scroll the page to get the desired result. On the other hand, you can explore third-party tools like AnyMP4 Screen Recorder, which has a Scrolling Window feature.
How to screenshot specific areas on Mac?
On a Mac, you can use the built-in screenshot tool by pressing Command + Shift + 4. This key binding allows you to select a specific area by dragging your cursor. After selecting the area, the screenshot is automatically saved to your desktop.
Knowing how to screenshot a specific area on Windows is a valuable skill for creating engaging visuals. The traditional Snipping and Snip & Sketch tools provide accessible means to achieve this. Meanwhile, AnyMP4 Screen Recorder stands out as a noteworthy contender. It offers not just screen recording functionalities but also a robust solution for capturing specific areas with ease. The next time you need a precise screenshot on your Windows system, consider the value that AnyMP4 Screen Recorder brings to the table.
 Updated by Angelica Liwanag to Screenshot
More readings
 4 Ways to Take Scrolling Screenshot on Mac to Save the Page
Learn how to take scrolling screenshots on Mac effortlessly. Capture web pages, documents, and content beyond the screen with simple methods and hotkeys.
 How to Take Screenshot Minecraft Gameplay on Windows and Mac
Learn how to take screenshots of Minecraft gameplay by built-in settings, hotkeys, and third-party tools on Windows and Mac. Follow our easy-to-follow guides!
 2 Ways to Take a Long Screenshot on iPhone
Learn how to take a long screenshot on iPhone with this comprehensive guide. Discover the best methods to capture extensive content on your iPhone effortlessly.
 Does Facebook Notify Screenshots? Learn the Truth!
Get facts about Facebook screenshot notifications. Discover if your online activity is being watched closely in this Does Facebook Notify Screenshots article.