- Snipping Tool Solutions
- Snipping Tool Review
- Snipping Tool Mac
- Snipping Tool Not Working
Snipping Tool is the default Windows screenshot utility for Windows 11/10/8/7/Vista. You can take a screenshot on Windows for free with the Snipping Tool. Some Mac users also want to get a Snipping Tool on Mac. Though there is no official Snipping Tool for Mac version, you can get Snipping Tool alternatives instead. What programs for Mac you can use to take a snip? This article reviews 5 popular Mac screenshot tools alternative to Windows Snipping Tool. You can download and choose the best one to snip on Mac.
| Price | Advanced Annotation Features | Scrolling Screenshot | Integrated Video Recording | Built-in Editing Tools | |
|---|---|---|---|---|---|
| Mac Built-in Screenshot Tool | Free | ||||
| AnyMP4 Screen Recorder | Free and Paid | ||||
| Grab | Free | ||||
| Lightshot | Free | ||||
| Snagit | Paid | ||||
| Monosnap | Free and Paid |
macOS includes a built-in screenshot tool that works as the most basic alternative to the Windows Snipping Tool. With the Command + Shift + 4 shortcut, you can capture a selected area or window. Meanwhile, pressing the Command + Shift + 5 keys will open the Screenshot toolbar for full-screen capture, window capture, and simple screen recording. These shortcuts are free, fast, and require no installation, making them suitable for quick, one-off screenshots. However, it lacks advanced annotation tools and it does not support scrolling screenshots.
What is the best snipping tool for Mac? If you don't know which Mac snipping tool to choose, you can continue reading to get more details. Here're the detailed pros and cons of each screen snipping tool for all Mac users.
AnyMP4 Screen Recorder is a complete screenshot, screen recording, and editing solution for Mac OS X 10.13 and later. This software solves all common pain points in one integrated workflow, from capturing to editing and exporting. It allows you to take high-resolution screenshots, scrolling captures, and window snips. Additionally, you can instantly annotate and edit them without switching to another app. It also includes professional screen recording features with advanced screenshot tools.
Like
Dislike
Secure Download
Secure Download
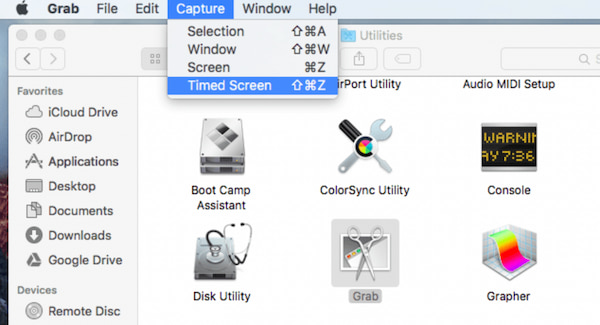
Grab is pre-installed on macOS 101.3 (High Sierra) by default. There is no need to install extra snipping tool Mac software. Though Grab is replaced by the Screenshot utility since macOS 10.14 (Mojave) update, you can still take a screenshot on Mac with Grab for free.
Like
Dislike
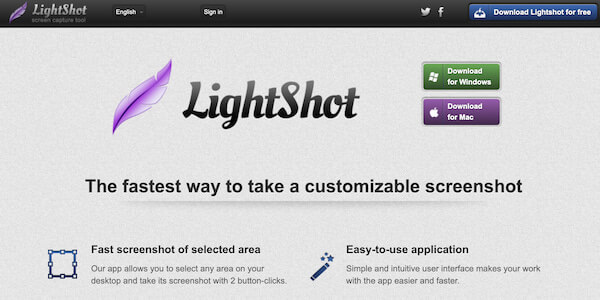
Lightshot allows users to set the sniping area and take its screenshot in 2 clicks. Before exporting, you can use the online editor to edit the Mac screenshot instantly. Later, you can upload your screenshot and get a short link. Lightshot Mac snipping tool allows users to share a screenshot on Mac.
Like
Dislike
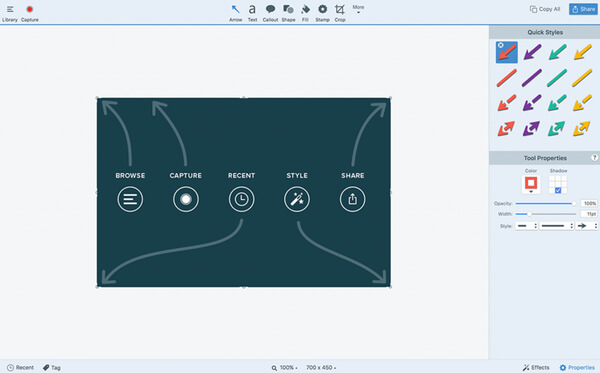
Snagit was initially designed for business visual instructions. You can take snapshots and screen videos with complex edits. Compared with other screen snipping tools for Mac, Snagit can snip a scrollable screenshot. Thus, you can screenshot an entire webpage on Mac.
Like
Dislike
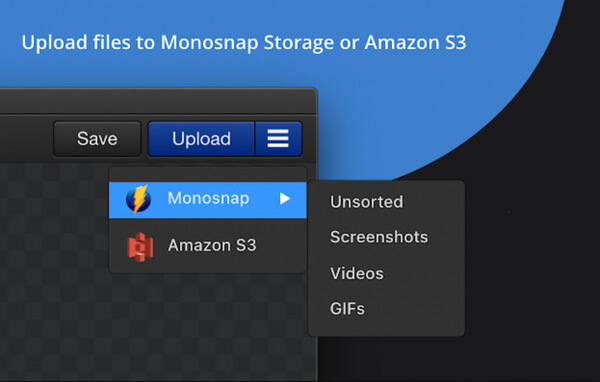
Monosnap allows users to capture full screen, part of the screen, and the selected window on Mac. Moreover, you can add annotation to your screen captured image. You can save the Mac screenshot, share it on social media, or send it to Photoshop for further editing.
Like
Dislike
Whether you want to take Mac screenshots for tutorials, businesses, educations, and more, you can use AnyMP4 Screen Recorder to solve the problem perfectly. You can capture any area on your MacBook Pro or MacBook Air screen clearly. Here're the detailed steps to use the snipping tool and do a screenshot on Mac.
Secure Download
Secure Download
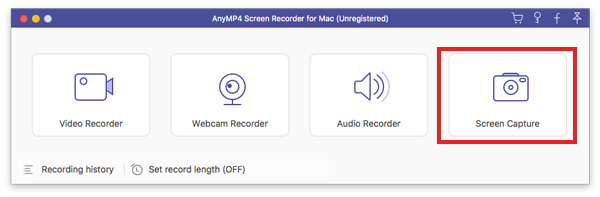
1.Launch AnyMP4 Screen Recorder on your Mac computer. Choose Video Recorder, then locate the Screen Capture feature (A camera icon) from the right corner of the interface to access the Mac snipping tool. From the drop-down option to choose the snip mode from Screen Capture, Scrolling Window and Popup Menu Capture.
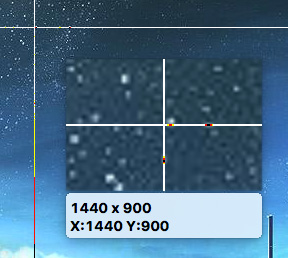
2.Your cursor will turn into a crosshair, allowing you to select the area you want to capture. Click and drag to select a custom area or click once on a window to capture the active window. For Scrolling Window, move the cursor over the scrollable area and left-click to confirm.
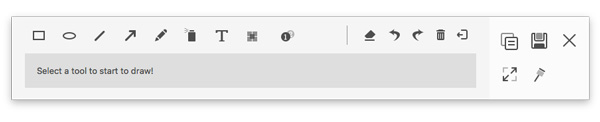
3.After capturing, a floating editing toolbar appears on the screen. Use the editor tools to add text, arrows, shapes, borders, and callouts. You can also blur or highlight sensitive areas, insert images or stickers, and adjust color, size, and opacity of annotations.
4.Click the Save option to export the screenshot in formats such as PNG, JPG, BMP, TIFF, or GIF. You can also click Copy to paste the image directly into other applications.
Where do Mac screenshots go?
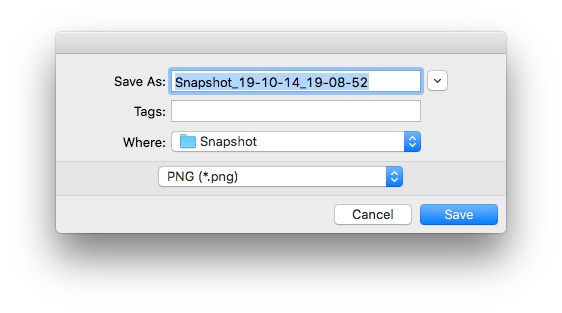
The captured screenshots are saved in PNG format on Mac desktop by default. You can find the Mac screenshot with the file name like Screen Shot xxxxx.png.
Can I change the keyboard shortcuts for Mac screenshot?
Yes. Choose System Preferences from the Apple drop-down list. Go to Keyboard and select Keyboard Shortcuts. Choose Screen Shots from the list. Check the box before the screen capture shortcuts you want to edit.
How to take screenshots with Mac Screenshot?
Press Shift, Command, and 5 keys at the same time on the Mac keyboard. Choose a snipping tool from the bottom menu bar. Here you can capture entire screen, program window, or a portion of the Mac screen based on your need.
Those are highly reviewed Mac snipping tools. You can snip on Mac with any screen size with high resolution. Furthermore, you can add annotations and make other changes while taking Mac snips. If you want to capture and edit a Mac screen in one stop, AnyMP4 Screen Recorder can be your first choice. When you're free, you can try to learn how to record videos on mac with it. The intuitive interface and powerful functions are beginner-friendly. Just free download and have a try right now.
Secure Download
Secure Download
 Updated by Alice Thorne to Screenshot
More readings
 How to Screenshot Full Screen or Custom Region on Toshiba Laptop
If you need to capture an image of your Toshiba laptop's desktop, you'd better read this guide carefully since you can find multiple ways to do the task in various cases.
 How to Take a Google Maps Screenshot on Windows, Mac, iOS and Android
People often need to screenshot Google Maps to help each other find some places. Here are three methods to do the job on your computer, iPhone and Android device.
 How to Take a Screenshot on HP (Full Screen/Active Windows/Custom)
This is the complete tutorial to screenshot on HP step by step. You can use both the default and professional tools to take a screenshot on all HP models and OS versions.
 5 Best Fixes to Solve Your Screenshot Can't Be Saved on Mac with Ease
When you try to take a snapshot on Mac with hotkey, but the Mac messages saying screenshot can't be saved, here are the reasons and the best solutions you should know from the article.