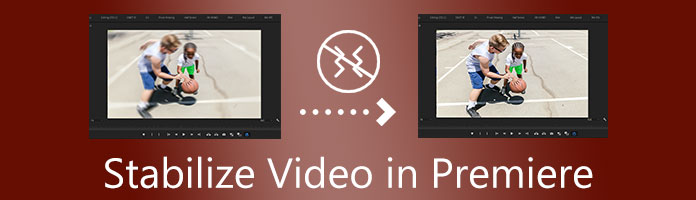
Having a shaky video can trigger our OCD. It is also inappropriate to utilize web-sharing content, especially on YouTube, Facebook, and TikTok. Therefore, we need to fix them if you have shaky videos on the devices you will use. In line with that, Adobe Premiere Pro is one of the most infamous editing tools among professional media users. This software possesses outstanding features for video editing. Other than that, the software is capable of producing high-quality video outputs. That is why, in this post, we will see the ability of Premiere Pro to stabilize video hassle-free and outputs a wise process. In addition, if you think that the Premiere Pro is not suitable for you, we also have an alternative tool that can help you with your task easier. We shall now start the procedure and make one of your tasks.
We agree that Adobe Premiere Pro is a great video editing tool, especially with advanced effects and rendering processes. However, many users are asking if you can stabilize the video in Premiere? The answer is yes. Through Adobe Premiere Pro, we can use its handy Wrap Stabilizer feature to make the process work. That is why in this portion, we will see the ability of Premiere to stabilize shaky video without complications. Please be mindful of every detail and see how effective the tool is and how it can produce high-quality outputs.
Step 1: Open the Adobe Premiere Pro on your computer device. Then, add the shaky video files you need to fix instantly on your Timeline.
Step 2: Look at the right corner and see the tab for Effects workplace on the interface. Under it, find the Video Effects, which are most probably located in the fifth folder. Select the folder as we open it.
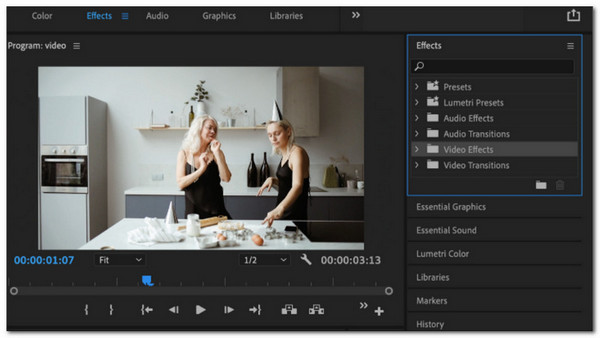
Step 3: Scroll down until you see the Distort folder from the Video Effects folder and click it. That action will show you different options to utilize with our video files. However, we only need to double-click when on the Warp Stabilizer.
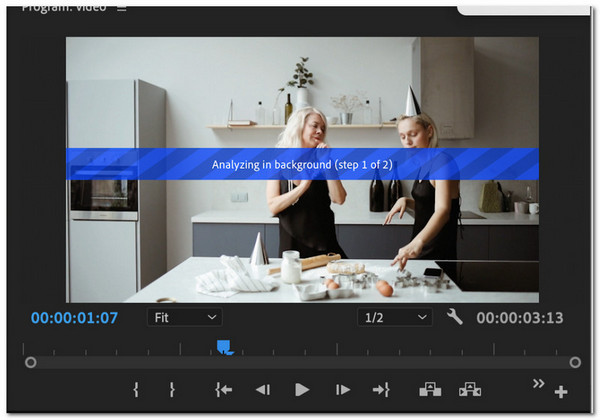
Step 4: As we proceed with the following instructions, we only need to wait as the editing software will Analyze your video footage. We need to undergo a critical thing to make the stabilization successful. Waiting may take a couple of minutes before it gets done.
Step 5: If the video footage is now finished, Premiere is now time to stabilize it. That can be possible through the use of the stabilizing algorithm of the software.
Step 6: This next step is for reviewing the result of stabilizing your video. It is an important thing to do because the output can vary. Some clips may be too dark, too slow, and other issues. If some of these issues occur, you may make it right by rendering. But, if the result is all good, you are done with the process.
Indeed, the Adobe Premiere Pro exists to help us fix shaky videos instantly. However, it is also essential to know that purchasing Adobe Premiere is very expensive. In addition, the process can be complicated for the new users because it is tough to master due to the outstanding features offered. Despite that, the editing tool is excellent and effective to use.
In the first part, we can see how amazing the Adobe Premiere is in alleviating the shake within our video footage. However, many users can not afford to purchase the software because it is expensive. On the other hand, new users have a hard time making the process successful. If you are one of them, you are barely looking for an excellent alternative for it. Fortunately, we have AnyMP4 Video Converter Ultimate.
This tool possesses the most flexible features for our media files. It is a converter but offers a toolbox that stabilizes your video without complication. In addition, it produces high-quality outputs and outstanding performance because of its AI technology to fix blur videos, and upscale video resolution. In line with that, we should now see what ability it can offer for all of us.
Secure Download
Secure Download
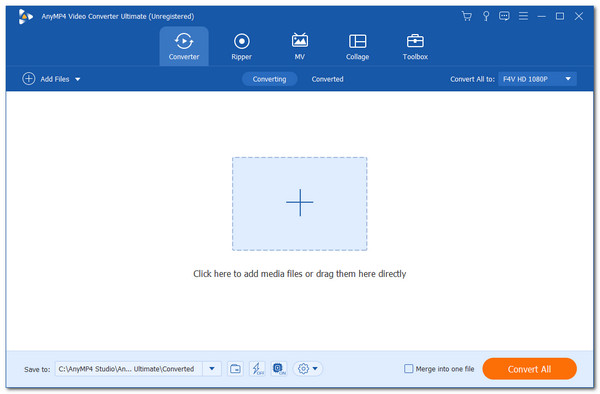
Step 1: Get the AnyMP4 Video Converter Ultimate from its official website and install it on your computer so that you may launch it properly and see its clean interface.
Step 2: On the main interface, locate the Toolbox icon, which we can see on the upper part of the interface. Different features will exist, and we only need to go with the icon features for Video Enhancer.
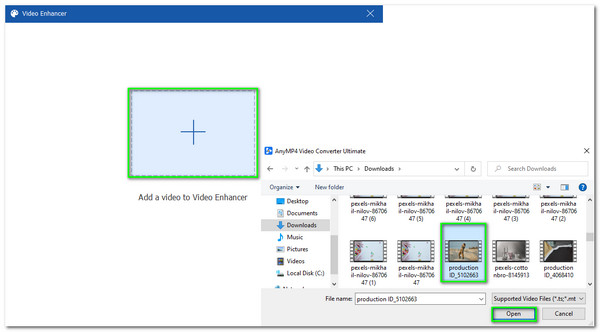
Step 3: A trim tab will appear, where we can see an Add symbol on its central part. Click on it to see an account where you can select your video files. Select the video you need to fix, and click the OK button to proceed.
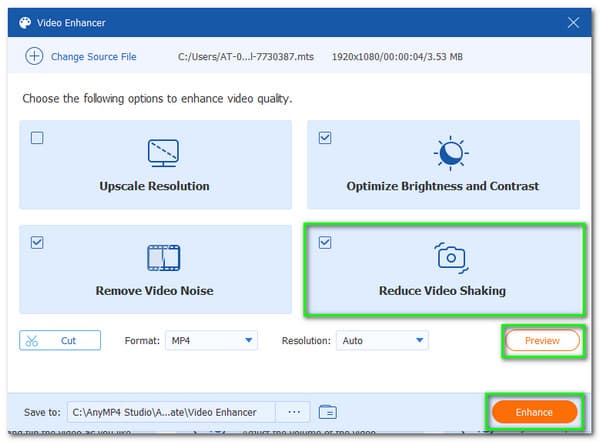
Step 4: You will now see a new set of features to enhance our shaky video. On a new tab, you will see the features for Upscale Resolution, Optimize Brightness and Contrast, Remove Video Noise, and Reduce Video Shaking. Select feature for reducing shaky video by filling the box on the top left side of the icon.
Step 5: Before proceeding with the process, you may preview your video by clicking the Preview button at the bottom part of the features. If you are good to go, it is now the time to click the Enhance button under the Preview button.
Step 6: lease wait for a second as the tool processes the stabilizing video footage. It will take a couple of moments then your video is good to go.
The easiest way to fix shaky video and the most affordable tool to use is there you go. Through this tool, we can now finish our tasks instantly. One of the pros of this tool is its compatibility even with novice users. That means a less complicated process of editing our shaky video. Indeed, AnyMP4 Video Converter Ultimate is one of the best tools.
What can I do to avoid cropping the video due to the stabilizing process?
As we all know, Adobe Premiere offers an amazing Warp Stabilizer. Under this feature, we can use the tool for adjusting the Smoothness Parameter to get the most fantastic setting for your video footage. In this way, we can also prevent too much cropping of our video. Surely, you can also use Premiere to crop videos freely as you wish.
How much will Adobe Premiere Pro cost you to purchase?
The Adobe Premiere Pro will cost you $20.99 monthly for the whole year. You may also pay it for the entire year for $239.88.
Does Warp Stabilizer an application?
Warp Stabilizer is not an application. Instead, it is a feature of Adobe Premiere that allows users to stabilize shaky video in Premiere. It is a great tool, especially for the cinematographer who does not have any equipment for stabilizing video.
We can see how flexible Adobe Premiere is in giving us the feature we need for editing. However, it may be costly and hard to use for some users. In line with that, we can also see why AnyMP4 Video Converter Ultimate is the best alternative to Premiere. Due to its adaptability and effectiveness, many users and even novice users will utilize it fully. Please share this post with users who need to fix their shaky videos like you and visit our website for more guidelines.
 Posted by Angelica Liwanag to Edit Video
Related Articles
 Adobe Captivate – How to Record eLearning Screen Video as Desired
How to record a stunning eLearning video with Adobe screen recorder? You can learn more about the detailed process to get the desired files as well as the best alternative from the article.
 Concrete Tutorial – How to Compress Video in Adobe Premiere Pro
You just installed Adobe Premiere Pro but don't know how to use it? Don't worry. This post will get you started by telling you in detail how to compress videos in Adobe Premiere Pro.
 2 Incredible Ways on How to Convert 480p to 1080p Resolution
Are you getting unsatisfied with the 480p resolution? Do not worry; here, we will instruct you how to convert 480p to 1080p HD resolution to get a high-quality video in two ways.
 Review of 5 Skillful AI Upscaling Video Apps and Software
AI video upscale procedure is not commonly known to most people out there. This article will introduce to you the five best AI-powered apps and software that can create a stunning masterpiece.