Editing short clips is the mainstream nowadays. Many people are doing this for different purposes, such as entertainment and others for profit. As we all know, there are a lot of social media platforms out there that allow us to post these videos. However, it is essential to know that our videos must be presentable. We can say that a video is presentable if there are no shaky parts. Thus, if you plan to post but your video is dangerous, do not worry because we will help you solve the problem. This article will present you with different mediums for different devices on stabilizing shaky video with ease.

Let us start this article by presenting the most significant way to stabilize MP4 video with the most fantastic software. If you want the easiest yet most effective stabilizing process, we should get AnyMP4 Video Converter Ultimate now. It is editing software that possesses many features, such as stabilizing your video with ease. Please see the steps below on how we can make it.
Secure Download
Secure Download
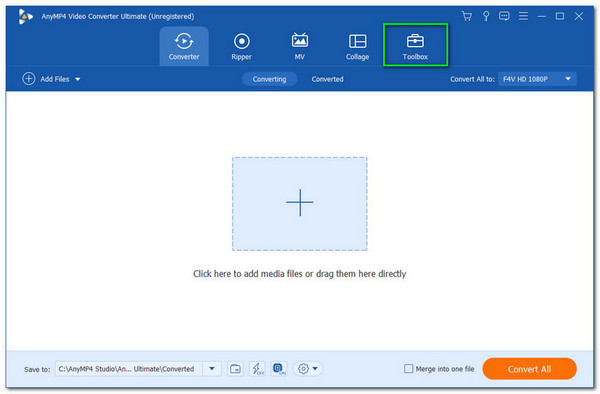
Step 1: Open the AnyMP4 Video Converter Ultimate to see its whole intuitive interface. From there, click the Toolbox feature on the top portion.
Step 2: From the option, you will see a diverse features icon. Please locate the tool for Enhance Video.
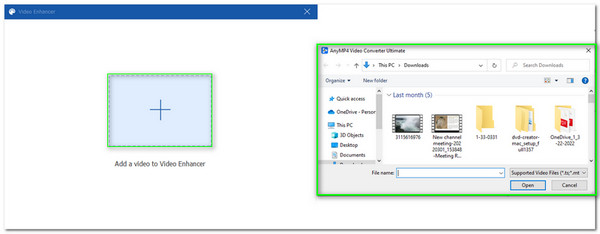
Step 3: A smaller tab will appear where you can add your video files. Kindly click the Plus sign on the central portion of the account. An account for your folders will exist. That means we can not choose the video we want to enhance. Select the video and click the Open button.
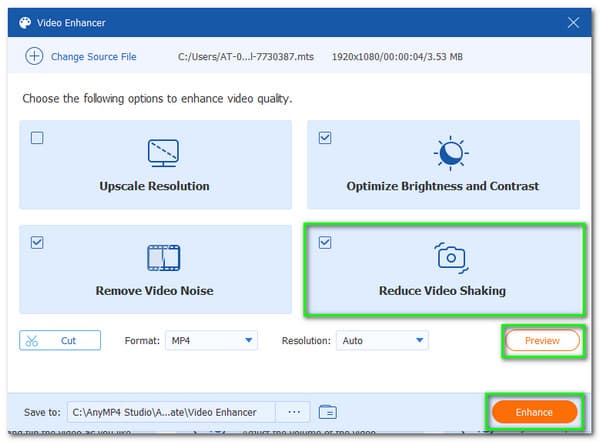
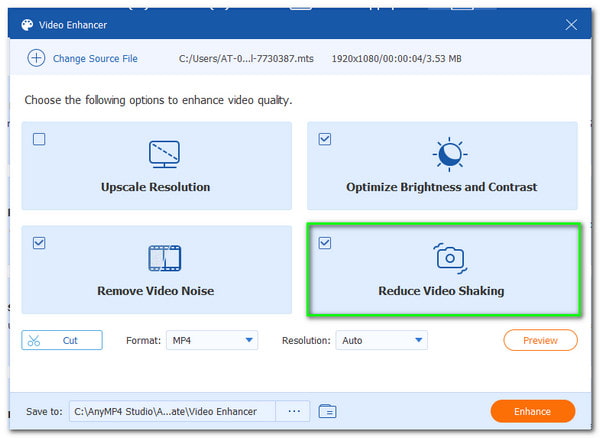
Step 4: Then, a new set of option tools will appear. What we need to do is check the Reduce Video Shaking. It is the fourth icon on the option.
Step 5: It is also crucial that you have chosen the correct video. You may secure it by clicking the Preview button on the bottom part of the interface.
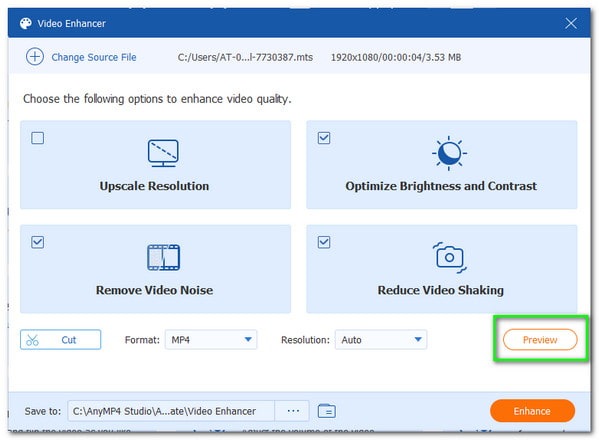
Step 6: If you are good to go, you may now start the process by clicking the Enhance button on the lower part of the interface. Please wait for a small amount of time, and your video is now ready to go.
That is the most straightforward way to stabilize your video. We can see how effective and productive AnyMP4 Video Converter Ultimate makes the process possible. You may experience it on your own by downloading it for free on their official website.
If you do not have a computer device to use but need to stabilize your video files, do you know you can use your mobile devices? This portion will help us understand how to stabilize video on Android and iPhone. In this situation, we can use CapCut. It is an app that stabilizes video effectively. You can get it on Google Play Store and App Store for free.
Step 1: Launch CapCut with your Android or iOS. From the interface, you will see a Plus sign under it. You will see the New Project. Click it to proceed.
Step 2: After that, you can now choose the video from the gallery and click the Add button.
Step 3: Your video will now be added to the editing workspace. Please click the video to see the tool that aims to modify your video. From there, a set of tools will appear. Press the Stabilize feature.
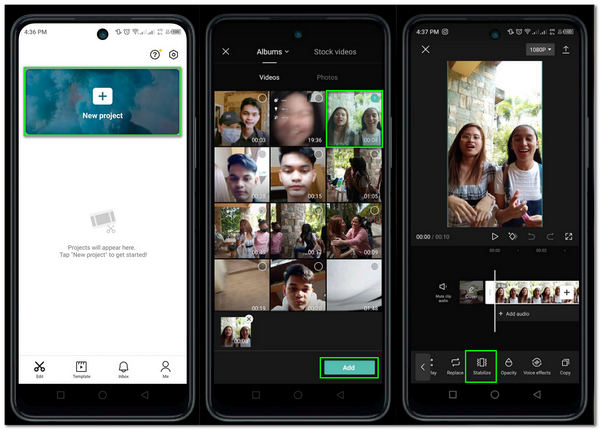
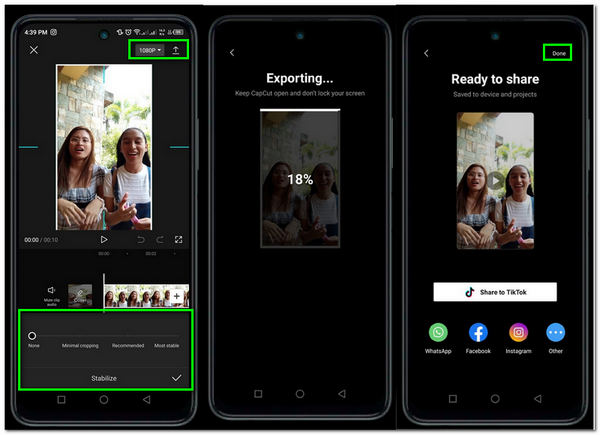
Step 4: Then, a Scale will exist where you can adjust the level of the stabilization process. You can choose from None to Most Stable.
Step 5: If you are good to go, you can now click the Save icon at the top portion of the interface. Wait for a few moments while the video is Exporting. After it, it will now be Ready to share.
The procedure above is evidence that stabilizing using our mobile phones is possible. We only need to choose an excellent editing application and follow every step to prevent complications. On the other hand, using an application can limit us in terms of the process of stabilizing video. That is because the application does not possess any advanced features similar to a desktop tool.
Proceeding to the next medium is for all professional video editors. This portion lets us discover how to stabilize a video in Premiere Pro. We are all aware that Premiere Pro is one of the great tools that possess outstanding features in making our video more professional to watch. In line with that, we shall know to see its ability to stabilize video.
Step 1: See your Premiere Pro on your computer. Add the video you want to stabilize and move it to the workspace for Effects.
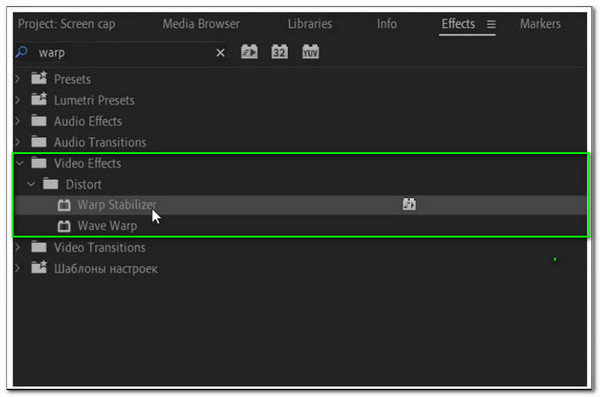
Step 2: Locate the Video Effects folder to see the Distort option. You may now find the feature for Warp Stabilizer to proceed.
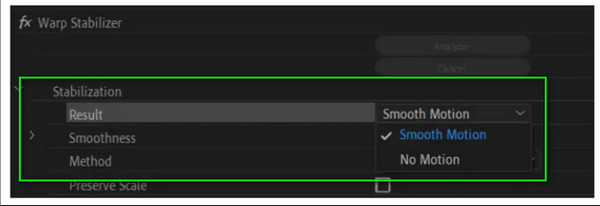
Step 3: The next step we need to do is wait as the software will assess your video file. After that, you can now adjust the Smoothness of your video.
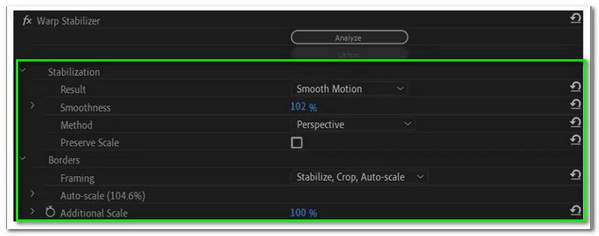
Step 4: After the adjustments, please click the Stabilization from the option. Next, locate the Result and select No Motion or Smooth Motion. Then, your video is now ready to export and render.
Those are the most manageable steps in making the stabilization process on Premiere Pro possible. Please be careful with each detail as we want to make the process successful. We all know that premieres are tremendous. However, it is also why it is hard to use and not applicable for new users.
We shall now learn the step in stabilizing shaky video on iMovie on the fourth method. Kindly look at the easy ways we can do it. Here are the steps we need to take in making it possible.
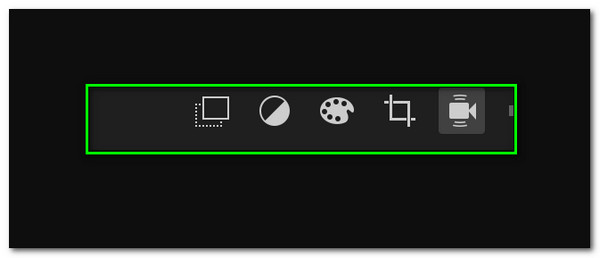
Step 1: Open the iMovie on your computer. Then add the video you want to stabilize. Double-click the video on the editing workspace, and a set of tools will appear, including the Stabilization icon.
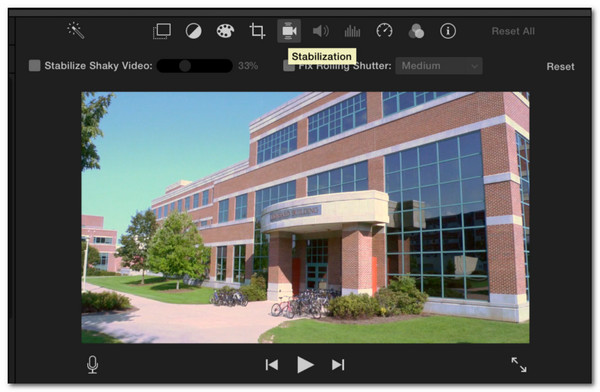
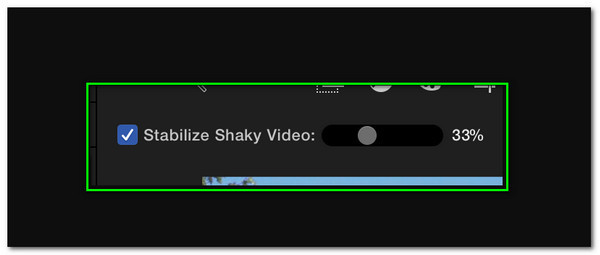
Step 2: From the Setting, please check the Stabilize Shaky Video box. The tool will automatically analyze your video.
Step 3: can now adjust the stabilization percentage by using the slider. Set it through your preference.
Step 4: If you are good to go, please click the Export icon and save your video to your computer.
That is the way to stabilize a video using the iMovie. It is easier than Premiere Pro but a bit low in quality. However, it is still effective and indeed a great help for all of us.
How to stabilize video in Movie Maker?
Go to the Stabilize Video button and add your video to edit. The process is automatic once you add the video and click the Save Video. Then you can click the Ok button to proceed with the saving process.
Is Warp Stabilizer software?
Warp Stabilizer is not software. The feature from Premiere Pro allows you to stabilize video instantly.
Can stabilizing crop video?
Yes. Cropping the video is a crucial element of a stabilizer to clean your shorts. However, it only cuts the unessential part and remains essential.
Therefore, we can conclude that stabilizing our video is possible with whatever device we use. We can see that it is possible with our computers, Android, iOS, and Mac. We can see above the essentiality of different software in making the process possible. Please share this post to reach more people who also need this information.
 Posted by Angelica Liwanag to Edit Video
Related Articles
 Top 5 Enthralling 4K AI Video Enhancer for Windows and Mac
Suppose you are a video creator or enthusiast who wants to originate a good quality video. Here, we provide a list of 5 best performing 4K AI upscaling software for Windows and Mac, which can be your crime partner.
 3 Easy Ways on How to Remove a Blur from a Video by AI
Nobody wants a blurry video, and that is undeniably true. In this article, we will clearly instruct you on how to remove blur from video using some of the best apps and software.
 3 Incredible Ways to Upscale 1080p to 4K Quickly and Easy
Do you want to experience 4K video on your Windows and Mac computer? Witness the fantastic way to convert 1080p to 4K using the best software in video editing
 2 Incredible Ways on How to Convert 480p to 1080p Resolution
Are you getting unsatisfied with the 480p resolution? Do not worry; here, we will instruct you how to convert 480p to 1080p HD resolution to get a high-quality video in two ways.