GIMP is a highly popular image editing and manipulation software. Though it is not a dedicated video editor, a common question is: Can GIMP edit video? The answer is yes. It can be utilized for certain video-related tasks, but not in the conventional sense of a dedicated video editor. It can perform frame-by-frame editing, create animations, apply effects, and composite visual elements onto frames. This post will outline the steps for approaching video editing in GIMP. We will demonstrate how to use GIMP to perform editing on video clips that would be challenging to achieve with a basic video editor.

The GNU Image Manipulation Program, known by many as GIMP, is a software primarily for image manipulation and editing. It offers tools for photo retouching, image composition, and image authoring. Given this flexibility, many ask: Can GIMP edit videos? Yes, but it has limitations. While it’s not a dedicated video editor, GIMP can be used for certain video-related tasks. By treating video clips as a sequence of still images, it allows for frame-by-frame editing, animation creation, special effects, and compositing.
In GIMP, you can perform editing by treating the video as a sequence of image layers. This technique can be used for basic video-related tasks, such as frame-by-frame editing, animations, special effects, and compositing. Now, a small heads-up: Since GIMP is not a true video editor, you need to prepare and edit a sequence of individual image files. By then, you will assemble it in a separate software.
If you like such an easy video editor, just check here the best video editing software for beginners.
Here’s how to edit a video in GIMP:
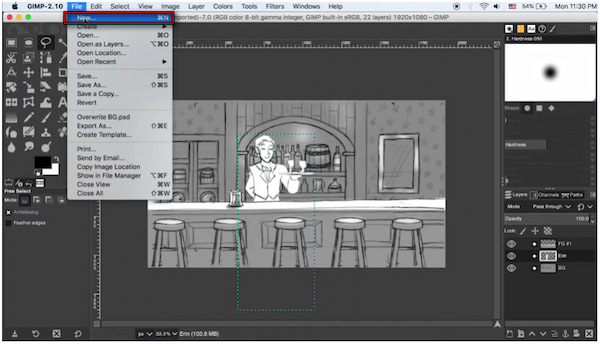
1. Navigate to the File tab, select New, and set the image size to 1920×1080 pixels. Click Advanced Options and set the resolution to 72,000. Then, click OK. Use the Layers panel to create new layers for your drawings.
2. Choose your desired Brush and adjust properties to begin drawing your character or object. Draw the first pose on one layer. To draw the next frame, hide the current layer, create a new layer, and draw the slightly changed pose. Repeat this for all frames of your animation.
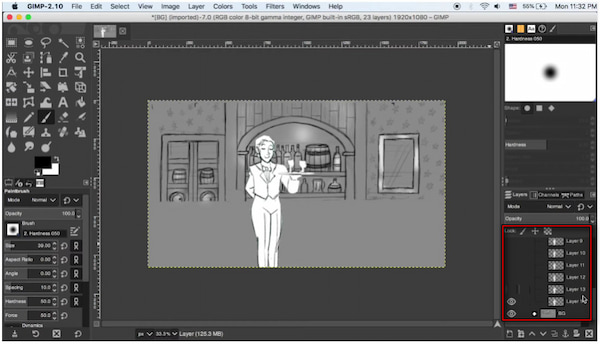
Important Note: This technique ensures that each frame is an individual image, showcasing the movement.
3. Right-click the foreground layer/folder and choose Alpha to Selection to select its contents. Then, move to the Select tab and select Invert to select everything outside the foreground object. Right-click the Character Folder, select Add Layer Mask, choose Selection as the initialize option, and click Add. This mask will hide the parts of the character that should be behind the foreground object.
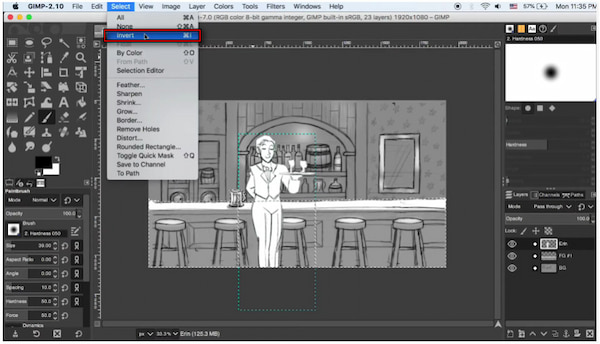
Tip: Group your character layers into a folder (Character Folder) and your static elements (background drawing) into separate folders. To make your character appear as if they are behind a foreground object, use a layer mask on the Character Folder.
4. To export the background, click the Eye button to hide the Character Folder. Ensure only your finalized background and static foreground layers are visible. Click File, select Export As, and change the file type to JPEG. Then, export the background image with maximum quality.

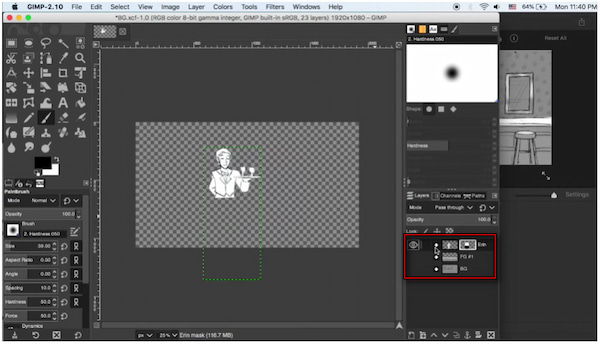
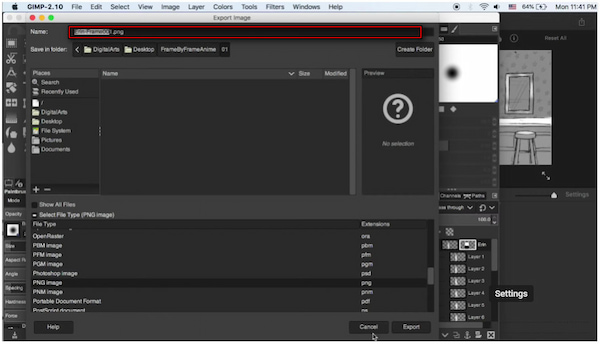
5. Next, export the character frames as a sequence by hiding the background. Be sure the Character Folder is visible when doing so. The background should now be transparent. Switch to the File tab, select Export As, and choose PNG Image as the file type.
6. Show only the layer for the first frame inside the Character Folder and export it as run_frame_001.png. Hide the first frame's layer, show the second frame's layer, and export it as run_frame_002.png. Repeat this process for every single frame in your animation sequence.
Once you have your sequential image files and your background image, use a video editing software. Import them to set the timing for each frame and render the final video. Although you can edit videos in GIMP, it is a highly time-consuming process that requires specialized editing expertise.
While GIMP is an exceptional tool for image manipulation, its use for video editing is limited. If you’re looking to move beyond single-frame edits and perform actual video editing, AnyMP4 Video Converter Ultimate is a necessary transition. Beyond its primary function, it offers a range of video, image, and audio editing tools. This includes Video Compressor, Video Trimmer, Video Reverser, Video Watermark Remover, Video Cropper, Noise Remover, and many others. It supports over 500 input formats, including MP4, MOV, AVI, MKV, WMV, etc. It features an MV mode with various theme templates for creating videos. Additionally, you can configure various audio track options, including background music, volume, and delay.
Here’s how to perform GIMP video editing using AnyMP4 Video Converter Ultimate:
1. Begin by downloading the AnyMP4 Video Converter Ultimate for free. Install the all-around software on your system and finish the installation process. Once completed, open the software to begin your video editing.
Secure Download
Secure Download
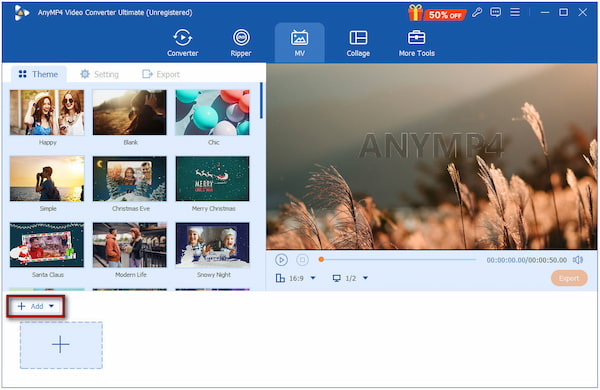
2. Upon startup, it will direct you to the Converter tab. Move to the MV mode and click +Add to import video clips or static images. Once added, drag and drop the files to rearrange the sequence into the desired position.
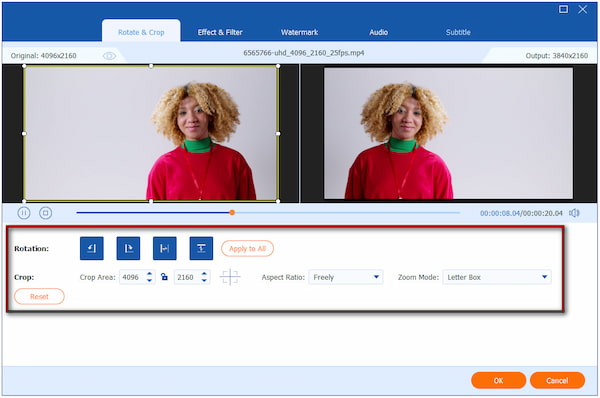
3. Switch to the Theme section and select a template that fits your project. For individual clips, click the Edit button to access tools for:

Rotate & Crop: Correct sideways or upside-down videos by rotating them to the correct orientation. You can also crop unnecessary edges to focus on the main subject.
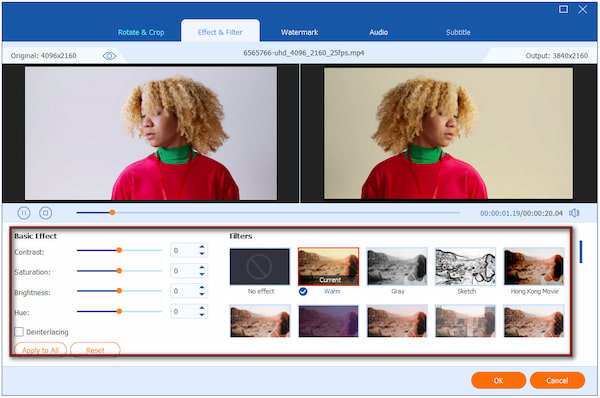
Effect & Filter: Adjust basic visual effects, such as brightness, contrast, saturation, and hue. You can also apply artistic filters to establish a specific mood.
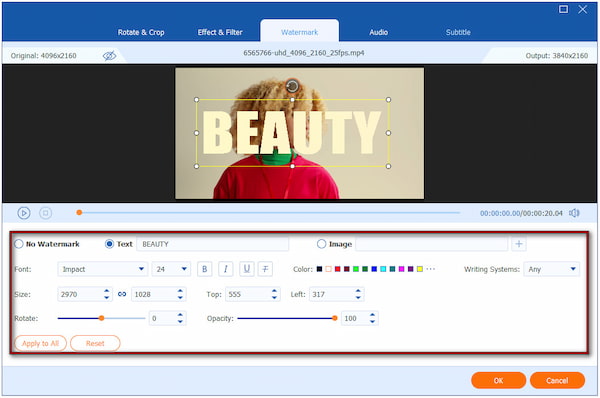
Watermark: Add a text or image overlay for branding or copyright. You can fully customize its position, size, transparency, and font.
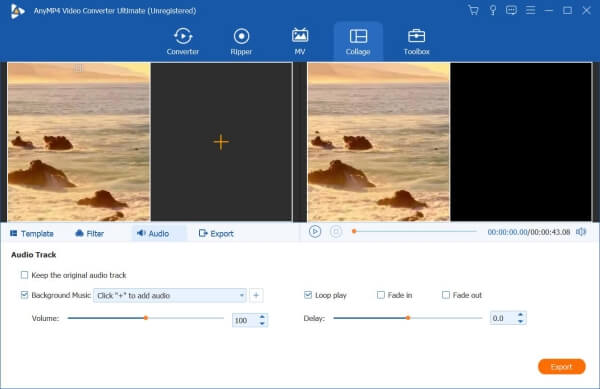
4. Proceed to the Settings tab to manage audio options. Here, you can keep the original track of the clips. You can also use the default music included with the chosen theme. If you want a custom background music, you can upload a new audio track.
5. Navigate to the Export tab to finalize your project. Name your file and select an output directory. Specify your desired output options, including the video format, frame rate, resolution, and quality. Then, click Start Export to produce your finished video file.

AnyMP4 Video Converter Ultimate, though known as a media converter, can also be used as a frame-by-frame video editor. Using the MV mode, you can import sequences of still images and turn them into video clips. You can also adjust the duration of each image to make it appear for a longer period.
Can GIMP edit videos directly like a dedicated video editor?
No, GIMP cannot edit videos directly like a dedicated video editor. It lacks the core feature of a true video editing software, making it unable to perform even basic video editing.
Is there a GIMP plugin for video editing?
Yes, the GAP (GIMP Animation Package). It allows some level of video and animation editing by treating frames as layers. However, it is no longer compatible with modern versions of GIMP.
What are the major limitations of using GIMP for video editing?
GIMP lacks a video timeline, which is essential for assembling clips, adding transitions, and other video editing tasks. Additionally, it lacks native audio track support for editing or syncing sound.
In conclusion, video editing in GIMP should be understood as a frame-level process, not traditional editing. GIMP excels at frame-by-frame editing, animation, special effects, and compositing to individual video frames. However, GIMP lacks a dedicated video timeline and requires external software for compiling the final video. For professional, efficient, and comprehensive video production, AnyMP4 Video Converter is essential. It is a user-friendly video editing solution that efficiently handles both basic and advanced tasks.
 Posted by Mark Cristobal to Edit Video
Related Articles
 How to Make 3D Films on Final Cut Pro 3D Editing
Create your 3D movies with one of the most innovative editing software, Final Cut Pro 3D Editing. Learn how to edit using this software by reading the article.
 How to Edit Video in Clipchamp | Edit Videos Like a Pro
No editing experience? No problem! Check our guide and learn how to edit video in Clipchamp. Learn the basic and advanced editing features it offers.
 Kapwing Video Editor Review, Is It A Good Video Cropper
Is the cropping feature in Kapwing Video Editor user-friendly? Check the answer from the review and get more alternatives to crop videos online and offline.
 How to Insert Text in Final Cut Pro for Titles and Captions
Want to learn how to put text in Final Cut Pro to add video titles or captions? Read this simple article guide to learn how and discover the best alternative.