When it comes to practical uses, screenshots of your device’s display are one of the most convenient options to easily save information without relying on traditional notes. To attest to this fact, smartphones are now built with multiple screenshot options. Due to the practicality of these images, most users of Windows PC scour online to look for the best way and learn how to screenshot on Windows, since learning how to capture these images will always come in handy. In this article, we will explore four methods that you can use to screenshot Windows PC displays. We will provide tutorials on how to use keyboard shortcuts, Snipping Tool, Xbox Game Bar, and a third-party screenshot tool that you can use as a more advanced alternative.
We will start this guide by featuring the tutorial on taking screenshots using Windows shortcuts on the standard keyboard. In total, we will provide a full guide on our of the most popular screenshot modes that can be done on the Windows display using the Print Screen key.
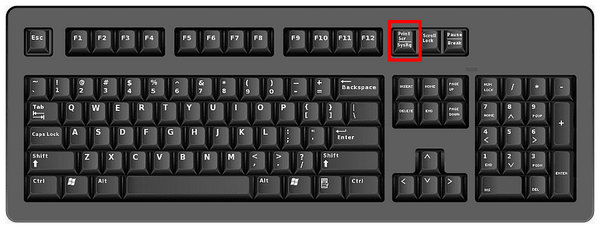
1. Find the Print Screen key on your keyboard and then press it.

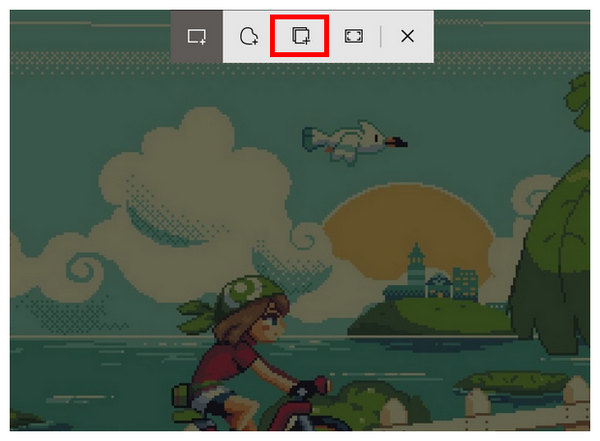
2. Pressing the Print Screen key will activate the screenshot overlay to be activated, where different screenshot modes are available. Select the Fullscreen Snip option.
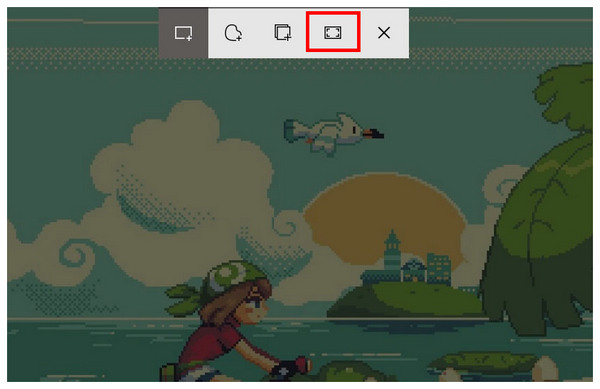
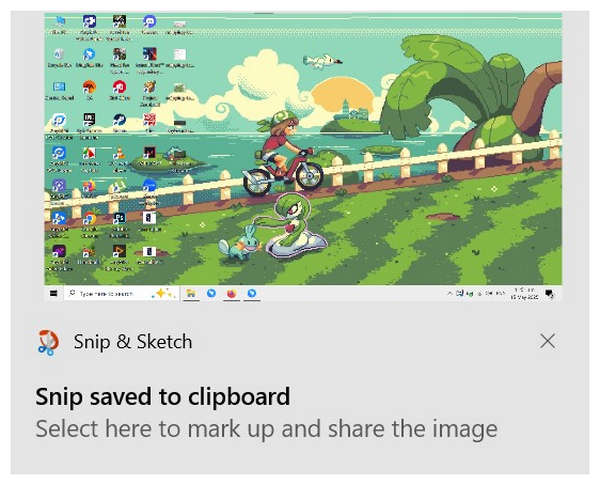
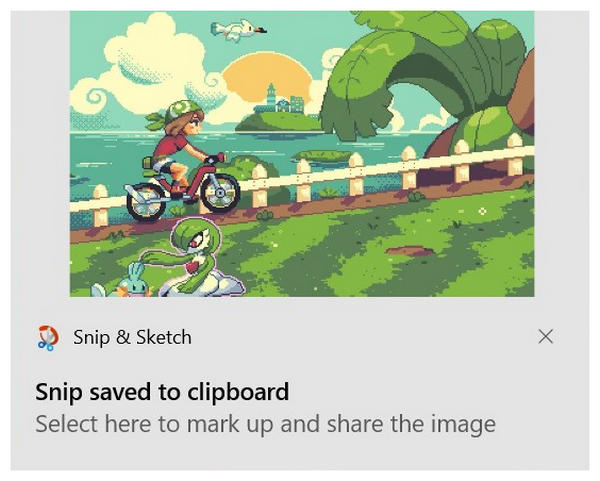
3. After clicking on Fullscreen Snip, your entire screen will be captured in the screenshot. A notification will pop up on your screen. Click on it to preview, edit, or save the screenshot.
Although it may be considered the most basic screenshot option, full-screen captures may still be considered the most practical option. This is because of its ability to retain a large amount of data in one image. There is a reason why full screenshots are the default capture mode that screenshots on Windows shortcut often use.
1. Press the Print Screen key on your keyboard to start capturing a standard screenshot.
2. In the screen capture window, use your cursor to select the portion of the screen that will be saved. Selecting the section that will be captured should be easy since the Print Screen will use the rectangle selector by default.

3. After capturing a screenshot, Windows’ screenshot tool will provide a notification that you can click to edit the screenshot or save it directly without any adjustments.
For more specific uses, you can also use custom screen capture as an alternative to the more popular full-screen screenshot. This option is usually used for sharing specific sections of the screen that only contain the data that you want to share or save for yourself. Regardless of your desired use, this option will always solve problems such as how to capture a screenshot on Windows.
1. Select the Print Screen button on your keyboard to start the screen capture process.

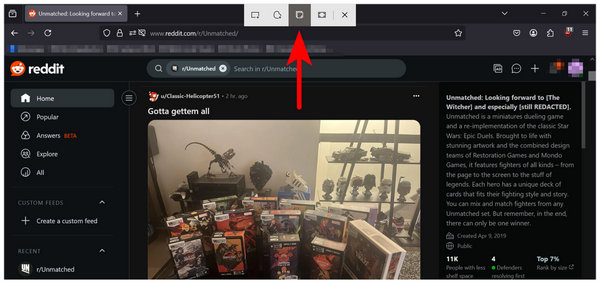
2. In the Screenshot mode selection menu, choose the Window Snip option to use the Active Window screenshot tool.
3. After selecting the Window Snip mode, a white outline in the current window on your display will show up. Then, simply Click on the active window to capture a screenshot of the active window.
Similar to full-screen capture, an active window screenshot can also take a full-screen capture. However, it is more customizable since it can only take a screenshot of the current window that you are using. Because of this element, most active window screenshots are often used for gaming-related reasons.
Although scrolling screenshot is a highly practical screen capture mode, the default screenshot tool of Windows operating system does not support this mode. Fortunately, the third party option that we will highlight in the fourth section of the article supports a scrolling screenshot function for Windows.
To capture a scrolling screenshot on your Windows PC, please refer to our guide on taking scrolling screenshots in the fourth part of this article.
If you are not familiar with keyboard shortcuts, fear not, since the Snipping Tool can be used as well to take screenshots on your computer. The Snipping Tool is the default screen capture tool for Windows 10 and 11 computers. Because of this development background, the screenshot shortcuts that we have presented above also use the snipping tool to edit their captured images. Moreover, the modes available in Snipping Tool might be activated by a specific keyboard shortcut.
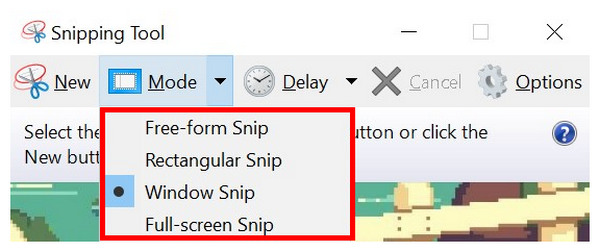
In line with screenshot modes, the program is equipped with four different options. These are free-from snip, rectangular snip, window snip, and full-screen snip. These modes' functions are self-explanatory: free form allows you to select the portion of that screen that will be captured without restrictions, rectangular can only capture a section of similar shape, window snip can only capture a specific window, and full screen can take a screenshot of the entire display.
To learn how to use Snipping Tool as a screenshot option, please read our three-step guide below.
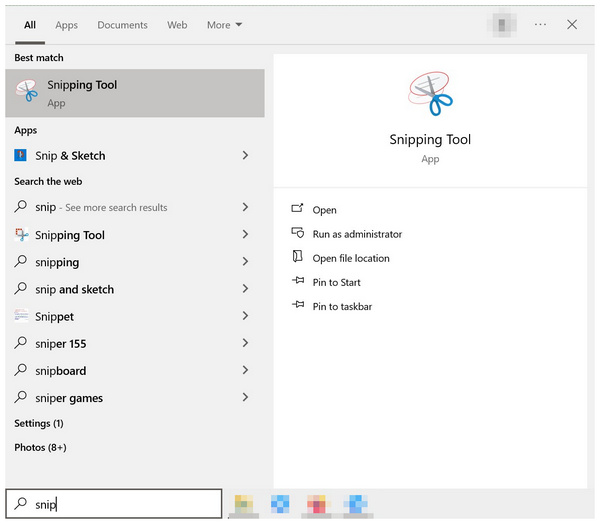
1. Search for the Snipping Tool on your taskbar’s search bar to open it. You have to search for the program manually since it is not readily available on the desktop.
2. In Snipping Tool’s main menu, click on Mode to open the available screenshot modes in the program. After choosing the mode you want to use, click on the New button to start the screenshot capture process.
3. Clicking on New will instantly trigger Snipping Tool to start the screenshot mode. Use your mouse cursor to take a screenshot. The way you control the cursor will change drastically based on the Screenshot Mode that you selected on the second step.

Due to the wide selection of screenshot modes, we recommend using all of the options first to make sure that you can find the solution to problems involving how do I screenshot on Windows computers.
Another new addition to the Windows 10 and 11 operating systems is the Xbox Game Bar. As its name suggests, this program is especially designed to capture gaming-related content, and screenshots are a staple of the gaming community.
To learn how to capture screenshots using the new Xbox Game Bar, please read our guide below.
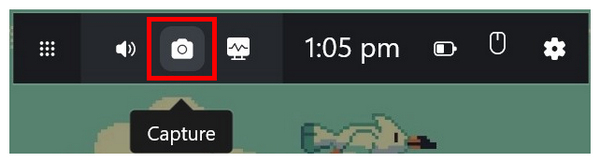
1. Open Xbox Game Bar using the keyboard combination Windows + G. In the menu that will open, select the Capture button.
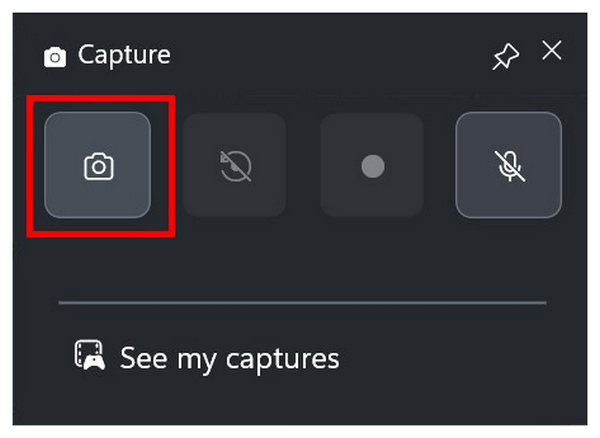
2. Inside the Capture menu, select the Camera button to take a full-screen screenshot.
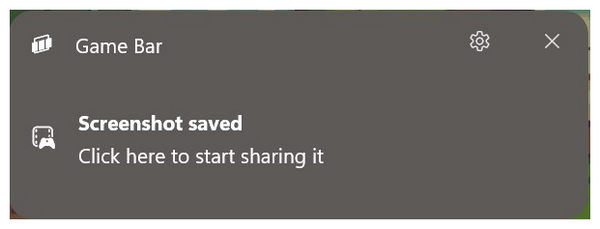
3. Once you click the Camera button, a notification will appear informing you that a screenshot has been saved. Click on the notification to open the file location where the screenshot is saved.
Since this option is optimized for gaming, Xbox Game Bar does not support taking screenshots in the file manager or on the computer’s desktop. You need to open a new window to make taking screenshots using the tool possible. Despite its limitations, Xbox Game Bar is a good option to take a screenshot on Windows without print screen.
Now that we have featured the built-in screenshot options that are available on Windows computers, this article will highlight the best third-party screenshot tool in the market that you can use on your Windows PC, with none other than AnyMP4 Screen Recorder.
Highly compatible with Windows 11/10/8/7, this optimized screen recorder program is equipped with a dedicated Screen Capture mode that can be used to take screenshots of your computer’s display.
More customizable than the options available by default on Windows, the tool can be used to capture a screenshot of a custom area, a specific window, or even take an extended scrolling screenshot which is highly ideal for saving loaded web pages offline.
Moreover, the software is also supported by ideal editing tools that use a practical pop-up menu feature, making screen capture editing seamless and more straightforward. When it comes to output format, the program is also highly commendable since it can save images into PNG, JPG/JPEG, BMP, GIF, or TIFF formats.
As a final touch on the tool’s practicality, images captured by the Screen Capture mode may be copied to the clipboard, saved to your computer, or pinned to the screen as a screenshot itself into a digital sticky note.
If you are interested in using the tool, please continue reading this section of the article to discover our provided step-by-step guides below featuring a detailed tutorial on taking a full-screen capture, a scrolling screenshot, and how to use the pin to screen feature of the program.
For an easier time following the tutorial, we recommend downloading the tool using the download link below as well as reading the program’s main features focused on its screen capture mode.
Secure Download
Secure Download
Main Features:
1. Open AnyMP4 Screen Recorder and then click on the drop down menu beside the active recording mode. Among the available modes, select the Screen Capture mode.

2. Take a screenshot of the screen regardless of the size. You don’t have to capture the entire screen. In the editing menu that will pop-up, select the Full Screen option.
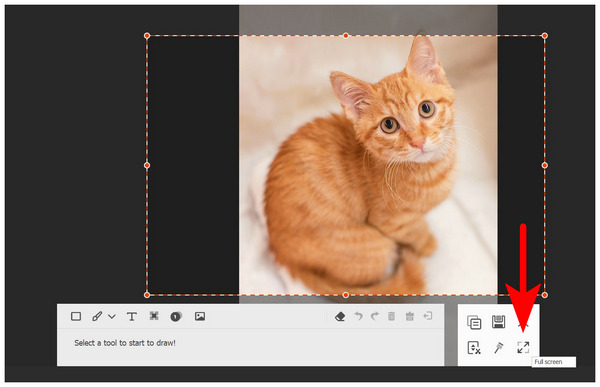
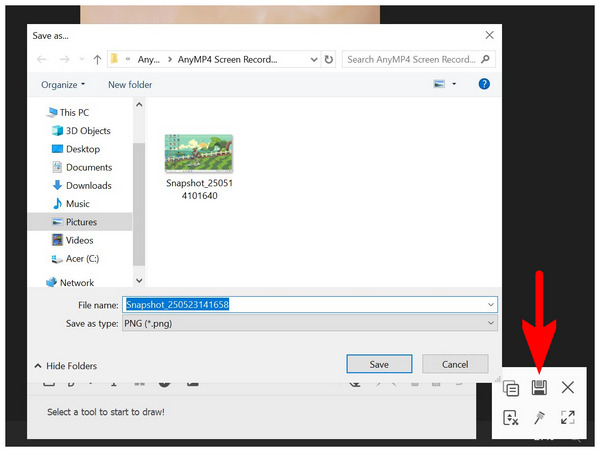
3. After clicking on the Full Screen option, click on the Save button to import the full screen snapshot in your computer’s file manager. AnyMP4 Screen Recorder will suggest saving the screenshot in the program’s Pictures folder, but you can also select a custom location where you want the screenshot to be saved.
1. Start AnyMP4 Screen Recorder and then change the recording mode by clicking on the mode selection menu. Among the modes available, select Screen Capture mode.

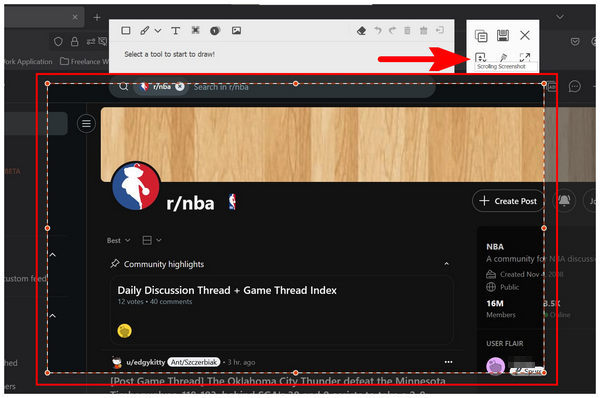
2. During the screenshot capture process, select the portion of the screen that you want to capture by the Scrolling Screenshot. After identifying the region of the screen you want to select, click on Scrolling Screenshot in the editing menu.
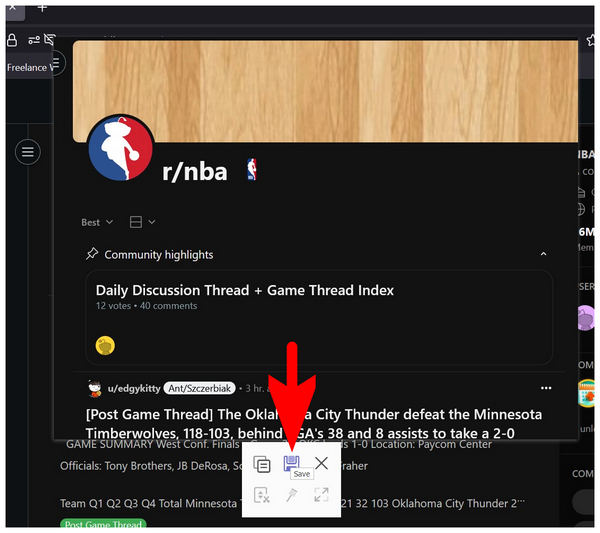
3. After selecting the Scrolling Screenshot mode, use your mouse’s scrolling wheel to identify the sections that will be captured. Then, click on Save to import the scrolling screenshot that you have taken into your computer’s storage.
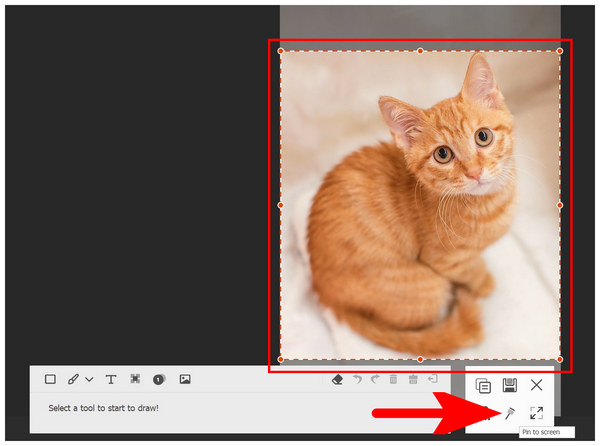
1. Open AnyMP4 Screen Recorder then change the recording mode by clicking the mode selection menu. Among the available options, select the Screen Capture mode.

2. Use the Screen Capture mode to select the portion of the screen that you want to be pinned on your display. After capturing the screenshot, select the Pin to Screen option among the available modes.
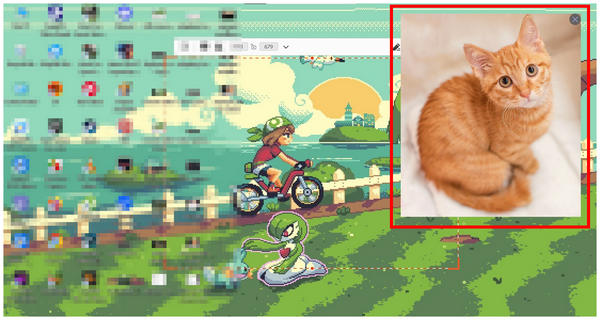
3. After clicking the Pin to Screen button, the screenshot that you have selected will now be opened in a separate Window that you can position wherever you want in the screen.
With the help of these three screenshot modes, we hope that AnyMP4 Screen Recorder will easily solve all your screenshot-related needs. For additional practicality, to program also supports screen recording for Windows computers, and it is one of the best free screen recorder tools for the platform.
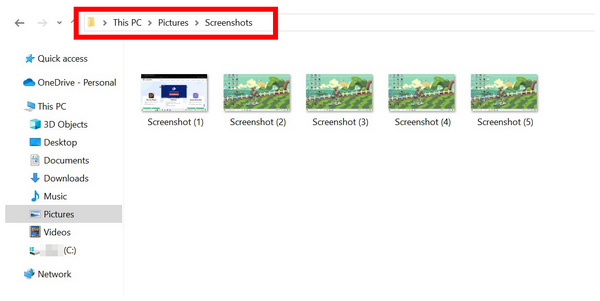
Altough screenshots that are edited using Snipping tool might be saved to a location of your choice, ther are some instances that you want to avoid editing screen capture images. In these cases, you can locate these pictures in using your computer’s File Manager and then following the path of This PC > Pictures > Screenshots.
We hope that this guide has helped you learn how to screenshot on Windows laptop or computers. However, if you think that the default option on the operating system is not enough for your current needs, make sure to try using our featured third-party option with AnyMP4 Screen Recorder.
Secure Download
Secure Download
 Posted by Riley Mitchell to Screenshot
Related Articles
 3 Ways to Screenshot on HP Desktop and Laptop of Any Screen Size
This is the complete tutorial to screenshot on HP step by step. You can use both the tools to take a screenshot on all HP models and OS versions.
 Tutorial to Screenshot on Lenovo Laptop/Desktop of Any Screen Size
This is the complete guide to screenshot on Lenovo laptop or desktop. You can take a full-screen, active or custom screenshot on Lenovo on Windows with ease.
 How to Screenshot on Dell Laptop/Desktop
How do you take a screenshot on a Dell laptop without PrtScn button? How to capture a screenshot with Windows 10? Here are 3 easy ways to screenshot on Dell.
 4 Ways to Take Scrolling Screenshot on Mac to Save the Page
Learn how to take scrolling screenshots on Mac effortlessly. Capture web pages, documents, and content beyond the screen with simple methods and hotkeys.