"I have a Toshiba laptop, but I cannot find the Print Screen key on the keyboard, how to screenshot on Toshiba laptop?"
A screenshot is a picture of whatever is on your desktop. The function of screenshot making has been built in the Windows operating system as long as it has existed. On any machines running Windows, you can simply press the Print Screen key to capture full screen.
The problem is that the design of Toshiba may be varied and you cannot find the shortcuts quickly. That is what you can learn from this post.

According to our research, many Toshiba users reported that they cannot find the Print Screen key on their keyboard. That is because the label is abbreviated or the key is combined with the End key. In addition to Print Screen, the key may be labeled PrtScn or PrtSc.
Step 1: Reach the screen you want to screenshot on Toshiba laptop and press the Print Screen button if you can find it. For keyboards with secondary functions of keys, press Fn + Print Screen keys.

Tip: If you cannot find the Print Screen key, chances are that it was combined with the End key.
Step 2: Go to the Start menu, find MS Paint and open it. Press Ctrl + V to paste the screenshot.
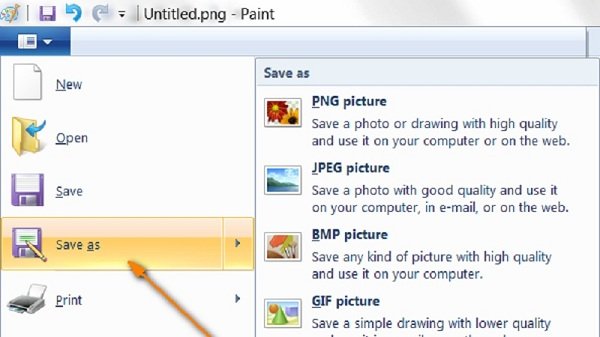
Step 3: Then go to the File menu, and select Save as to trigger the format panel. Now, choose your favorite image format, such as PNG, JPEG, BMP, or GIF to enter the save as dialog.
Step 4: Navigate to a specific folder to save the screenshot for Toshiba, enter a filename and hit the Save button.
Similar to other laptops, Toshiba devices with Windows 10/8/7 has the pre-installed Snipping Tool. It is a good way to take screenshots on Toshiba and other computers. Unlike the Print Screen key, Snipping Tool is a software utility.
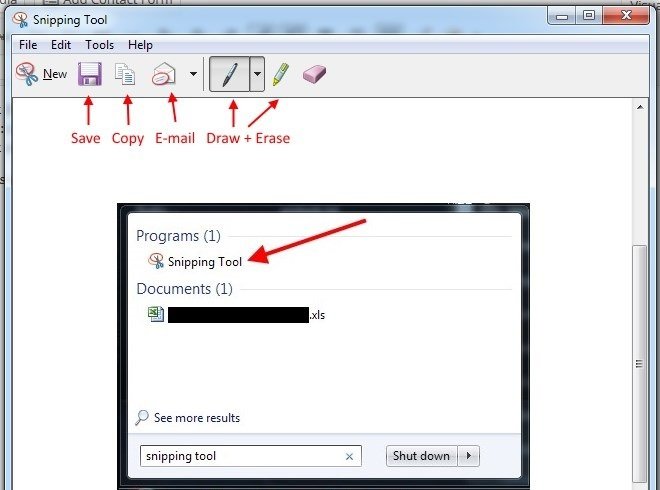
Step 1: Run the Snipping Tool on your laptop. For Windows 10/7, find it in the Start button. On Windows 8, search for it from the right edge.
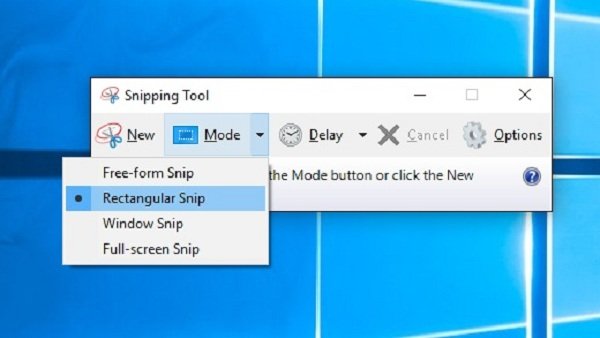
Step 2: Click and expand the Mode option and select a proper mode:
Free-form Snip, draw a free-form shape covering an object.
Rectangular Snip, screenshot a custom region on Toshiba.
Window Snip, take a screenshot for a window.
Full-screen Snip, capture the entire screen.
Here we select Rectangular Snip.
Step 3: Set the Delay, and click New. Then your screen will turn dark. Click on the top left corner of the area you wish to screenshot on Toshiba, and drag your cursor until the object is covered.
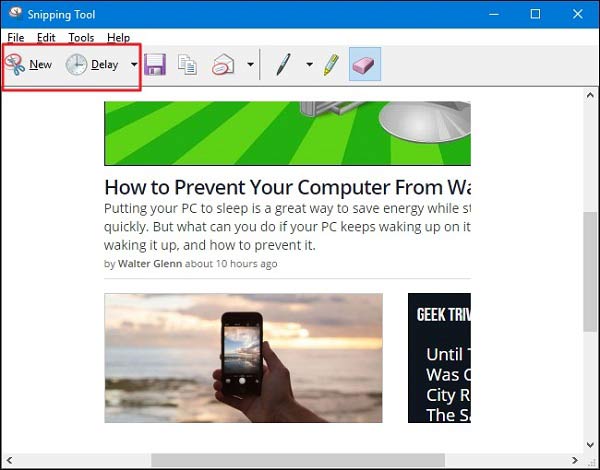
Step 4: Once you release your mouse, the screenshot will show up in Snipping Tool. Then click the Save icon to save the screenshot to your hard drive.
Then you can use the photo editing software to edit the photos further.
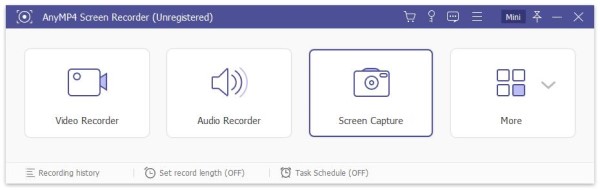
The Print Screen key and Snipping Tool are simple methods to screenshot on Toshiba. However, you still have another option, AnyMP4 Screen Recorder. It is a free way to take screenshot on Toshiba without any restriction, like signup. Moreover, you can get extensive functions within the single application, like image editing.
Main features of the best screenshot tool on Toshiba
In brief, it is the best alternative solution to built-in screenshot tools on Toshiba.
Secure Download
Secure Download
Step 1: Install Screen Recorder
Open Screen Recorder after you install it to Toshiba for free. Enter the screen you want to screenshot, and then select Screen Capture in the main interface.
Tip: To set the output format and other options, go to the Preferences dialog. Here you can get custom options related to output, hotkeys and more.
Step 2: Take a screenshot
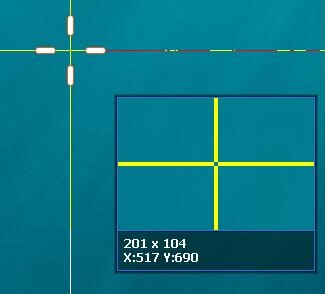
Now, your cursor will become a cross. Click on the top left corner of the desired area with your left mouse. Keep pressing your mouse and drag your mouse to cover the entire region. When it is done, let your mouse go.
Step 3: Edit and save screenshot
Next, the toolbar window will pop up. Optionally, you can edit your screenshot with the tools on the toolbar. Ocean you are satisfied, click the Save icon and export the screenshot. Alternatively, click the Clipboard icon to send the image to your clipboard.

How do you take a screenshot on a Toshiba laptop Windows 10?
On Toshiba Windows 10, you have several options to take a screenshot. For full screen, the Print Screen key is enough. The built-in Snipping Tool lets you screenshot for any region. You also can make a screenshot for full screen with Game Bar.
What is the Fn key on Toshiba laptop?
Toshiba laptops offer extra features with the Function key. It is usually labeled as Fn, which allows you to activate a range of features, such as lock laptop, adjust volume and resolution, and more. Sometimes, it works with End button to screenshot on Toshiba laptop.
Where is the PrtScn button on Toshiba laptop?
The Print Screen or PrtScn key is usually located on the top line of your keyboard on Toshiba laptop and next to the Function keys. If there is a Fn key, hold down both Fn + PrtScn to take a screenshot. Cannot find Print Screen key? Try the End key instead.
This article has discussed 100% working methods to take a screenshot on Toshiba laptop and computer. No matter you want to screenshot your full screen, a specific window or custom region, they can meet your need easily. AnyMP4 Screen Recorder, for example, allows you to screenshot any region on your desktop and then edit the image immediately. Plus, you can decide to save the screenshot to your hard drive or send it to clipboard according to your situation. More questions? Please write it down below.
 Posted by Ted Klarso to Recorder
Related Articles
 4 Proven Ways to Transfer Photos from One Android Phone to Another
This article shares 4 methods to help you transfer photos and pictures from one Android device to another, so you can share your photo collection with your friends or family.
 A Complete Guide to Transfer Photos from iCloud to PC, Mac or iPhone
Considering some iPhone users do not understand how to transfer and download photos from iCloud to their computer or iPhone, we share a step-by-step guide in this article.
 Everything You Should Know about Transferring Photos to iCloud
No matter you just get your new iPhone or have used iOS device for years, it is important to learn how to transfer photos to iCloud from iPhone in order to free up space.
 Top 3 Easy Methods to Lock Photos on iPhone without Losing Quality
How to hide some sensitive or private photos on your iPhone from your friends or family? The article shares 3 easy methods to lock photos on your iPhone.