Nowadays, recording life with pictures and videos become easier than ever before due to the advanced lenses on smartphones, like iPhone. Moreover, the built-in apps on iPhone and Mac make it easy to edit your multimedia files. The problem is that some users still do not understand how to use the advanced features in the preinstalled apps. Therefore, this guide explains how to do a voiceover with iMovie on iPhones and Mac computers.

Voiceover is a piece of narration in a movie or video. It is not accompanied by the video but added to the movie with a video editor, such as iMovie.
Step 1: Fire up the built-in video editor on your Mac, go to the Projects panel and click the Create New button to make a new project. Next, select Movie from the dropdown menu.
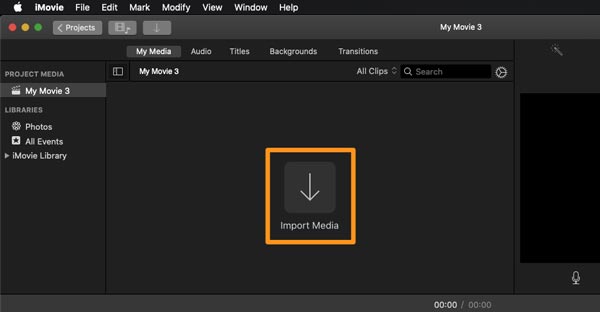
Step 2: Click the Import Media button and open the video that you want to edit in iMovie. Then drag and drop the video onto the timeline.
Step 3: Next, place the play-head to the beginning point where you want to add the voiceover. Now, either click the Microphone icon at the bottom of the composition panel or choose Record Voiceover from the Window menu.
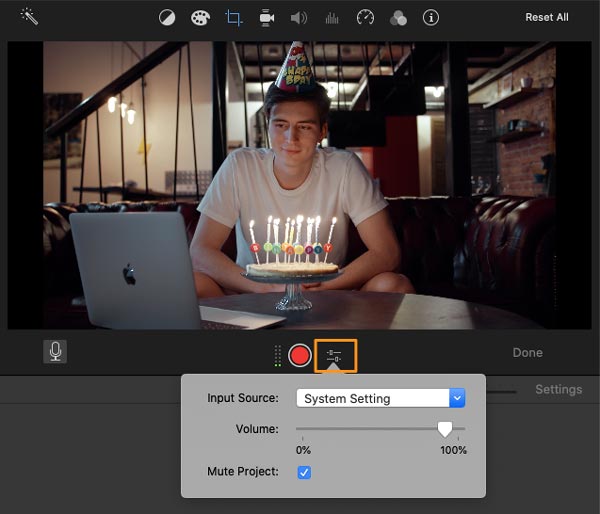
Step 4: On the popup dialog, pull down the Input Source option and select your microphone, and adjust the volume. Click the red Record button and start doing a voiceover on iMovie after the countdown.
Step 5: When the voiceover recording is done, click the Stop button under the composition panel. Your voice will be added to the timeline as a new track. Click Done at the bottom right side of the composition panel.
Step 1: When you want to add a voiceover on iMovie on iPhone, start the preinstalled video editor app, and create a new movie project or open an existing project.
Step 2: Tap the + icon, choose Video and add the video from Camera Roll to iMovie. Preview the video on the timeline and find the beginning position of the voiceover.
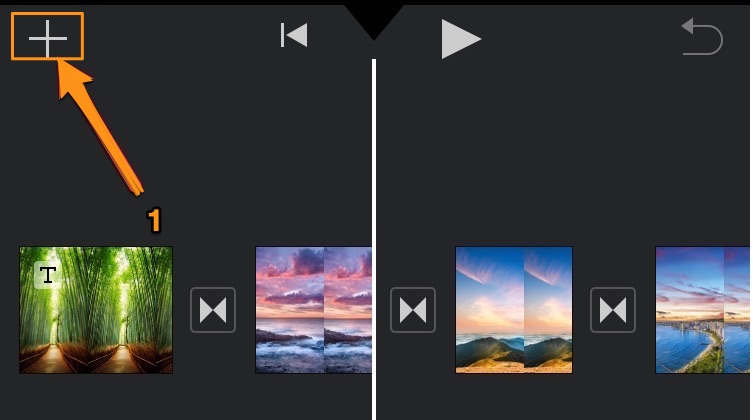
Step 3: Tap the + icon at the upper left side of the timeline, and choose Voiceover on the context menu. Now, you will be presented with the Ready to Record box.
Step 4: Test your voice and adjust the volume. Once you are ready, tap the Record button to trigger the 3-second countdown.
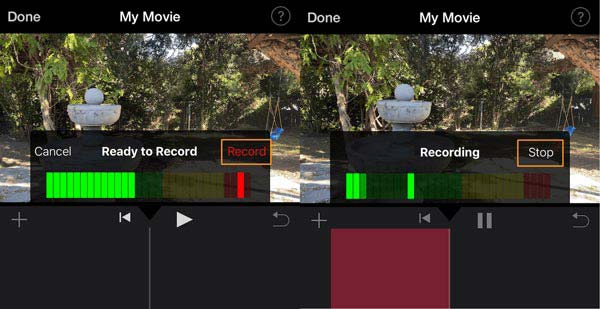
Step 5: Then record the voiceover, and tap Stop when you are done recording. Pre-listen to the voice recording, and tap Accept, and press Done.
Although iMovie is a convenient way to do a voiceover on iPhone and Mac, it is not available to PCs. Moreover, the voiceover feature is pretty simple. AnyMP4 Screen Recorder is a good way to record a voiceover without iMovie. The output quality is impressive.
Main Features of the Best Voiceover Recorder Alternative to iMovie
Secure Download
Secure Download
Step 1: Install voiceover recorder
Run the best voiceover recorder alternative to iMovie after you install it on your PC. Then select Video Recorder to enter the main interface. If you just want to record your voice, select Audio Recorder instead.

Step 2: Record voiceover
Play the target video on your desktop. Turn to the voiceover recorder, and set the recording area according to the video playback in the Display section. If you intend to mix the background sound and your voice, turn on both System Sound and Microphone, and adjust the volume. To mute the video while doing voiceover, disable System Sound and enable Microphone. The Webcam is used to add your face and reaction to the video, and you can decide to toggle it on or not. Play the video, click the REC button, and initiate doing voiceover without iMovie.
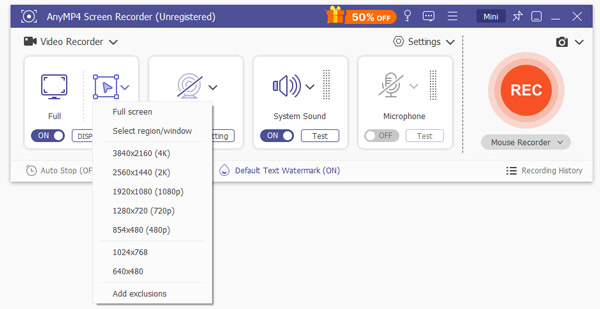
Tip: If you intend to record a voiceover automatically, click the Take Schedule menu, and set it up according to your need.
Step 3: Save voiceover
When the voiceover recording finishes, click the Stop button. A few seconds later, you will see the preview window. Play the video and remove unwanted frames with the Clip functionality. At last, click on the Save button if you are satisfied with the video.
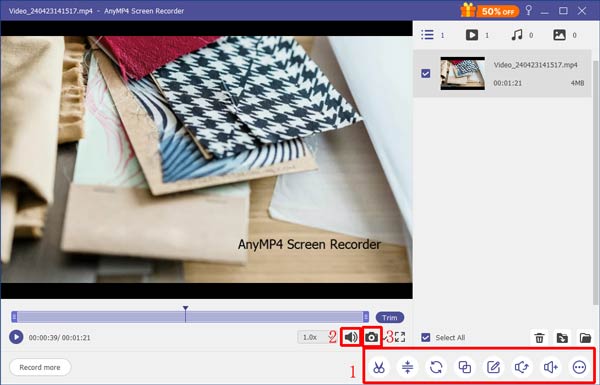
Note: To change the video format, output directory, hotkeys, and more, click the Gear icon in the main interface to open the Preferences dialog.
Why does voiceover not work in iMovie?
You might have a corrupt preference. Open iMovie while holding down the Option and Command keys on your keyboard. Then delete preferences in the box that appears. You can also check your microphone when the voiceover does not work.
How to add a voiceover file in iMovie?
In the iMovie project on Mac, click the Add Media icon, choose Audio, and add the voiceover file to the project. When it comes to iMovie on iPhone, tap the + icon, select Audio, and overlay the voiceover to the video project.
Can I talk over a video?
The easiest way to talk over a video is by doing a voiceover to the video. You can open a video in iMovie or a video editor, and use the Voiceover feature to talk over a video. Make sure to uncheck Mute Project.
Now, you should understand how to add a voiceover to a video using iMovie on both iPhone and Mac. It is not very difficult if you follow our steps. If you do not like iMovie or it is not available to you, try AnyMP4 Screen Recorder directly which is a professional tool to record voice over music. If you encounter other problems when using iMovie, please leave a message below this post and we will reply with it quickly.