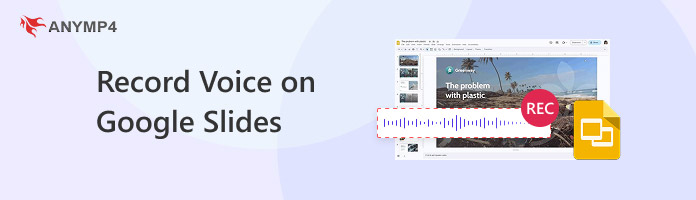
How to Record Voice on Google Slides: Record First, Insert Second (2026)
Quick Answer:
Google Slides lacks a built-in voice recorder. But you can still insert the voice into Google Slides easily:
- Step 1. Record narration as an MP3 or WAV file using desktop or online audio recording tools;
- Step 2. Upload the audio to Google Drive and set sharing permission to "Anyone with the link";
- Step 3. Click Insert > Audio in Google Slides to place the audio icon onto your presentation.
When you try to make a Google presentation for your online class, or want to walk your team through a sales deck, you open your slides, click around the top menu, and look for a little microphone icon. Where is it?
Google Slides cannot record your voice. It only lets you link audio files that already exist on your computer. But don't worry. You can still add narration to your slides by recording your voice first, then inserting it into your slides. Let’s explain the detailed guide step by step.
| Feature |
AnyMP4 Screen Recorder (Desktop) |
AnyMP4 Free Online Audio Recorder |
| Best For |
Full slide decks, clean voice tracks, trimming audio |
Quick one-slide notes, zero setup |
| Audio Formats |
MP3, WAV, AAC, M4A, WMA (Lossless to Standard) |
MP3 (Standard) |
| Key Features |
Mic noise cut, mic booster, built-in sound trimmer |
One-click record, browser-based, instant save |
| System |
Windows 11/10/8/7 and macOS 10.13+ |
Web browser (runs on Windows) |
| Price |
Free trial (Paid license for full features) |
100% Free (No card needed) |
Method 1: Record Narration with AnyMP4 Screen Recorder (Desktop, Windows & Mac)
If you need to narrate ten or twenty slides, a desktop tool saves you tons of time.
I tested AnyMP4 Screen Recorder on my own laptop. It works on both Windows and Mac. What I like most is the audio recorder, which lets me record system sound and microphone voice separately and simultaneously. Besides, it has built-in audio trimmer. If you cough at the start or pause for five seconds at the end, you can cut the dead air out before you save the file.
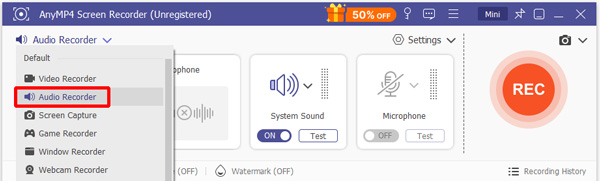
1. Open the Audio Recorder
Install and launch the software. On the main screen, click the Audio Recorder card.
2. Make Audio Recording Settings
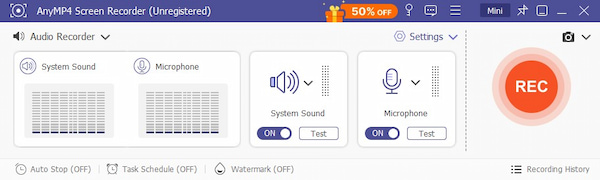
Turn your Microphone switch to ON. If you only want your voice, leave the System Sound switch set to OFF. That way, your computer will not record stray ding sounds from Slack or your email.
Before you start recording voice, do not forget to click the drop-down of System Sound to find the Settings option to adjust the audio volume, enable Microphone noise cancellation, and make recording test.
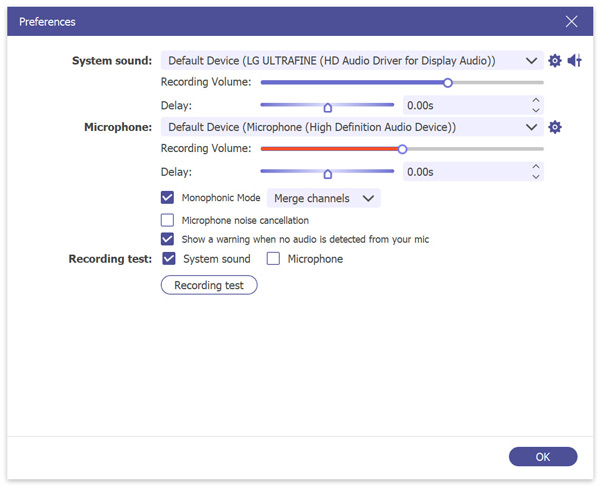
Tips
If your laptop fan is loud or your AC is humming in the background, this single toggle cleans out the hiss so your voice sounds crisp.
3. Record Voice and Trim Your Recording
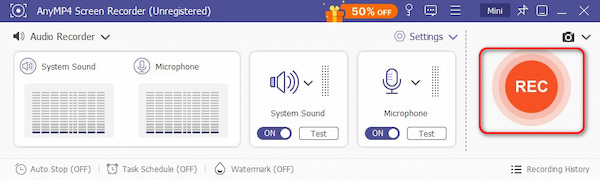
Click the big orange REC button. You will see a 3-second countdown. Start speaking your notes for slide one.
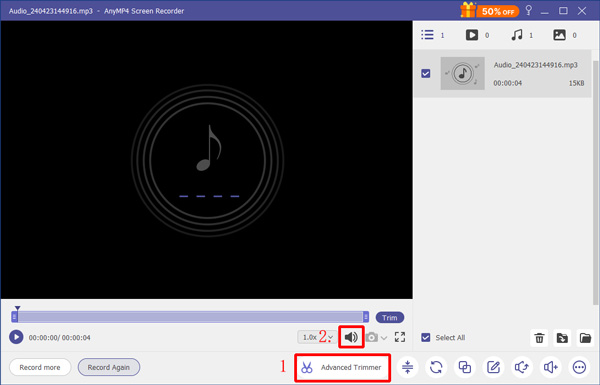
When you finish, click the red Stop button. The preview window opens right away. Play the track back. Drag the little sliders at the left and right edges to snip off any quiet space at the start or end.
You can also use the Advanced Trimmer to cut the audio recording file as you wish.
4. Save as MP3
Once the voice recording editing is done, you can save your file as an MP3.
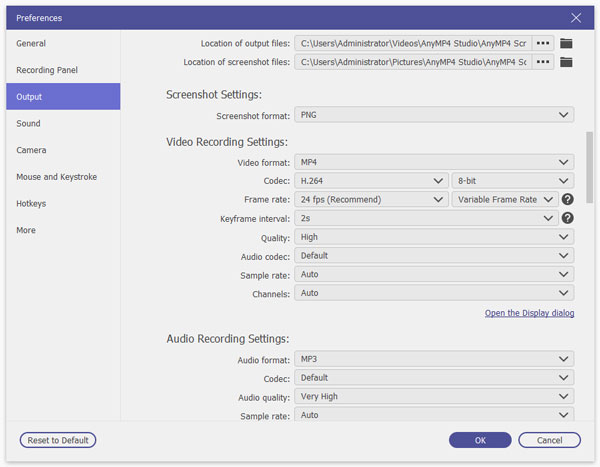
If you want to pick WAV instead, head to Preferences > Output > Audio format before you record. Both formats work smoothly inside Google Slides.
Method 2: Record Voice for Free Online (Quick Takes, No Installation)
What if you just need a 20-second intro for a single slide and do not want to install any software? Use the online tool.
AnyMP4 Free Online Audio Recorder runs right in your browser. It does not cost a penny and needs no sign-up.
1. Open the Web Tool
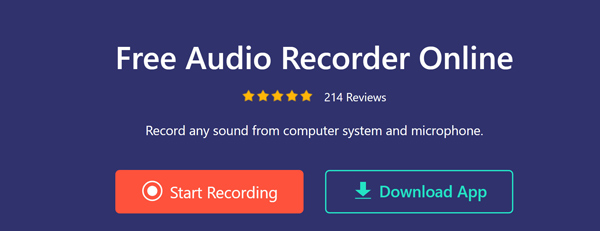
Go to AnyMP4 Free Online Audio Recorder and click the Start Recording button. If it is your first visit, click the prompt to run the quick launcher.
2. Allow the Mic and Record
Your browser will pop up a box asking to use your microphone. Click Allow.
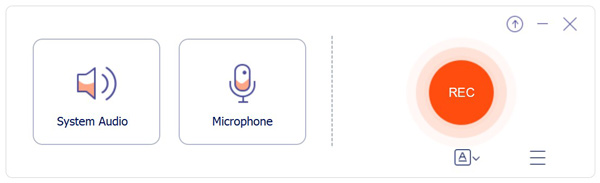
Make sure the Microphone icon is bright and active. Click REC and start speaking.
3. Stop and Save Audio Recording
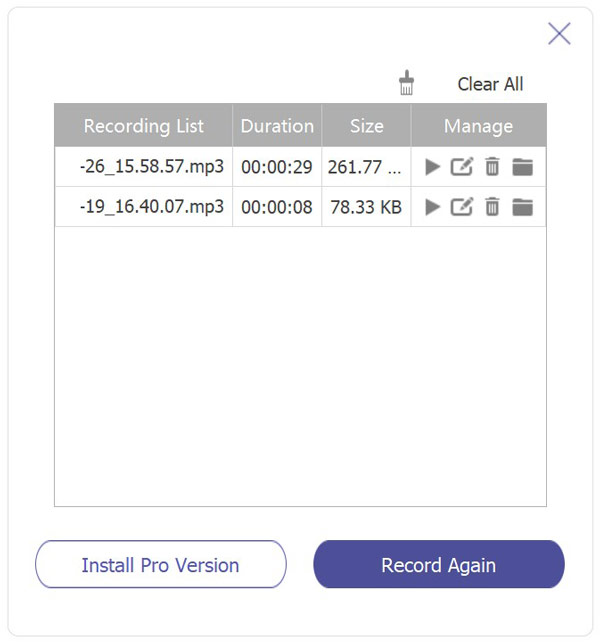
When you finish talking, click the Stop button. Then you will be directed into a window, where all your recording history will be listed as MP3. Ou can click the file you recorded just now to see where it is stored on your device.
Note
This web tool runs best on Windows browsers. If you are on a Mac, or if you want to clean up background dog barks, stick with the desktop version in Method 1.
How to Insert the Recorded Audio into Google Slides (The Critical Step)
Now you have your MP3 files sitting on your computer. Here is where most people get stuck. You cannot drag an audio file from your desktop directly onto a slide. You must go through Google Drive.
1. Upload to Google Drive and Fix Your Link
Open Google Drive. Click New > File upload. Pick your recorded voice file and upload it to Drive.
Then, right-click the audio file inside your Drive list. Click Share > Share. Under General access, change Restricted to Anyone with the link. Leave the role as Viewer and click Done.
Note
If you skip this step, your audio will work fine for you, but everyone else who opens your presentation will see an ugly error that says "Access Denied."
2. Put the Audio on Your Slide
1. Open your presentation in Google Slides.
2. Click on the slide where you want the voice track.
3. In the top menu, click Insert > Audio.
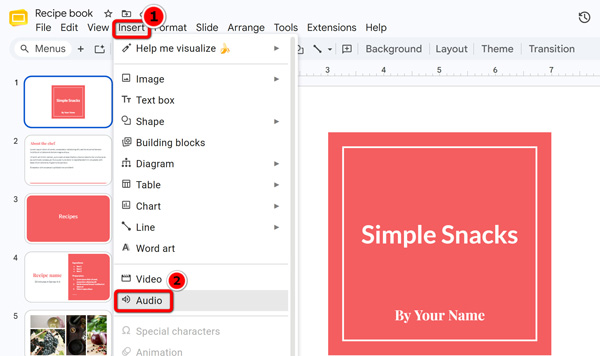
4. You will see your files. Click on your newly uploaded track under the My Drive or Recent tab.
5. Click the blue Select button at the bottom.
A small speaker icon will pop up on your slide. You can click and drag it to any corner of the screen.
3. Set Your Playback Rules
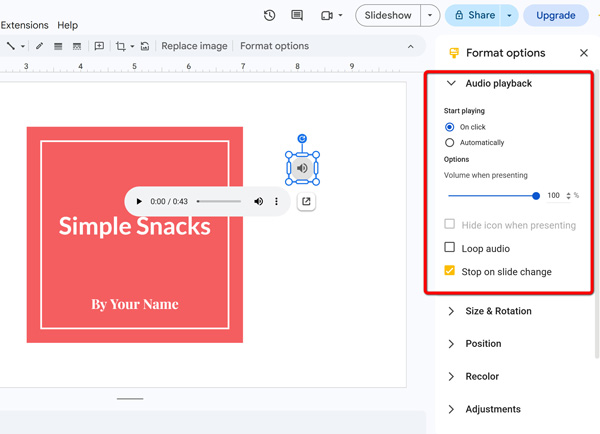
When the speaker icon is selected, a panel called Format options opens on the right side of your screen. This panel gives you three handy switches:
- • Start playing:
- Pick On click if you want to click the speaker icon during a live talk.
- Pick Automatically if you want the voice to start the exact second you turn to this slide.
- • Stop on slide change: Check this box! If you leave it unchecked, the voice from slide one will keep talking even after you flip to slide two.
- • Loop audio: Leave this unchecked unless you want your voice track to play on repeat forever.
- • Hide icon when presenting: If you picked "Automatically," check this box. It hides the speaker icon so your slide looks clean.
Best Practices for Recording a Professional Google Slides Narration
A messy recording can ruin great slides. Here are a few simple tricks I use whenever I build a presentation:
- • Keep it short: Aim for 30 to 60 seconds per slide. Long blocks of speech bore people. If you have three minutes of things to say, break the topic across three separate slides.
- • Record one slide at a time: Never try to record your whole 20-slide presentation in one giant ten-minute audio file. If you mess up on slide 18, you will hate having to redo the whole thing. Make one file per slide: slide-01.mp3, slide-02.mp3, and so on.
- • Watch your mic distance: Stay about 4 to 6 inches (10 to 15 cm) away from your microphone. If you get too close, your breath will pop on letters like "P" and "B." If you sit too far back, you will sound like you are speaking from inside a hallway closet.
- • Test for five seconds: Before you record the whole deck, speak one test sentence. Stop and listen. Make sure the volume is loud and clear.
Troubleshooting: Why Google Slides Audio Isn't Working & How to Fix It
1. People say they cannot hear the audio or it asks for permission
- • Why it happens: The file in your Google Drive is still set to "Restricted."
- • The fix: Head to Google Drive, right-click the audio file, select Share, and switch it to Anyone with the link. You do not need to re-insert the audio into your slides; it fixes itself instantly.
2. The audio file does not show up when you click Insert > Audio
- • Why it happens: Your audio is saved in a weird format like M4A, OGG, or WMA. Google Slides only looks for MP3 and WAV files.
- • The fix: Convert the file or just record it straight to MP3 using AnyMP4 Screen Recorder. If you have no MP3 recording file, follow this guide to extract MP3 from MP4 for uploading to Google Slides.
3. The speaker icon is grayed out or spins forever
- • Why it happens: You deleted the audio file from your Google Drive, or you moved it into the Drive trash bin.
- • The fix: Never delete the MP3 files from your Drive after you insert them. Google Slides does not store the audio inside the presentation file; it streams the sound directly from your Drive.
FAQs About Recording Voice on Google Slides
What audio file formats work best with Google Slides?
MP3 and WAV work best. Stick to standard MP3 files whenever possible. They stay small in file size and load quickly on slow Wi-Fi connections.
Why does Google Slides say I need access to play the audio?
This happens when the owner of the slide deck forgot to change the sharing permissions on the source audio file in Google Drive. Change the file permission to "Anyone with the link can view."
How do I make audio play automatically when changing slides?
Click the speaker icon on your slide to open Format options on the right side. Under the Audio playback tab, change the drop-down menu from "On click" to "Automatically."
Is there a file size limit for audio inserted into Google Slides?
Google does not list a strict audio file size limit. It gives you available Google Drive storage space (up to 100 MB per file is safe). For smooth playback in Google Slides, you had better keep your MP3 audio under 10 MB each. (MP3 file size is large? Learn it here to compress MP3.)
Conclusion
Unlike PowerPoint, Google Slides does not have an audio recording feature. So if you need to play a voice in your Google presentations, you need to:
1. Record your microphone and make a quick MP3.
2. Toss it into Google Drive and set the link to public.
3. Drop it onto your slide using Insert > Audio.
If you want an easy, all-in-one desktop recorder that cleans out background hum and lets you snip your mistakes, grab the free trial of AnyMP4 Screen Recorder. If you only need to record one quick sentence from a Windows PC, pull up the AnyMP4 Free Online Audio Recorder in your browser and get it done in seconds!