With our world becoming more modem, there is no denying that all things are now done digitally. And with progress, we made the simplest of things even better. One example of this is listening to music. People nowadays save their songs on their mobile phones. It is convenient, but the only catch is that we can only keep a limited amount of audio files on our phones. But with our technological advancements, we can sort of hack our way out of this concern. We are introducing Audacity, the ultimate audio editor. You can reduce the size of audio using Audacity. And with that said, we will show you how to do this. Please continue reading below to learn all the facts related to Audacity and audio compression.

Speaking of facts, it is also worth mentioning that you can upload your songs and recordings without any problem with audio compression. So with all of these facts, we hope you are convinced to use Audacity for your convenience. Before we show you how to use this software, we will first introduce it to you to know its functions. Audacity is a free audio editor available on Windows, Mac, and other operating systems. It is an outstanding software toolset for its field. With Audacity, you can record audio and computer playback. You can convert analog tapes and records into digital records or CDs. Of course, you can compress MP3, WAV, AU and OGG audio files with Audacity. It has tons of functionalities. This is the go-to audio editor for all users because it is surprisingly free and accessible.

Now that we have established what Audacity is and where it is dedicated, we will go to the tutorial on how to compress an audio file in Audacity.
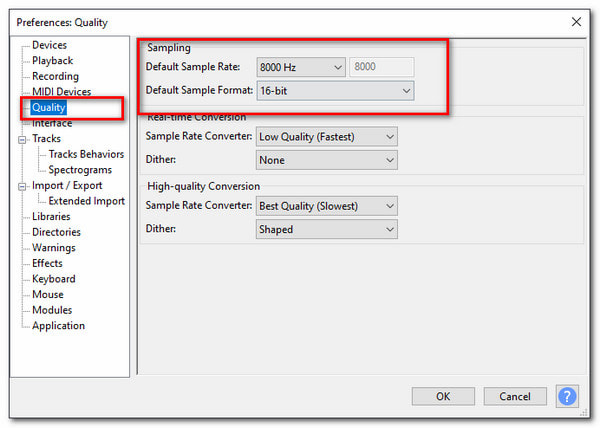
1. Launch the software, then Import an audio file to start. After uploading, look at the top-right corner of the screen and click Edit. Under this setting, select Preferences, then Quality. You can decrease the Default Sample Rate and Default Sample Format.
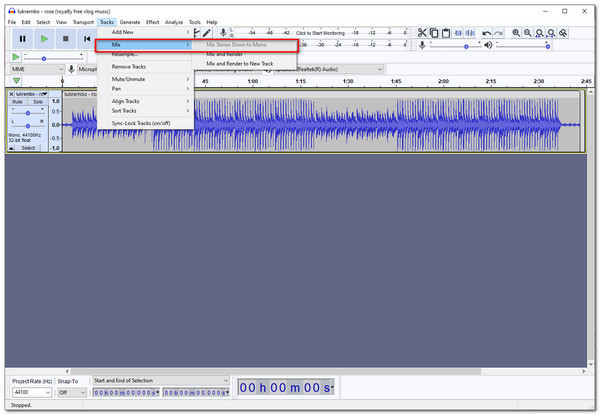
2. After reducing the Sample Rate, we will convert the audio from Stereo to Mono. Click on Tracks at the top menu selections. Under that, click on Mix, then select Mix Stereo Down to Mono. After that, they are now mixed.
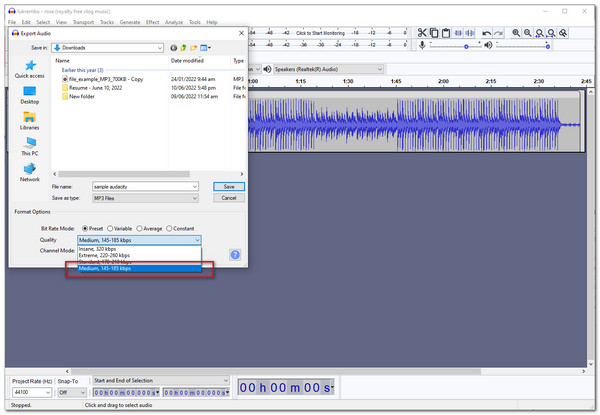
3. You can now save the audio and tune down the Export Settings. Select File at the top selections, followed by Export Audio. Select MP3 Type, then set the Quality to Medium, 145-185 kbps. This setting will lower the file size; however, it will also reduce the quality.
Then that will be it for the tutorial on how to compress audio files in audacity. The process is not that hard, especially if we give simple steps and procedures. Even though navigating through the software settings is tedious, you managed to do it; congratulations!
With the information now established, did you know that there is another definition for audio compression? One is for reducing size, while one is for maintaining sound quality, particularly on the dynamics of the audio. While this is an article for reducing the file size of your audio files, we will still cover the broad definition of the terminology of Audio Compression.
By maintaining the dynamic for your audio, you also keep it to its highest quality. This procedure benefits people who want to create consistency in their sound. But not everyone knows how to use audio compression completely. That is why we will provide the best settings to compress audio in audacity.
The best ratio to start with is a 6:1 Ratio for keeping consistency for your songs and recordings. By doing this, you are preserving the quality of your audio. You will also need to set a Threshold for your tracks. Limiting the signal level of the audio will not give an unnecessary loudness that may cause harm to your ears.
Lastly, it is to set the Attack and Release wisely. The attack is where the compressor’s gain reduction starts, and release is when stopping the act of the gain signal. With the threshold of the track now set, you can determine where you will put the appropriate attack and release.

There is no exact setting for having the best compressor settings. It is all about feeling and hearing the audio. In conclusion. this function is very significant in editing your audio files. But it is hard to prevent bugs and unexpected errors. It is relatively common in known program tools.
We will teach you the guide for fixing audacity if it does not let you compress your tracks.
It is inevitable to have bugs in software tools. There is no shame in providing a guide on how to make your work effective. We will teach you how to fix audacity compressor errors in this case.
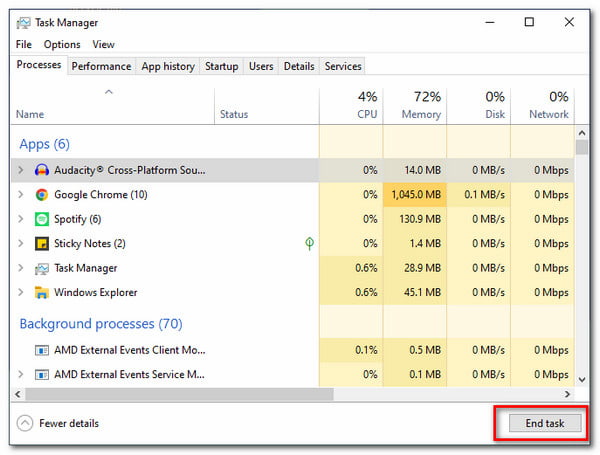
The typical resolution for fixing errors is to force stop the program. Do this by accessing the Task Manager. Locate the software you are trying to force stop and select it. Then at the bottom-left corner of the setting, you will see End Task.
Another solution is to reinstall the software. But other than that, you might have to update the program or your operating system. If it is not still working, you might have to call or get a resolution from services provided by Audacity.
Audacity is a known software, but it is not stranger to errors and bugs, as previously mentioned. Plus, it is very complex and quite challenging to reduce the size of an mp3 with audacity. That is why we are here to provide you the alternative software for Audacity. We will give you two software tools that will help you compress your audio files.
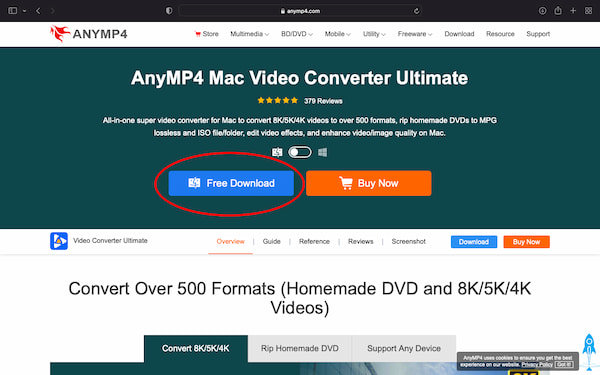
AnyMP4 Video Converter Ultimate Mac is an excellent video converter capable of compressing the file size of your songs and recordings as the Audacity alternative! It sounds crazy because it is a video converter, but its added features can be anything you need! How does a program have multiple functions? Learn this by continuing to read below.
With AnyMP4 Video Converter Ultimate Mac, you can reduce the file size of your audio files from 5% up to 95% compression rate! Additionally, you can customize the audio settings. For example, you can choose the audio file format you want to convert. You can also select the Channel, Sample Rate, Bitrate, and many more in the settings!
These multiple factors and functionalities will convince you to use this tool, especially its competent initial function.
Recommendation
With this explained, we will teach you how to compress your audio files using this program.
1. Get the software from the website. Select the Mac version. Install and Launch it.
Secure Download
Secure Download
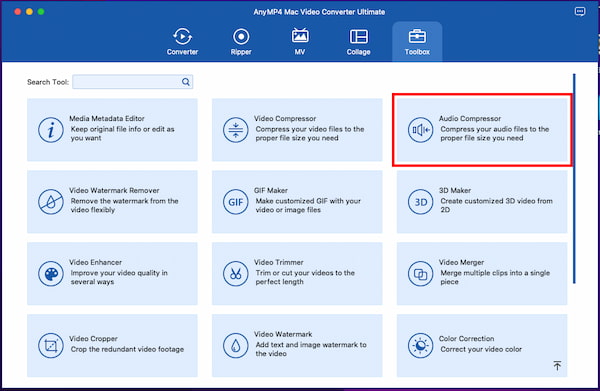
After launching, locate the top selection on the start interface. Click on the feature at the far right that says Toolbox. Under that, select Audio Compressor.
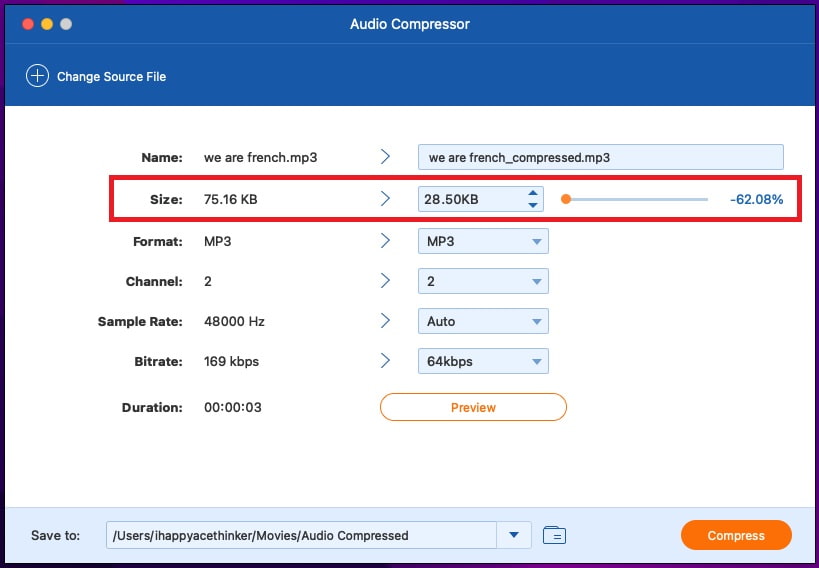
2. Upload your audio file like MP3, WAV, OGG, etc. In this interface, change the audio file Size by dragging the indicator or choosing how much file size you want your audio file to have.
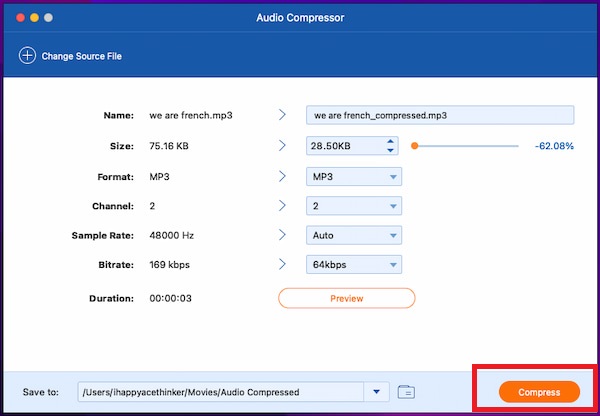
3. Click Preview to listen to the edited audio. If satisfied with the result, click on Compress to finalize the compression process. And just like that, you now have high-quality compressed audio.
Do you not own a Mac device? Do not worry. We will provide you with an excellent online audio compressor!
The second software is the web-based program AnyMP4 Audio Compressor Online. This Audacity alternative software is free and highly accessible for all users. Even if it is online, it is secured and safe to use. It supports all famous audio file formats like MP3. WAV, OGG, and so on, making it more functional and efficient.
Additionally, it has an easy-to-navigate interface, which is handy for newbies and saves busy users time. Moreover, it can maintain your songs to their highest quality. If you want a highly intuitive audio compressor, use this software!
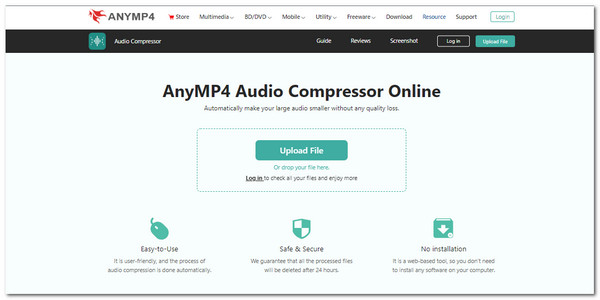
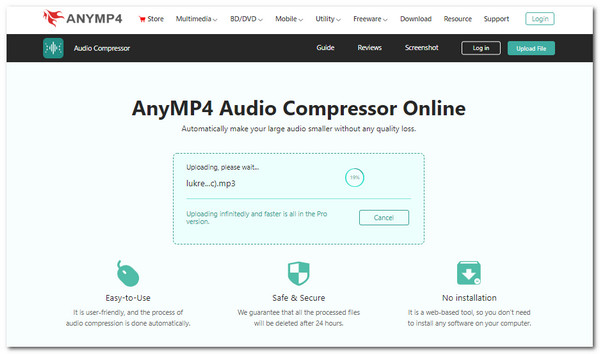
1. Open AnyMP4 Audio Compressor Online on your computer or mobile phone via a browser. Select Upload File to upload your audio files in the middle of the screen.
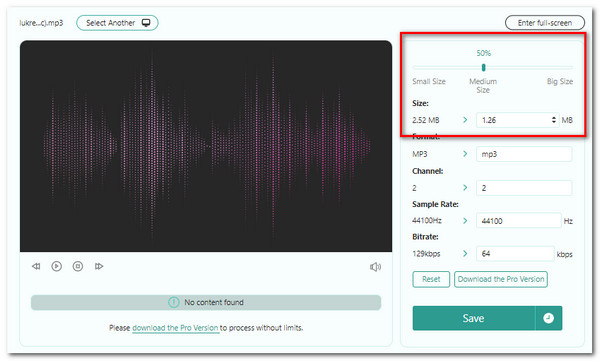
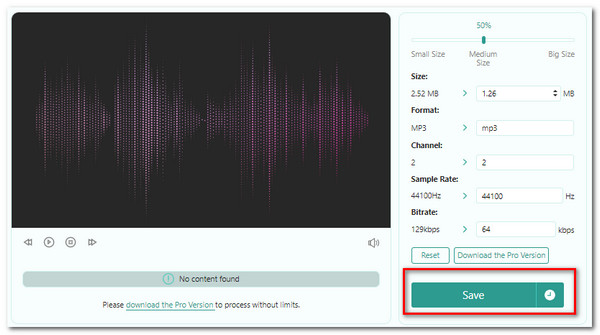
2. After you upload the audio file, it will take you to the editing interface. On the right side, select Tools. Find the Size setting at the top of the tools. In here you can drag the indicator or set how much you want it to be compressed.
3. Once satisfied, you can export or Save your compressed Audio.
How much should I compress vocals in Audacity?
A significant amount of decibels compressing vocals in Audacity is a 5:1 ratio. Use 7:1 & 8:1 for heavily compressed songs with minimal dynamic range. For a lower ratio of 2:1 & 3:1, for a more natural sound.
How will I send an email with a music file that is too big without compressing the audio file size?
Google Drive does not compress video or audio. You could upload it to your Google Drive and then share the link with the recipient.
How much is the file size limitation for sending audio files via e-mail?
The audio file size limitation is about 16MB.
Thank you for making it to this part of the article. We hope that you know how to compress audio files in Audacity. And we are sure you now have an excellent alternative for using Audacity. We hope that you continually use AnyMP4 programs in your daily lives. Share this article with your friends and relatives. Visit our website for more articles like this. Thank you!
 Posted by Angelica Liwanag to Edit Audio
Related Articles
 [Fixed] 3 Methods to Compress Videos for Discord to Less than 8MB
Discord video is too large to send? You should compress videos for Discord to less than 8MB! Here are 3 Discord file compressor tools for you here.
 5 Efficient Methods to Compress Large GIF Files to a Smaller Size
If you want to compress a GIF for Twitter, Giphy, Screencast, and more other websites, you can learn more about 5 efficient methods from the article.
 3 Easy Ways to Compress WAV Files with Audio Comperssor
WAV files are larger than other audio files. We share 3 audio compressor to lossless compress WAV files for free up storage space.
 Top 8 MP3 Compressor to Shrink MP3 File Size Online and Offline
Are you looking for MP3 compressor to reduce MP3 file size without losing quality? Here is a list of top 8 best MP3 size reducer for Windows, Mac and online.