We all know the infamous Premiere Pro because of its professional and superb features. It is one of the most trusted editing software in the digital market. Therefore, we can say that this tool possesses tons of beneficial features. In line with that, in this post, we will see Adobe Premiere Pro's ability to improve the quality of our media files. It is also common knowledge that this software is hard to use due to its flexibility. Thus, having a guideline is necessary to utilize it properly and hassle-free. We present the details of learning how to improve video quality in Premiere Pro. Check out the information below and ensure you bear all of these details in your mind.

Premiere Pro belongs to the most flexible and powerful tools of Adobe incorporation. Its existence is to help different users to edit their video clips and movies in the most professional ways. This editing software is widely known worldwide due to its super-advanced capability in the visual editing process.
In connection with that, we shall now begin to witness its ability and learn how to increase video quality in Premiere Pro. Reminder, be mindful of each detail and step so that we will not have a problem with the editing process.
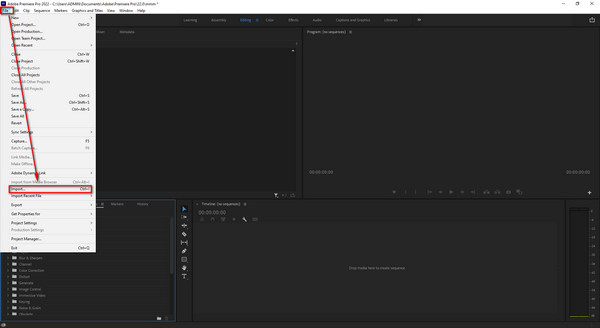
1.Launch Adobe Premiere Pro on your computer and see the File tab on the left corner of the interface. After that, a list of options will appear; drag down to the Import button and click it.
You may also use the hotkey for instant access, and you only need to press CTRL and I on your keyboard simultaneously. After that, a file tab will exist. Select your video and add it to the Timeline.
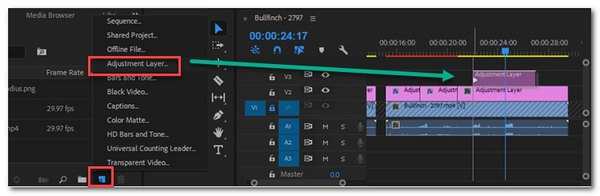
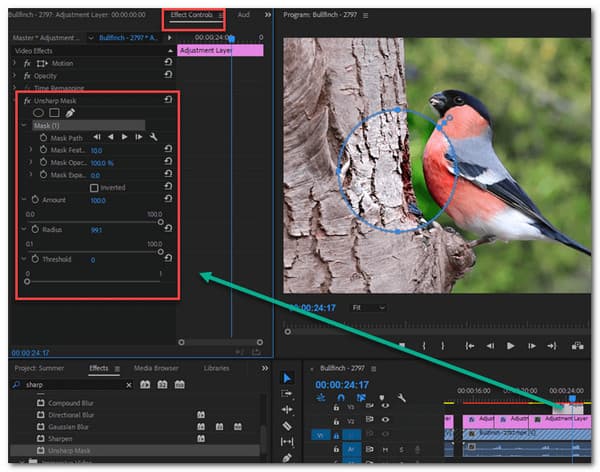
2.Now, see your video on the Timeline of Premiere Pro. Locate the File icon, which we can see on the right side alongside the dust bin. Then, press the Adjustment Layer on the list to create a layer to drag it on the Timeline. Please place it above your video. This step will enable us to Add Effects to your video.
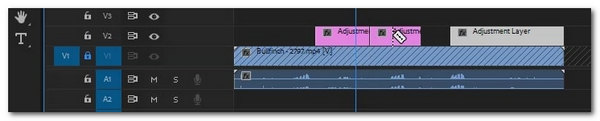
3.On the Timeline, where you can see the layer for adjustments, do the sharpening process. You can improve the whole video or a specific part of it. Kindly click the Razor tool or the C on your keyboard as a shortcut for the second option. This feature will cut the adjustment player you added a while ago on the part that is not necessary to improve. If you want to sharpen the whole video, then leave it as it is.
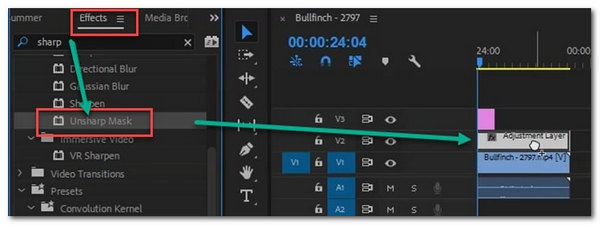
4.Now, click the Adjustment Layer with the FX icon on it. Then, under the Effect tab, find the Unsharp Mask to drag it into the layer on your Timeline.
5.It is now the time to adjust the elements of each slider as we improve the quality of your video. You will see a flexible parameter setting on the left side of the interface. This parameter setting will give you different options and ways to enhance video quality in Premiere Pro. Please add Mask to your video by clicking the Oval/Rectangle/Pen symbol.
6.Finally, let us learn how to render and export high-quality video in Premiere Pro. Please locate the Export Setting and set the other element to improve your video following your preference. Then, click the Export button to finish the process.
Note: Continue with Part 2 for more details.
That is how we use Adobe Premiere Pro. The process is complicated and hard for the new users because of its overwhelming different features. However, the method is very effective as long as you follow every guideline and you will not miss even a single thing. This powerful video editing tool also possess other features to refine your videos like compress videos, rotate, crop, and more.
Now let us dig deeper to learn how to export video without quality in Premiere Pro. This process is very crucial to producing high-quality output. Please check the details below.
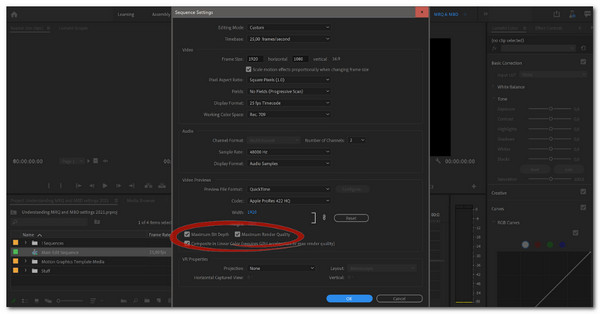
1.Go to the File to see the New icon and find the Sequence. You now will see a dialogue for the New Sequence. From there, go to the Video Preview. Under this, check the Maximum Bit Depth.
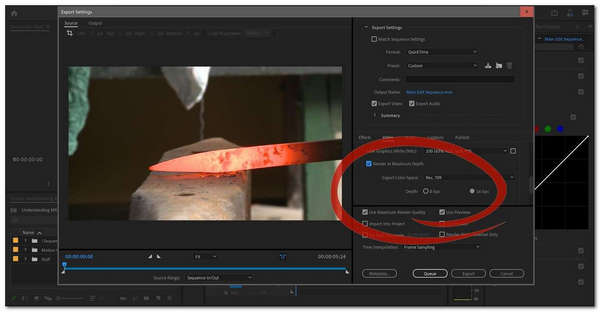
2.Now, please process with the Export Setting of your video. Under the Video tab, please check the Render at Maximum Depth. Then, click the Export button.
3.Wait for the rendering process, and let your video undergo the process of enhancement. This process will take a lot of time, and please be patient.
Similar software, Windows Media Player, is also capable of increasing video quality on Windows computers.
Do you think Premiere Pro is hard to use? Then, we have the best alternative editing software for you. AnyMP4 Video Converter Ultimate is an incredible software that will enable us to improve the quality of your video with super easy steps, unlike the Premiere. This software is very recommendable because of the following:
Recommendation
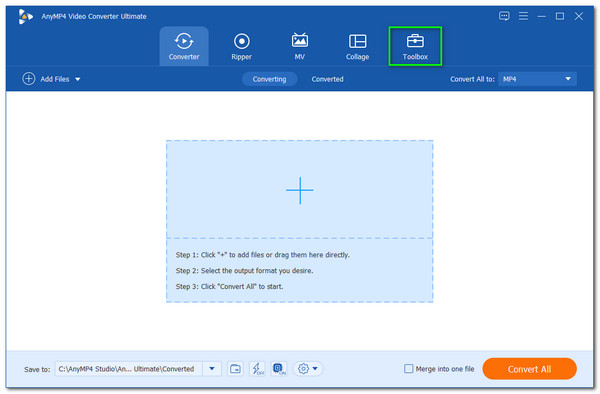
1.Open the AnyMP4 Video Converter Ultimate.
Secure Download
Secure Download
From its interface, please click the Toolbox icon.
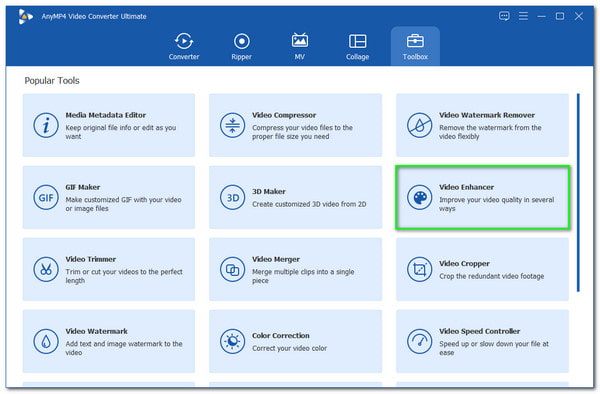
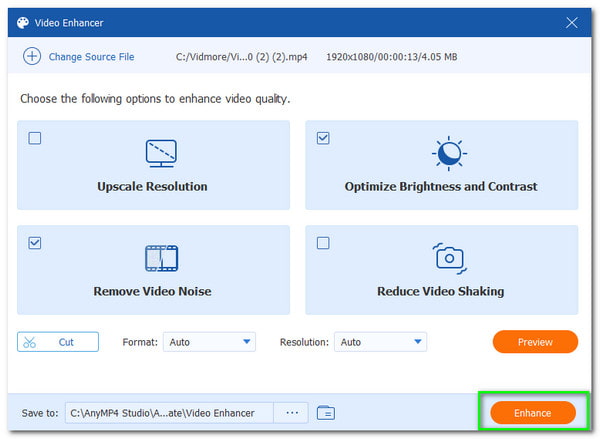
2.You are now seeing a new tab that presents different features from the software. Among the options, please choose the Video Enhancer button.
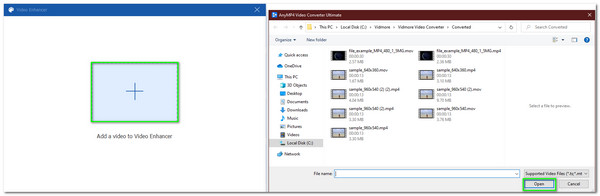
3.Now, add your video to the timeline by pressing the Plus icon on the new tab. Then a file tab will exist, which brings you the video you need to improve the quality. Do not forget to click the Open button to continue.
4.Another tab will exist. From there, set the setting to improve the quality of your video by checking the box for Upscale Resolution. Choose the Resolution of your video too by using the drop-down bar.
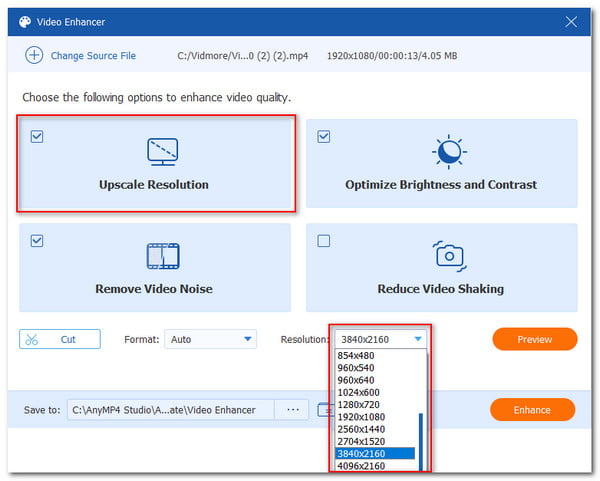
5.Your video is now good to go and please click the Enhance button. Then wait until your video is complete.
That is the simple process from AnyMP4 Video Converter Ultimate to improve the quality of your video files. Indeed, this flexible and effective tool is suitable even for new users. Try this now.
Does Premiere Pro support 8k resolution?
Yes. Premiere Pro is an advanced technology that has the highest video resolution like 8K nowadays. This ability includes 4K to 8K video footage. Thus, a presentable and clear visual is guaranteed with this tool.
How long will it take to render a 30-minute video in Premiere Pro?
Enhancing a 30-minute video in Premiere Pro will take two to three hours of rendering time. As we all know, Adobe Premiere will depend on the time of the video and what effects it contains.
Is it free to enhance in Premiere Pro?
You may enhance for free in Adobe Premiere Pro using the 7-day trial it offers. However, after that, you need to pay $20.99 a month if you want to continue your subscription to the editing software.
It is an incredible moment to use Adobe Premiere Pro to enhance the video quality of our clips. However, we can see how complicated it is to use because of its flexibility. Therefore, we need a lot of time to master it. On the other hand, if you want an instant process of improving the quality of our video, then you can use AnyMP4 Video Converter Ultimate. Discover its powerful tool and smooth operation.
 Posted by Angelica Liwanag to Edit Video
Related Articles
 Comprehensive Guide of Adobe PDF Editor
When you need to edit a PDF file, there are a lot of tools to select. This article shares Adobe PDF Editor, the most professional and popular PDF editing tool.
 Adobe Captivate – How to Record eLearning Screen Video as Desired
How to record a stunning eLearning video with Adobe screen recorder? You can learn more about the detailed process to get the desired files as well as the best alternative from the article.
 How to Restore Old Video Quality: Reminiscing Memories in HD
Old and grainy videos are annoying to watch. Therefore, we need to learn how to restore the quality of videos as we make our watching experience more immersive.
 4 Effective Methods to Make a Blurry Video More Clear
Alleviate blurry recording video using the best enhancement tools. Join us as we learn how to make a video more clear without complication. Kindly check this post.