Command-line-based video editing is one of the most efficient ways to apply basic video editing adjustments quickly, such as trimming duration and cutting. Although it is easy to apply once you have learned the lines, you must overcome the intimidating aspect that requires prior knowledge of command lines by learning them. With that in mind, this article will provide you with important commands you need to learn to make use of FFmpeg to trim videos. We will provide an overview of the essential commands for editing videos in FFmpeg, highlighting the value of using it to trim videos. Additionally, a step-by-step guide on using the tool will also be discussed, and an alternative video trimming tool will also be added.

Unlike traditional video editing software, FFmpeg is a command-line tool that extends the capabilities of your desktop’s command prompts to also access the multimedia files on your device, such as videos, audio, or images.
Aside from trimming, you may also use FFMpeg to compress videos, change file format, and more.s
Although it can be used for editing, its command-based nature makes it way more complicated and advanced than drag-and-drop editors. However, if you already know how to use command lines, it is one of the most powerful and fastest options for applying basic video adjustments.
Highlighted below are three of the most significant benefits of using FFmpeg for video editing.
FFmpeg is by far the fastest option for trimming videos, as it requires only opening the command prompt, typing the proper commands, and then confirming your selection. With the proper commands, FFmpeg can trim videos by time, making it one of the most accurate options for doing so.
Aside from using FFmpeg to clip videos by time, another strength of using the tool is its retention of video quality, which is a common problem for freeware video editors. When using only command-based trimming, the video itself will not be imported to an editor, which may reduce its quality. Instead, it will be cut directly, making the video quality totally unaffected.
Finally, the most important benefit of using FFmpeg for FFmpeg clip video by time is improved automation. The need to access video editors and learn their trimming tools will not be needed when FFmpeg is used. Directly using FFMpeg to crop video or trim its length will now become totally automated with the right commands.
To learn the important commands essential for video trimming, continue reading the next section of the article, where we will highlight the commands you need to learn.
The FFmpeg trim Start of Video command -ss is used to indicate the portion of the video where the trim will begin. To use this command, type the line and then the second or minute in the video. For example, “-ss 40” will begin trimming the video at the 40-second mark.
If you plan to use FFmpeg to trim a video by timestamp, you can use the Duration command -t. With this line, you may set a specific duration that will only be edited in your clip. As an example, the “-t 1:00” command will only make the first 1 minute of your video be processed.
In contrast to the Start Time, the FFmpeg trim End of Video command, using the -to option, sets where the video cut will end. This is often used together with Start Time. You must set the start command first, then add the end time command to cut the duration in between. For example: -ss 20 -to 50 will cut the 30-second duration in between them.
To add the video you want to edit, you have to use the Input File command of -i, which is the command needed for identifying the file you want to edit. To use this, write the command, followed by the file name and format, and then the output file name for the edited video. For example: -i input.mp4 output.mp4 will edit the input file you have added and produce a new file in the output directory.
To drastically improve the efficiency of your edited video, you need to add the FFmpeg trim video without re-encoding command, -c copy, to prevent the program from re-encoding the audio and video. This will apply the adjustments you added instantly. Simply write the -c copy command at the end of the line to remove re-encoding.
For more advanced editors, filters may be added to videos using FFmpeg directly. You only need to use the “-vf” command and then write the command for the specific filters you want to use. Unfortunately, this demands learning more advanced commands for filter editing, such as scale=1280:720, fps=60, hflip, and more. To change the scale of a video to 1080p and its frame rate to 30, use the command line -vf “scale=1920:1080” “fps=30”.
To use the fastest way of trimming videos in FFmpeg, you have to combine the commands for Start Time, Input File, Duration, and Avoid Re-encoding. For this example, ensure that you change the start time, duration, and specify the file name of the video you want to trim.
Learn how to use the software using our quick tutorial guide below.
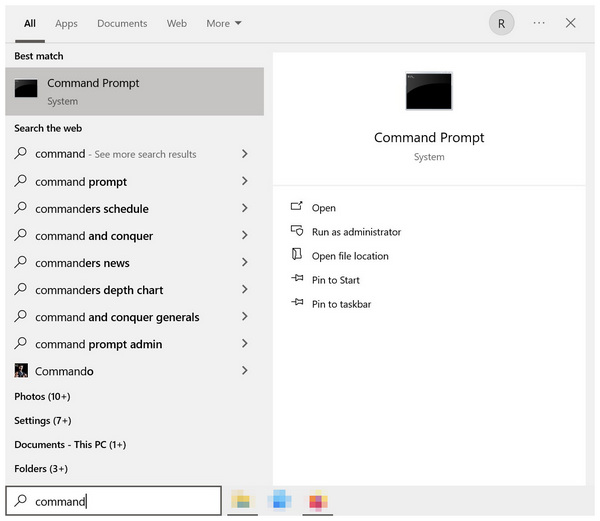
1. Open the Command terminal software on your computer.

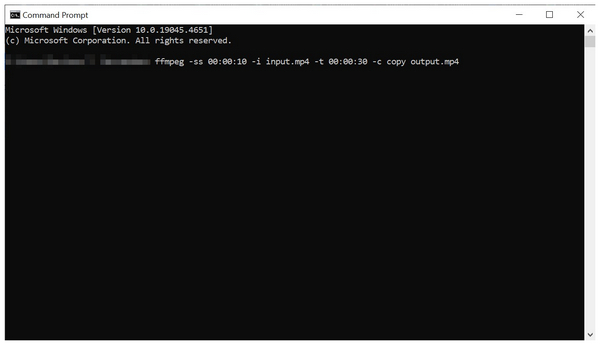
2. In the command prompt screen, copy and paste the reference line: ffmpeg -ss 00:00:10 -i input.mp4 -t 00:00:30 -c copy output.mp4.
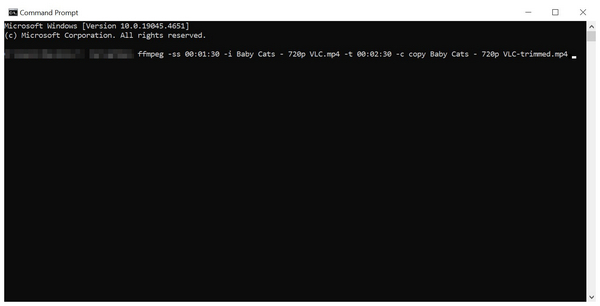
3. Once the line has been added, change the start time Value, file name, format, and duration. For example: ffmpeg -ss 00:01:30 -i Baby Cats - 720p VLC.mp4 -t 00:02:30 -c copy Baby Cats - 720p VLC-trimmed.mp4.
The combination of the mentioned commands is the fastest way to trim videos in FFmpeg, and on desktop computers in general. You simply need to learn the correct commands to do so.
For a more precise trimming, you can change the order of the commands in the FFmpeg prompt you will write to have the 'Input File' command first. This will greatly improve the pace of reading the file you will add to the program.
For a more precise trimming, make sure to read out guide below.
1. Open the Command terminal on your computer.

2. In your computer’s command line program, copy and paste the reference line ffmpeg -i input.mp4 -ss 00:00:10 -t 00:00:30 -c copy output.mp4.

3. Then, edit the command line to suit your preferences. For example: ffmpeg -i Baby Cats - 720p VLC.mp4 -ss 00:00:30 -t 00:01:30 -c copy Baby Cats - 720p VLC-trimmed.mp4.

This is similar to generic trimming in the first method. However, writing command lines this way will greatly improve the efficiency of your editing process.
Although avoiding re-encoding greatly improves the speed of video processing, it may prevent effects from being applied to your video. Therefore, learning how to trim videos with re-encoding is also important. Re-encoding also allows using FFmpeg to fix corrupted videos.
To learn how to use the command line for trimming and re-encoding, please read the guide below.
1. Open the Command terminal on your computer.
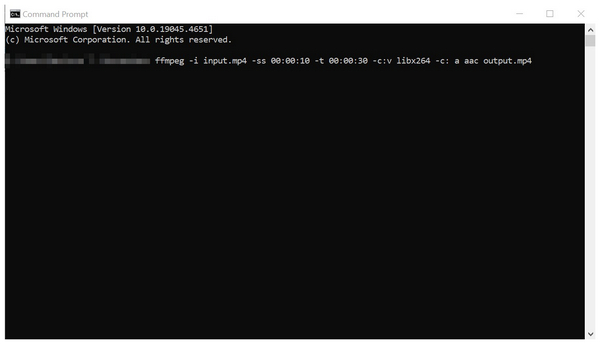
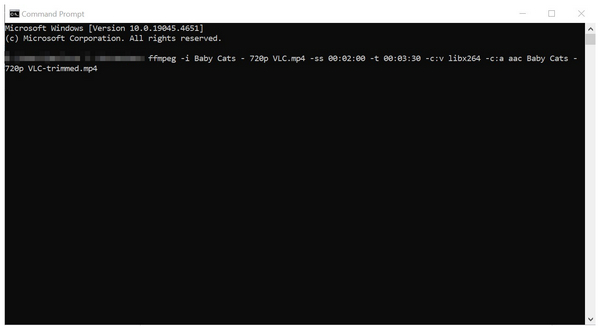
2. Copy and paste the reference command line: ffmpeg -i input.mp4 -ss 00:00:10 -t 00:00:30 -c:v libx264 -c: a aac output.mp4 on your command prompt.
3. Edit the command line according to your preferences. As an example: ffmpeg -i Baby Cats - 720p VLC.mp4 -ss 00:02:00 -t 00:03:30 -c:v libx264 -c:a aac Baby Cats - 720p VLC-trimmed.mp4.
If you plan to use the Apply Filters effect for FFmpeg editing, remember to enable re-encoding of your video.
Instead of using Duration trimming, another alternative for accurate trimming is to edit the video using start and end times. In fact, this option is more accurate than using the duration command.
Learn how to use it by reading our guide below.
1. Open the Command terminal on your computer.

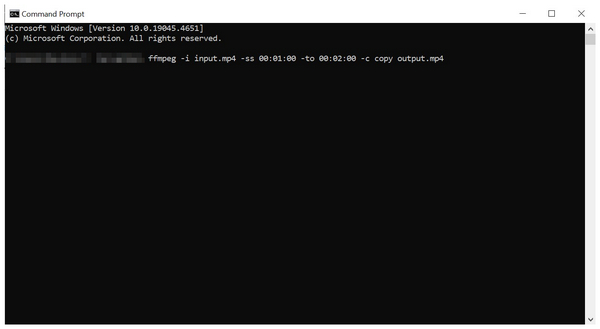
2. On your command software, copy and paste the reference line, ffmpeg -i input.mp4 -ss 00:01:00 -to 00:02:00 -c copy output.mp4.
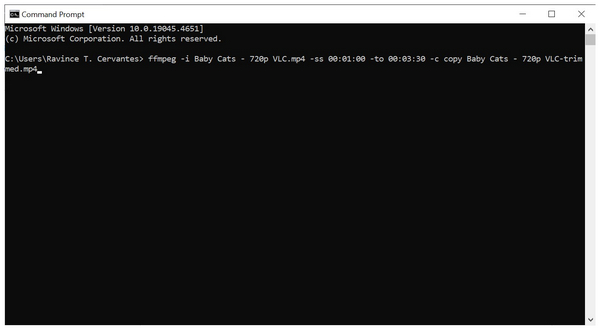
3. Then, change the input name to the video you want to edit. Then, adjust both the start time and end time values. For example, ffmpeg -i Baby Cats - 720p VLC.mp4 -ss 00:01:00 -to 00:03:30 -c copy Baby Cats - 720p VLC-trimmed.mp4.
This option is more accurate than using the duration command because manually setting the end time for video trimmer enables a more precise identification of where the video will be cut.
In exchange for the efficiency and direct trimming capabilities of FFmpeg, its steep learning curve and the demanding knowledge required to use it may be too much for casual users. To solve this issue, using a flexible multimedia tool may be the better choice, and AnyMP4 Video Converter Ultimate is one of the best options available on the market.
Compatible with both Windows and Mac computers, AnyMP4 Video Converter Ultimate features an exclusive Video Trimmer tool, optimized to either precisely cut portions of a video or quickly trim unwanted sections.
Using the Video Trimmer tool, you can easily delete a segment of a video, apply fast split, and fade-in and fade-out effects to the file using the beginner-friendly editing menu of the program. The presence of an interface makes video editing much more accessible, as opposed to purely command-based editing, such as with FFmpeg.
In addition to being highly accessible, the software also supports a wide range of video formats, including MP4, MOV, WMV, AVI, MKV, GIF, and over 500 other file types. This is a great addition for a software that also offers advanced editing tools, such as a video encoder and an audio channel.
Since AnyMP4 Video Converter Ultimate is a multimedia program, it also offers flexible media editing tools, including the namesake feature in Video Converter, MV Editor, Collage Maker, and 3D Maker tool. Moreover, other tools may also be used in the Toolbox section of the program, aside from the Video Trimmer, such as Video Cropper, Video Rotator, Video Reverser, Video Compressor, Video Watermark Remover, Video Enhancer, Video Speed Controller, and more.
To learn more about AnyMP4 Video Converter Ultimate, make sure to read its main features below. We also provided a detailed guide on using the software, which you can easily follow by downloading the program with the provided link.
Secure Download
Secure Download
Main Features:
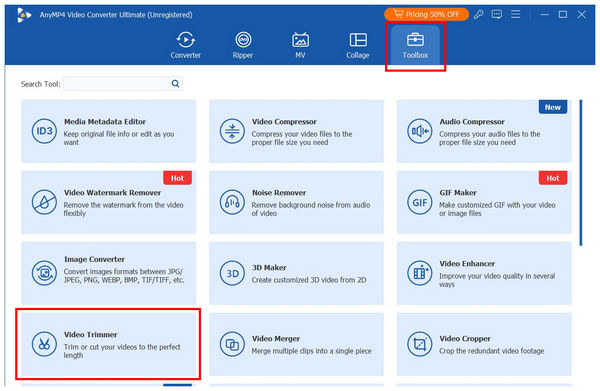
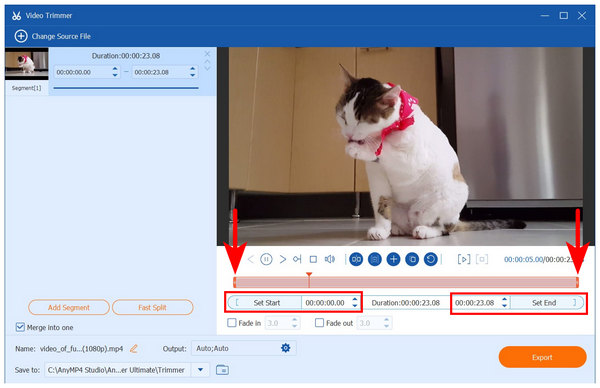
1. Open AnyMP4 Video Converter Ultimate, and then click the Toolbox option in the menu. Then, find the Video Trimmer tool and select it. Upload the video file you want to trim in the Add File menu.
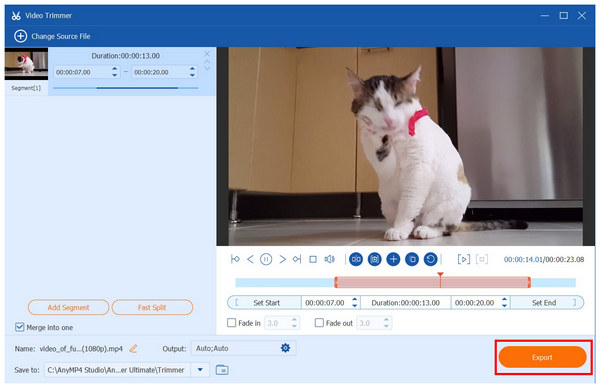
2. With the file now added to the Video Trimmer tool, you can trim the video using either the Trimming Bars for basic trimming or by adding specific times in the Set Start and Set End menus; the part of the clip outside the set times will be cut. For a smoother transition, you can add Fade In and Fade Out effects to achieve a more seamless video cut effect.
3. After editing the video using the trim tool, click Export to produce the edited clip with accurate trims.
Since video trimming in AnyMP4 Video Converter Ultimate offers a full interface, this makes the tool more beginner-friendly than the intimidating option of using FFmpeg command lines to trim videos.
What's the fastest way to trim a video with FFmpeg?
The fastest way to trim videos in FFmpeg is using command lines. You need to install FFmpeg on your computer first. Then, apply the proper lines for trimming videos mentioned in this article.
Why is my video not trimmed at the exact time I specified?
Please double-check that the duration you entered is accurate. Confusion about trimming time is a common issue. Ensure that you have edited the correct duration in minutes or seconds.
Can I trim multiple videos at once with FFmpeg?
Yes, you can. Trimming videos in FFmpeg is possible with command lines. However, using command lines is a skill in its own right. It is not simple.
Is using FFmpeg to trim videos easy?
No, it is not. You need to use FFmpeg lines to make video trimmings possible. Learning the editing lines is another essential skill to acquire.
Should I use FFmpeg for video trimming?
It depends on your skill level. FFmpeg relies solely on command lines. This made learning these lines a prerequisite for operating FFmpeg.
Now that we have provided a guide for four of the most popular methods to make FFmpeg trim the beginning of the video or other portions of it, we hope that this article has provided you with useful information that you may use to learning the basics of trimming videos using command lines. Otherwise, it is more advisable to use a beginner-friendly option in AnyMP4 Video Converter Ultimate instead. You may download it as an alternative using the link below.
Secure Download
Secure Download
 Updated by Mark Cristobal to Edit Video
Related Articles
 3 Easy Ways to Trim a Video on MacBook Quickly
Looking for the best method to trim a video clip on Mac? You are lucky since this article shows the easiest methods and the concrete guide.
 MKV Cutter - How to Trim MKV File on Mac and Windows PC
What is the best MKV cutter? How do I trim an MKV file? How to cut MKV files for free? Get 3 MKV cutters to split or trim MKV files on Mac and Windows computer.
 Step-by-step Guide to Crop a Video Using FFmpeg for Beginners
How to crop a video with FFmpeg command line for free? You can learn the steps in our concrete tutorial and the best alternative solution.
 [Detailed Guide] How to Compress Videos to Smaller Sizes with FFmpeg
Want to shrink videos, but find it complex to reduce the video size and resolution through Ffmpeg? This article shows you the detailed steps with pictures.