The Snipping Tool is a built-in Windows utility designed to capture screenshots with ease. For many, it’s the go-to tool for quickly saving important information or sharing visual instructions. For many, it’s the go-to tool for quickly saving important information, sharing visual instructions. This can be a frustrating experience, especially when you urgently need to take a screenshot of critical information. In this post, we’ll highlight the common reasons why Snipping Tool is not working. Beyond identifying the causes, we'll also provide practical solutions to help you fix the issue. Our goal is to equip you with effective troubleshooting steps to get the tool running again.
Why is my Snipping Tool not working? The common reason the Snipping Tool stops working is that the app crashes during use. It happens due to corrupted app files or conflicts with other third-party screenshot tools installed on the computer. When the app crashes frequently, it makes it impossible to capture screenshots or recordings smoothly. This usually requires repairing, resetting, or reinstalling the tool to restore proper functionality.
1. Press the Windows key + I to open the Settings. Click the Apps option, select Apps & Features, and search for the Snipping Tool.
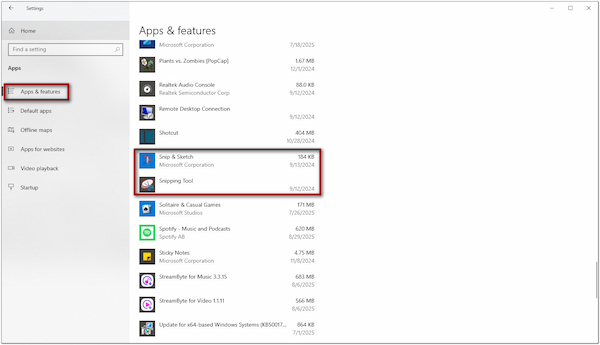
Important Note: Older builds may list it as Snip & Sketch.
2. Click the Snipping Tool/Snip & Sketch and click the Advanced Options. Scroll down to the Reset section and click the Reset button to reset the app.

Resetting the Snipping Tool can fix corrupted files without deleting app data. This action clears all app data and restores it to its default state. If resetting doesn’t work, uninstall and download the Snipping Tool from the Microsoft Store. If it still doesn’t work, consider other Windows screenshot tools here.
Another reason why the Snipping Tool does not work is related to Windows Updates. Sometimes after installing new updates, certain apps become unstable due to compatibility issues, missing files, or incomplete patch installations. For instance, a known bug in a Windows 11 update once caused Snipping Tool to fail to open at all. Since it is a built-in utility, its performance depends on the operating system’s stability and the updates Microsoft rolls out.
1. In the Settings, click the Update & Security option and proceed to the Windows Update section. Check for any new updates, and if Microsoft has released a fix, install the latest patch.
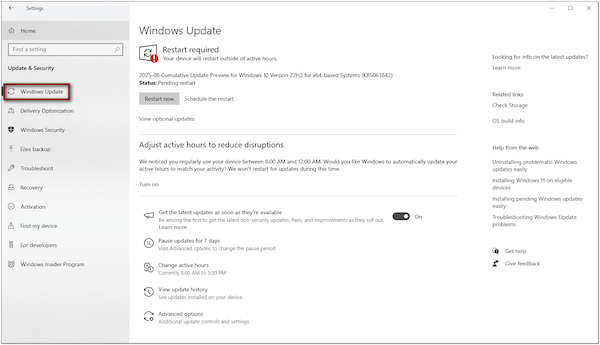
2. Restart your computer after installation and test the Snipping Tool. If the issue started immediately after an update, you may need to roll back the update. Find the update that was installed just before Snipping Tool stopped working and uninstall it.
Windows updates are essential for improving system security and performance. However, sometimes they unintentionally cause built-in apps, such as the Snipping Tool, to malfunction. By keeping your system updated and knowing how to uninstall faulty updates, you can ensure that the Snipping Tool remains usable.
Snipping Tool is primarily known for being a Windows screenshot shortcut tool. Beyond screenshots, it also offers features like screen recording in newer versions of Windows. Snipping Tool is not working on Windows 11 if permissions for screen recording are disabled under privacy settings. The tool may appear unresponsive when you try to record. Other incorrect configurations can also cause the Snipping Tool to malfunction during operation.
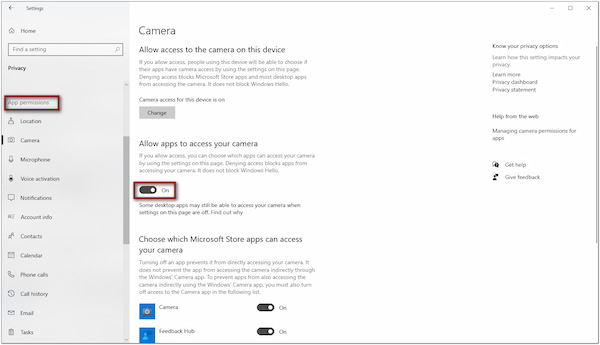
1. Open the Settings, click Privacy, and scroll down to the App Permissions section. Ensure the Snipping Tool has access to the Camera, Microphone, Background Apps, and other necessary resources.
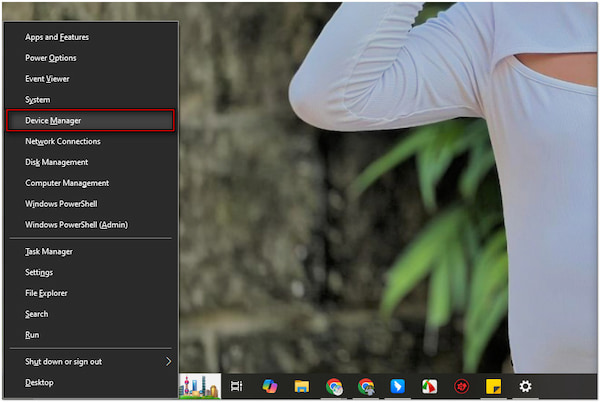
2. Press the Windows key + X, select Device Manager, and check your graphics drivers. Expand the Display Adapters option and right-click your graphics card.
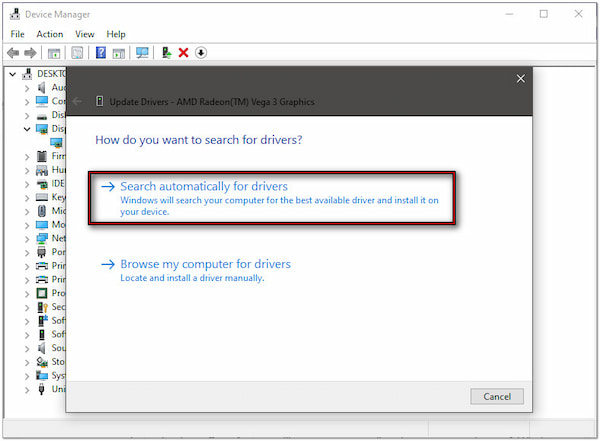
3. Select Update Driver in the pulldown menu and click Search automatically for drivers. If updates are found, install them and restart your PC.
Ensuring the Snipping Tool has the correct permissions and recording settings is essential for smooth operation. Without proper access, the tool may fail to capture or record video correctly. Updating graphics drivers also ensures compatibility and prevents display-related errors.
After trying multiple troubleshooting methods, there may still be cases where the Snipping Tool is not working. At this point, instead of struggling with limited fixes, switch to a reliable alternative: AnyMP4 Screen Recorder. It is a professional recording tool for Windows (version 7 and later) and macOS (version 10.12 or later). This software surpasses what the Snipping Tool can offer.
Not to mention, it provides seven recording modes for all your screenshot and recording needs. It offers Screen Recorder, Audio Recorder, Screen Capture, Game Recorder, Window Recorder, Webcam Recorder, and Phone Recorder. With it, you can choose to record with or without system sound, microphone, or webcam. You can also customize the recording area and size, rather than being limited to the entire screen. It supports multiple output formats, including MP4, MOV, WMV, MKV, F4V, WebM, MPEG-TS, JPG, PNG, BMP, TIFF, and GIF. For screenshots, you can capture windows, custom areas, scrolling content, or even pop-up menus. Captured images can be saved in PNG, JPG/JPEG, BMP, GIF, or TIFF formats.
What to Expect With AnyMP4 Screen Recorder:
• Exports screenshots and recordings into multiple formats.
• Define exactly what part of the screen to record: full, window, or custom region.
• Records screen, audio, gameplay window tab, webcam feed, and phone display.
• Boasts post-recording editing tools, like Advanced Trimmer and Video Compressor.
• Screenshot full window, active window, long web pages/documents, and pop-up menus.
1. Begin by downloading the AnyMP4 Screen Recorder for free. Install the Snipping Tool, a screenshot and screen recording alternative, and wait for the installation process to complete. Once finished, open the software to start recording the screen or taking a screenshot.
Secure Download
Secure Download
2. Upon startup, the software defaults to Screen Recorder mode. In this mode, you can do both screen recording and screenshots. For screenshots, look for the Camera button and click the pulldown menu. Here, you can access the Screen Capture, Scrolling Screenshot, and Popup Menu Capture. To quickly activate this mode, you can press the default hotkeys. Here’s a reference:

| Screen Capture | Alt + C |
| Scrolling Screenshot | Alt + L |
| Popup Menu Capture | Alt + M |
To record a screen, set your recording area in the Display tab: Full or Custom. Optionally, you can toggle the Webcam, System Sound, and Microphone buttons on.

3. Move and resize the Screen Selector to align with the content you want to capture. Your cursor will change into a crosshair. Click and drag it to select the part of the screen you want to capture. If you want a full-screen screenshot, drag across the entire display. You can also capture active windows or menus by dragging the frame over them.

Creative Tip: For lengthy pages, select the Scrolling Screenshot option. Upon activation, use your Mouse Wheel or the Space key to scroll through the page. Alternatively, use the Left-Click to capture the screen to the bottom automatically.
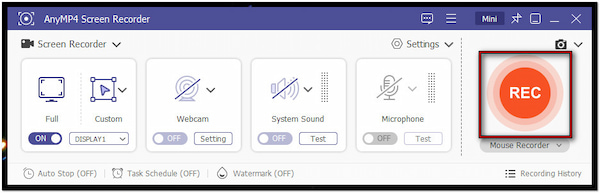
For screen recording, click the large red REC button to begin recording. A three-second countdown will appear on your display, indicating the recording is about to begin. During recording, you can click the Camera button to take screenshots.
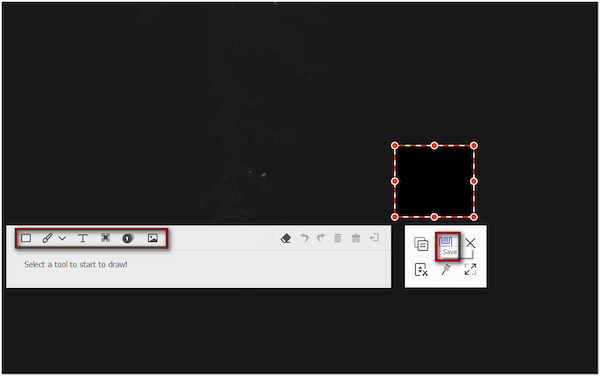
4. Optionally, click the Toolbox button to access the annotation and drawing tools. You can add shapes, text, callouts, images, use pens, highlighters, markers, and more. Once you have completed the drawings and annotations, click the Save button to export the screenshot.
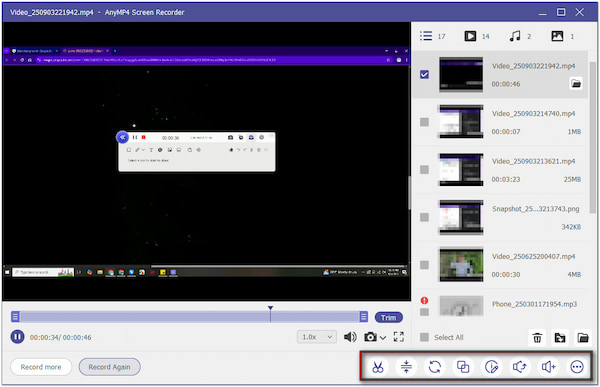
To end the screen recording, simply click the red Square button. The software will open the Recording Preview window, where you can edit the recorded screen. Use the Advanced Trimmer to cut unnecessary portions, the Video Compressor to reduce file size, and the Media Converter to convert the default export video format, among other tools.
AnyMP4 Screen Recorder provides you with significantly more screenshot capabilities than the Windows Snipping Tool. Also, you can use this software when the Snipping Tool video is not working. It provides both flexible screenshot modes and multiple recording modes.
When the Snipping Tool is not working properly, it can disrupt productivity and cause frustration. Issues like app crashes, Windows updates, or incorrect settings are common. Fortunately, they can often be resolved with the right troubleshooting steps. However, if the problem persists, it’s best to turn to a more reliable alternative. That’s where AnyMP4 Screen Recorder comes in as the ultimate solution. It features advanced recording modes and customizable screenshot options. Additionally, it includes built-in editing tools and supports exporting recordings and screenshots in multiple formats.
Secure Download
Secure Download
 Posted by Alice Thorne to Screenshot
Related Articles
 Solutions to Fix Xbox Game Bar Not Recording Issues
Is your Xbox Game Bar not recording? Get into this post, find out how to resolve these common problems, and get back to recording gameplay smoothly.
 How to Fix Zoom Recording Does Not Exist Error
Having a hard time with local Zoom Recordings or Zoom cloud recording not showing up? Read this article to ensure that your Zoom recordings are saved properly.
 Everything You Should Know about Audacity Recording Software
If you're looking to get started in podcasting or recording music with Audacity, you are at the right place. Read the complete guide for Audacity.
 Why OBS Game Capture Not Working and How to Fix It
If you find OBS game capture is not working, you will need to take certain steps to fix the problem. In this article, we will teach you how to do it in detail.