As most portable media device can't support some video formats like FLV, MTS, M2TS, AVI, RMVB, MKV, F4V, ASF, and VOB and others, you should convert these videos that media player compatible video format like MP4, MOV, M4V, AVI, WMV, 3GP, and MPEG, etc. AnyMP4 DVD Converter for Mac is dedicated to Mac users and integrates the functions of ripping DVD and converting video to any video as you like. Thus you can easily enjoy the DVD and video on your iPad, iPhone, the new iPad, iPhone 4S, HTC, Samsung Galaxy S3, Galaxy Tab, Galaxy Note, Google Nexus 7, Kindle Fire, Xoom and Nokia Lumia, etc.
How to convert any video to video on Mac with the best DVD Converter for Mac? This step-by-step guide will show you the detailed steps of converting videos at will in an easy way. First of all, you need to free download AnyMP4 DVD Converter for Mac and install it on your Mac.
Secure Download
Secure Download
After installing the program on your Mac, you can launch it and open the main interface. Click "Add Video" button and select the video you want to convert and add it to the program, also you can click "Add Video" drop-down button to select "Add Folder" to add multiple videos to the program at the same time.
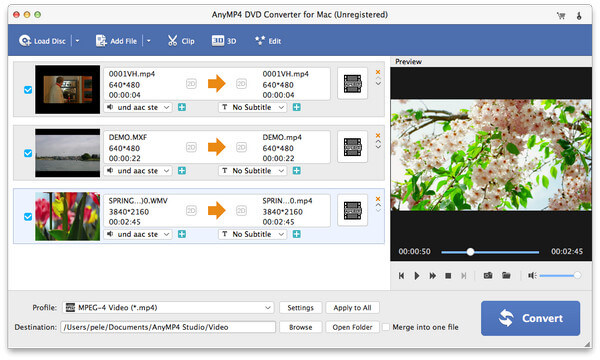
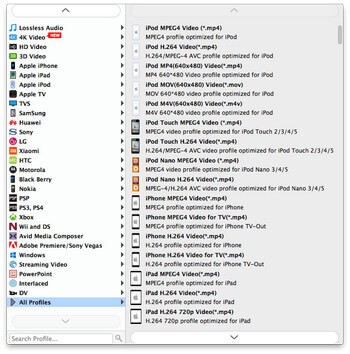
You can choose different output formats for each added video, just click "Profile" list in line with the corresponding video area to select your needed output format for the video. And you can choose one output format for all the added videos, just click "Profile" drop-down button at the bottom of the main interface and select the your needed format and then click "Apply to All" button to make the output format apply to all added videos.
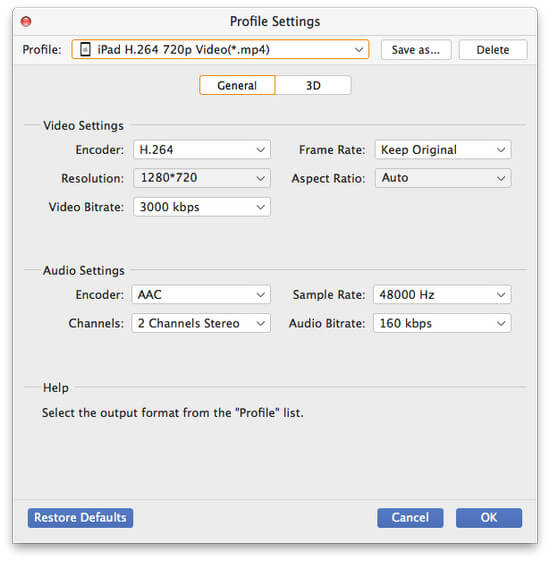
Besides, you are allowed to define the output settings by clicking "Settings" button and open the "Profile Settings" window and start to adjust the video settings like video resolution, video bitrate, frame rate, video encoder, aspect ratio, and audio settings such as audio channels, sample rate, audio encoder, and audio bitrate.
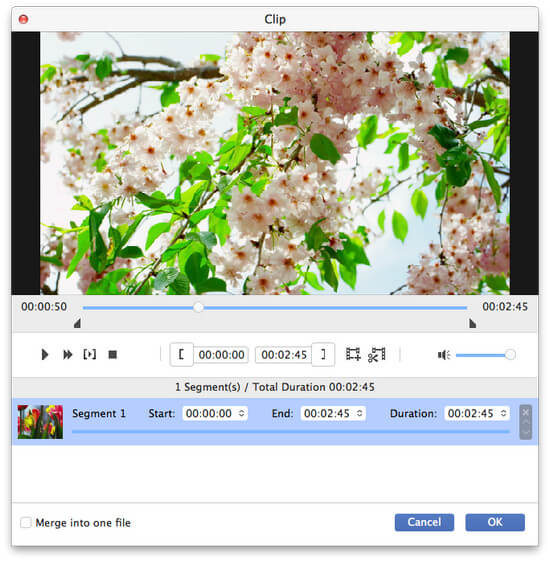
Click "Edit" button to open the "Edit" window, here you can edit the video with the multiple editing features. When you want to cut off the part of the video, you can press "Trim" button to enter the "Trim" column and start to drag the slide bar to change the start and end point of the time. Or you can enter the start and end time value in the corresponding box directly.
At last, you can click "Convert" button to convert the video to video as you like, this program supports batch conversion.
 Updated by Joan Aimee to Rip DVD
Related Articles
 How to Play DVD on MacBook Pro
What should you do to play DVD on MacBook Pro? Here are the solutions for you.
 Can You Play DVD on Wii with The Easiest Way
Get easiest methods to serve Wii as DVD player, to play DVD on Wii in 2 methods.
 What Format do DVD Players Use Always
The commonly used format for DVD. Learn the formats supported by DVD Players.
 How to Fix The Issue on VLC Won't Play DVD
How to fix the problems that VLC won't play DVD or VLC DVD player not working?