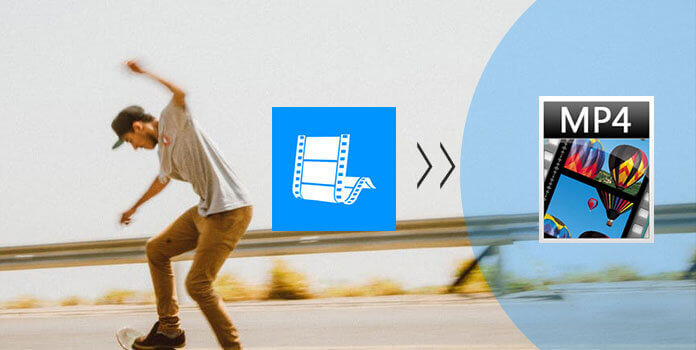
Have you ever met this situation: when importing MP4 files to your Windows Movie Maker, but then suddenly it stops working, or Windows Movie Maker cannot recognize the MP4 files? Well, the reason of this issue is that Windows Movie Maker cannot support the MP4 format, and you have to transfer the video from MP4 format to any other formats that is supported by Windows Movie Maker, including WM, MPE, MPG, MPEG, ASF, MP2V, MP2, M1V, AVI and WMV. The converting process is easy and convenient, as if you have a professional program to help you. Thus, this article will introduce you 6 applications to import the MP4 to Windows Movie Maker, and below is the step-by-step guides.
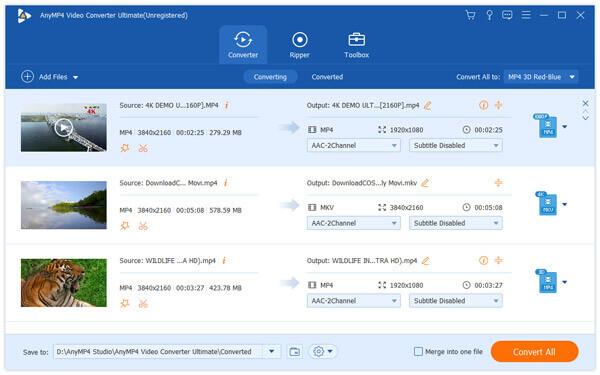
AnyMP4 Video Converter Ultimate is the best and most comprehensive MP4 to Windows Movie Maker software. It can help converting your MP4 videos to any other formats compatible with Windows Movie Maker without too much effort. After downloading and installing of this software, follow the instructions below to import the MP4 to Windows Movie Maker.
Secure Download
Secure Download
Step 1: Import the MP4 video to the program
As soon as open the AnyMP4 Video Converter Ultimate, click "Add Files" button on the top left corner to add the video you want to convert.
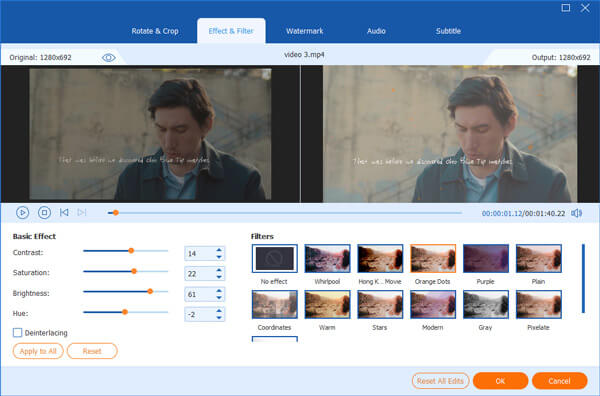
Step 2: Edit the video settings
Hit on the Edit icon and go to the editing window. You can adjust the video effect, rotate, crop and watermark the video.
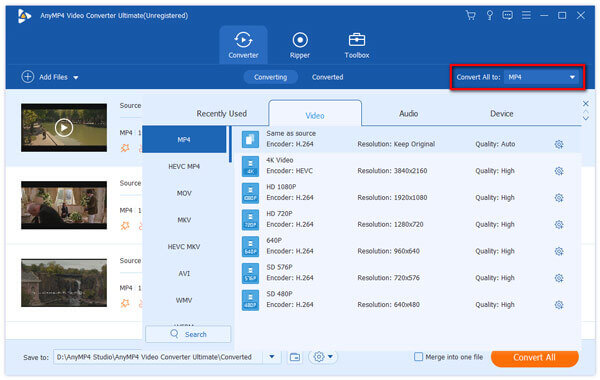
Step 3: Choose the output format
Select which format you want to convert to on the lower frame. Make sure the selected format is compatible to Windows Movie Maker.
 <
<
Step 4: Convert the MP4 video
Select the destination where to save the exported video and click Convert All button to start the converting process. Then your MP4 file can be imported to Windows Movie Maker as another format.

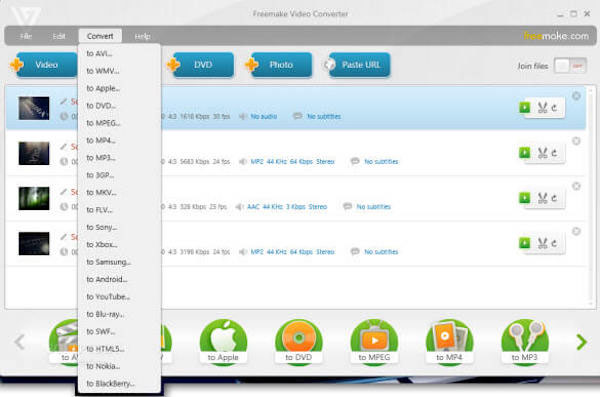
Freemake Video Converter is well known for importing the MP4 files to Windows Movie Maker excellently. It supports you to transfer video between 500+ formats including MP4, MP3, AVI, WMV, MKV and more. It can be used on many platforms and earns good reputations among users.
Step 1: Download and install the Freemake Video Converter on your computer. This program is only available to Windows.
Step 2: Click the Add button on the top right corner to open your selected MP4 video in the main interface.
Step 3: Choose the video format that is compatible with Windows Movie Maker, such as MPEG. And then edit the video settings on the editing windows.
Step 4: Then importing the MP4 files to Windows Movie Maker by clicking "Convert" button.
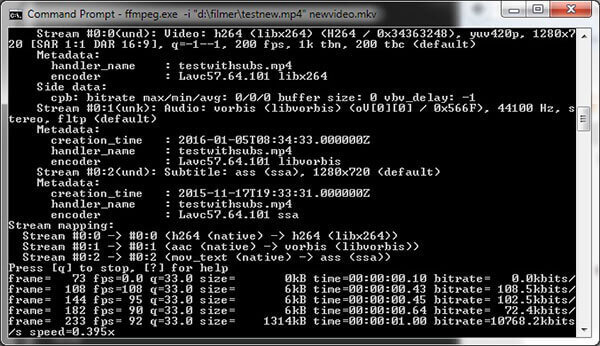
FFmpeg is a free software project to record, convert and stream audio and video. Of course, you can import the MP4 video to Windows Movie Maker with this program. The simple interface and concise design can help you operate easily.
Step 1: Download the FFmpeg program on your computer and launch it. The only disadvantage of this program is that it is not available for Mac OS X/11/12.
Step 2: Copy and paste the code below in the command line: ffmpeg -i input -acodeclibfaac -vcodec mpeg4 -b 1200k -mbd 2 -flags+mv4+aic -trellis 2 -cmp 2 -subcmp 2 -metadata title=X output.mp4.
Step 3: Entitle a new name to the output video in the metadada title where X is and click on Enter button.
Step 4: Define the destination where the exported video is saved, and click Enter again to launch the transform process. Now you can import the MP4 video to Windows Movie Maker.
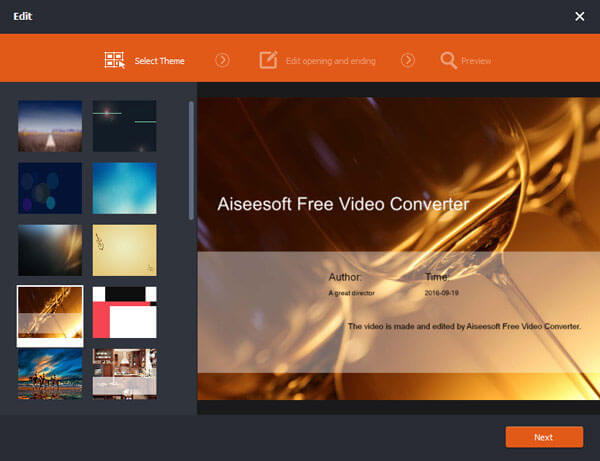
Aiseesoft Free Video Converter is another video converting program for you to take into consideration. With multiple output formats in this software, you can easily convert your MP4 video to other video formats compatible with Windows Movie Maker.
Step 1: After downloading and installing Aiseesoft Free Video Converter on the computer, Click Add File to add the video file which you want to convert.
Step 2: Before converting, you can edit the video setting. By clicking Edit button, you are able to add opening and ending theme and words.
Step 3: Then click the dropdown button of "Output format" to choose the target video format. And hit on Convert to export the video.
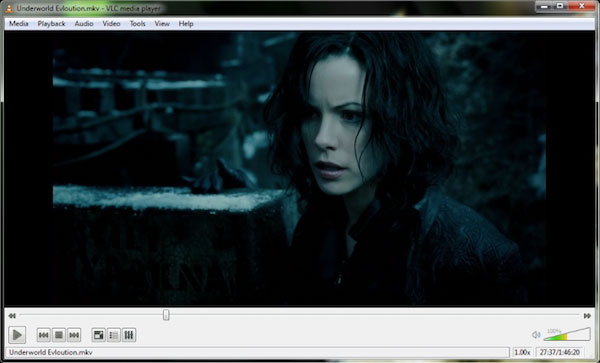
VLC is a simple yet functional tool for you to import MP4 video files to Windows Movie Maker. It makes it easy to solve your problem that Windows Movie Maker cannot recognize the MP4 files. Read on and learn.
Step 1: Download and install VLC, and then launch it on your computer. VLC applies to both Windows and Mac.
Step 2: Click the Add button to add your File that you want to import MP4 video files to Windows Movie Maker.
Step 3: Click on the video tab, select a suitable format that is compatible with Windows Movie Maker.
Step 4: Simply click on the Convert button in the lower right corner, you can start the converting process.
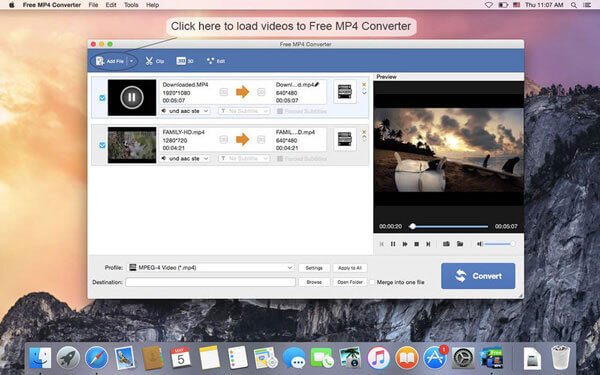
Free MP4 Converter is a nice video converting program. It supports a wide range of video formats, such as MP4, AVI, MKV and so on. So you can import the MP4 files to Windows Movie Maker with a high quality by Free MP4 Converter.
Step 1: Download and Launch the Free MP4 Converter and add the MP4 video into the main interface. You can also add multiple videos here.
Step 2: Select the video format you want to export at the format category. And the selected format has to be supported by Windows Movie Maker.
Step 3: Click the "Convert" button and wait for a few minutes, and you can import the MP4 file to Windows Movie Maker.
What video format works with Windows Movie Maker?
Windows Movie Maker can import the following formats: Video Files: .wmv, .asf, .wm, .m2ts, .mts, .m2t, .mov, .qt, .avi, .dvr-ms, .wtv, .mp4, .m4v, .3gp, .3g2, .k2g, .mpeg, .mpg, .mpe, .m1v, .mp2, .mpv2, .mod, .vob, .m2t, .m1v and .mov, .asf, .wm, .wma, .aif, .aiff, .wav, .m4a and .mp3, .jpg, .jpeg, .jfif, .jpe, .tif, .tiff, .gif, .bmp, .dib, .rle, .ico, .icon, .png and .wdp.
How to save video as MP4 in Windows Movie Maker?
Run Windows Movie Maker, after editing the project, click File to select Save movie to choose MP4. Then it will save Windows Movie Maker video as MP4, but the format can be only playback in Windows Live Movie Maker.
How to publish a Windows Movie Maker video to YouTube?
Step 1. Open a video in Windows Movie Maker, click Publish movie, then choose Save To This Computer. Step 2. Under More Settings, make the settings for the video and click Publish to save the video from Windows Movie Maker locally on your computer. Step 3. Go to YouTube on your browser, and sign into YouTube account. Click Upload to choose the published video and start uploading to YouTube.
 Posted by Ted Klarso to Convert Video
Related Articles
 4 Best Ways on How to Export iMovie to MP4
Read on and learn, this article will introduce 4 best methods to export iMovie to MP4.
 How to Turn MP4 into GIF With Top 5 Methods
Ever wonder how to turn your MP4 videos into GIF images? Don't worry. Read on and learn, this article will introduce 5 methods for you to achieve it.
 6 Best Audio Joiner software to Combine Audios
Learn more details about the 6 best Audio Joiner software to combine them.
 Convert Video to MP4 Free With Top 10 Methods
Here are the step by step guides about converting video to MP4. Read and discover your favorite tool.