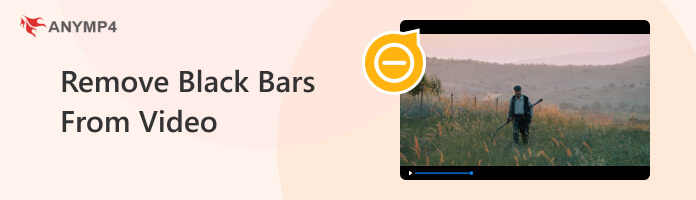
Complete Guide: How to Remove Black Bars from Video (4 Best Methods)
Quick Summary:
The fastest way to remove black bars is to crop the video to your target aspect ratio (16:9, 1:1, 9:16). On Windows and Mac, use AnyMP4 for batch 4K processing; on iPhone, use iMovie’s Fill mode; and in Premiere Pro, use Auto Reframe for AI-powered black bar removal without manual cropping.
Black bars, also known as letterboxing, can be an unwanted distraction when watching videos. These black bars appear when a video’s aspect ratio does not match the display, resulting in space above and below the video content. Thankfully, there are effective methods for removing black bars from videos and enhancing the viewing experience. In this post, we will master four straightforward and efficient ways to banish those black bars from your videos. Read more to help you achieve a clean and visually appealing video.
| Video Editing Tools |
Speed and Performance |
Privacy |
Editing Features |
| Shotcut |
Moderate to slow exporting speed. |
Fully offline and local editing. |
●Video cropper tool.
●Cropped video size and position control.
●Manual precision cropping. |
| AnyMP4 Video Converter Ultimate |
Fast local rendering. |
100% local and offline processing. |
●Batch editing
●UHD support for 4K and 8K videos.
●Exclusive video cropper tool. |
| iMovie |
Fast and optimized for Apple devices. |
Runs locally on Mac and iOS devices. |
●Crop to fill editing.
●Drag-and-drop editing.
●Limited precision controls for video cropping. |
| Adobe Premiere Pro |
High performance and GPU-accelerated. |
Connected to Adobe Creative Cloud. It is not fully offline. |
●Percentage-based zooming controls.
●AI-powered auto-reframe.
●Sequence resolution editing. |
| Clideo Online |
Reliant on internet connection stability. |
Files are uploaded to cloud servers. Poor privacy. |
●Simple crop and resizing tools.
●Aspect ratio presets.
●Limited fine controls. |
Part 1. How to Crop Out Black Bars in Video on Shotcut
Shotcut is a free video editing solution that offers various features, including the ability to crop black bars from videos. Users can adjust the video’s aspect ratio or crop-specific areas to achieve the desired frame size. Using the video cropping tool, Shotcut can crop videos without black bars that may appear when aspect ratios differ.
It also helps that Shotcut is an open-source tool that is equally reliable as other traditional video editors when it comes to aspect ratio adjustments. To improve the program’s familiarity, its UI is also optimized to be more similar to that of other popular video editors.
Before proceeding with our Shotcut tutorial, we need to understand why black bars appear. It is usually rooted in incompatible screen and video aspect ratios. On modern screens, 16:9 is the standard aspect ratio. However, video types do not meet this standard because of their cinematic appeal and screen differences. This causes these types of videos to be letterboxed (top-bottom) or pillarboxed (left-right).
For a quick reference on modern screen and video aspect ratios, please see our table below.
| 16:9 |
Widescreen aspect ratio for modern flat-screen TVs and computers. Also used typically in modern movies and
shows. |
| 9:16 |
Vertical aspect ratio for a smartphone. Used on short-form videos. |
| 1:1 |
Square aspect ratio. Not as popular as the other two options, but widely used on social media feeds like
Instagram. |
1. Click Open File to import the video and drag it into the timeline.
2. Add a new filter from the Filters panel.
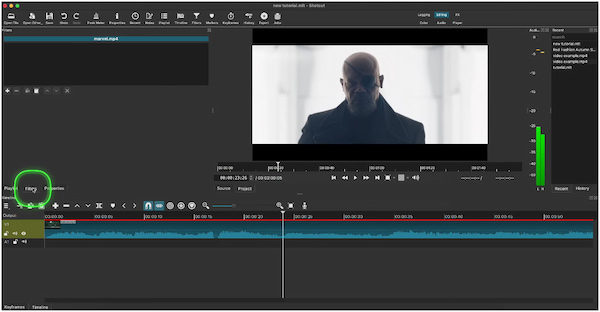
3. Choose Size, Position & Rotate, and adjust Left, Right, Top, and Bottom values.
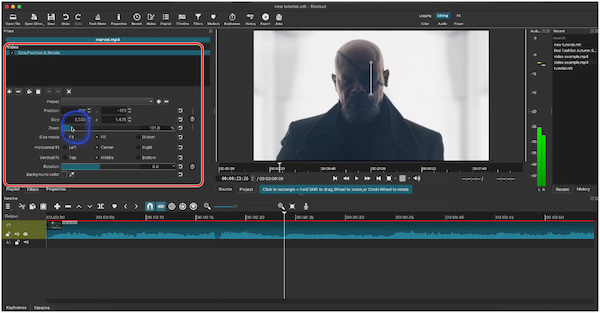
4. Enable Pad to maintain the aspect ratio.
5. Click Close to apply the cropping to the video clip.
6. Click File, then Export Video. Then, click Export to save the cropped video.
Although Shotcut can handle tasks such as video cropping, it might not perform as efficiently as some editing tools, especially for complex projects or high-resolution videos.
Tip
Cropping reduces resolution slightly. Increase your export bitrate to avoid softness.
Testing Notes: Shotcut is powerful, but its interface can feel overwhelming. It took us three steps to locate the “Crop: Source” filter.
Part 2. How to Remove Black Bars from Video in AnyMP4 Video Converter Ultimate
AnyMP4 Video Converter Ultimate is a full-featured multimedia tool for editing, enhancing, and converting videos and audio files. It offers various editing features, including Video Cropper, Merger, Trimmer, Rotator, Reverser, and more. AnyMP4 Video Converter Ultimate Video Cropper feature provides precise control over the cropping area, enabling you to remove black bars from the video.
It lets you crop the black bars freely using the adjustable region box or by entering the crop area value. Aside from that, it allows you to maintain the original aspect ratio or choose from custom options, such as 16:9, 4:3, 21:9, 16:10, 5:4, 9:16, and 1:1.
To provide an efficient workflow for its users, the software also offers an effective Batch Processing feature. This allows multiple videos to have their aspect ratios adjusted, making it both faster and easier to remove black bars.
Here’s how to remove black bars from video in AnyMP4 Video Converter Ultimate:
1. Beforehand, click the Free Download button to obtain AnyMP4 Video Converter Ultimate. Install it on your computer and launch it afterward.
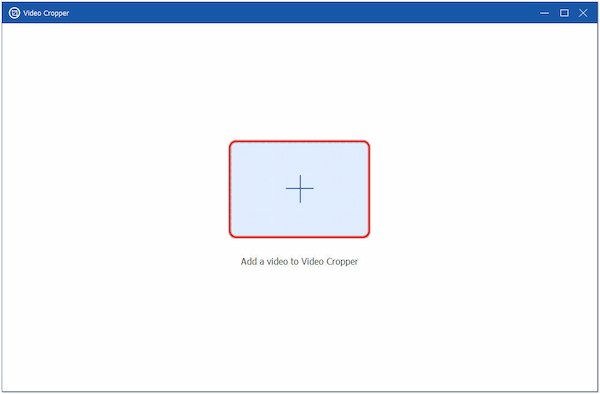
2. Navigate to the Toolbox tab and select the Video Cropper tool from the selection.
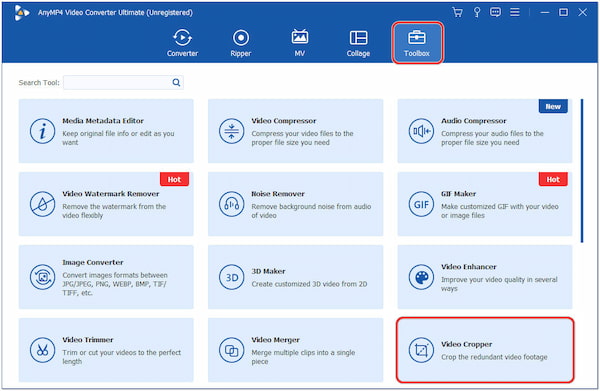
3. From the Video Cropper window, click + to import the video you want to crop, which has black bars.
4. You should see a video preview with an adjustable cropping region box in the cropping window. Drag the pointers to crop out the black bars.
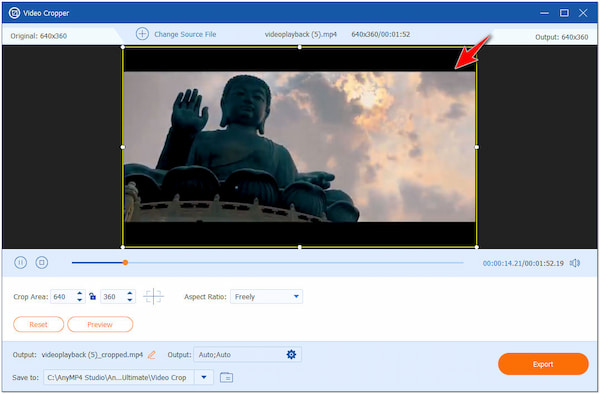
5. After adjusting the cropping area, use the preview function to see how the video will look without the black bars.
6. Proceed by clicking the Output field and selecting the desired output settings. Click Export to save the new video without black bars.
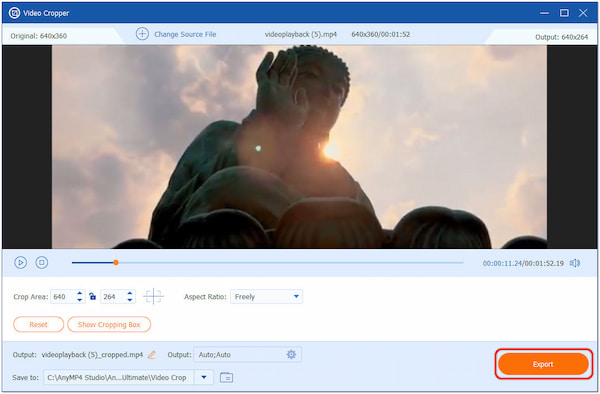
The AnyMP4 Video Converter Ultimate Video Cropper feature and other editing tools give you the flexibility to customize your video hassle-free. It lets you save your output in your desired format, such as MP4, MOV, MKV, and AVI, with up to 8K resolution. For more video cropper editors, see the list here.
Tip
Make sure to learn why the black bar exists. Although black bars are common when an aspect ratio is incompatible, some movies use them for cinematic effect.
Editor’s Note: In our tests with AnyMP4, the Auto-Crop tool saved several minutes compared to manual cropping, but videos with subtitles required manual edge checks.
Part 3. How to Get Rid of Black Bars on Video Using iMovie
iMovie is a user-friendly video editing application for Apple users. It lets users edit and enhance videos directly on their iPhones. iMovie offers several features, including a cropping option to remove black bars on videos. Its convenient mobile editing functionality makes it the best choice for users who want to create polished videos on the go.
Aside from basic video cropping, you can also solve black bar issues by using the Fill options on traditional editors. This uses zooming to fit the video to the aspect ratio you are using; however, this may remove some parts of the clip. Make sure to balance this trade-off when trying to fix black bars without cropping.
Because iMovie is a built-in tool on Apple devices, it is essential for users who need to adjust aspect ratios. However, keep in mind that iMovie for iOS and macOS have different workflows.
Here’s how to get rid of black bars on iPhone videos using the iMovie app:
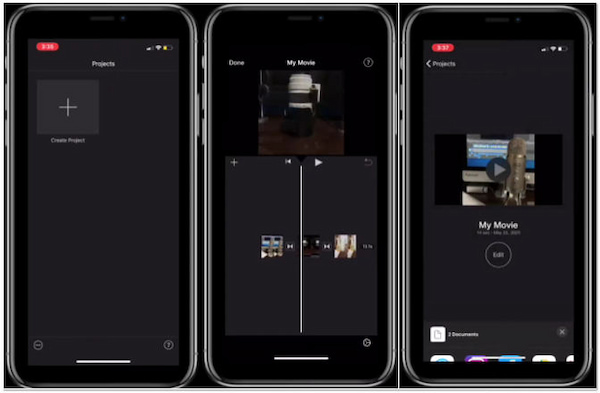
1. Tap + Create Project, then Movie, and add the video with black bars.
2. Drag the video to the Timeline, tap it, and choose Crop to Fill.
3. Use adjustable handles to crop out black bars.
4. The video will be zoomed in to fill the screen while preserving its proportions.
5. Tap the Apply button to confirm changes.
6. Tap the Share, then Save Video to export the cropped video.
iMovie provides essential video editing tools, including a video cropping feature, for quick, straightforward editing tasks. However, iMovie is only available on iOS devices, so Android users cannot access the app.
Tip
Use video cropping instead of stretching when removing black bars. Cropping is preferable because it will not cause distortion.
Editor Note: When using iMovie for iOS, make sure to double-check your adjustments since touch-based editing is not the most accurate.
Part 4. How to Cut Black Bar Off a Video with Adobe Premiere Pro
Adobe Premiere Pro is a professional, extensive video editing tool in the Adobe Creative Cloud suite. It is used by skilled video editors, content creators, and filmmakers to cut black bars from video. Adobe Premiere Pro offers advanced editing tools and features, making it well-suited for professional video editing projects.
Widely considered the industry-standard video editor, Adobe Premiere Pro offers black-bar removal via its Auto Reframe. This feature is one of the most notable AI-based features in the program and is also considered one of the most efficient solutions for aspect ratio editing.
Alternatively, a manual option for black bar removal is to apply a Gaussian blur to the pillarbox portions of the video you are editing. This is often the selected option when playing mobile-based videos on widescreen.
Here’s how to cut the black bar off on video with Adobe Premiere Pro:
1. Click File, then Import to load the video.
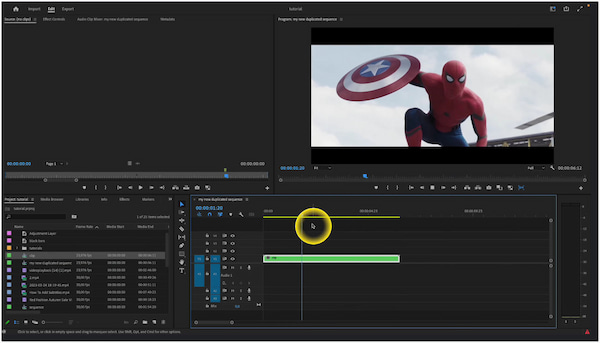
2. Right-click the video in the Project panel and select New Sequence From Clip.
3. Drag the video clip from the Project panel to the Timeline panel.
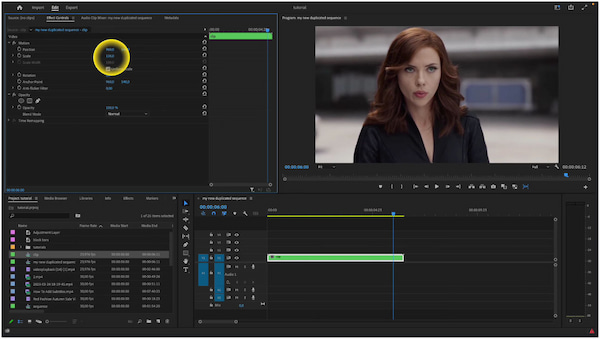
4. Search for Crop in the Effects panel. Drag the Crop effect to the video in the Timeline.
5. Adjust crop settings in the Effects Controls panel to remove black bars.
6. Go to File, Export, then Media to open the Export to save the video without black bars.
Adobe Premiere Pro supports high-resolution videos and offers customizable export settings, ensuring high-quality final output. However, high-quality output requires powerful hardware to run smoothly.
Tip
To avoid black bars, use popular aspect ratios such as 16:9, 9:16, or 1:1. Also, select the aspect ratio based on where you will watch the video.
Editor Note: When testing its features as an aspect ratio editor, Adobe Premiere Pro’s complexity is a major hurdle. Its tools, which are not well-labeled, make it challenging for beginners to understand.
Part 5. How to Edit Out Black Bars from Videos Using Clideo Online
Unlike the other options in this article, Clideo Online operates without installation. This makes it the most accessible tool when removing black bars from videos. It is also very easy to use and offers multiple social media platforms to help users upload videos to specific platforms while using the correct aspect ratio.
Make sure to read our guide below to learn how to use it.
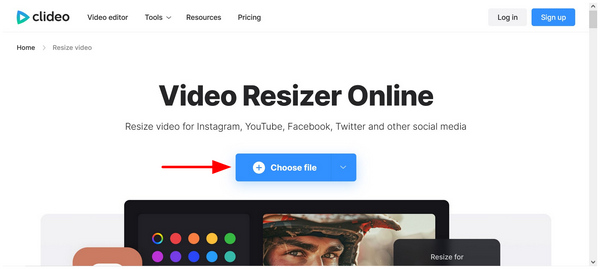
1. Go to Clideo Video Resizer’s website. Then, select the Choose File button to upload the video with the black bars you want to remove.
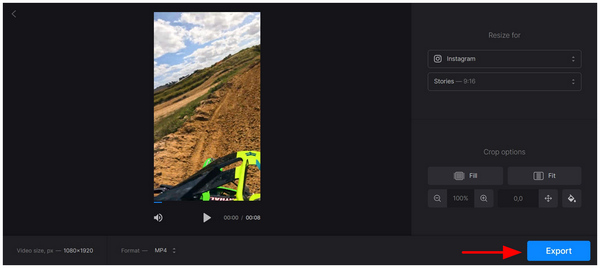
2. In the Video Resizer menu, select the social media site where you want to upload your video. Next, select the aspect ratio you want to use for your video. In our tutorial, we are using a vertical video with black bars on the sides. In this case, select any option with a 9:16 aspect ratio to remove it.


3. Once the black bars have been removed, you can now select Export to create the video free from the pillarbox.
Tips
You have to select the appropriate aspect ratio when editing files on Clideo. Fortunately, this is easy to do since the preview section of the online tool is highly visible.
Editor Note: Manual editing is not present in the program. This makes it a good choice for beginners but limited for experienced users.
Part 6. FAQs about Removing Black Bars from Video
Why are there black bars on my video?
Black bars on a video appear when the video’s shape doesn’t match the screen where it’s played. If the video’s shape differs from the screen’s, black bars appear on the sides, above, and below the video. It helps preserve the video's original proportions without distorting or cropping the image.
Do iPhone X video previews have black bars?
YES! iPhone X and newer iPhones have a specific screen shape called 19.5:9. If a video’s shape doesn’t match this, you might see black bars when watching the video in full-screen mode. Even video previews on social media or in players can have black bars if they use a different aspect ratio.
How to remove black bars from a video for free without a watermark?
You can use AnyMP4 Video Converter Ultimate to remove black bars without watermarks. It lets you crop the video to match the screen’s shape and remove the black bars. Adjust the settings correctly before saving the video to avoid distortion and export it without watermarks.
How do I stretch resolution without black bars?
To stretch a video’s resolution without black bars, you must match the video’s shape to the screen’s shape. Use AnyMP4 Video Converter Ultimate to crop the video precisely to fit the screen’s shape. This way, the video will fill the entire screen without any black bars.
What are black bars on a video called?
Black bars on videos are commonly referred to as letterboxing or pillar boxing. Letterboxing occurs when black bars appear above and below the video, and pillarboxing occurs when black bars appear on the sides of the video. These black bars maintain the video’s original aspect ratio and prevent distortion or cropping when displayed on screens with different aspect ratios.
How do I remove black bars from a video without losing quality?
Make sure to crop the videos. You can also use the Fill option to zoom them into the aspect ratio. Make sure to avoid stretching to avoid distortion issues.
Why does my video have black bars when I upload it to YouTube?
You might be using the wrong aspect ratio. When uploading on YouTube, use either 16:9 or 9:16. Use the widescreen option for videos and the vertical for Shorts.
How can I convert 4:3 video to 16:9 without stretching?
Yes, you can. However, you will apply pillarboxing to your video. This will cause black bars to appear on the left and right sides.
Can I remove black bars from videos on my iPhone for free?
Yes, you can. iMovie for iOS should be good enough for this to work. It is a good option since iMovie is optimized for beginners.
Conclusion
Don’t let black bars spoil the visual charm of your videos. With the four methods we’ve explored, you now have the tools to remove black bars from videos and create polished videos that captivate your viewers. Using video editing software like AnyMP4 Video Converter Ultimate, you can manually crop a video, choose a custom aspect ratio, edit 4K videos, and apply adjustments by batch; these methods offer versatile solutions to the common problem of letterboxing. So, next time you encounter black bars in your videos, remember these techniques and say goodbye to the distraction.