For many creators, achieving cinema-quality color from amateurs in video color grading can be challenging. This article will introduce workflow and color grading in CapCut, a video editor with surprisingly in-depth color tools. This comprehensive guide can fully unlock the potential of your video projects, making your edits look professional or more cinematic. Whether you are repairing the color of the footage or creating a new masterpiece, we believe this beginner-friendly tutorial will improve your editing skills. If this is what you are looking for, you have come to the right place! Now let's get started.

| Color Correction | Color Grading | |
|---|---|---|
| Primary Aim | Accuracy & Realism | Emotion & Style |
| Nature | Technical/Corrective | Creative/Artistic |
| Order | Always comes first | Comes after correction |
| Outcome | Natural-looking footage | A unique cinematic look |
If you try to Color Grade before you Color Correct, the math of the colors will clash. You will end up with muddy, washed-out shadows and unnatural skin tones. Always neutralize your image first!
CapCut Color Suite has three powerful features: Exploring Curves, HSL, and Wheels, which can transform ordinary edits into professional-grade works.
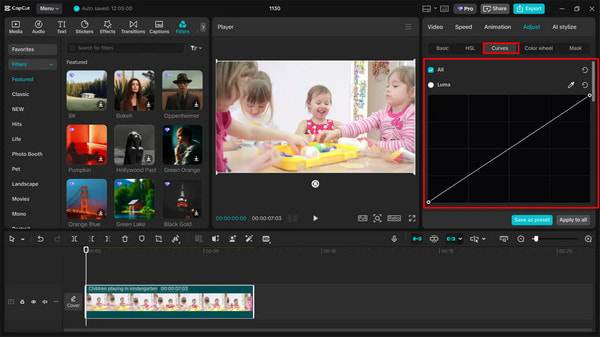
The Curves tool is a graph representing the tones in your image, and the most powerful tool for controlling Dynamic Range. By adjusting the curve graph, you can fine-tune the brightness and contrast of your video, thereby creating better shadows, highlights, and the range of tones.
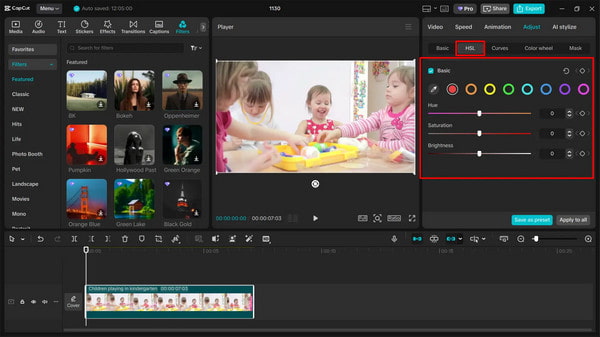
HSL stands for Hue, Saturation, and Luminance. This is your precision tool for isolated grading.
• Hue: Changes the actual color.
E.g., if the actual color of a section does not match the color captured in the photograph, use this feature to adjust.
• Saturation: Controls the intensity.
E.g., if the color of an item is too distracting, you can select it and drop the saturation.
• Luminance: Controls the brightness of a specific color.
E.g., increase the luminance of a specific object without overexposing other parts of the image.
Importing custom LUTs is the fastest way to achieve a professional cinematic look used by high-end colorists. Here is the advanced workflow for importing and customizing LUTs in CapCut's desktop version (Windows/Mac).
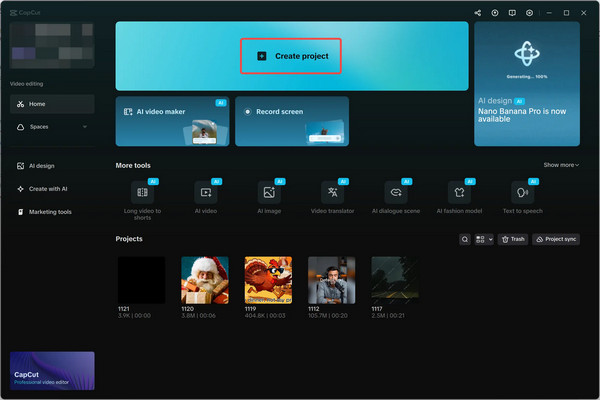
1. Open CapCut and click Create project > Import to upload your video. Then, drag the file to the timeline to begin editing.
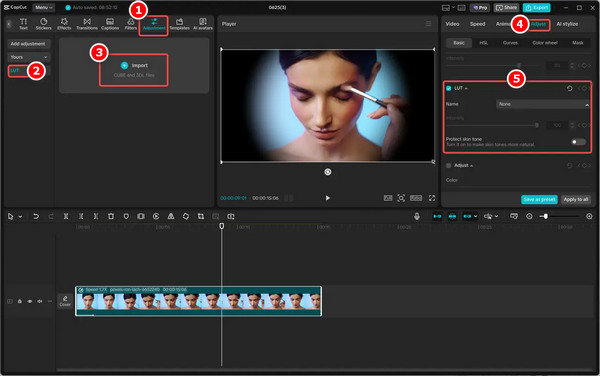
2. Go to the Adjustment tab, click the LUT option > Import to upload your custom LUTs. Apply the LUT to your video and refine the look with HSL, Color wheel, etc., tools.
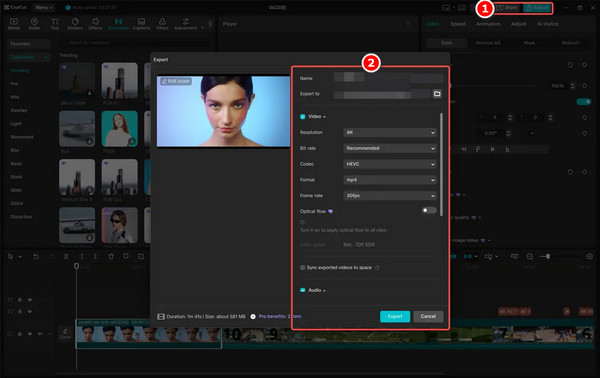
3. After completing color grading, click Export and configure the resolution, format, frame rate, and other settings for your video as needed. Finally, share it on platforms such as YouTube or TikTok.
Choose CapCut if your final destination is TikTok/Reels: it supports sharing edited videos directly to any platform.
AnyMP4 Video Converter Ultimate is a powerful, all-in-one video editor compatible with both Windows and Mac. It supports 500+ digital formats, which have excellent compatibility. As a professional video editing software, its built-in editor offers a wide range of editing features, allowing you to easily color grade videos by adjusting brightness, contrast, saturation, hue, and adding filters. Additionally, it provides simple yet powerful video tools like Video Enhancer and Color Correction. All of these are all well-suited for adjusting video colors.
1. Download and install it on your Windows/Mac computer. After installation, it will open automatically.
Secure Download
Secure Download
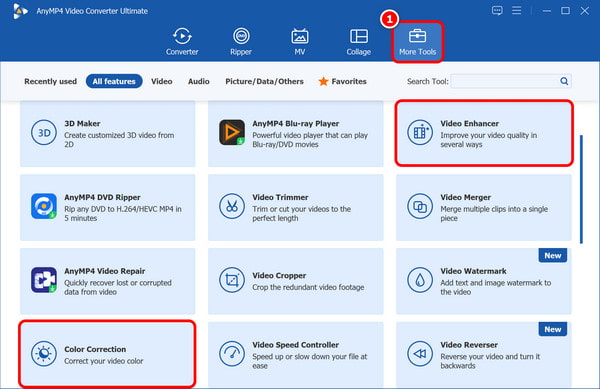
2. Go to the More Tools tab and find Video Enhancer and Color Correction. The former can optimize brightness and contrast, and the latter lets you easily adjust brightness, contrast, hue, and other settings for your video.
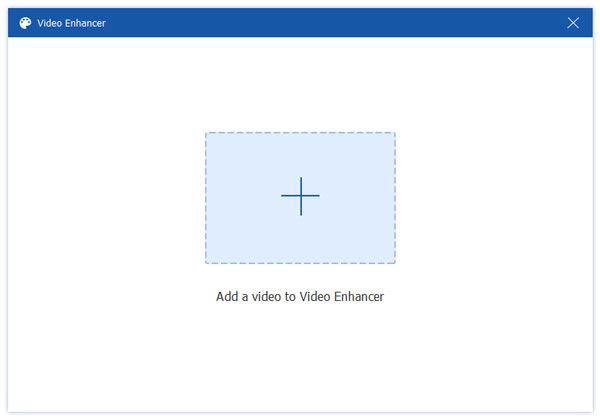
3. Let us optimize brightness and contrast with Video Enhancer first. Click Video Enhancer > the plus button to select the video file.
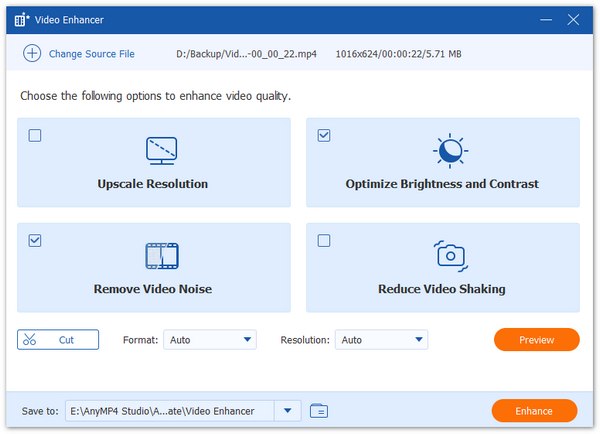
After entering the Video Enhancer window, enable the Optimize Brightness and Contrast option. You can also enable other options based on your needs.
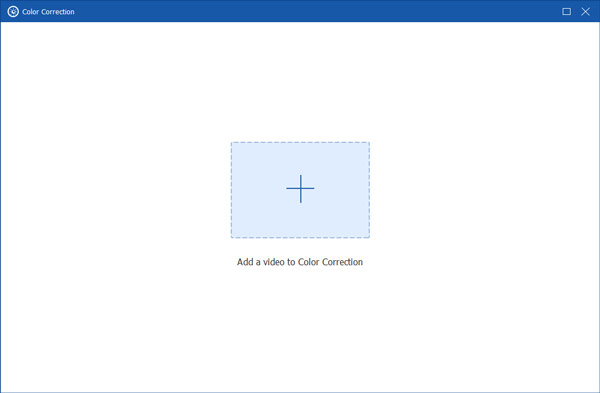
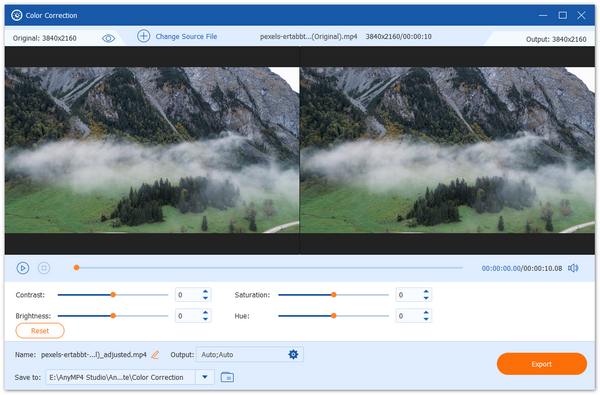
4. Click Color Correction, and then also click plus to add the video.
After adding the video, you can move bars next to Contrast, Saturation, Hue, and Brightness to adjust the effect of your file. At last, click the Export button to store the edited video.
Choose AnyMP4 if your source footage is low-quality, shaky, or in the wrong format. Because AnyMP4 Video Converter Ultimate supports various video file formats and also provides H.264/HEVC codecs, which have good compatibility.
Can I use professional .cube LUTs in CapCut?
Yes, you can use professional .cube (and .3DL) LUTs in CapCut, but this feature is primarily designed for the Desktop version (PC/Mac)
Why does my video look 'washed out' after exporting?
Washed-out exported video is usually caused by gamma/color space mismatches between your editing software and the media player.
Does color grading reduce video quality?
Color grading doesn't inherently reduce quality, but excessive grading on low-bitrate or highly compressed footage may result in reduced video quality.
Is there a chroma key in CapCut?
Yes, CapCut has a Chroma Key (often called Green Screen) tool that works on both the mobile app and the desktop version.
How to add a color gradient in CapCut?
To add a color gradient in CapCut, create a gradient background by placing two colored clips on separate tracks, using the Mask tool (split or linear) to blend them, and adjusting the Feather setting for a smooth transition.
This article introduced the workflow of CapCut color grading. It is a powerful social media video editing tool. However, it may encounter issues when processing highly compressed or low-resolution footage. In that case, AnyMP4 Video Converter Ultimate, a professional desktop video editing software, is a better choice. Click the download button below to get it now and try its AI-powered enhancement features and professional color tools for free! We're confident you'll be satisfied. If you have other ideas about video color grading, feel free to share them with us in the comments section!
Secure Download
Secure Download
 Updated by Mark Cristobal to Edit Video
More readings
 Edit CapCut Background: Add, Remove, Blur, and White
Do you want to edit your image background with ease? Learn how to use CapCut tools with this full guide to add, remove, blur, or change the background to white.
 Remove CapCut Watermark: Free & Pro Methods in 2026
Learn how to remove CapCut watermarks using free tools, pro export settings, and AI-powered watermark removers. Choose the best method for clean videos.
 How to Crop on CapCut PC and Mobile: A Complete Guide
This article will serve as your guide to help you learn how to change the ratio in CapCut video editor on different platforms where the software is available.
 Top 3 AI Color Grading Tools to Save 80% Prep Time
Looking for the best AI Color Grading software of 2026? Read the top 3 tools in this post to save 80% of your post-production time.