Secure Download
Secure Download
With the increased reliability of webinar apps for accessible online meetings, the demand for recording tools has also increased, as this software serves as a valuable companion for easier information retention during live meetings. As such, learning how to reliably record a webinar on Windows, Mac, iOS, Android, and other options is of great importance. In this article, we will highlight why using a dedicated webinar recorder is a good decision, based on its cost-effectiveness, flexibility, and improved recording quality.

The most significant downside of relying on built-in recorders of webinar tools is that the proprietary formats these recordings capture are usually saved. This means that built-in recordings can only be opened in the specific tool, and file sharing becomes nearly impossible as file conversions are often not available for proprietary formats.
Aside from heavily restricted formats, hidden costs and expensive storage restrictions also make built-in recorders not a worthy option. These hidden costs are also applied via subscription services. As such, it is better to just use a third-party recorder that saves recordings in regular video files and uses local storage.
Compared to the built-in recording feature of the online webinar service, another efficient way to record a webinar is to use third-party recording tools, as most of these options offer a practical Scheduled Recording feature. In the market, AnyMP4 Screen Recorder is a webinar recording program that allows you to easily capture multi-camera or selected camera footage on your Windows 10, 8, 7, and Mac computer.
Aside from its practical recording options and multi-camera function, the software also offers a scheduled recording feature that allows you to automatically record your screen at a specific time and date. This feature enables the program to record webinars even when your device is unattended.
Additionally, the codec, frame rate, and captured audio tracks for your webinar recordings are all fully customizable. This will ensure that you can customize your recording format, quality, and the audio on the webinar you want to record.
For an easier overview of what makes AnyMP4 Screen Recorder good recording software, learn more about the program with its main features below.
Recommendation
To learn how to set up webinar recordings and scheduled task recordings, make sure to read our guides below featuring these two methods.
Ensure you download the software to make your recording setup easy.
Secure Download
Secure Download
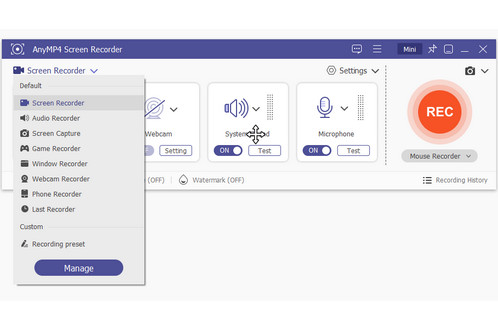
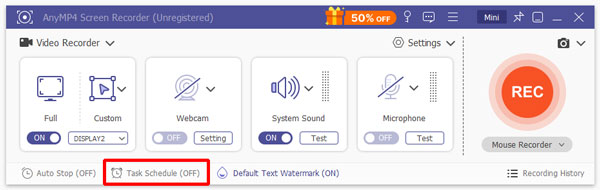
1. Open AnyMP4 Screen Recorder and ensure you are in the Video Recorder mode.
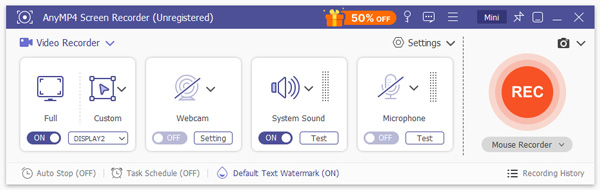
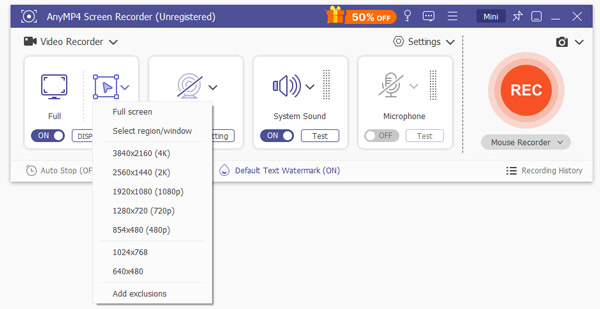
2. Next, set up the portion of your screen that will serve as the recording area. For a simpler setup, you can just use Full Screen.
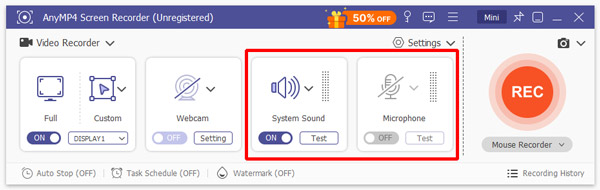
3. Finally, adjust the audio settings of your setup to capture either the System Audio, Microphone, or both. Then, click on REC to begin recording.
Before proceeding to scheduled recordings, ensure that your Video Recorder mode is set up correctly. Your scheduled recording will use the settings you set up.
1. Click on the Task Schedule on the lower part of AnyMP4 Screen Recorder’s menu.
2. Then, set up the Task Name, Recording Mode, Start Time, Start Day, and Duration Limit for your recordings. Click on OK to confirm your schedule.
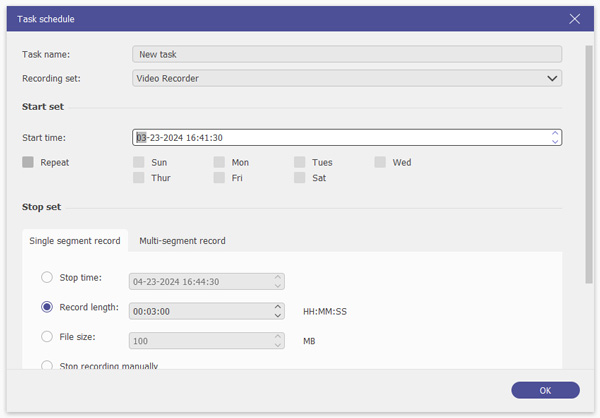
When setting up scheduled recordings, ensure that you always verify how the recording mode you selected is configured. If you plan to make the recording automated, it is advisable to close your webcam and capture only system audio.
We will begin this guide by introducing the built-in recording tool for Mac computers, specifically the QuickTime Player screen recording feature. Although this option is quite basic, it can get the job done if you only wish to record your computer’s screen without any form of advanced recording options.
Learn how to use it with our guide below:
1. Open QuickTime Player, click File, and then select New Screen Recording.
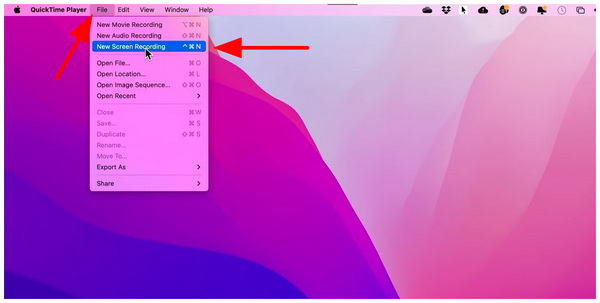
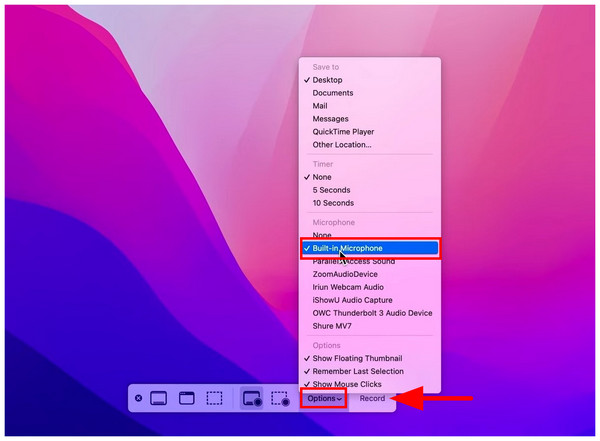
2. With the New Screen Recording option selected, QuickTime Player’s recording mode options will appear on the lower portion of the screen. You can select Record Entire Screen for less setup and to ensure that the entire webinar is captured.
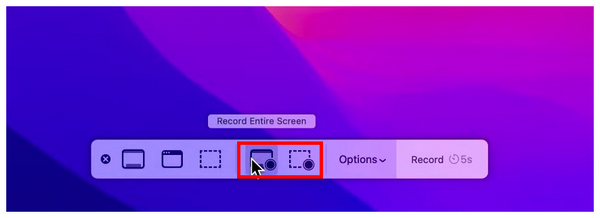
3. Finally, click on Options to check the audio output and input from your recording. If you wish to capture your audio as well, check the Microphone option available in the options. Click on Record to begin recording.
Although QuickTime Player gets the job done, its recording mode lacks important features, such as basic editing tools. This makes the program only an entry-level option, or if you want to plan on recording and nothing else.
Primarily used for gaming, the Xbox Game Bar can still serve its purpose if you only want it to capture webinars and meetings. This is because the software functions well even if you are not recording a video game. It also helps that it is easy to set up.
Learn how to use it using our guide below:
1. Open the Xbox Game Bar and use the keyboard combination Windows + G. Then, click on the Camera icon in the game bar menu that appears.

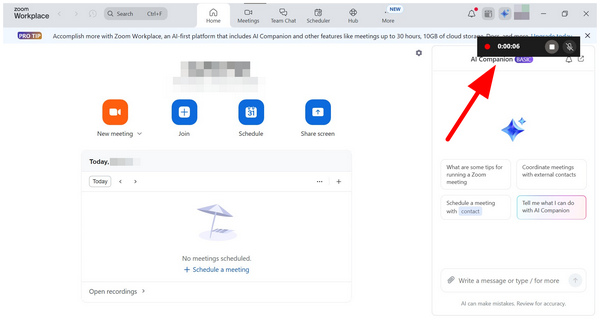
2. Next, select the Record button in the Capture settings that opens. You can only access the Record function if the program detects that another program is open. This means you must open your webinar app before setting up the Xbox Game Bar.
3. With the webinar app now open, the Xbox Game Bar will start the screen recording. Click the Stop button on the new recording pop-up to stop the recording process.
Since Xbox Game Bar recordings provide an accessible notification, you can quickly access them. This makes previewing your recordings easy and convenient, allowing you to do it on the go.
Finally, mobile users on iOS devices can still reliably use the default iPhone screen recording feature in their control center if they want to capture webinars on your meeting apps. The setup only requires one difference since you need to hold the recording button instead of just tapping it.
Learn how to set it up using our guide below:
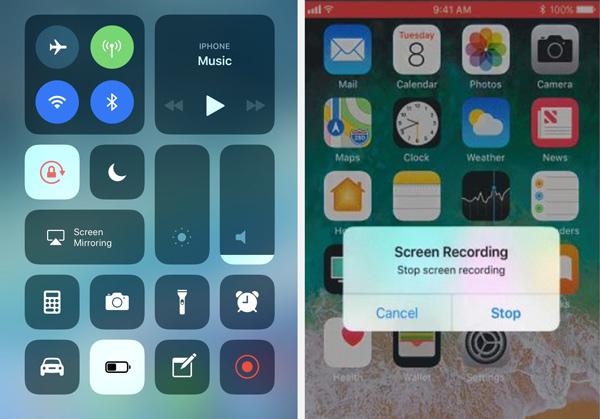
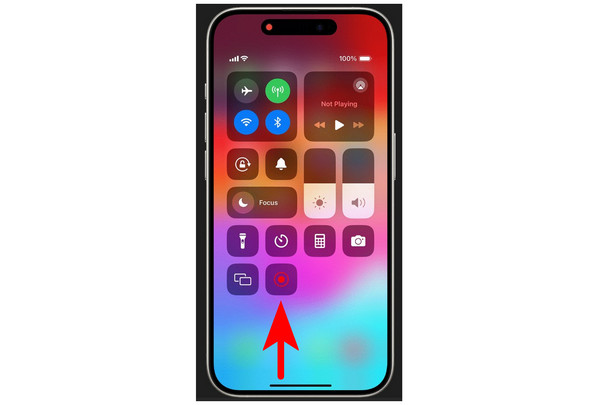
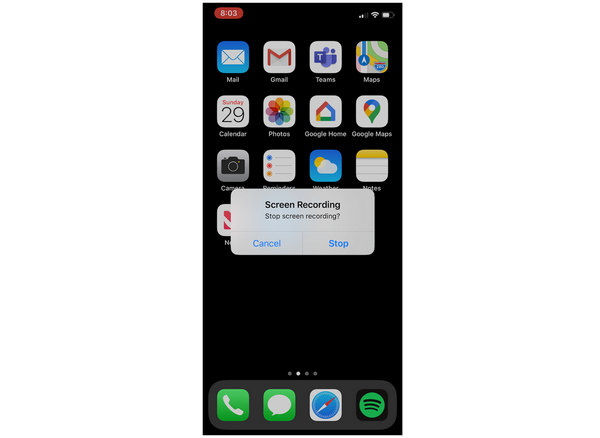
1. Open your Control Center by swiping down on your screen. Here you can find the Screen Recording option.
2. Tap the Screen Recording button while the webinar app is ongoing on your iOS device. Wait for 3 seconds before the recording starts. While the recording is active, return to the webinar app to capture your screen.
3. Tap the red-colored status bar at the top of the screen, then select Stop when the webinar meeting is finished. After recording, you can check the captured video in your device’s gallery.
When relying on built-in recorders, such as this one, be mindful that webinar apps typically have privacy measures in place to prevent unsolicited recordings. As such, it is common for these recording tools to capture only a black screen. This is usually common for mobile devices such as iPhones and Android devices.
Is recording webinars legal?
Yes, they are. However, you need to ask permission for the participants of the meeting. Recording secretly is a major breach of privacy and trust.
Can I rely on built-in recording tools on webinar apps?
Yes, you may. However, they are not the best options. These built-in tools usually only save videos in a format accessible only to them, which makes file sharing nearly impossible.
What format do built-in screen recorders on webinar apps use?
It depends on what webinar app you are using. However, they are usually proprietary formats. This means that they may only be accessed in the apps where they are captured.
Should I use third-party screen recorders?
Yes, you may. Most third-party screen recorders are reliable enough. They are often way better than built-in recorders in webinar apps.
Are the built-in recording tools on computers sufficient for capturing webinars?
Yes, they usually are. This means that you can record meetings on Windows or macOS pretty reliably. However, these programs lack advanced features that third-party apps offer, such as scheduling recordings.
To record a webinar video for loop playback on a computer or share it with more people is not difficult. You could use the built-in recording feature from the online webinar service providers or use the third-party software to record an online webinar video.
Which way is your favorite?
Let me know by leaving your comments below.
Secure Download
Secure Download
 Updated by Alice Thorne to Record Video
More readings
 How to Record Just Audio on Zoom (Host & Participant Guide)
Learn how to record audio on Zoom as a host using the built-in feature or as a participant with third-party software without permissions.
 3 Steps to Record on Peacock (Movies, Shows, Live TV)
Record any show, movie, or live sport on Peacock in 4K/HD quality. Follow this step-by-step guide to save Peacock videos within steps without a black screen.
 How to Record a Ringtone on iPhone Out of Voice Recording
Learn how to record ringtone on iPhone right here, and get the best practices for recording, setting, and changing the default ringtones on iPhone easily.
 How to Record Viber Calls on Desktop & Phone Without Limits
Want to record Viber calls? Discover the best ways to capture voice calls and video calls on Viber without a limit on the computer, Android, and iOS devices.