Graphics Interchange Format, also known as a GIF, is a compressed image file format capable of animation. GIF is a short animation and low-resolution video clip that can be used as reactions in online communications to express emotion and feelings instead of words. GIF is widely used by young people on social media sites like Facebook, Messenger, Twitter, etc., to add humor to content. There are ways to make a GIF, but it is worth investing the time to edit GIFs in Photoshop. Are you one of those curious how to make your own? This article offers the best step-by-step tutorial on how to make a GIF in Photoshop. So come with us to learn how to create a GIF quickly and simply.
Yes, you can make GIFs in Photoshop. The easiest thing about GIFs is that they aren't too difficult to create. An animated GIF can be made if you can access Photoshop and some free time. For an overview, the pros we can get here are that it is in complete control, high quality, and free with Creative Cloud. On the other hand, it is slower than other methods because of many features and a minor learning curve.
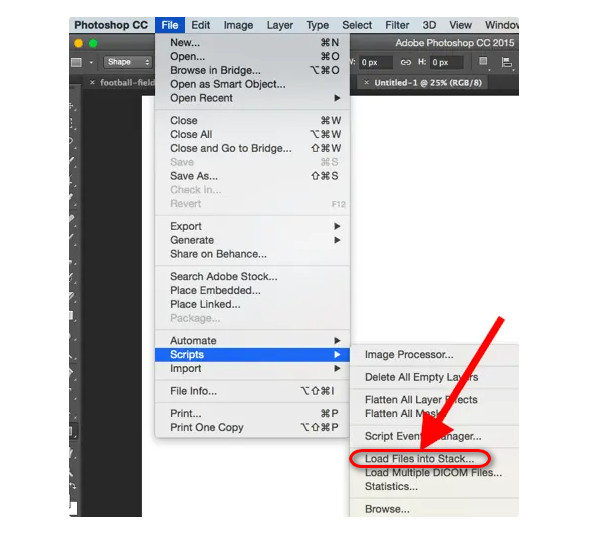
1. Upload your photos to Photoshop. Click File, then see the Scripts. From there, Load Files Into Stack to import the desired photos into Photoshop from a separate folder.
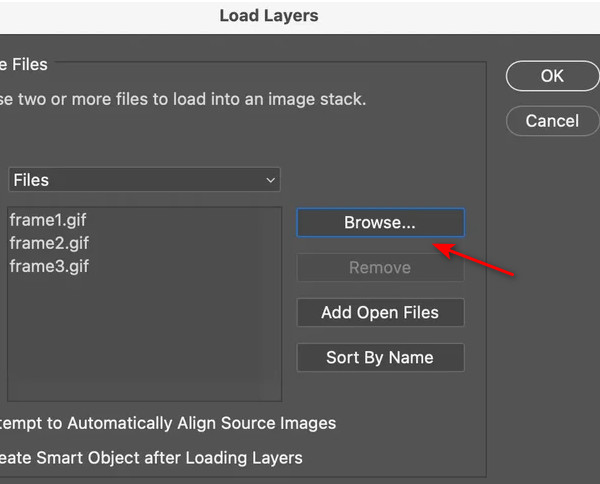
2. Select Browse after that, then select the files you want to include in your GIF.
3. Next, select OK.
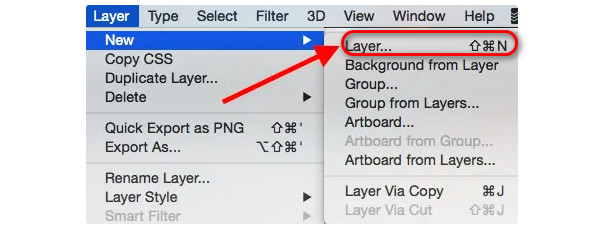
1. Create a unique Photoshop Layer for each frame of the animated GIF. We can make it by clicking Select Layer, then go to the New. From there, please see Layer to add a new layer.
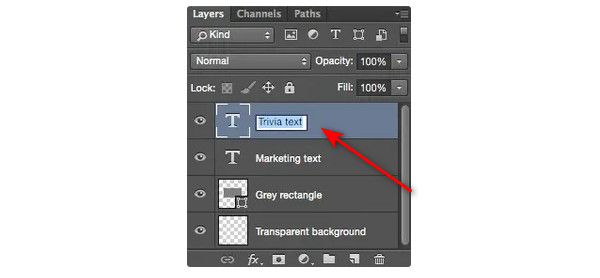
2. Make sure to give the names of your layers so you can easily remember them when creating your GIF. To rename a layer, double-click on the existing layer name in the Layer panel at the bottom right of your screen and put in the new name. When you're done, hit Enter.
3. You are prepared to go to step two when all your layers are present and identified.
Pro Tip: To merge layers so that they show up in a single frame in your GIF, enable visibility for the layers you wish to combine (by clicking on the Eye to the left of each layer name so that just the eyes for the layers you like to merge are open). Then, hit Shift + Command + Option + E on a Mac or Windows computer. The merged content will be created as a new layer in Photoshop, which you should also rename.
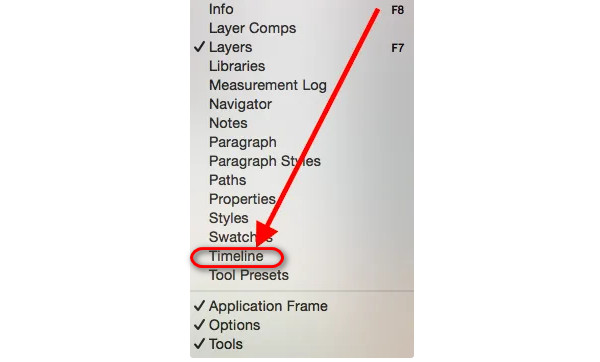
4. Open the Timeline Window.
Go to the top navigation and select Window to Timeline to access the Timeline. You can turn certain layers on and off for various lengths using the Timeline to convert your static image into a GIF.
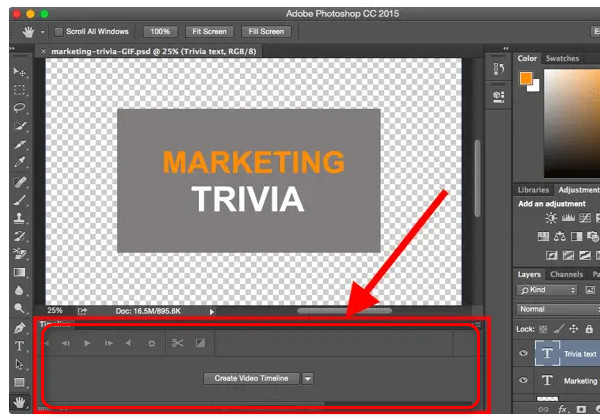
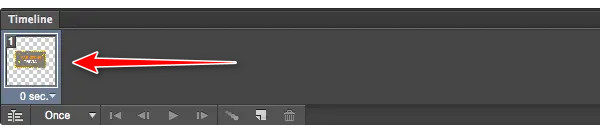
5. At the bottom of your screen, the Timeline window will appear. It appears as follows:
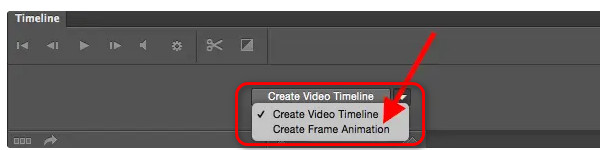
6. Select Create Frame Animation in the Timeline window.
Choose it from the dropdown menu if it isn't already selected; however, click it for the frame animation options to appear.
7. Your Timeline should now appear as follows:
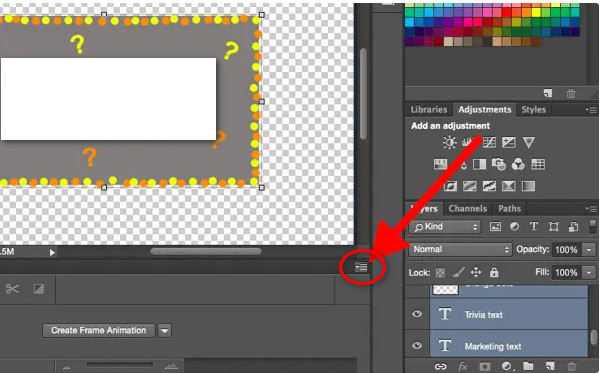
8. For every new frame, create a new layer. To begin, choose Select and go to All Layers from the top navigation menu to select each Layer individually. Then, click the menu button on the Timeline screen's right side.
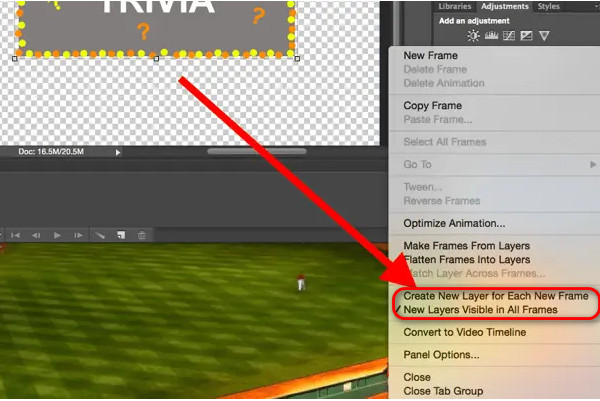
9. Make your selection from Create New Layer for each new frame on the dropdown menu that opens.
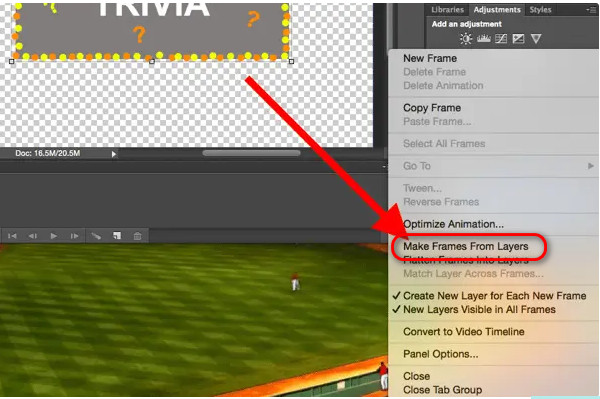
10. Select Make Frames From Layers from the same menu button on the right. Each Layer of your GIF will become a frame as a result.
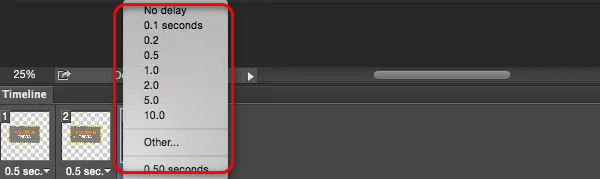
11. Under each frame, choose how long it should remain visible before moving on to the following one. To do this, select your desired duration by clicking the time icon next to each frame. In this instance, we settled on 0.5 seconds for every frame.
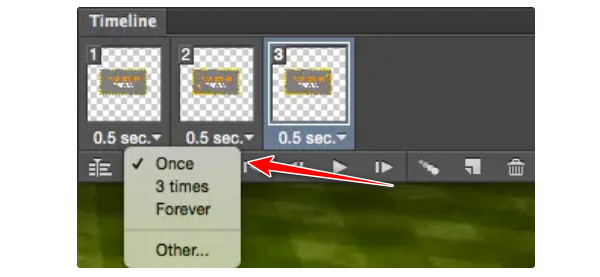
12. Choose how many times you want it to loop at the bottom of the toolbar. One will be the default, but you can loop it as many times as you'd like, up to and including Forever. If you want to provide a custom number of repeats, click Other.
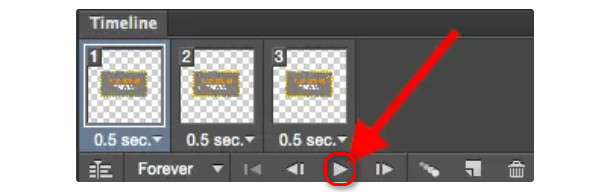
13. Click the play icon to preview your GIF.
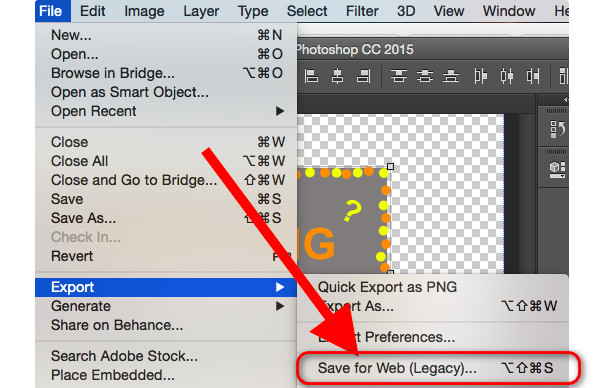
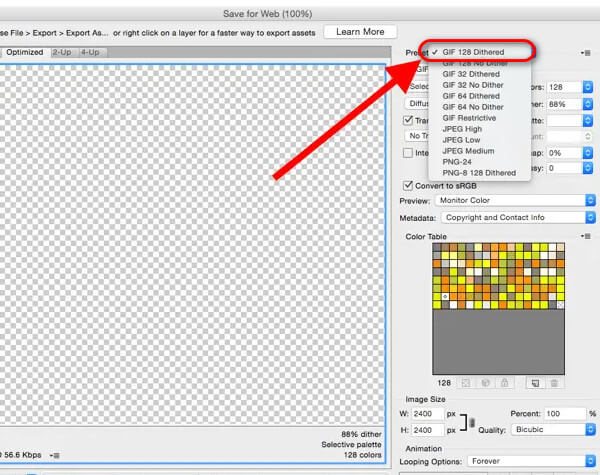
1. Export and Save Your GIF. Are you happy with your GIF? By selecting File by seeing Export. From the, please hit Save for Web (Legacy) from the top menu bar; you can save it for use online.
2. Next, under the Preset dropdown menu, select the kind of GIF file you want to save it as. Choose Dithered GIFs to avoid color banding if your GIF has gradients.
You may decide against dithering if your image extensively uses solid colors. How large (and accurate) the GIF colors will be compared to the original JPEGs or PNGs depends on the number next to the GIF file.
A higher dithering percentage, according to Adobe, results in the appearance of more colors and detail, but it also grows the file size.
3. For your PC, save the File by clicking Save at the bottom. This GIF is now prepared for upload for marketing purposes. It should play smoothly if you upload the GIF file to any internet location where you'd put an image.
When you export the GIF, the GIF file may be low resolution due to the low frame. But you can use Photoshop to increase the image resolution.
You have learned how to make and export/save a GIF from Photoshop. It will be hard if you do not carefully follow all the steps to make GIFs in Photoshop because it’s quite long. If you want an easier method, read more below.
AnyMP4 Video Converter Ultimate is the best choice of the top GIF makers and editors. It is fantastic for making an engaging GIF on Windows or Mac. With the aid of this GIF editing program, you can rotate the GIF, change the effects and filters, add a watermark, and more. Additionally, it supports processing your GIF using the numerous tools included in its built-in Toolbox, such as Color Correction, Video Cropper, 3D Maker, etc.
Recommendation
1. Get AnyMP4 Video Converter Ultimate
Download and install AnyMP4 Video Converter Ultimate on your computers.
Secure Download
Secure Download
2. Access Toolbox
Go to the Toolbox of AnyMP4 Video Converter Ultimate. Then after that, choose GIF Maker.
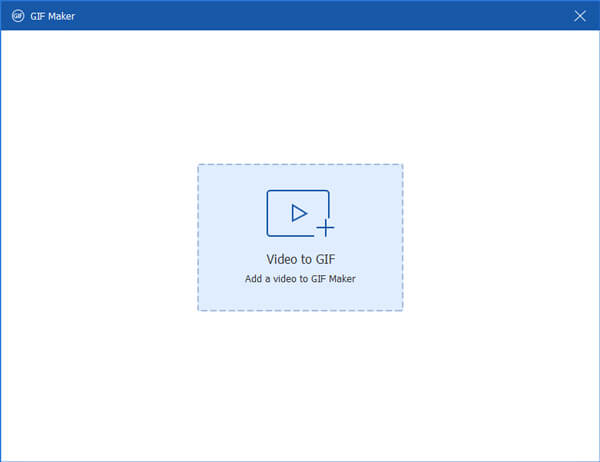
3. Add a Video or Photos
From there, the tool will give you options on what process you will need: Video to GIF or Photo to GIF. You only need to choose the function you prefer and continue.
Then, we are now about to click the Add button to insert the video or photos that we want to make as a GIF file.
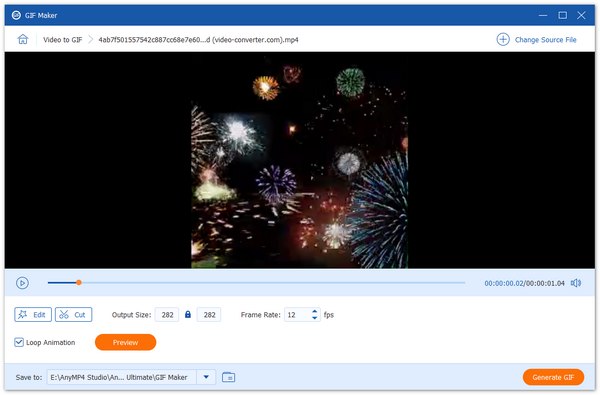
4. Edit File (Optional)
You can now edit the video with various features depending on your need or preference, such as Rotate and crop, Effect and Filter, Watermark, Audio, and Subtitle. Or you can cut the video and save the part you want to make a GIF.
5. Generate and Save GIF
Finally, after all the steps, you can now click Generate GIF to create your animated GIF and save it on your file.
See, it is the quickest and simplest way to create GIFs. It has only a few quality steps to follow compared with other methods that are too long and complicated, especially for beginners. If you know someone struggling with making GIFs, share this article with them to help.
Is it easy to make a GIF in Photoshop?
Photoshop makes it simple to produce moving images with high-quality GIFs that can convey more captivating narratives than a static image ever could.
What is the use of GIF in Photoshop?
Aside from GIFs being used by end users on social media, it is also helpful for online brands to make their content more appealing through quirky and fun GIFs.
What are the advantages of using GIF?
They can spread like wildfire on social media platforms as memes since they are simple to make, don't require a lot of technological expertise, and are quick to construct. GIFs' color restrictions keep their file sizes manageable. They may load web pages more quickly as a result.
Why are GIFs better than images?
GIFs are stronger than photos due to their rapid movement, and their condensed length makes them easier to consume than video. Learn more ways here to make GIFs with GIF creators.
How do you optimize a GIF?
Just select a limited color palette and stick to it to lower the file size. Using no more than 2-3 colors will yield the greatest results. Consider utilizing a few neutral hues and perhaps one bright color because vivid and intense tones of color take up more room.
That's it! The above words are all about creating GIFs in Photoshop. Also, if you find Photoshop is hard to use, AnyMP4 Video Converter Ultimate is a good alternative to making GIFs. Just sit in front of your desktop, follow the instructions carefully to enjoy your GIFs, and add extra humor on social media such as Facebook, Messenger, Twitter, etc. If you find this article excellent, don't hesitate to share it with your friends, colleagues, and classmates to have their GIFs!
 Posted by Angelica Liwanag to GIF
More readings
 How to Make Background Transparent in Photoshop [4 Steps]
Want to learn how to edit background in Photoshop? Here you will find out how to edit your photo and make its background transparent using Photoshop.
 [100% Working] How to Open an HEIC File in Photoshop
Do you wonder if Photoshop can open HEIC files? If you want to know the answer, check it in this post and discover how it works!
 4 Ways to Add Image Over GIF: Enhance Your Animations
This post will focus on four innovative methods to add images over GIFs. Elevate your GIFs with stunning visuals and create captivating animations.
 5 Methods to Change Animated GIF Speed to Slow/Speed up
This post will outline five simple yet effective ways to change GIF speed. Learn how to modify GIF speed using offline and online tools effortlessly here.