During the daily usage of your iPhone, you may send pictures through a messaging app like iMessage/MMS or social apps frequently. Are you having trouble sending pictures on iPhone?

Many iOS users complain about the iPhone won’t send pictures issue on the internet. For instance, you get the error prompt that “Not Delivered” with a red exclamation sign after sending a picture in text message, iMessage or WhatsApp message. Actually, many factors may cause the iPhone not sending pictures problem. Here in this post, we will show you 5 easy methods to fix iPhone won’t send pictures issue with ease.
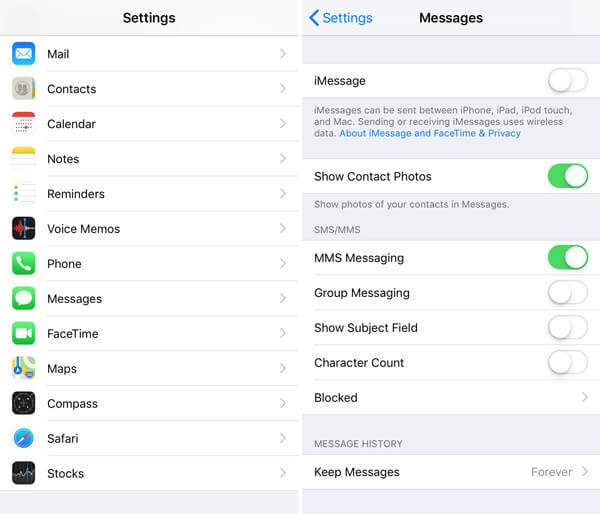
If you send pictures through iMessage app and continually find that these images can’t be sent, you should first check the MMS feature on your iPhone. You should know that iPhone pictures are sent through MMS. So you need to enable MMS for the photos sending.
Here you can open “Settings” app, choose the “Message” section and then turn on the “MMS” feature.
You should make sure that you get a good cellular network or Wi-Fi network connection for the pictures sending on your iPhone. A bad or unstable network will result in the iPhone won’t send pictures issue, especially for some large image files.
You can unlock iPhone and then swipe from bottom part to arise the “Control Center” to check if the “Cellular Data” or “Wi-Fi” is enabled. You can also turn on the network in "Settings" app.
Still can’t send pictures on iPhone? You can try restarting your iPhone to get rid of this issue.
Step 1. Unlock iPhone and then keep pressing the “Power” button till you see the “Slide to power off” appears on the screen.
Step 2. Swipe the red power off button from left to the right to shut down iPhone.
Step 3. Wait for a while and then keep pressing the “Power” button to restart iPhone.
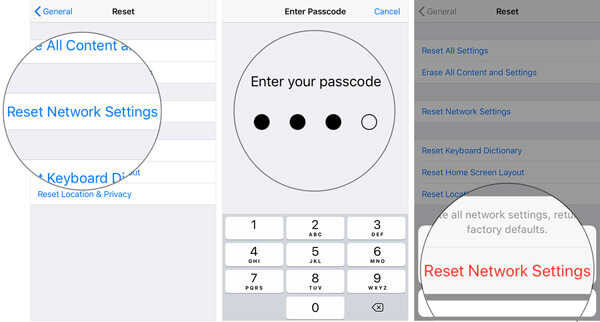
If you fail to send pictures on iPhone, you can choose to reset all iPhone network settings. By resetting all network settings, you can easily reset those settings that affect the way your iPhone connects to Wi-Fi and the cellular network. After that, you can get a good network connection to send photos on iPhone.
Step 1. Turn on your iPhone and open the “Settings” app.
Step 2. Tap the “General” option, scroll down and then find and tap on the “Reset” option.
Step 3. Tap "Reset Network Settings" option to reset all network settings of your iPhone. During this step, you need to enter the Apple passcode to confirm the operation.
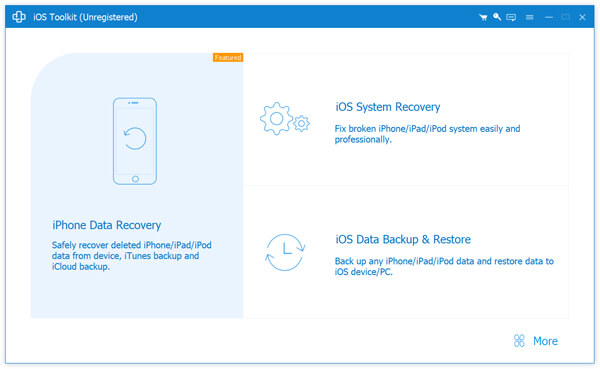
With the first 4 methods above, you have a big chance to fix the iPhone won’t send pictures issue. What if the problem is still there? Here we strongly recommend the one-for-all iPhone issues fixing software, iOS System Recovery to help you solve the iPhone images sending problem.
Secure Download
Secure Download
Step 1. Click the download button and then follow the instructions to free install and run this iPhone issues fixing software on your computer. When you enter the first interface, select the "iOS System Recovery" feature.
Step 2. Connect your iPhone to it with a lightning USB cable. To help your computer quickly recognize the iOS device, here you need to tap “Trust this computer” on your iPhone screen.
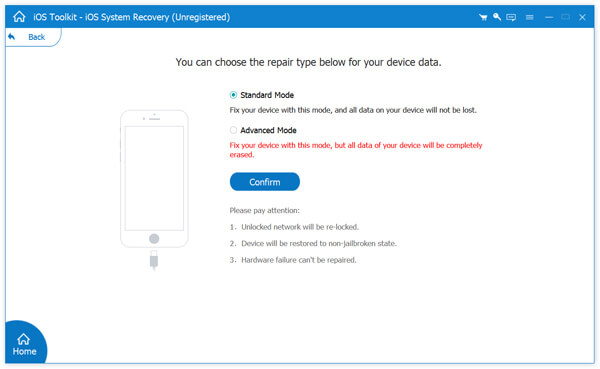
Step 3. There are 2 repair modes, Standard Mode and Advanced Mode designed in this software to help you fix the iPhone won’t send pictures.
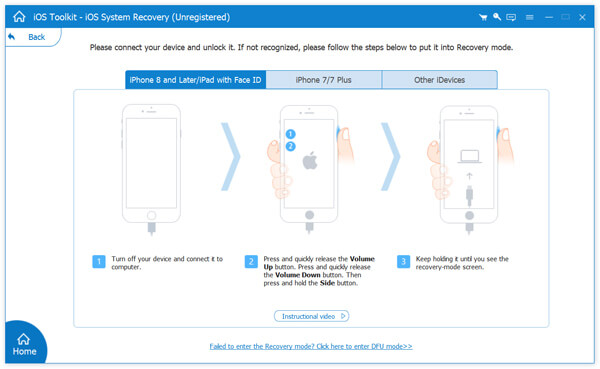
Step 4. As it mentioned above, you need to put your iPhone into Recovery mode or DFU mode to fix the issue. During this step, you can follow the detailed instructions offered to guide your iPhone into the Recovery/DFU mode.
Step 5. To fix this iPhone images sending issue, you need to download a repaired plug-in. Before you do that, you should confirm your iPhone model and other information displayed in the interface are correct.
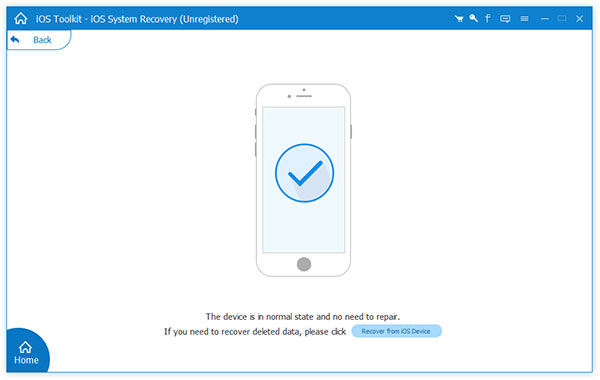
Click the “Repair” button to start the plug-in downloading and fixing process. When the fixing process is finished, your iPhone will restart itself and then back to the normal condition. You can send a photo and check if the problem is solved.
We mainly talked about the iPhone won’t send pictures issue in this post. We shared 5 simple ways to help you deal with this problem. Which method tricks worked for you? If you have any other better methods, you can share them with other readers in the comment.
 Updated by Riley Mitchell to iOS Issues
Related Articles
 Safe and Easy Ways to Backup iPhone Photos
Backup all your photos from iPhone in original quality. You can get 3 different methods to backup iPhone photos to computer or cloud storage with ease.
 Tutorial of Editing Pictures on Windows and Mac
You don't need to be a professional photographer to produce stunning images for Instagram, Facebook or other social media. Learn how to edit photos on Mac OS 12/11/X and Windows in one article.
 How to Transfer Photos from iPhone to iPhone/iPad [4 Simple Ways]
How do I transfer photos from iPhone to new iPhone? Is there any free way to transfer photos from iPhone to iPhone without computer? How to transfer iPhone pictures to another without iCloud? All questions will be answered in this post.
 How to Fix iPhone iPad Update Problems
Facing some iPhone update problems? Just read this article and follow the methods we recommend to you to fix this error.