It is well known that Adobe Photoshop is the most professional photo editing software for computer, but it is far from the only option. In fact, there is also brilliant and feature-packed photo editing software for your computer. As lens technology developing, we can take photos with digital camera or smartphone simply.
However, there is always room for improvement, like removing red-eye, color balance, cropping out unwanted parts, and more.
In this article, we are going to show you how to edit pictures on Mac OS 12/11/X and Windows 10/8/8.1/7 without losing quality.

AnyMP4 Video Editor is a professional photo editing application available to Windows 10/8/8.1/7. If you need a flexible way to edit photos, it is the best option.
Advantages:
Disadvantages:
Step 1: How to edit pictures on PC
The photo editor is a desktop program, so you need to download and install it on your computer. Then launch it and click the Add photo(s) and video(s) here button to load the pictures to edit. It also supports the drag-and-drop command.
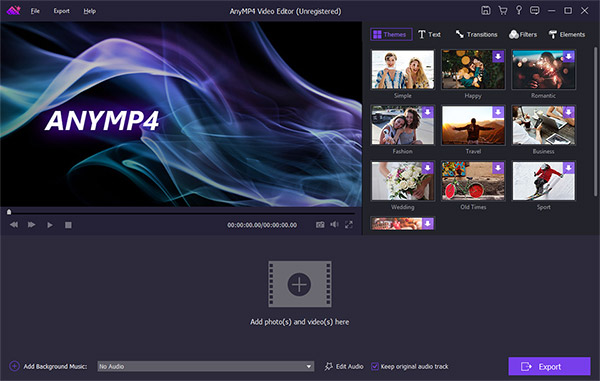
Secure Download
Step 2: Edit your pictures quickly
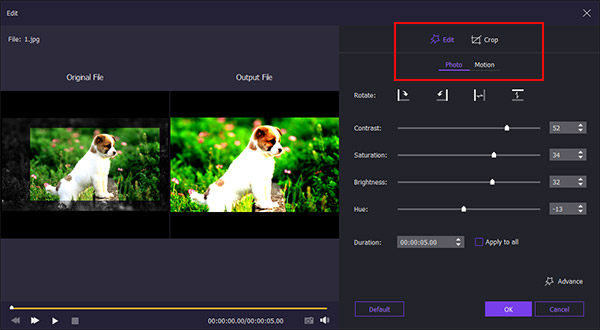
Select a picture and click the Edit menu to open it in the photo editing window. Here you can find the basic editing tools.
Crop the photo: Select the Crop tab and remove unwanted parts.
Rotate the image: Go to Edit > Photo and click options next to Rotate until you get the right orientation.
Adjust the picture: Move the sliders of Contrast, Saturation, Brightness, and Hue.
After editing, click OK button to confirm it and back to the home interface. Then you will discover the advanced features.
Add text: Go to the Text tab, select your favorite template and put it to the proper position. You are allowed to reset the content, font, size, color and more.
Apply filter: Press the Filters tab and choose the proper filter. It will be applied automatically.
Overlay stickers: Go to the Elements tab, select your favorite sticker and drag it to the right place.
Tip: It also could help you to make slideshows with transitions, you music and photos on the storyboard.
Step 3: Output edited pictures
When you are satisfactory result, click the Export button to open the next window. Select a proper format from the left side and then pick the right resolution. Drop the file name and location to save the picture. Finally, hit the Convert button. A few seconds later, you will get the edited pictures.

Some Mac device owners asked if it is possible to edit pictures on Mac for free. In fact, Apple has introduced basic photo editing features into the Photos app, such as:
Advantages:
Disadvantages:
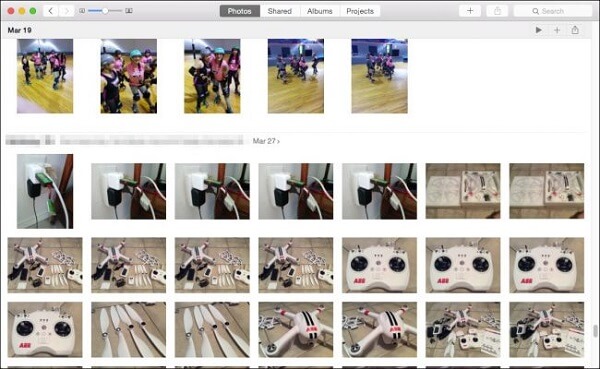
Step 1: Open the Photos app on your Mac and you will be presented all photos and videos on your machine. Go to the Photos tab from the top of your screen and select the photo you’d like to edit.
Tip: If you want to edit multiple photos in batch, go to the Albums tab and select the folder.
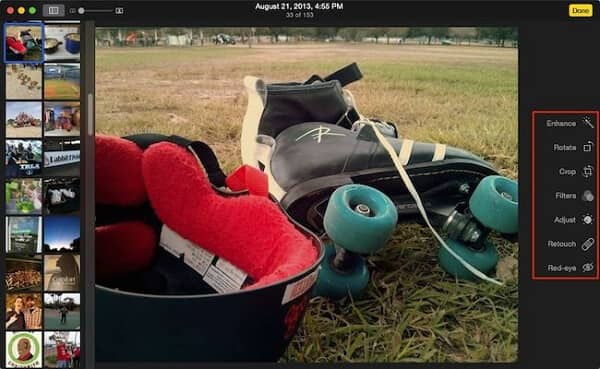
Step 2: Locate the upper right side and click Edit button to open the photo editor on Mac.
Enhance photo: Click the Enhance option on the right sidebar. Then the photo or photos will be enhanced automatically.
Rotate images: Hit the Rotate option and drag the picture until you get the desired effect.
Crop a picture: Select Crop and move the control border to remove unneeded areas.
Add filters: Pick Filters option and select a proper photo filter from the collection.
Do adjustment: Hit the Adjust button and you are allowed to modify light, color and other parameters.
Retouch your photo: Choose Retouch and wipe out on the area needs to polish. It will smudge out little blemishes and imperfections.
Remove red-eye: Press the Red-eye feature and use it on your portrait.
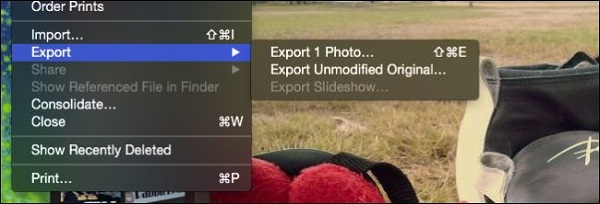
Step 3: When photo editing is complete, click the Done button at upper right corner to save it. It will replace the original photo with the edited one. If you want to save the result as a new picture, click and expand the File menu, and select Export to export it.
Note: If you need a professional photo editor for Mac, you can try Adobe Photoshop, GIMP, and more.
More free photo editors, just check it here.
Now, you should grasp the process of editing photos on Mac or Windows. A powerful photo editor is able to simplify the photo editing task. That is why we use AnyMP4 Video Editor as the example. On the other hand, the native photo editor for Mac, Photos allows you to edit pictures on Mac without paying a penny. Surely, you cna also edit pictures with one photo editor, e.g. Google Photos. Anyway, we hope that our recommendations and guides are useful to you. More questions about photo editing? Please leave your messages below.
 Posted by Riley Mitchell to Edit Audio
Related Articles
 Top 6 Cartoon Photo Editor Apps for iPhone and Android
Here listed top 6 best cartoon photo editors for clicking a picture and converting into cartoon.
 Everything You Should Know About Google Photo Editor Application
Google Photos is one of the best ways to store and edit your photos and videos online. You can learn all knowledge in this article.
 Top 10 3D Photo Editors for Android/iPhone and Computer Users
By using the best 3D photo editor, you can convert 2D images into 3D or create 3D pictures with your camera.
 Top 5 Skinny Photo Editor Apps for iPhone and Android Devices
There are many mobile photo editing apps available across all of the app stores, making it tough to choose which ones to use.