Many people took photos with their iPhone cameras to record every cherished moment. Like going on a vacation, out-of-town activities, or something important happening in their lives. On the other hand, we tend to use cameras more than we use actual photos. As a result, these photos occupy most of the storage space. iPhone cameras get better with every new generation, making our device run slowly.
iOS 11’s default format for new photos is HEIC. Nonetheless, as the image quality keeps improving and resolutions continuously enhance, it is time for you to know how to add a jpeg to photos Mac to free up your space. Recently, iOS 11 was released to the public and is now available on iPhone 5s and higher.

iTunes is the default tool that allows users to manage data between iOS devices and computers.
When we discuss M4A audio compression, we can discuss two aspects: the technique of lowering files and the features that can be included with the M4A reduction process. It is an act of lowering the M4A file size utilizing the tool in the audio compression process.
The M4A file format is an audio file that was made utilizing the AAC lossy compression method. M4A is an abbreviation for MPEG-4 Audio. The file suffix for these audio files is usually.m4a. This is particularly true for unprotected content. It may hold various audio information, including audiobooks, songs, and podcasts. M4A is a more complex format than MP3, which was not initially intended for audio exclusively. It is simply an audio layer in MPEG 1 or 2 video files. M4A files are secured by FairPlay Digital Rights Management and have the.m4p extension when purchased from the iTunes Store. Apple iPhones employ MPEG-4 audio for ringtones, but those files have the m4r extension.
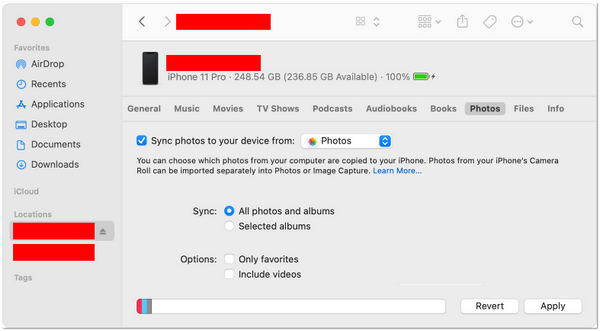
1.From the official website of Apple, download and install Make sure that you have the latest version of iTunes. Run iTunes and link your iPhone to your Mac through a USB cable.
2. Click on the device icon in iTunes. Then click the box following to Sync Photos. In the drop-down menu, choose the photos that you want to sync.
3. Select to sync all photos or selected albums, then click apply. To release your space, delete the images. When the sync is done, you have already saved pictures from your iPhone to your Mac. You can delete these photos from your Phone now.
For more ways to copy JPEG images from iPhone to Mac, you can refer to this post.
You can connect an Android to your Mac and import your photos into the Photos app. Below we will provide a detailed step to do such a thing.
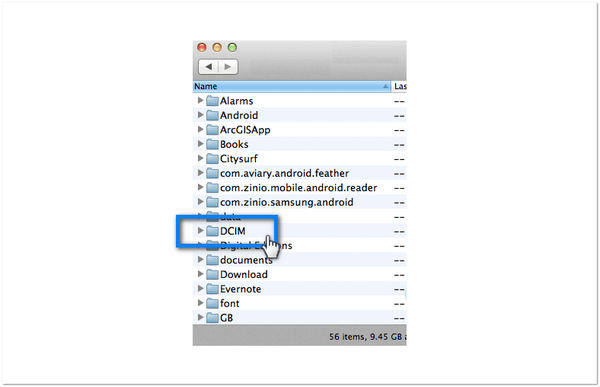
1. Link your Android device to your computer and find your JPEG photos. On most Android devices, you can locate these files in the DCIM folder then Camera. Install a file transfer for Android on your Mac, open it, and proceed to the DCIM folder then Camera.
2. Please select all the photos you want to transfer and drag them to a folder on your Mac.
3. Disconnect your Android device from your Mac. Connect your iOS device to your Mac.
4. On your Mac(macOS Catalina), open the Finder. Open iTunes on a Mac with macOS Mojave or a PC. On your computer, sync the photos to your iOS device. You can find your photos on your device in Photos then Albums.
How to add a JPEG to photos on Mac? Is there any available JPEG photo transfer software that we can use?
AnyMP4 iPhone Transfer Pro gives you a reliable, straightforward, and handy way to move your JPEG photos to the computer. It is the leading JPEG photo transfer software to copy selected one or multiple pictures to Mac. With a few clicks, you can manage your iPhone JPEG photos on your Mac to delete, add, create albums, and edit the photos. In addition, you can share such data as videos, music, contacts, and text messages.
The procedure is effortless. You first install the AnyMP4 iPhone Transfer Pro on your Mac, then connect your device to the computer. Below we will demonstrate how to backup photos from iPhone to Mac.
1. Head to the official website of AnyMP4 iPhone Transfer Pro on your Windows or Mac. Click the Free Download button to download the software.
Secure Download
Secure Download
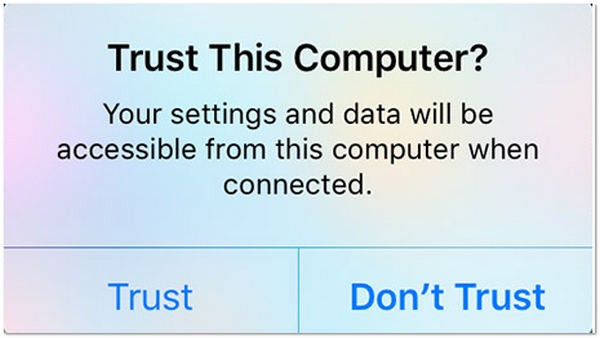
2. After downloading the program, connect your iPhone to your computer via a USB cable. Then click the Trust button on your iOS device.
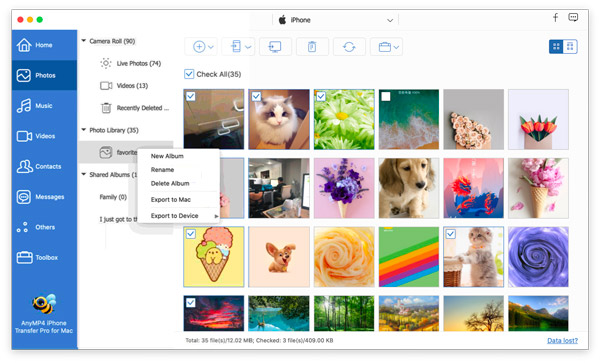
3. On the left panel of the main interface, select Photos in the data type. Tick the box of the photos you want to transfer.
4. Choose the Export to Mac button from the top menu from the selection tools and start the transfer.
Aside from transferring your JPEG photos from the device to the computer, it can also sync iPhone messages to Mac. Besides, this tool has a lot of excellent features to offer. In particular, with its HEIC Converter feature, you can convert your HEIC file into the most common image file format like JPEG, and PNG. With this feature, you can select the HEIC photo from an iOS device or computer, then convert your HEIC photo into JPG, JPEG, and PNG file formats.
Can I use AirDrop to transfer photos from iPhone to Mac?
Definitely YES! You can use AirDrop to immediately transmit photos to anyone with a Mac, iPad, or iPhone nearby. You don’t need to set up any certain accounts. Ensure you and the receiver are connected to a Wi-Fi network, and the Bluetooth and AirDrop are turned on. With AirDrop, you can wirelessly transmit photos, videos, documents, map locations, websites, and more to a nearby Mac, iPhone, iPad, or iPod touch. (AirDrop is not working? Here are the solutions.)
How many photos can I AirDrop?
It’s limitless! Sending photos using Airdrop has no limit, regardless of how many images you want to send. However, your success will depend on how powerful your devices’ processors are and how large your files are.
Is the HEIC format better than the JPEG format?
HEIC files are better than JPEG in terms of compression and image quality. The HEIC format can enhance photos’ quality with transparency and broader dynamic range capabilities. Apple uses HEIC images through iPhones and iPads that run on iOS 11 or higher. It guarantees that users can make the most of the high-quality 4K cameras on the devices, plus the burst mode functions and live photos. The smaller-sized files leave you with plenty of storage on your device. It allows photos to be made in smaller file sizes while having a higher image quality than JPEG.M4A player on your device, even if you cannot open the M4A files.
Whatever method you use, it is easy to transfer photos and videos from an iPhone to a Mac. But for a more convenient way to do such a thing, we highly recommend AnyMP4 iPhone Transfer Pro to do the job for you. Make sure you move the pics you need. Otherwise, you are just rearranging the mess around. If this post has aided you, let us know! You can leave a comment below or give us a star.
 Posted by John Malcolm to iOS Tips
More readings
 3 Easy Ways to Sync iBooks from Mac to your iPhone
Transferring your iBooks from Mac to your iPhone is an easy thing to do. See and learn how to get it done in these unique ways.
 6 Ways to Transfer Videos from Android Phone to PC or Mac Quickly
Read this post and get 6 easy ways to transfer videos and movies from Android to PC and Mac with or without USB cables here. Find the best one.
 5 Verified Solutions to Fix iMessages Not Syncing or Updating on Mac
When you find your iMessage is not syncing between iPhone and Mac, don't panic. This guide shows you 5 solutions to fix this problem.
 6 Quick Ways to Transfer Files from PC or Mac to iPhone or iPad
After downloading some files, you may want to use them on iOS device. This post shares 6 ways to help you transfer files from PC or Mac to iPhone.