Installing new macOS versions on a Mac should be a simple process. The Mac notifies you that an update is available via a pop-up in Notification Center; in certain situations, it has even downloaded it and is only waiting for your approval to install it. However, occasionally when you hit Go on an update, things go awry. This guide will walk you through what to do if your Mac stalls or freezes during an operating system software update or if you encounter an error message suggesting a problem.
This article will look at what to do if you can't update macOS, how to fix it if it won't install, and other tips and solutions. We also reviewed the various error messages we saw while attempting to install a macOS update and how we dealt with them.

You've come to the right site if you're looking for solutions to your Mac's update problem. However, you must first understand the symptoms and reasons before you can grasp how to remedy the problem. A handful of the issues and mistakes caused by a Mac update issue are listed below.
If you have an issue with your Mac's most recent update, you will most likely experience problems when attempting to boot the device. You may receive a notice that says a critical software update for your Mac is necessary, but an error occurred when installing this update; your Mac can only be used once this update is installed.
In addition, if your Mac has a problem with an update, it's because the update process was interrupted somehow. The following are a few of the most common causes: Perhaps you ran out of power or patience and disconnected the PC halfway through the process. Also, assume a laptop battery failed, or you attempted to switch off a machine before it finished upgrading. In that instance, the computer may become stuck between being updated and running an update.
So, before we get into debugging, let me talk about how you usually update a Mac and try to ease the problem with your updating process. We should know the proper way and standard way to update your macOS because the improper way of doing it can make the issue exist. Follow the instructions below:
1. Launch the System Preferences application. The System Preferences app can be accessed from the Apple menu in the upper-right corner of your Mac's screen.
2. After that, we need to select the Software Update tab.
3. In the third step, we are now about to select the Update/Upgrade Now option.

Tips/Reminder:
When your current macOS version receives minor updates, an Update Now button appears. When a new macOS with a new name is installed, Upgrade Now is utilized. You can also click the Automatically keep my Mac up to date box to have new updates installed automatically. However, if the usual way is not working, you should proceed to the next ways to ease the issue.
When you find your Mac screenshot is not working, this solution still works.
If your Mac isn't updating correctly, you should run the Safe Mode update first. Safe Mode is a diagnostic mode found in both Microsoft Windows and Apple Mac operating systems. It disables some of the standard background processes. It also makes it easier to detect flaws on a PC and prevents your machine from launching programs that may be creating problems during starting on a Mac.
You must boot your Mac into Safe Mode to proceed with this procedure. Follow the instructions below:
1. Turn Off your Mac and wait 10 seconds.
2. Kindly hit and hold the Power button until you see the startup options window.
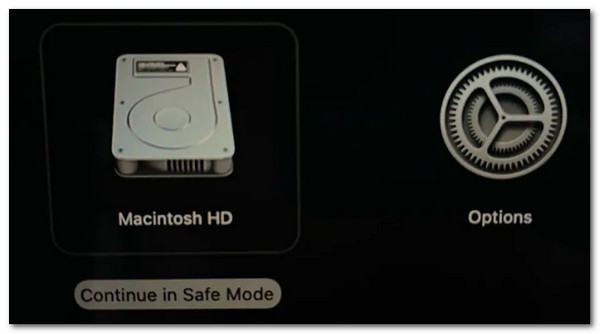
3. Startup disks will be displayed. Choose your Startup disk.
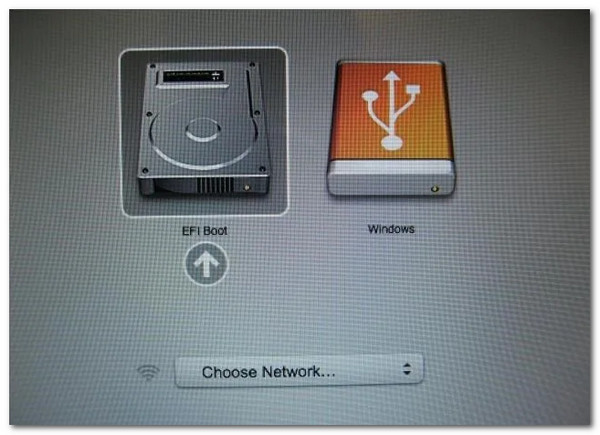
4. After selecting the startup disk, hold down the Shift Key and pick the Continue in Safe Mode option before releasing the Shift Key.
5. The Mac has now booted into Safe Mode. After entering Safe Mode, repeat the procedures outlined earlier in this article to upgrade your macOS to Safe Mode. We will proceed to update the usual way on the first solution.
Assume you need help getting your machine to install the update independently. In that circumstance, a recovery backup may be required. It will ensure that no files are lost in the update scramble.
You can enter recovery mode by doing the following steps:
1. Select the Restart option from the Apple menu.
2. Hold down the Command + R keys while restarting your Mac.
3. Hold these keys until you see the Apple logo on the screen after restarting.

That's all. It will enable you to connect to the internet and download a new operating system to restart the procedure.
Another reason your Mac won’t update is that unwanted files within your Mac can cause delays or prevent you from updating your system. Let us ease this problem by cleaning up your Mac to update the system successfully if that is the case. Another reason is your Mac is full; perhaps cleaning it can help you. Aiseesoft Mac Cleaner is an excellent Mac utility for cleaning out junk files, unnecessary files, large and old files, duplicate folders, and uninstalling apps to free up a lot of space.
Recommendation
1. Install Aiseesoft Mac Cleaner on your Mac.
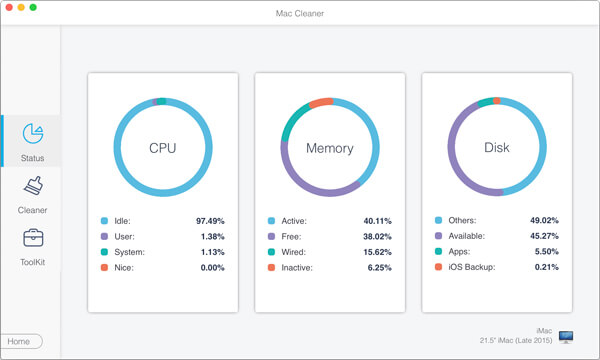
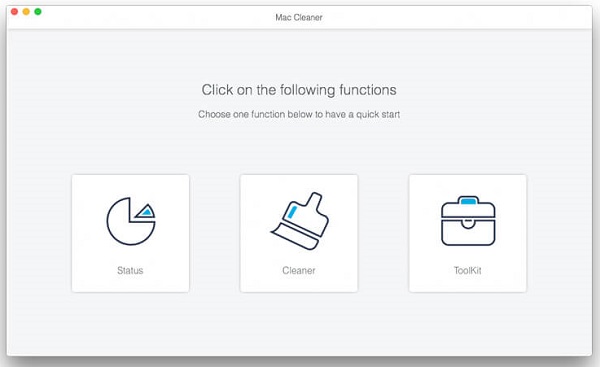
2. Then, start Mac Cleaner on your Mac. Examine your Mac's system condition. You will see a data analyzer on its main interface. Then if you notice that your Mac is now complete, we should proceed in cleaning it now.
3. Scan your Mac for huge and outdated files. Afterward, we must select the module Large & Old Files from the left side. To scan your Mac's files, click the Scan button.
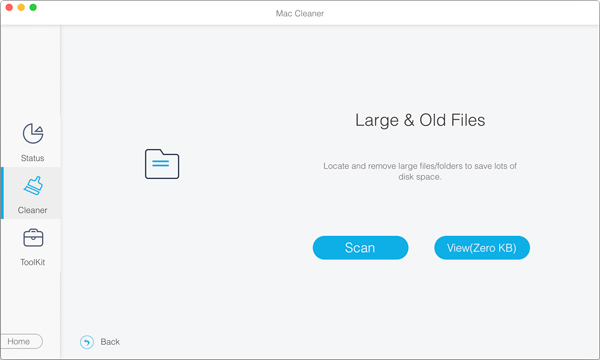
4. As we proceed, we shall now select the Review Button. When the scanning is finished, click the View button at the bottom right of the window to review the results. You may also select Rescan to rescan your Mac.
5. Examine and Select items as you can see, massive and antique Mac files have been organized into categories. You may quickly choose and clean files. Please, check the objects you want to clean, then click the Clean button to erase them.
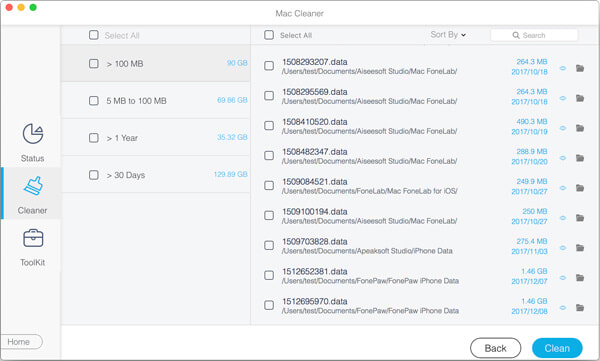
6. After a while, the vast and old files you selected are erased from your Mac. Remember, the methods to clean up the other modules, such as System Junk, iPhoto Junk, Duplicate Finder, Trash Bin, and so on, are the same as those in the Large & Old Files module.
1. Does my RAM in Mac possess a role in having a problem with the updating process?
Yes. You need more RAM to update your Mac system. For that, if you're experiencing trouble updating your Mac, ensure you have adequate RAM and storage space. You can also perform restarting your computer and manually downloading the update. Finally, try booting safely or using Disk Utility to repair your hard drive.
2. Can Mac OS X Public Beta be updated?
Yes. However, you will continue to get beta updates for future releases. If you wish to stay on the public release schedule or are using the developer beta and want to upgrade to the public version, you must first opt out of getting macOS beta updates.
3. What if the latest feature of the Mac is?
There are enormous updates that we can expect with our Mac. Some of these are the: Network Priorities, changing your network priority was a capability we may have taken for granted as a standard feature of macOS. But we needed to be corrected. Apple appears to have determined that we no longer need to select our network priority. Another feature from previous macOS versions, the Schedule section of System Preferences, allowed Mac owners to specify when they wanted their Macs to turn on and off. Those are a few of the updates.
We can now easily update our Mac after easing the hindrances within your Mac by following the solutions above. We hope YouTube had an excellent experience in fixing the problem. Especially with the incredible features of Aiseesoft Mac Cleaner. If you are interested and need the details like this, you can visit our website for more.
 Posted by John Malcolm to Eraser
More readings
 Step-by-step Guide to Use iMac as an External Monitor for PC
Learn how to put iMac into target display mode. You can use your old iMac as a monitor/display with a better audiovisual experience and a larger screen.
 [Solved] How to Sync Calendar from Mac to iPhone
How do I get my calendar on my Mac to sync with my iPhone? This post shows 3 simple ways to help you transfer calendar from Mac to iPhone.
 iMessage Not Syncing on Mac
How do I fix iMessage not syncing between iPhone and Mac? How do I sync messages to my Mac? All questions will be answered in this post.
 Get Your Best Mac Screen Recorder to Record Screen Video and Audio
Read and get your best screen recorder for Mac software. Here’re top 10 free and paid screen video recorders for MacBook Pro and Air users.