Want to change the hue of a video and search for a video color editor or hue changer?
Hue refers to the color displayed in a video or an image file. You can easily adjust the hue to shift colors toward an analogous color. While editing, you often need to customize the hue, brightness, saturation, or contrast of a video. Here in this post, we recommend 3 easy-to-use hue video editors for you to change the color of your video on Mac, Windows PC, or directly online.

| Hue Changer | Platform | Pros | Cons | Watermark | Automatic video coloring | 4K output support |
|---|---|---|---|---|---|---|
| Windows & Mac | • One-click video upscaling. • Several built-in filters. • Real-time preview. |
• No timeline. | ||||
| Windows | • Intuitive interfaces and automated AI suggestions. • AI technology can saveg time. • Various AI models to upscale videos. |
• Full features need a subscription. | ||||
| Online | • Access on any device. • Support multiple output formats. |
• Brand watermark. •Long processing time. |
||||
| iOS, iPadOS, and macOS | • User-friendly interface. •Free to use. |
• Not compatible with Windows. •Does not support MKV video. |
To edit and change a color of a video, whether you are using a Windows 111/10/8/7 PC or a Mac, you can rely on the all-featured video editor and converter software Video Converter Ultimate. It offers many video effects changing options for you to easily adjust the hue, brightness, saturation, and more.
Recommendation
Secure Download
Secure Download
1. This recommended Video Converter Ultimate has a specific video hue adjusting option for you to quickly change the hue of a video. You can free download it and follow this guide to customize your video color. When you first enter it, you will be guided to the Converter feature. Here you can click on the Add File(s) or the plus button to load your video file.
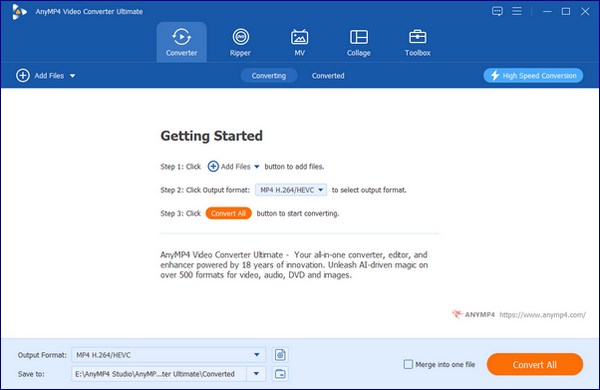
2. When your video loaded to this video hue changer, you can click the Edit icon under the video to open the main editing window.

3. Click the Effect & Filter tab. Find the Hue option under the Basic Effects. Then you can drag the hue bar to the left or right to freely change hue in video. During this step, you are also allowed to apply new filters, and adjust video brightness, contrast, or saturation. There is a Deinterlacing feature offered there for you to deinterlace a video with ease.

4. After you change video hue, you can click on the OK button to save your changes. Then you will be taken to the home window of this Video Converter Ultimate. Select a suitable output format from the drop-down list of Convert All to. After that, you can click the Convert All button to save the edited video on your local computer.

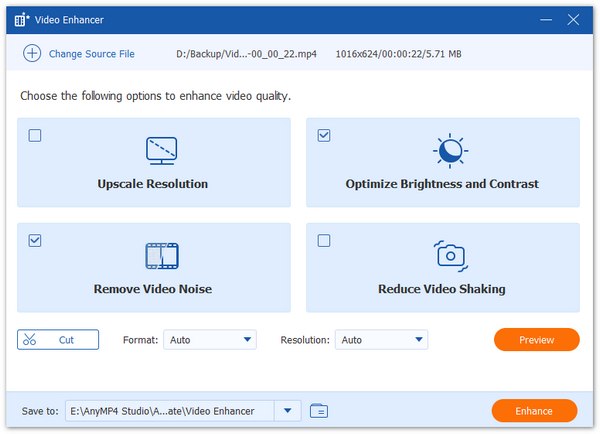
5. For more useful tools, you can go to the Toolbox. To adjust your video effects, you can select the Video Enhancer tool.

6. It gives you 4 options to enhance your video quality, Optimize Brightness and Contrast, Upscale Resolution, Remove Video Noise, and Reduce Video Shaking. You can use them to change video effects and improve the output quality.
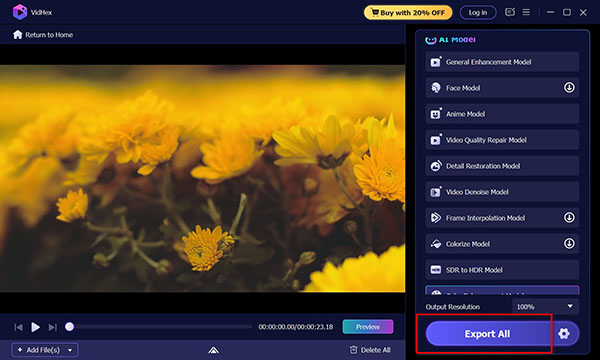
VidHex, as an AI-powered video enhancement tool, is expected to offer functionalities for comprehensive color correction, which typically includes the ability to adjust the hue of videos. Although a standalone Video Hue Changer tool explicitly named as such within VidHex was not found, modern AI video enhancers usually integrate hue adjustment as part of a broader color grading or color correction suite. This feature allows you to shift the overall color spectrum of their video, enabling you to correct color casts, achieve a specific aesthetic mood, or fine-tune the color balance to make footage appear more natural or stylized.
Here are the steps to improve video quality by VidHex by using its various AI models.
Secure Download
Secure Download
1. Open the VidHex software on your computer. Click on the plus button or dragging or dropping the video file that you want to adjust the hue of into this tool.

2. Once your video is loaded into the editing workspace, there are various AI models listed on the right side, where you can find the option of Color Enhancement Model tab within the interface.
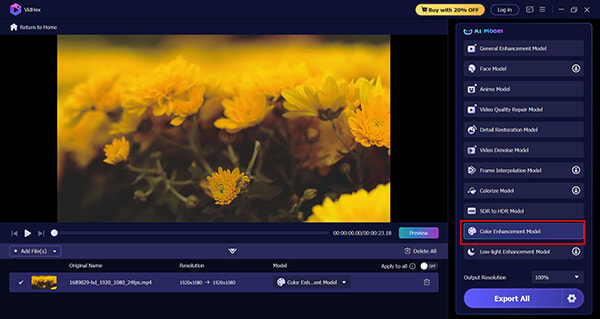
3. Once the model is applied, you can click the preview button on the left side to check if the hue of the video file is improved or not.
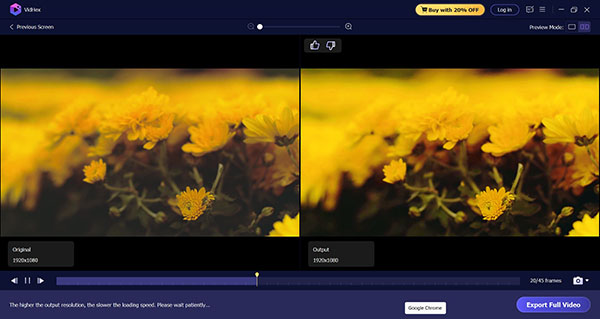
Once satisfied with the hue and other color corrections, confirm your settings, and start configuring your output settings for video format, resolution up to 4K, and encoder. Such settings can be done by clicking the settings option next to the Export All button.
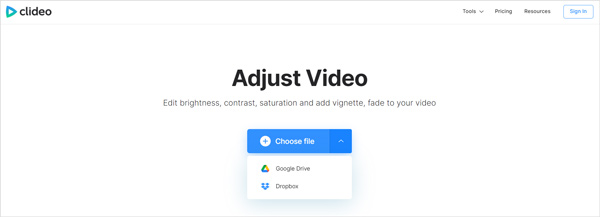
When you want to change hue of a small video clip, you can turn to some online video hue changers. This part takes the popular Clideo Adjust Video as an example to show you how to change hue of a video online.
1. This online video hue changer is compatible with most web browsers including Chrome, Safari, IE, Edge, Yahoo, and Firefox. You can open your browser and go to the Clideo Adjust Video site.
2. When you enter its page, you can click on the Choose file button to browse and upload your video file. As you can see, it also allows you to change hue of a video from Google Drive and Dropbox.
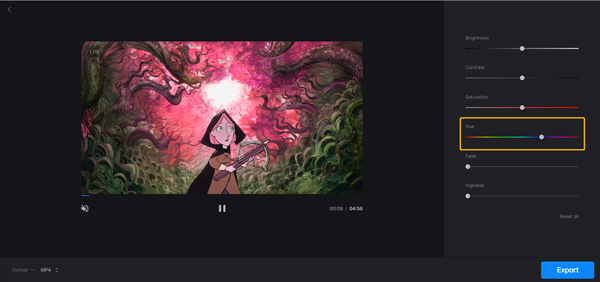
3. After the video uploading, you can handily change the video hue to fit your need. Here you can also adjust the video brightness, contrast, saturation, and more. In the bottom-left corner, you can change the output video format. Then you can click on the Export button to confirm your operation.
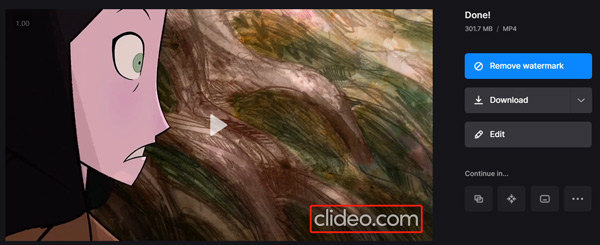
4. This free online hue changer will add a watermark to your output video file. You can choose to directly download it, or upgrade to a paid version to remove watermark.
If you are using an Apple device like iPhone, iPad, or Mac, you can choose to change video hue using its default video editor, iMovie.
1. Free install and open the iMovie app on your iOS device. Create a new movie project and add your video to it. Tap your video clip in the timeline to highlight it.
2. Tap on the Filters button, and then choose and apply a suitable filter to your video. You can directly view the effect changes in the viewer.
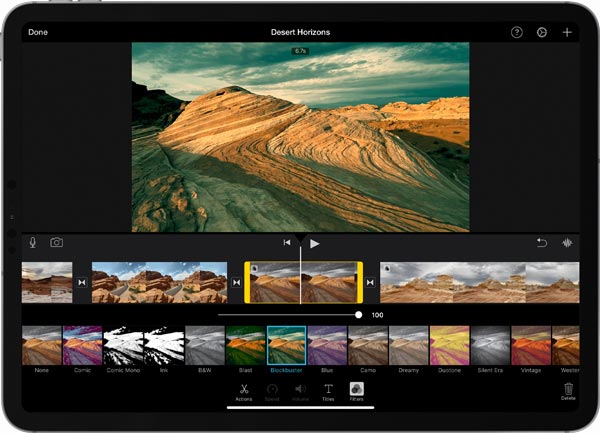
After changing hue of the video, you can use the regular steps to save the edited video on your iPhone or iPad.
1. Open the iMovie app on your Mac. Create a new movie project and import your video file to it. You need to drag the video clip to the timeline for later editing.
2. Choose the video clip in the timeline and then click on the Color Correction button. Now you can use these options to easily change your video hue and other effects.
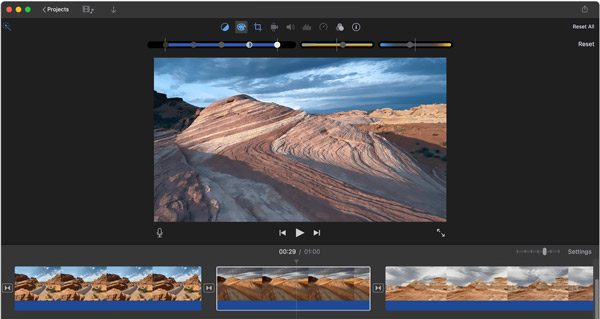
Can I change the hue of a video in VLC?
Yes. VLC Media Player allows you to directly change the video hue while playing. When you play a video in VLC, you can click on the Tools menu, choose the Effects and Filters option to enter the Adjustments and Effects window. Here you need to click on the Video Effects tab, tick the Image adjust option, and the n change the video color using the Hue feature.
How to change the photo hue?
Many photo editors can help you change the hue of a picture by adding filters or adjusting the color settings. For instance, you can rely on the powerful Adobe Photoshop, an online image editor, or photo editor apps to easily change the photo hue.
How to change the hue of a recorded video on my iPhone?
To change the video hue on your iPhone, besides iMovie, you can also use its built-in editing features. You can open your video in Photos app, click on the edit button, and then use its Effects or Filters option to change the hue of this video.
How do you change the hue of a video? You can get 4 easy-to-use hue changer tools from this post to help you adjust the video color. Whether you want to change video hue on a computer, directly online, or your mobile phone, you can find the right way to do that.