Free Download100% Clear & Secure
Free Download100% Clear & Secure
When it comes to audio editing work, Adobe Premiere Pro is often overlooked, as the program is more known as a professional option for video editing. However, the program was developed to be versatile enough, making it capable of handling audio files as well. In this article, we will explore the different options to help our readers learn how to edit audio on Premiere Pro using three of the most beginner-friendly editing options in the program. We will also explore an alternative designed for ease of use as a substitute for Premiere Pro.

Yes, it can. Adobe Premiere’s editing tools, made for videos, can be used as a music and audio editor. However, since the program is optimized for professional use, most of these options require technical skills to use. As such, you need to learn specifically how to trim audio in Premiere Pro to make using it accessible.
Yes, audio trimming and splitting audio into different portions are possible in Adobe Premiere Pro. This adjustment is usually done using keyboard shortcuts or via tools available in the program.
Yes, audio adjustment is also possible in Premiere Pro. In fact, this adjustment option offers maximum accuracy for volume reduction or boosting. Premiere Pro’s decibel-based volume controller makes this possible. This feature makes adding audio fade-in/out in Premiere Pro possible.
Finally, the Razor Tool is a trim tool in Premiere Pro that is commonly used on videos. This editing option works best for moving trimmed portions of audio in the timeline. This can also be used to position different trimmed portions of videos.
To learn how to apply these common and easy audio editing options in Premiere Pro, make sure to read our detailed tutorial about these tools below.
1. Hold Alt/Option and click on the audio file in the editing timeline. This will select only the audio playback itself and not the entire media in the timeline of Premiere Pro.
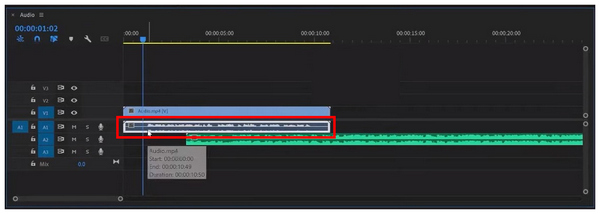
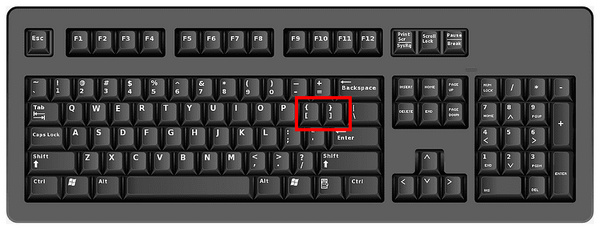
2. Then, position your playhead to the part of the audio you want to cut. Finally, use the keyboard combination Control/Command + K to trim the portion of the audio on the left side of your playhead.
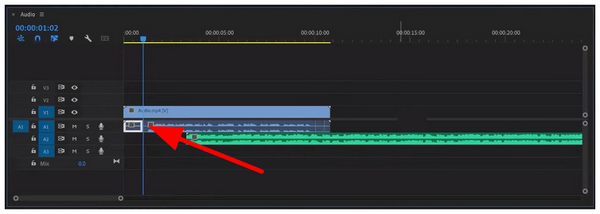
Since the portion trimmed by the keyboard combination is now separated from the audio timeline, you can now delete or move it to a different position in your audio file. Since trimming reduces the file size of your file, it can be used indirectly as a tool to compress audio in Premiere Pro.
1. Select the media file you are editing in the editing timeline. Then, find the line in the middle of the audio track. You can click and hold it to adjust the volume of your media.
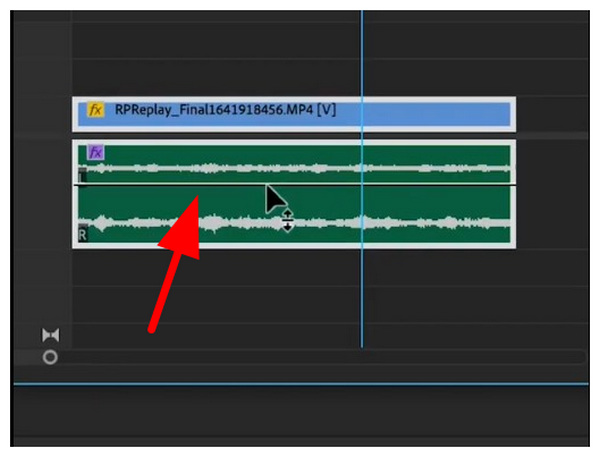
2. For more accurate adjustment, select the media in the timeline, then use your Bracket Keys to adjust the decibel value by one with each press.
Volume adjustment for specific audio files in the Premiere Pro timeline is made to be as accessible as possible. It was designed this way to make audio adjustments easier for video editors.
1. Select the Razor Tool on the tools tab of Premiere Pro. You may use the keyboard shortcut C to activate it.
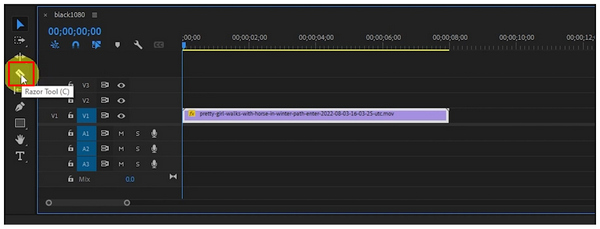
2. With the Razor Tool active, select a point in the video where you want to cut.
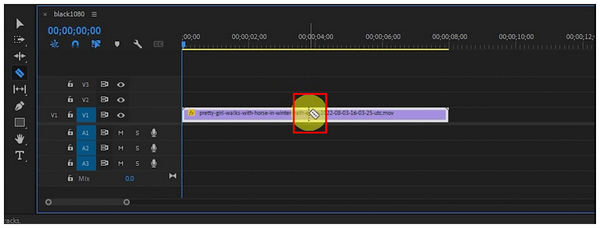
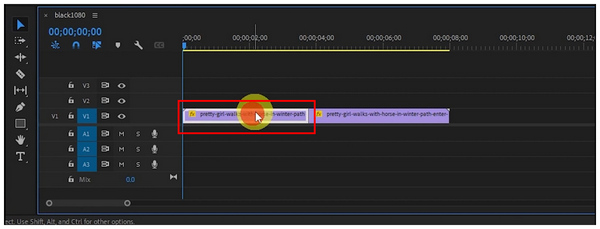
3. After selecting a point in the video using the Razor Tool, the other portions of the point will be cut based on how much you used the razor tool. If you only select one point, it will be cut in half.
Since the Razor Tool requires basic practice to use effectively, make sure to only use it once you are already familiar with the basic trimming tool in Premiere Pro.
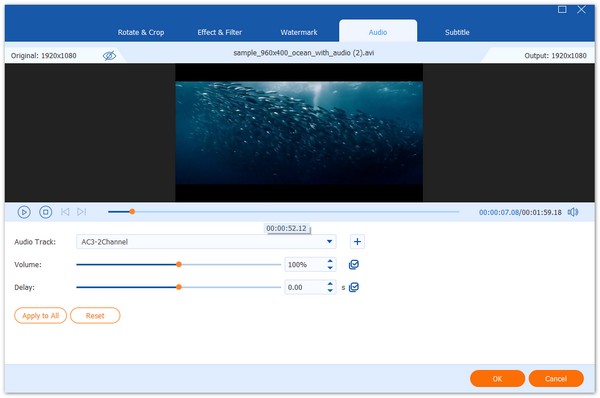
Although Adobe Premiere Pro can do audio adjustments, it is hard to deny that it requires technical skills to use, and most of its tools are inclined for video editing. In this case, AnyMP4 Video Converter Ultimate should work great as an alternative if you want to edit audio files easily.
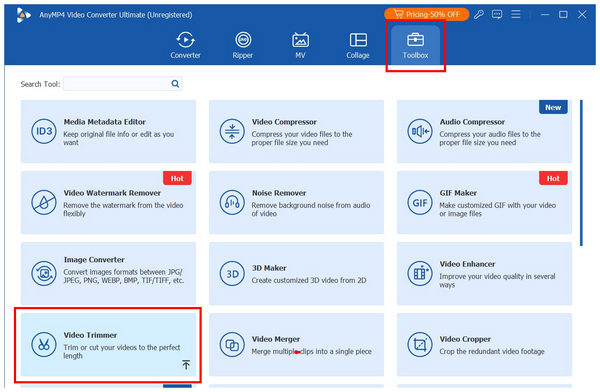
Equipped with a toolbox of automated media editing tools, AnyMP4 Video Converter Ultimate is one of the most reliable multimedia software programs on the market. This was made possible by the audio editing options in the program, including Noise Remover, Volume Booster, Audio Compressor, Trimmer, and other media adjustment options.
In this guide, we will feature the trimmer tool of the program, as this editing method requires significant technical skills to use properly. For an easier time following our audio trimmer tutorial, make sure to download AnyMP4 Video Converter Ultimate first using the link below.
Secure Download
Secure Download
1. Open AnyMP4 Video Converter Ultimate and then proceed to the Toolbox section. Then, select the Video Trimmer option. Then click on the Add button to import the audio file you want to trim.
2. Once the audio file has been imported, you may now use the trim slider in the start and end portions of your audio file. For more accurate trimming, you can also edit the time in the Set Start and Set End tabs under the playbar.
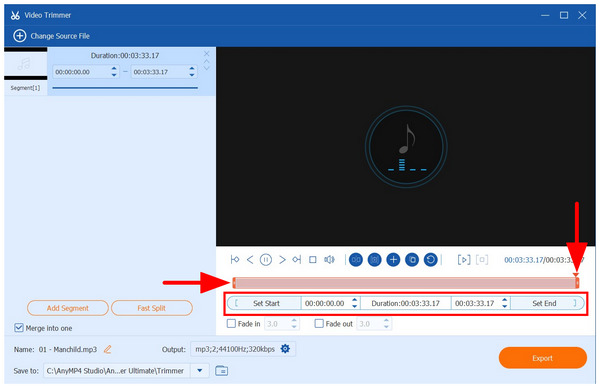
3. When you are done trimming the audio file, simply click on Export to begin producing the audio now edited to your liking.
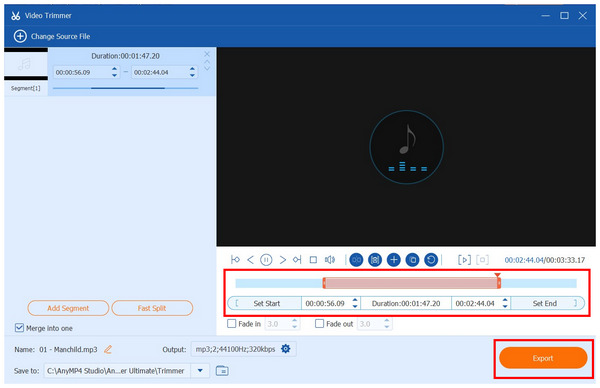
Via three simple steps, you can now easily trim your audio files in AnyMP4 Video Converter Ultimate. This simple tool eliminates the need to adjust the playhead or learn the basics of the Razor Tool in Adobe Premiere Pro.
Can I adjust volume levels for different clips?
Yes, you can. Adobe Premiere Pro allows trimming audio and video. Then, these cut portions may have their volume level adjusted individually.
What is the Essential Sound Panel, and how do I use it?
The essential sound panel in Premiere Pro adds a set decibel value for the entire video. This helps in volume consistency. It is also helpful for batch audio adjustment.
Can I add music and sound effects in Premiere Pro?
Yes, you can. Adding audio files in Premiere Pro is possible. This is essential both for video and audio editing.
Is Premiere Pro hard to use?
Yes, it is. Premiere Pro is not advisable for beginners. The program requires advanced technical skills to use effectively.
Should I use Premiere Pro for audio editing?
Yes, you can. However, it is not made to function as such. This makes more advanced audio editing tools not available in the program.
Now that we have discussed the options to help you learn how to edit audio on Adobe Premiere Pro, we hope that this article has given you enough knowledge about the basic tools to edit music files in the program. For an easier alternative, do not forget to consider using and downloading AnyMP4 Video Converter Ultimate using the link provided below.
Secure Download
Secure Download
 Updated by Mark Cristobal to Edit Audio
More readings
 How to Change Video Size in Premiere Pro Using 2 Methods
Read this article for a full guide on resizing videos on Premiere Pro with the scale or set to frame size options while learning their differences.
 Slow Down a Video in Premiere Pro - Make Video Slow Motion
How to speed up and slow down in Premiere Pro? How can I change the playback speed in Premiere Pro? Learn how to use Adobe Premiere Pro to slow down the video.
 How to Optimize Audio for the Web While Maintaining Quality
Suppose you are having a hard time optimizing web-audio content. Then this article is for you. See the three exceptional methods in practicing compression.
 Concrete Guide to Help You Adjust Audio Delay on Windows/Mac
The first thing you can do to resolve the audio out of sync is to read our guide and adjust audio delay in VLC or other software easily and quickly.